Inserting tables
Insert a table
To insert a table in the Document Editor,
- place the cursor where the table should be added,
- switch to the Insert tab of the top toolbar,
- click the
 Table icon on the top toolbar,
 -
select the option to create a table:
either a table with predefined number of cells (10 by 8 cells maximum)
If you want to quickly add a table, just select the number of rows (8 maximum) and columns (10 maximum).
or a custom table
In case you need more than 10 by 8 cell table, select the Insert Custom Table option that will open the window where you can enter the necessary number of rows and columns respectively, then click the OK button.

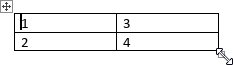
- If you want to draw a table using the mouse, select the Draw Table option. This can be useful, if you want to create a table with rows and columns of different sizes. The mouse cursor will turn into a pencil
 . Draw a rectangular shape where you want to add a table, then add rows by drawing horizontal lines and columns by drawing vertical lines within the table boundary.
 -
If you want to convert an existing text into a table, select the Convert Text to Table option. This feature can prove useful when you already have some text that you have decided to arrange into a table. The Convert Text to Table window consists of 3 sections:
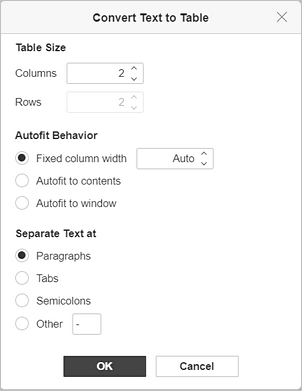
- Table Size. Choose the required number of columns/rows you want to distribute your text into. You can either use the up/down arrow buttons or enter the number manually via keyboard.
- Autofit Behavior. Check the needed option to set the text fitting behavior: Fixed column width (set to Auto by default. You can either use the up/down arrow buttons or enter the number manually via keyboard), Autofit to contents (the column width corresponds with the text length), Autofit to window (the column width corresponds with the page width).
- Separate Text at. Check the needed option to set a delimiter type for your text: Paragraphs, Tabs, Semicolons, and Other (enter the preferred delimiter manually).
- Click OK to convert your text to table.
-
If you want to insert a table as an OLE object:
- Select the Insert Spreadsheet option.
-
The corresponding window appears where you can enter the required data and format it using the Spreadsheet Editor formatting tools such as choosing font, type and style, setting number format, inserting functions, formatting tables, etc.
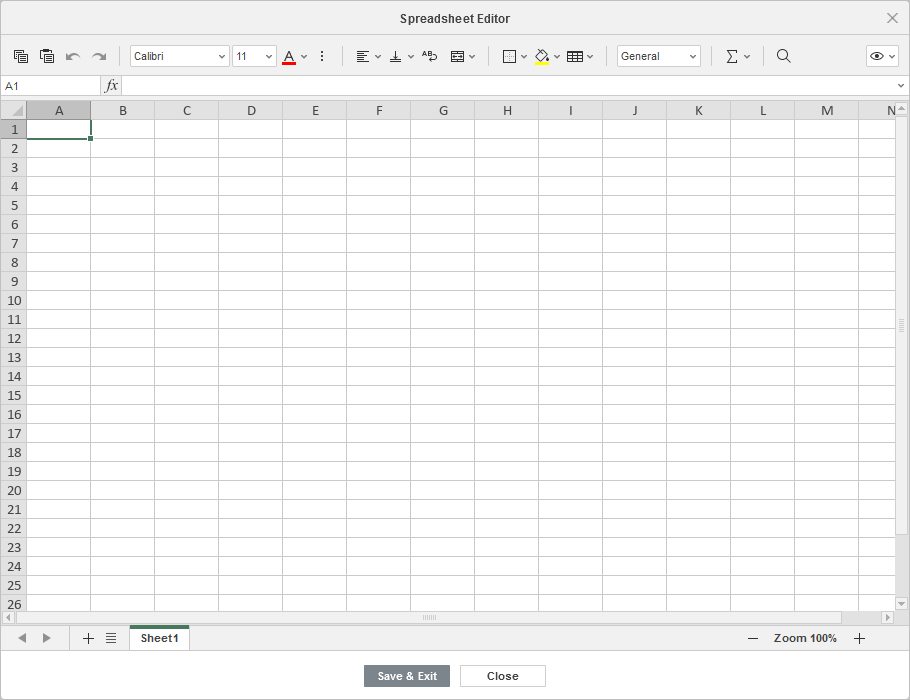
- The header contains the
 Visible area button in the top right corner of the window. Choose the Edit Visible Area option to select the area that will be shown when the object is inserted into the document; other data is not lost, it is just hidden. Click Done when ready.
 - Click the Show Visible Area button to see the selected area that will have a blue border.
- When ready, click the Save & Exit button.
- once the table is added you can change its properties, size and position.
To resize a table, hover the mouse cursor over the  handle in its lower right corner and drag it until the table reaches the necessary size.
You can also manually change the width of a certain column or the height of a row. Move the mouse cursor over the right border of the column so that the cursor turns into the bidirectional arrow  and drag the border to the left or right to set the necessary width. To change the height of a single row manually, move the mouse cursor over the bottom border of the row so that the cursor turns into the bidirectional arrow
  and drag the border up or down.
To move a table, hold down the  handle in its upper left corner and drag it to the necessary place in the document.
It's also possible to add a caption to the table. To learn more on how to work with captions for tables, you can refer to this article.
Select a table or its part
To select an entire table, click the handle in its upper left corner.
To select a certain cell, move the mouse cursor to the left side of the necessary cell so that the cursor turns into the black arrow  , then left-click.
To select a certain row, move the mouse cursor to the left border of the table next to the necessary row so that the cursor turns into the horizontal black arrow  , then left-click.
To select a certain column, move the mouse cursor to the top border of the necessary column so that the cursor turns into the downward black arrow  , then left-click.
It's also possible to select a cell, row, column or table using options from the contextual menu or from the Rows & Columns section on the right sidebar.
Note: to move around in a table, you can use keyboard shortcuts.
Adjust table settings
Some of the table properties as well as its structure can be altered using the right-click menu. The menu options are:
- Cut, Copy, Paste - standard options which are used to cut or copy the selected text/object and paste the previously cut/copied text passage or object to the current cursor position.
- Select is used to select a row, column, cell, or table.
- Insert is used to insert a row above or row below the row where the cursor is placed, as well as to insert a column at the left or right side from the column where the cursor is placed.
It's also possible to insert several rows or columns. If you select the Several Rows/Columns option, the Insert Several window will appear. Select the Rows or Columns option from the list, specify the number of rows/column you want to add, choose where they should be added: Above the cursor or Below the cursor and click OK.
- Delete is used to delete a row, column, table or cells. If you select the Cells option, the Delete Cells window will open, where you can select if you want to Shift cells left, Delete entire row, or Delete entire column.
- Merge Cells is available if two or more cells are selected and is used to merge them.
It's also possible to merge cells by erasing a boundary between them using the eraser tool. To do this, click the
Table icon on the top toolbar, choose the Erase Table option. The mouse cursor will turn into the eraser  . Move the mouse cursor over the border between the cells you want to merge and erase it.
 - Split Cell... is used to open a window where you can select the needed number of columns and rows the cell will be split in.
It's also possible to split a cell by drawing rows or columns using the pencil tool. To do this, click the
Table icon on the top toolbar, choose the Draw Table option. The mouse cursor will turn into the pencil . Draw a horizontal line to create a row, or a vertical line to create a column. - Distribute rows is used to adjust the selected cells so that they have the same height without changing the overall table height.
- Distribute columns is used to adjust the selected cells so that they have the same width without changing the overall table width.
- Cell Vertical Alignment is used to align the text top, center or bottom in the selected cell.
- Text Direction - is used to change the text orientation in a cell. You can place the text horizontally, vertically from top to bottom (Rotate Text Down), or vertically from bottom to top (Rotate Text Up).
- Table Advanced Settings is used to open the 'Table - Advanced Settings' window.
- Hyperlink is used to insert a hyperlink.
- Paragraph Advanced Settings is used to open the 'Paragraph - Advanced Settings' window.

You can also change the table properties on the right sidebar:
Rows and Columns are used to select the table parts that you want to be highlighted.
For rows:
- Header - to highlight the first row
- Total - to highlight the last row
- Banded - to highlight every other row
For columns:
- First - to highlight the first column
- Last - to highlight the last column
- Banded - to highlight every other column
Select from Template is used to choose a table template from the available ones.
Borders Style is used to select the border size, color, style as well as background color.
Rows & Columns is used to perform some operations with the table: select, delete, insert rows and columns, merge cells, split a cell.
Rows & Columns Size is used to adjust the width and height of the currently selected cell. In this section, you can also Distribute rows so that all the selected cells have equal height or Distribute columns so that all the selected cells have equal width.
Add formula is used to insert a formula into the selected table cell.
Repeat as header row at the top of each page is used to insert the same header row at the top of each page in long tables.
Convert Table to Text is used to arrange the table in a plain text form. The Convert Table to Text window sets the delimiter type for the conversion: Paragraph marks, Tabs, Semicolons, and Other (enter the preferred delimiter manually). The text in each cell of the table is considered a separate and individual element of the future text.
Show advanced settings is used to open the 'Table - Advanced Settings' window.
Adjust table advanced settings
To change the advanced table properties, click the table with the right mouse button and select the Table Advanced Settings option from the right-click menu, or use the Show advanced settings link on the right sidebar. The table properties window will open:
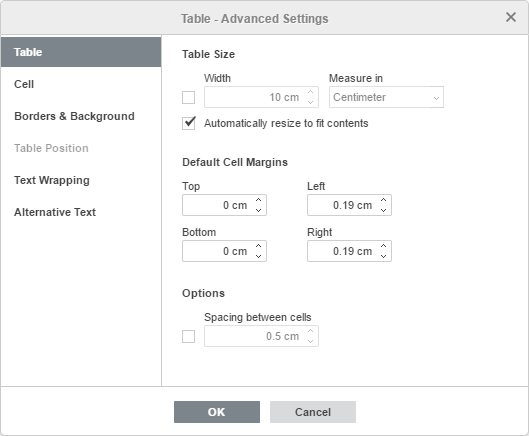
The Table tab allows changing the properties of the entire table.
-
The Table Size section contains the following parameters:
- Width - by default, the table width is automatically adjusted to fit the page width, i.e., the table occupies all the space between the left and right page margin. You can check this box and specify the necessary table width manually.
- Measure in allows specifying the table width in absolute units, i.e., Centimeters/Points/Inches (depending on the option specified on the File -> Advanced Settings... tab) or in Percent of the overall page width.
Note: you can also adjust the table size manually, changing the row height and column width. Move the mouse cursor over a row/column border until it turns into the bidirectional arrow, and drag the border. You can also use the
 markers on the horizontal ruler to change the column width and the
  markers on the vertical ruler to change the row height.
 - Automatically resize to fit contents - allows automatically change the width of each column in accordance with the text within its cells.
- The Default Cell Margins section allows changing the space between the text within the cells and the cell border used by default.
-
The Options section allows changing the following parameter:
- Spacing between cells - the cell spacing which will be filled with the Table Background color.
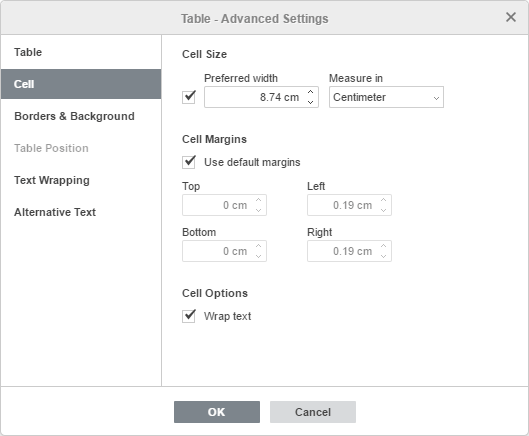
The Cell tab allows changing the properties of individual cells. First, you need to select the required cell or select the entire table to change the properties of all its cells.
-
The Cell Size section contains the following parameters:
- Preferred width - allows setting the preferred cell width. This is the size that a cell strives to fit, but in some cases, it may not be possible to fit this exact value. For example, if the text within a cell exceeds the specified width, it will be broken into the next line so that the preferred cell width remains unchanged, but if you insert a new column, the preferred width will be reduced.
- Measure in - allows specifying the cell width in absolute units, i.e., Centimeters/Points/Inches (depending on the option specified on the File -> Advanced Settings... tab) or in Percent of the overall table width.
Note: you can also adjust the cell width manually. To make a single cell in a column wider or narrower than the overall column width, select the necessary cell and move the mouse cursor over its right border until it turns into the bidirectional arrow, then drag the border. To change the width of all the cells in a column, use the
markers on the horizontal ruler to change the column width.
- The Cell Margins allows adjusting the space between the text within the cells and the cell border. By default, the standard values are used (the default, these values can also be altered on the Table tab), but you can uncheck the Use default margins box and enter the necessary values manually.
-
The Cell Options section allows changing the following parameter:
- The Wrap text option is enabled by default. It allows wrapping the text within a cell that exceeds its width onto the next line, expanding the row height and keeping the column width unchanged.
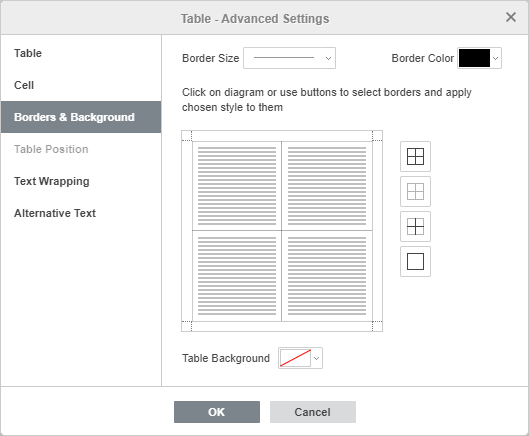
The Borders & Background tab contains the following parameters:
- Border parameters (size, color and presence or absence) - set the border size, select its color and choose the way it will be displayed in the cells.
Note: in case you choose not to show the table borders by clicking the
 button or deselecting all the borders manually on the diagram, they will be indicated with a dotted line in the document.
To make them disappear at all, click the Nonprinting characters
button or deselecting all the borders manually on the diagram, they will be indicated with a dotted line in the document.
To make them disappear at all, click the Nonprinting characters  icon on the Home tab of the top toolbar and select the Hidden Table Borders option.
- Cell Background - the color for the background within the cells (available only if one or more cells are selected or the Allow spacing between cells option is selected at the Table tab).
- Table Background - the color for the table background or the space background between the cells in case the Allow spacing between cells option is selected on the Table tab.
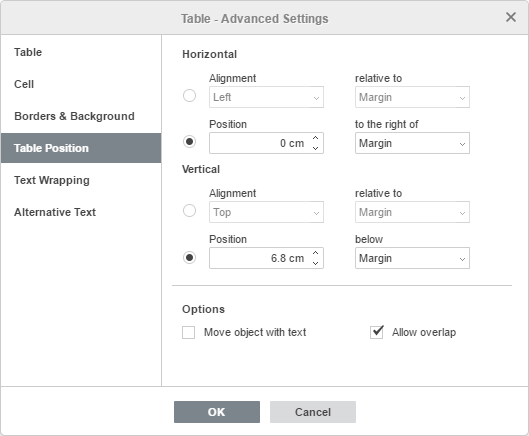
The Table Position tab is available only if the Flow table option on the Text Wrapping tab is selected and contains the following parameters:
- Horizontal parameters include the table alignment (left, center, right) relative to margin, page or text as well as the table position to the right of margin, page or text.
- Vertical parameters include the table alignment (top, center, bottom) relative to margin, page or text as well as the table position below margin, page or text.
-
The Options section allows changing the following parameters:
- Move object with text ensures that the table moves with the text.
- Allow overlap controls whether two tables are merged into one large table or overlap if you drag them near each other on the page.
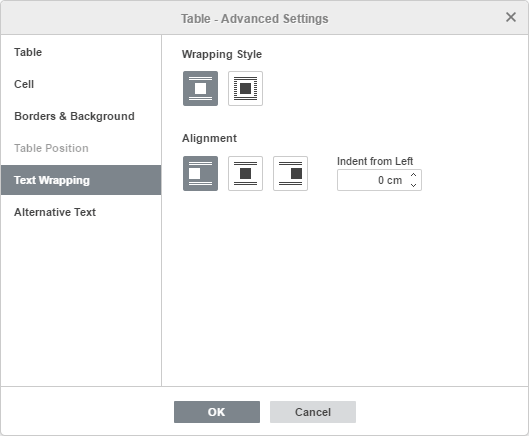
The Text Wrapping tab contains the following parameters:
- Text wrapping style - Inline table or Flow table. Use the necessary option to change the way the table is positioned relative to the text: it will either be a part of the text (in case you select the inline table) or bypassed by it from all sides (if you select the flow table).
-
After you select the wrapping style, the additional wrapping parameters can be set both for inline and flow tables:
- For the inline table, you can specify the table alignment and indent from left.
- For the flow table, you can specify the distance from text and table position on the Table Position tab.
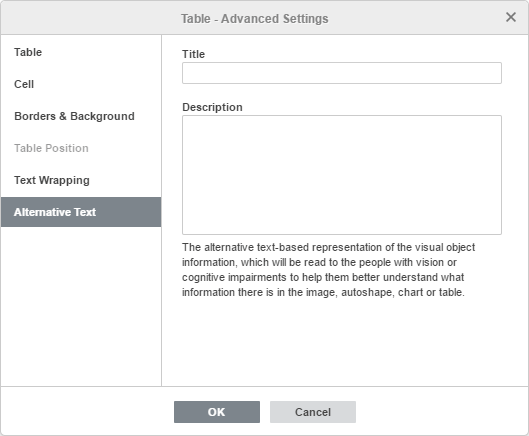
The Alternative Text tab allows specifying the Title and Description which will be read to people with vision or cognitive impairments to help them better understand the contents of the table.