WordPress

About the ONLYOFFICE and WordPress integration

ONLYOFFICE integration plugin allows WordPress administrators to open documents, spreadsheets, and presentations for collaborative editing using ONLYOFFICE Docs. In published posts, the editors are visible to all WordPress site visitors (both authorized and unauthorized) in the Embedded mode only. For more information, please refer to the GitHub page of the ONLYOFFICE to WordPress connector. The plugin is distributed under the GPL-2.0 license.

To learn more about how the ONLYOFFICE connector for WordPress works, please visit our API documentation page.
Main features
  • Creating, editing and viewing text documents, spreadsheets, and presentations.
  • Co-editing documents in real-time: two co-editing modes (Fast and Strict), the Track Changes mode, comments, and the built-in chat.
  • JWT support to secure your traffic so that no one can have access to your documents with the exception of the users with proper rights.
Supported formats
  • For creating, editing and viewing: DOCX, PPTX, XLSX
  • For viewing only: XLS, XLSX, XLSM, XLT, XLTX, XLTM, ODS, FODS, OTS, CSV, PPS, PPSX, PPSM, PPT, PPTX, PPTM, POT, POTX, POTM, ODP, FODP, OTP, DOC, DOCX, DOCM, DOT, DOTX, DOTM, ODT, FODT, OTT, RTF, TXT, HTML, HTM, MHT, XML, PDF, DJVU, FB2, EPUB, XPS, OXPS
  • For filling forms: PDF

Connecting ONLYOFFICE Docs to WordPress

Requirements
  • ONLYOFFICE Document Server v6.1.0 (server or cloud version) or later

    You need an instance of ONLYOFFICE Docs that is resolvable and connectable both from WordPress and any end clients. It must be able to POST to WordPress directly.

    Please refer to the official documentation page to learn more about installing ONLYOFFICE Docs.
  • WordPress v. 5.7 or higher
  • ONLYOFFICE Connector 2.3.0 for WordPress
Installing the ONLYOFFICE plugin for WordPress

To start using ONLYOFFICE Docs with WordPress, use one of the three installation methods: via .zip archive, by cloning the master branch, or using the WordPress marketplace:

  1. Using the .zip archive:
    • Download the zipped plugin.
    • Navigate to the Plugins section in your WordPress administrative dashboard.
    • Go to PluginsAdd New.
    • Click Upload Plugin.
    • Click Choose File, select the downloaded ZIP file, and upload it.
    • After installation, click Activate.
  2. By cloning the master branch:
    • Clone the master branch:
      cd wp-content/plugins git clone https://github.com/ONLYOFFICE/onlyoffice-wordpress
    • Activate the plugin from the WordPress administrative dashboard.
  3. Using the WordPress marketplace:
    • Install the plugin from the official page on the marketplace.
    • After installation, click Activate.

    Configuring ONLYOFFICE Docs in WordPress

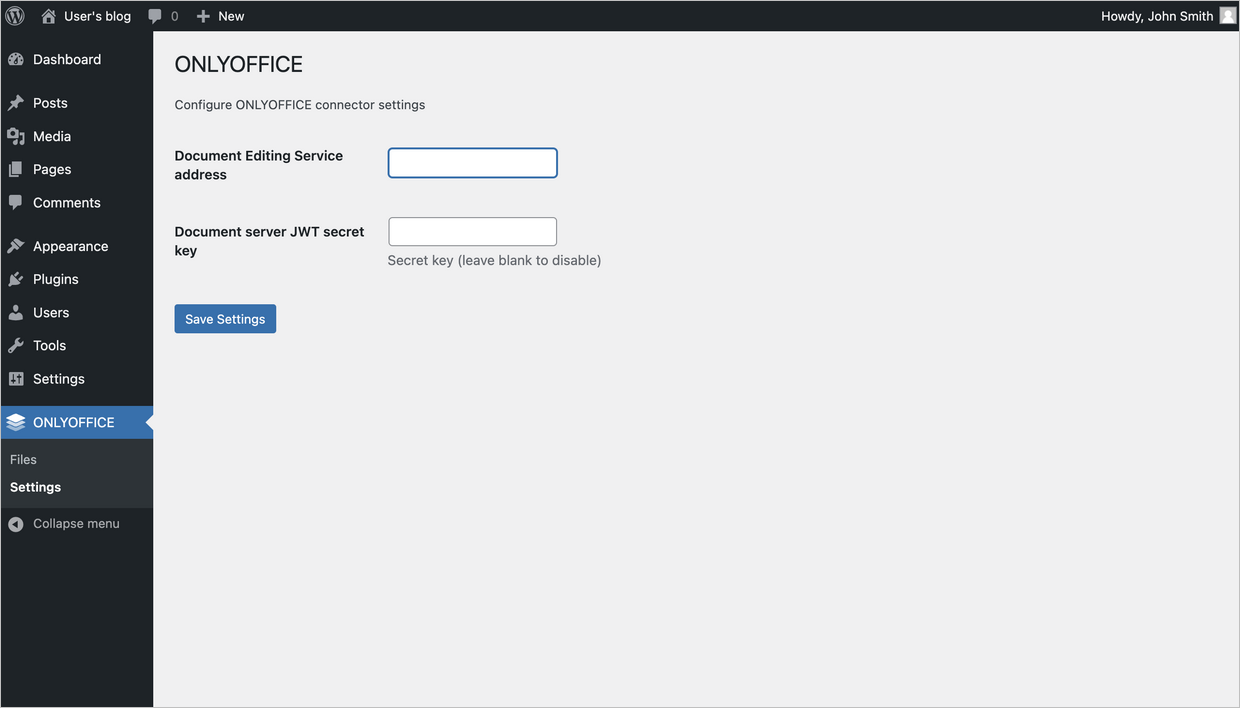
    After installing the plugin, configure the connection settings:

    1. Go to WordPress administrative dashboard → ONLYOFFICE → Settings.
    2. Specify the URL for the connector settings:
      • Document Editing Service address - specify the URL address where Document Editing Service is installed.
        The address of ONLYOFFICE Docs must be accessible from WordPress, as well as the address of WordPress must be accessible from ONLYOFFICE Docs.
      • Secret Key - specify the secret used to sign the data.
        Starting from ONLYOFFICE Docs v7.2, JWT is enabled by default and the secret key is generated automatically. You need to enable it on the WordPress side as well: find your secret key in the ONLYOFFICE Docs configuration file, then specify the same secret key in the connector settings. For more details, see the Enabling JWT for the ONLYOFFICE and WordPress integration section of this article.
      • Authorization header - (leave blank to use default header) - authorization JWT header used in ONLYOFFICE is AuthorizationJwt. In case this header is in conflict with your setup, you can change the header to the custom one.
    configureconfigure
    How it works

    The user-document interaction is done both at the client side and at the server side.

    The main notions used throughout the current documentation are explained below.

    The client side includes:

    • Document manager - the list of the documents displayed in the user browser where the user can select the necessary document and perform some actions with it (depending on the provided rights, the user can open the document to view it or edit, share the document with other users).
    • Document editor - the document viewing and editing interface with all the most known document editing features available, used as a medium between the user and the document editing service.

    The server side includes:

    • Document storage service - the server service which stores all the documents available to the users with the appropriate access rights. It provides the document IDs and links to these documents to the document manager which the user sees in the browser.
    • Document editing service - the server service which allows performing the document viewing and editing (in case the user has the appropriate rights to do that). The document editor interface is used to access all the document editing service features.
    • Document command service - the server service which allows performing additional commands with document editing service.
    • Document conversion service - the server service which allows converting the document file into the appropriate Office Open XML format (docx for text documents, xlsx for spreadsheets and pptx for presentations) for their editing or downloading.
    • Document builder service - the server service which allows building a document easily without the need to actually run a document processing editor.

    Please note, that ONLYOFFICE Document Server includes the document editor, document editing service, document command service, document conversion service and document builder service. The document manager and document storage service are either included to Community Server or must be implemented by the software integrators which use ONLYOFFICE Document Server on their own server.

    Enabling JWT for the ONLYOFFICE and WordPress integration

    To protect documents from unauthorized access, ONLYOFFICE editors use the JSON Web Token (JWT). The token is added in the configuration when the Document Editor is initialized and during the exchange of commands between inner ONLYOFFICE Docs services. The secret key is used to sign the JSON web token and validate the token upon the request to ONLYOFFICE Docs.

    Starting from ONLYOFFICE Docs v7.2, JWT is enabled by default and the secret key is generated automatically. You need to find your secret key in the ONLYOFFICE Docs configuration file, then specify the same secret key in the connector settings.

    Step 1: Find your secret key in the ONLYOFFICE Docs configuration file

    1. Open the local.json file with any available text editor.
      • For Linux - /etc/onlyoffice/documentserver/local.json
      • For Windows - %ProgramFiles%\ONLYOFFICE\DocumentServer\config\local.json
      • For Docker – enter the ONLYOFFICE Docs container using the docker exec -it <containerID> bash command and open /etc/onlyoffice/documentserver/local.json

        Alternatively, you can use the following command to find the default secret key without opening local.json:

        sudo docker exec <containerID> /var/www/onlyoffice/documentserver/npm/json -f /etc/onlyoffice/documentserver/local.json 'services.CoAuthoring.secret.session.string'

      The local.json file should look like this:

      {"services": {"CoAuthoring": {"token": {"enable": {"request": {"inbox": true,"outbox": true},"browser": true}},"secret": {"inbox": {"string": "yoursecret"},"outbox": {"string": "yoursecret"},"session": {"string": "yoursecret"}}}}}
    2. The true value is specified in three sections. It means that token validation is enabled.
      • services.CoAuthoring.token.enable.browser
      • services.CoAuthoring.token.enable.request.inbox
      • services.CoAuthoring.token.enable.request.outbox
    3. The automatically generated secret key is specified in three sections. You can replace the default secret value with your own secret key. The secret key must be the same in three sections.
      • services.CoAuthoring.secret.inbox.string
      • services.CoAuthoring.secret.outbox.string
      • services.CoAuthoring.secret.session.string
    4. If you make changes, save them and restart the services for the config changes to take effect.
      supervisorctl restart all

    Step 2: Specify the same secret key in the connector settings

    In the connector settings, specify the same secret in the Secret key field and save the settings.

    Start using ONLYOFFICE Docs within WordPress
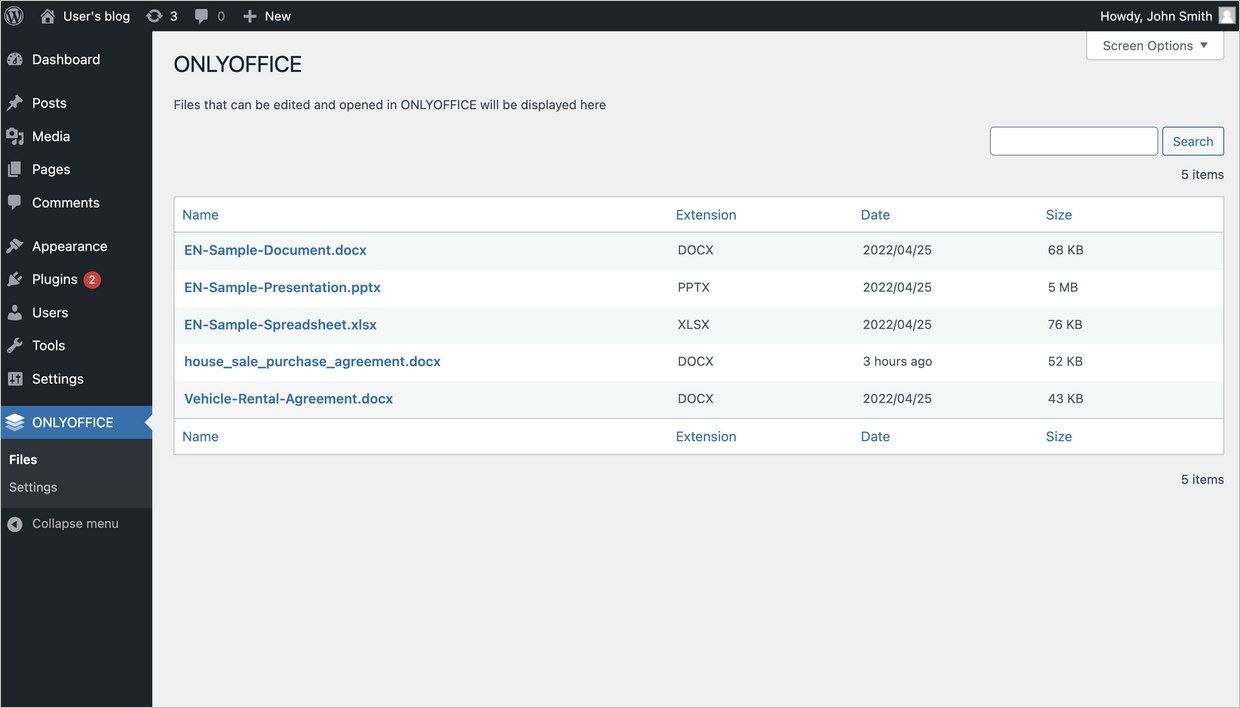
    Viewing documents

    To view all documents, go to WordPress administrative dashboard > ONLYOFFICE > Files.

    viewview
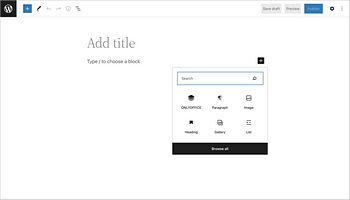
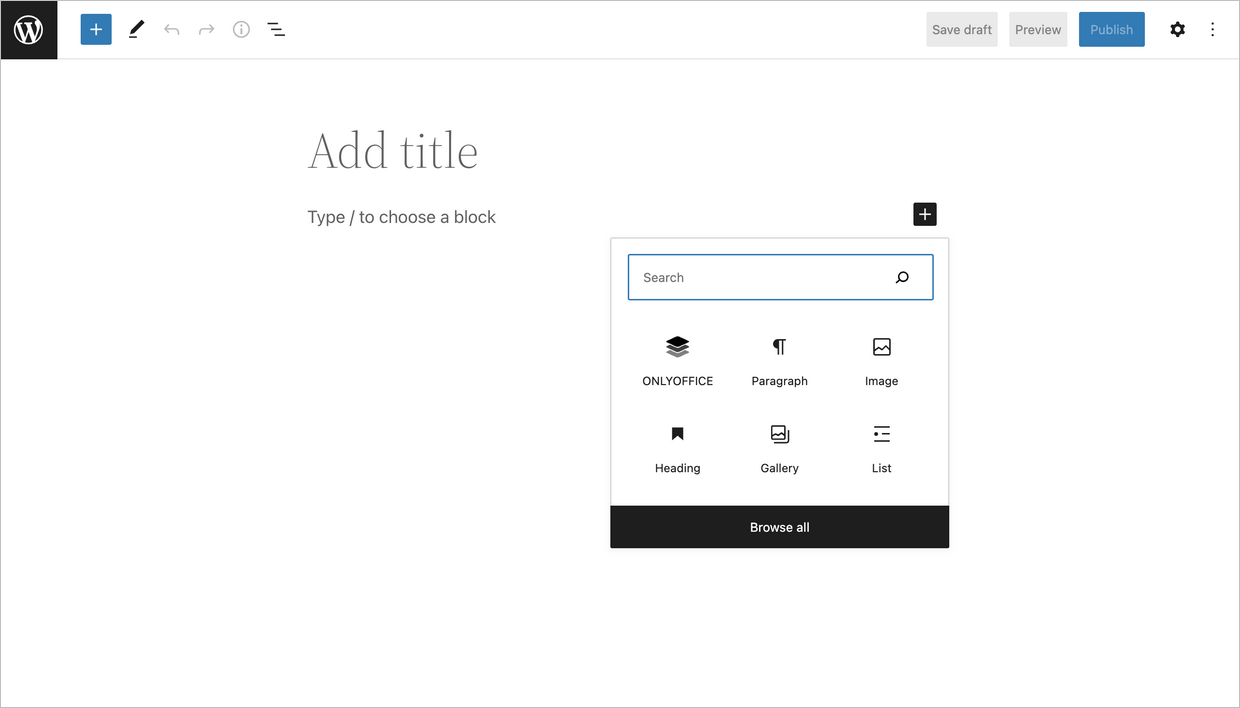
    Adding ONLYOFFICE block

    To add ONLYOFFICE block for future use:

    1. Open the Create a post window.
    2. Click the ONLYOFFICE icon in the panel below.
    add_blockadd_block
    Uploading and embedding a file

    To upload a file to the ONLYOFFICE block and embed it into a new post:

    1. Open the Create a post window.
    2. Choose the ONLYOFFICE block.
    3. Click the Upload button to upload a file from your computer to the ONLYOFFICE block
      or
      Click the Media Library button to select a file from your library and upload it to the ONLYOFFICE block.
      uploadupload
      embedembed

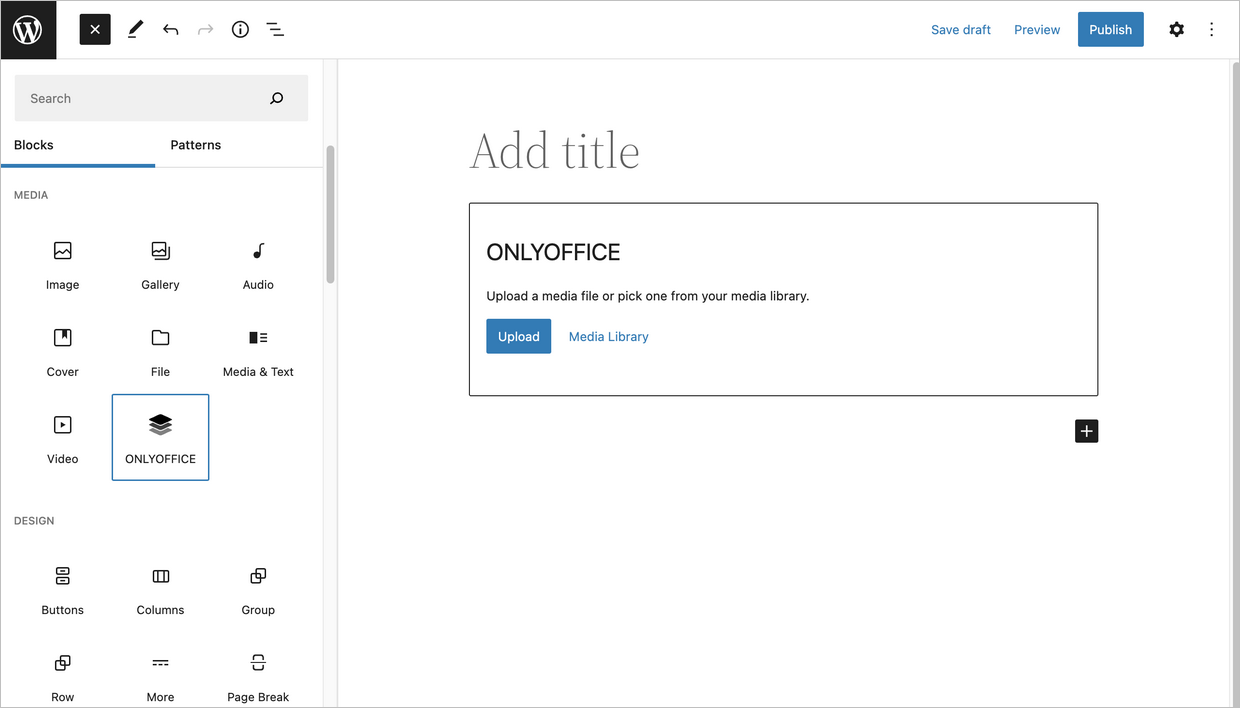
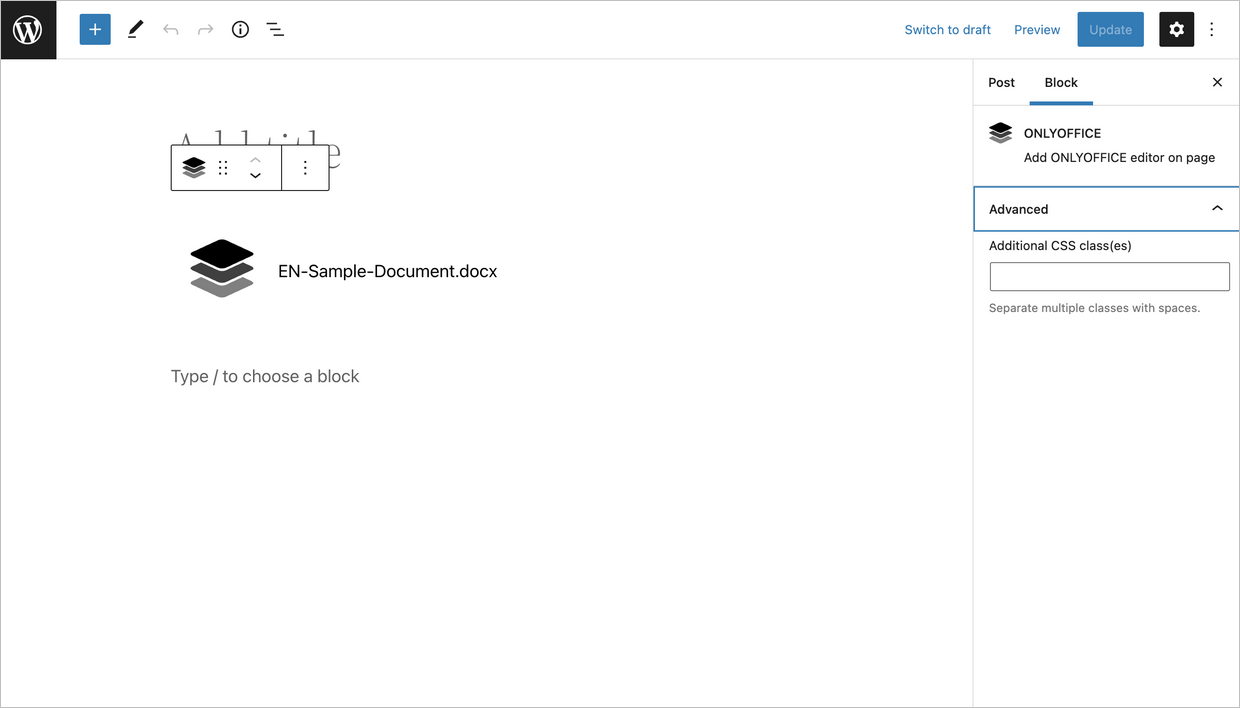
    The document will be embedded in the created post.

    embeddedembedded
    To learn more about the most common problems and the ways to solve them, please visit our troubleshooting guide.

    Host ONLYOFFICE Docs on your own server or use it in the cloud

    Article with the tag:
    Browse all tags