Adding animations
Animation is a visual effect that allows you to animate text, objects and graphics as to make your presentation more dynamic and emphasize important information. You can control the movement, color and size of the text, objects and graphics.
Applying an animation effect
- switch to the Animation tab on the top toolbar,
- select a text, an object or a graphic element you want to apply the animation effect to,
- select an Animation effect from the animations gallery,
- select the animation effect movement direction by clicking Parameters next to the animations gallery. The parameters on the list depend on the effect you apply.
You can preview animation effects on the current slide. By default, animation effects will play automatically when you add them to a slide but you can turn it off. Click the Preview drop-down on the Animation tab, and select a preview mode:
- Preview to show a preview when you click the Preview button,
- AutoPreview to show a preview automatically when you add an animation to a slide or replace an existing one.
Types of animations
All animation effects are listed in the animations gallery. Click the drop-down arrow to open it. Each animation effect is represented by a star-shaped icon. The animations are grouped according to the point at which they occur:
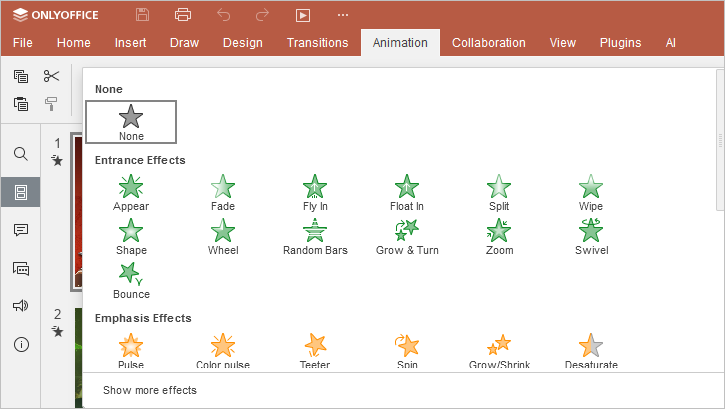
Entrance effects determine how objects appear on a slide, and are colored green in the gallery.
Emphasis effects change the size or color of the object to add emphasis on an object and to draw attention of the audience, and are colored yellow or two colored in the gallery.
Exit effects determine how objects disappear from a slide, and are colored red in the gallery.
Motion Paths determines the movement of an object and the path it follows. The icons in the gallery represent the suggested path. The Custom Path option is also available. To learn more, please read the following article.
Scroll down the animations gallery to see all effects included in the gallery. If you don’t see the needed animation in the gallery, click the Show More Effects option at the bottom of the gallery.
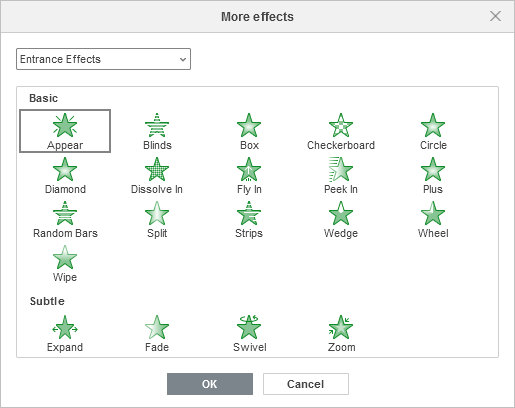
Here you will find the full list of the animation effects. Effects are additionally grouped by the visual impact they have on audience.
- Entrance, Emphasis, and Exit effects are grouped by Basic, Subtle, Moderate, and Exciting.
- Motion Path effects are grouped by Basic, Subtle, and Moderate.
Applying Multiple Animations
You can add more than one animation effect to the same object. To add one more animation,
- click the Add Animation button on the Animation tab.
- The list of animation effects will open. Repeat Steps 3 and 4 above for applying an animation.
If you use the Animation gallery, and not the Add Animation button, the first animation effect will substitute for a new one. A small square next to the object shows the sequence numbers of the effects applied.
As soon as you add several effects to an object, the Multiple animation icon appears in the animations gallery.

Changing the order of the animation effects on a slide
- Click the animation square mark.
- Сlick
 or
or  arrows on the Animation tab to change the order of appearance on the slide.

Setting animation timing
Use the timing options on the Animation tab to set the start, the duration, the delay, the repetition and the rewind of the animations on a slide.
Animation Start Options
- On click – animation starts when you click the slide. This is the default option.
- With previous – animation starts when previous animation effect starts and effects appear simultaneously.
- After previous – animation starts right after the previous animation effect.
Note: animation effects are automatically numbered on a slide. All animations set to With previous and After previous take the number of the animation they are connected to as they will appear automatically.

Animation Trigger Options
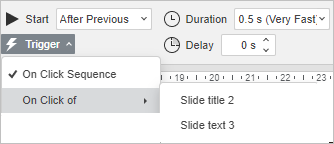
Click the Trigger button and select one of the appropriate options:
- On Click Sequence – to start the next animation in sequence each time you click anywhere on the slide. This is the default option.
- On Click of - to start animation when you click the object that you select from the drop-down list.
Other timing options

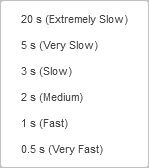
Duration – use this option to determine how long you want an animation to be displayed. Select one of the available options from the menu, or type in the necessary time value.
Delay – use this option if you want the selected animation to be displayed within a specified period of time, or if you need a pause between the effects. Use arrows to select the necessary time value, or enter the necessary value measured in seconds.
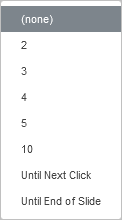
Repeat – use this option if you want to display an animation more than once. Click the Repeat box and select one of the available options, or enter your value.
Rewind – check this box if you want to return the object to its original state when the animation ends.
Animation color options
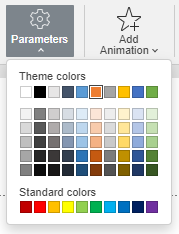
You can set the final color for animation effects that change color.
Click the Parameters button at the top toolbar and select the necessary color on the Theme colors or Standard colors palette.
Animation pane

The Animation pane displays set animations and allows for easier animation management.
-
- Play All - click this button to play all currently created animations.
- Play Selected - click this button to play all currently selected animations. During the playback, only selected animations are displayed in the list.
- Play From - click this button to play animations starting with the selected one and going down the list. During the playback, only selected animations are displayed in the list.
- Stop - click this button to stop animation playback.
- Use the and buttons to change the order of objects' animations on the slide.
- To set the Start point, click an animation with the right mouse button or click the More button to the right of the animation.
- The timeline of the slide is displayed below the animation pane.
- To change the duration of an animation, click and drag its ending point on the pane to the desired time point.
- To move an animation along the timeline, click right on its diagram representation on the pane and drag it to the desired time point.
- Use the Zoom interface buttons to zoom in and out of the timeline.
Volver a la página anterior