Managing user types and permission levels allows you to control, which sections users can access and which actions they can perform in ONLYOFFICE DocSpace. Once users are added to DocSpace, admins can manage them: sort and filter the user list to easily find the necessary user, edit the user info, change user types (promote or demote users), resend invitations, disable active users, and remove disabled users from DocSpace. Admins can also manage users within a certain room.
All DocSpace user accounts are listed in the Contacts section. Click the corresponding option in the left-side menu to open the user list.
When managing users in DocSpace, the available actions differ depending on the user type:
| Section\User type |
Owner |
DocSpace admin |
Room admin |
User |
Guest |
| Contacts |
|
|
|
|
|
| Inviting "DocSpace admin" |
|
|
|
|
|
| Inviting "Room admin" |
|
|
|
|
|
| Inviting "User" |
|
|
|
|
|
| Inviting "Guest" |
|
|
|
|
|
| Promoting to "DocSpace admin" |
|
|
|
|
|
| Promoting to "Room admin" |
|
|
|
|
|
| Promoting to "User" |
|
|
|
|
|
| Demoting "DocSpace admin" to "Room admin" or "User" |
|
|
|
|
|
| Demoting "Room admin" to "User" |
|
|
|
|
|
| Demoting "User" to "Guest" |
|
|
|
|
|
| Disabling "DocSpace admin" |
|
|
|
|
|
| Disabling "Room admin" |
|
|
|
|
|
| Disabling "User" |
|
|
|
|
|
| Disabling "Guest" |
|
|
|
|
|
| Editing or removing users |
|
|
|
|
|
| Viewing own guest list |
|
|
|
|
|
| Viewing someone else's guest list |
|
|
|
|
|
Operations in the Members and Guests lists
On the Contacts -> Members tab, admins can view, add and manage internal users.
On the Contacts -> Guests tab, room admins can view and manage own guest list. The DocSpace owner and DocSpace admins can also view and manage someone else's guest list.
Using tools on the top toolbar, you can perform the following operations:
- Search for a user/guest name using the search bar at the top of the user/guest list.
- Filter the user list by group (Without group, Other), status (Active, Pending invite, Disabled), type (DocSpace admin, Room admin, User), account (Paid, Free), account login type (SSO, LDAP, standard login) and storage quote ((if enabled) Default quote, Custom quote) using the
 button. Select the necessary filter parameters and click Apply. To clear the filter, use the Clear all option if several parameters are selected or the cross icon if a single parameter is selected.
The guest list can be filtered by inviter (Me, Other), status (Active, Pending invite, Disabled), account login type (SSO, LDAP, standard login).
- Sort users by name, type, group, email using the
 button. Click the arrow next to the selected parameter to change the sort order.
Guests can be sorted by email, inviter, registration date.
- Use the
 icon to display or hide the Type, Group, Email, Storage / Quota columns in the user list (Compact view).
The Email, Inviter, Registration date columns are available in the guest list.
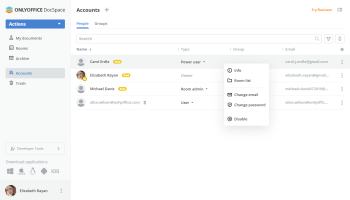
Using the right-click menu or the  icon next to the user/guest name, you can perform the following actions. The actions may vary depending on the account status:
 Invite again (For Pending accounts only) – to send an invitation to DocSpace again.
 Info – to view the user/guest info. You can also use the icon in the upper right corner of the top toolbar.
 Room list – to view the rooms the user/guest is invited to (the filter by room member will be applied).
 Change email (For Active accounts only) – to specify a new email address.
 Change password (For Active accounts only) – to set a new password.
 Reset authentication (For Active User accounts only) – to log out all active connections. This action is only available when two-factor authentication is enabled. It terminates all active sessions and resets the authenticator app configuration.
 Change type (For Active and Pending Guest accounts) – to promote the Guest type to User and move the User to the Members list.
 Disable (For Active and Pending accounts) – to disable the user/guest.
 Enable (For Disabled accounts only) – to re-enable the disabled user/guest.
 Delete user/guest (For Disabled accounts only) – to remove the disabled user/guest.
- Remove – to remove the guest from the Room admin guest list. This action is available only for the Room admin in the list of their guests. It does not block or remove the guest from the portal.
 Change owner (For the Owner account only) – to assign another DocSpace owner.

Using the right-click menu in the Storage / Quota column next to the user name, you can perform the following actions:
- Change quota (if the default quota is enabled) – to set a custom quota per user.
- Set to default (if the default quota is enabled and changed) – to set a custom quota to the default value.
- Disable quota (if the default quota is enabled) – to disable the quota.
Resending invitations to DocSpace
- Go to the Contacts section on the left.
- Click the
 Plus icon above the list of users/guests or right-click one of the pending accounts in the list.
- Select the Invite again option from the menu.
Changing user types
- Go to the Contacts section on the left.
- Click the icon next to the user name.
- Select Info.
- Open the list next to the user Type.
- Select a different user type.
User can be promoted to DocSpace admin or Room admin. Admins cannot be demoted to User.
Changing user/guest account statuses
- Go to the Contacts section on the left.
- Click the icon next to the user/guest name.
- Select Disable or Enable.
Removing users/guests from DocSpace
To remove a disabled user/guest who did not create rooms or add documents to the room,
- Go to the Contacts section on the left.
- Click the icon next to the disabled user/guest name.
- Select the
 Delete user/guest option.
- A confirmation window opens. Note that personal documents and folders in the Documents section of this user will be deleted. Click Delete.
Reassigning data when deleting profiles
If you want to remove a disabled user who created rooms or documents/folders in the room, rooms created by this user and documents stored in these rooms will be reassigned automatically to an admin performing the deletion. Reassign data manually to choose another destination user for reassignment.
Currently, the data reassignment option is only available for the users with the Disabled status, it's not possible to reassign the data that belongs to an active user.
What happens to the data after reassigning
After you reassign data and delete a user, the related contents created by a user will be processed as follows:
- Personal documents and folders in the Documents section of this user will be deleted.
- Rooms and documents/folders created by the user in a room are not deleted, but their ownership is reassigned to the selected user.
Deleting a user
To delete a user,
- Go to the Contacts section on the left.
- Click the icon next to the disabled user name.
- Select the Delete user option.
- A confirmation window opens where you'll be prompted to reassign the user's data:
- Click the Reassign data to another user link in the confirmation window.
- A new panel opens where you can select a DocSpace user you wish to reassign data to. Click the Plus icon in the New data owner section and choose the necessary active user from the list.
- The Delete profile when reassignment is finished box is checked by default that allows to automatically delete the profile after data reassignment.
- Click the Reassign button.
You can use the Abort transfer option to abort data reassignment.
Once the reassignment process is over, you'll be notified via email.
If you unchecked the Delete profile when reassignment is finished box, you can return to the list of disabled users and manually delete the user without losing their data.