Project documents
The Documents section displays the list of all the documents added to the projects which are accessible for the current user. Depending on the user access rights, they can view project documents and manage them.
If you need to create new documents/spreadsheets/presentations, please download the ONLYOFFICE Documents app for Android and proceed with the creation of the required files.
In the project documents list, you can view the folders that correspond to existing projects. Within each project folder, you can find all the files and folders attached to this project:
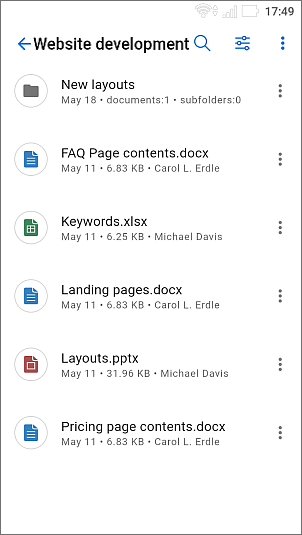
In the file list, you can view the following information about files: title, creation date, file size, and author.
Sort and filter documents in the list
To easily find the necessary document in the list, you can apply different sort and filter parameters.
Sort documents
- tap the
 icon in the upper right corner,
 - select the necessary sorting criteria: Last modified date, Creation date, Title, Type, Size, or Author,
- tap the necessary criteria to sort the items in ascending or descending order. Tapping the same criteria will reverse the sorting order.
Filter documents
- tap the
 icon in the upper right corner,
 - select the necessary filter in the Filter list: Type, or Author, and choose the necessary parameters for the selected filter:
- to filter files by Type, select the necessary type (Folders, Documents, Presentations, Spreadsheets, Images, Media, Archives, All files).
- to filter files by Author, choose one of the following options: Me, Users, or Groups.
- tap the SHOW DOCUMENTS button.
Manage files in the list
Touch the item icon  to the right of the necessary file in the list.
For the documents, spreadsheets, presentations, media files, images, archives, and files in other formats you can choose the following actions:
- Open the selected file in the ONLYOFFICE Documents app. You must also be logged in under the same account and have access to the file,
- Copy link to the selected file,
- Download the selected file. When the document is loaded, it opens,
- Copy the selected file,
- Move the selected file,
- Rename the selected file. If you select the Rename option, a new window opens. Type in a new file name and tap the CONFIRM button,
- Delete the selected file.
The Move, Rename, and Delete options can be unavailable to users who do not have enough permissions.
Open documents and media files
You can open and view documents and media files (video, images, audio) directly from the application.
To open a document, tap it, and it will automatically open in the corresponding editor of ONLYOFFICE Documents. After you finish editing, save the document and it will be automatically updated.
To open a media file, tap it, and the selected file will start downloading to your device. Next, you will be prompted to use one of the applications that can open this type of file.