Tasks
The Tasks section displays the list of all the tasks accessible for the current user. Depending on the user access rights, they can view tasks, manage them, create new tasks, or edit existing ones.
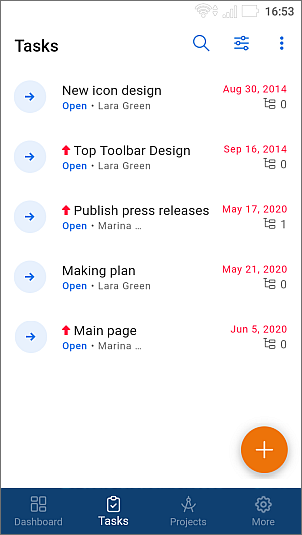
In the task list, you can view the following information about tasks:
- the task title,
- the task’s high priority level
 that is displayed to the left of the task title,
 - the task status designated with the corresponding icon on the left: the default statuses are open
 or closed
  ,
, - the person who created the task,
- the task deadline,
- the number of subtasks
 that is displayed on the right.
Sort and filter tasks in the list
To easily find the necessary task in the list, you can apply different sort and filter parameters.
Sort tasks
- tap the
 icon in the upper right corner,
 - select the necessary sorting criterion: Deadline, Priority, Creation date, Start date, Title, or Order,
- tap the necessary criterion to sort the items in ascending or descending order. Tapping the same criterion will reverse the sorting order.
Filter tasks
- tap the
 icon in the upper right corner,
 - select the necessary filter in the Filter list: Responsible, Creator, Project, Milestone, Status, Due date, and choose the necessary parameters for the selected filter:
- to filter tasks by Responsible, choose one of the following options: Me, Other user (choose one), Groups (choose the needed groups), No responsible.
- to filter tasks by Creator, choose one of the following options: Me, Other user (choose one).
- to filter tasks by Project, choose one of the following options: My projects, Other projects, With tag, Without tag.
- to filter tasks by Milestone, choose one of the following options: Milestones with my tasks, No milestone, Other milestones.
- to filter tasks by Status, choose one of the following options: Open or Closed.
- to filter tasks by Due date, select one of the available presets: Overdue, Today, Upcoming or tap the Custom period option, specify the Begin and End dates in the calendar and click SAVE.
- if necessary, apply other available filters,
- tap the SHOW TASKS button.
Manage tasks in the list
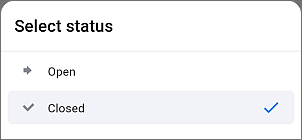
To change the task status, tap the item icon then choose the necessary option to change the task status:
For open tasks, the Closed option is available that allows to close the selected task.
For closed tasks, the Open option is available that allows to reopen the selected task.
Open the needed task and tap the button in the upper right corner.
- allows to choose one of the following actions:
- Copy link to the selected task,
- Edit task,
- Follow/Unfollow task,
- Copy task,
- Delete task.
View tasks
To view a certain task, you can tap the task name in the task list.
The task overview screen opens. The Overview section is activated by default.
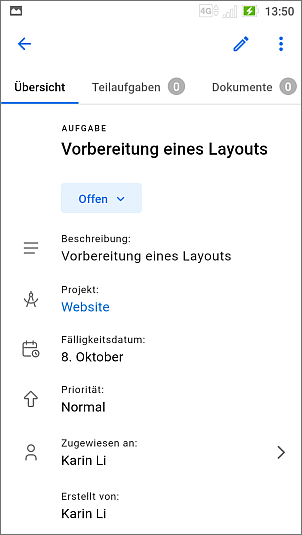
To navigate between the task sections, tap the buttons at the upper panel:
Overview - to view the task info: title, status, project, milestone, start date, due date, priority, assigned to, created by, creation date,
Subtasks - to view the list of subtasks added to this task. If you have corresponding rights, you can manage existing subtasks or add new subtasks to the task using the round  button in the bottom right corner.
Documents - to view the documents attached to this task,
Comments - to view the comments related to this task.
Create a new task
If you have corresponding rights to create a task, the icon is available in the bottom right corner of the task list. To create a new task:
- tap the icon - the new task creation form opens,
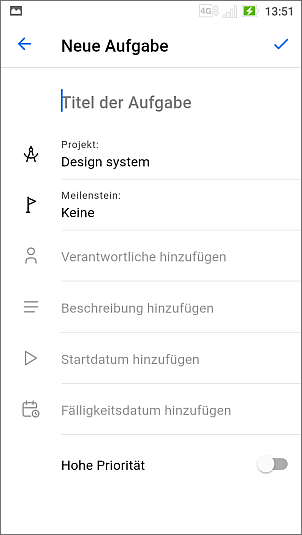
- specify the Task title (this field is obligatory),
- select a Project you want to add the task to (this option is obligatory): tap Select project, then choose one of the available projects.
- select a Milestone you want to add the task to: tap None, then choose one of the available milestones within the previously selected project.
- choose the responsible person you wish to assign this task to using the Add responsible option: tap Add responsible, then choose one of the available users on the Select responsible users screen tapping their name. When ready, tap the
 icon in the upper right corner,
 - activate the Notify responsible users switcher if you want to send them a corresponding notification about a new task. The switcher is turned off by default,
- Add description of the task, if necessary,
- set a Start date: tap the Set start date option and select a date using the calendar,
- set a Due date: tap the Set due date option and select a date using the calendar,
- tap the High priority switcher, if necessary. Use this option if you consider the newly created task to be more important than others,
- when ready, tap the icon in the upper right corner of the New task screen.
Edit tasks
To adjust some task settings, tap the task name in the task list to view it, then tap the icon in the upper right corner and select the Edit task menu item.
On the Edit task screen, change the necessary parameters specified when creating the task. You can also change the task Status selecting one of the options: Open or Closed. When ready, tap the icon in the upper right corner.
If you want to delete the task, go to the task overview screen, tap the button in the upper right corner and choose the Delete task option.
Create a new subtask
To start creating a new subtask, open the task overview screen, go to the Subtasks section using the upper panel, then tap the icon in the bottom right corner of the subtask list.
On the Add subtask screen, create a subtask:
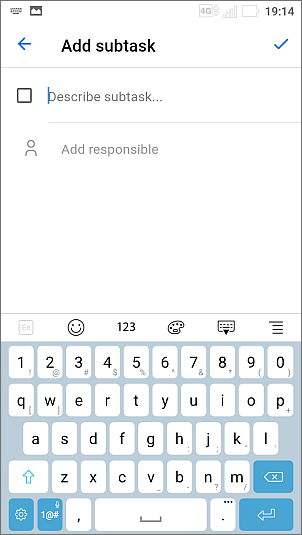
- specify your subtask Title in the Describe subtask... field,
- select the responsible person you wish to assign this subtask to: tap Add responsible, check the necessary user on the Select responsible users screen and tap the icon in the upper right corner.
- tap the icon in the upper right corner of the Add subtask screen.
To close the subtask, tap the  square to the left of the subtask.