Working with Custom rooms
Custom rooms include a wide range of features for any purpose. They can be suitable for both highly specialized projects and complex tasks involving many participants with different roles.
You can collaborate on documents with DocSpace members assigning various permission levels or create external links with different access rights for third-party users.
Key features
- Multiple permission levels: co-editing, reviewing, commenting, viewing
- Working with both space members and external users
- Creating shared links with different access rights
- Protecting links with a password and other security measures
Possible use cases
- Viewing ready documents without the possibility to change them
- Commenting to discuss articles and prepare them for publishing
- Sending documents for review, accepting and rejecting changes
- Co-authoring files
Let's take a look at the basic steps when working with Custom rooms.
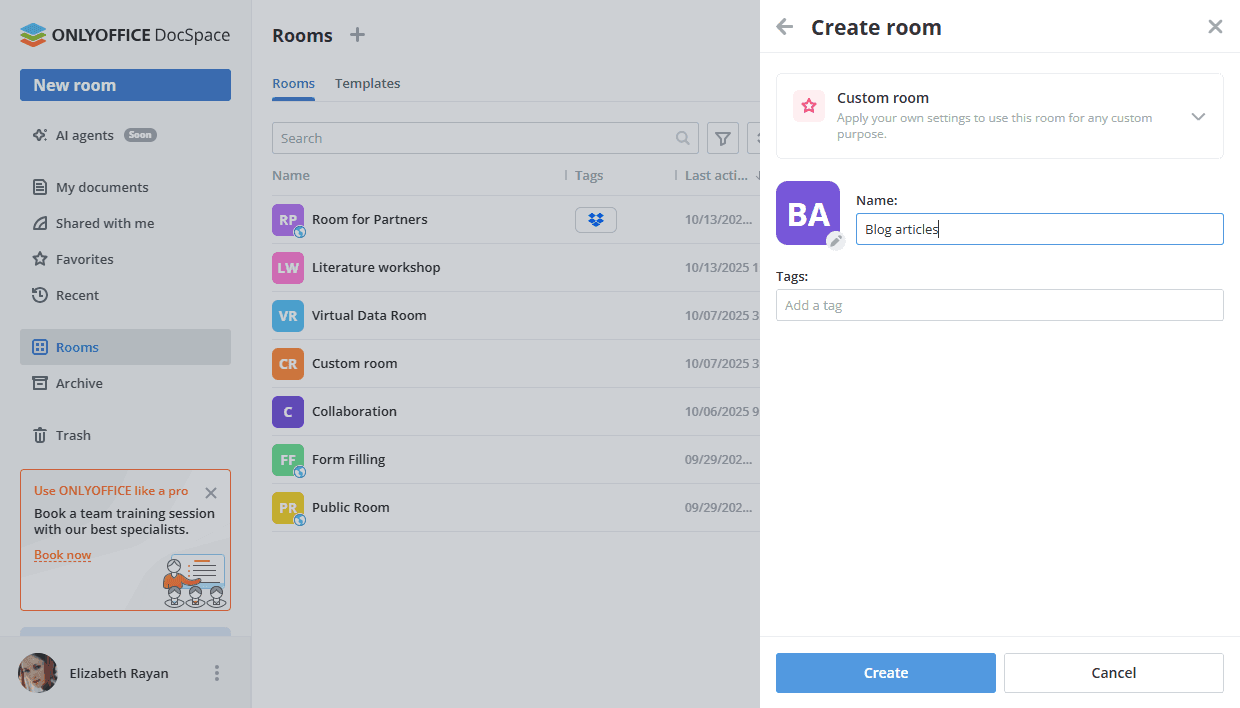
Step 1. Create a Custom room
Create a new Custom room in a few easy steps:
- Go to the Rooms section and click the New room button or the
 Plus icon.
 - Select the Custom room type.
- Enter the room Name.
- Optionally, you can add tags or an icon.
- Click Create.
Step 2. Add documents to the room
Use quick action links in the newly created room or the Actions menu to add documents:
- Create new documents, spreadsheets, presentations, and PDF forms online.
- Add existing files and folders from your DocSpace sections: My documents or Rooms.
- Upload existing files and folders from your device.
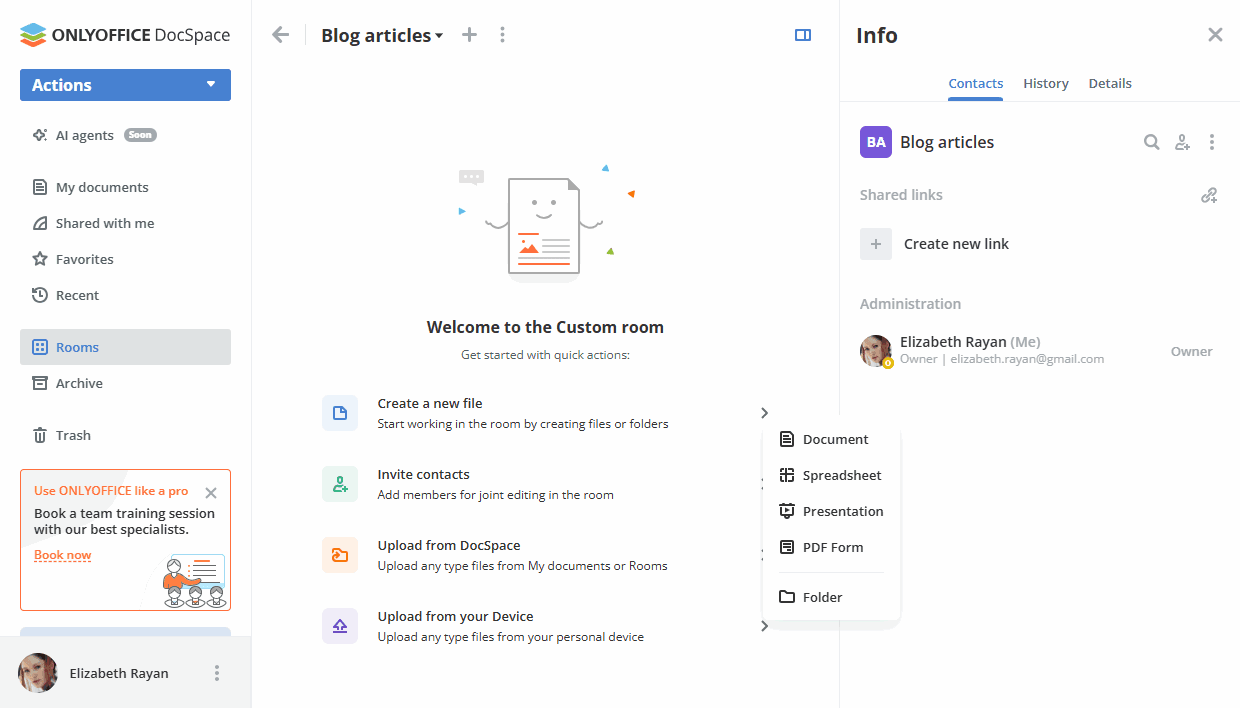
All available options for working with documents in rooms are listed here.
Step 3. Add authorized users to the room
If necessary, you can add guests or users registered in your DocSpace to the room for working with documents and managing its contents.
In the Custom room, the available permission levels are Room manager (Paid), Content creator, Editor, Reviewer, Commenter, Viewer. Both Room managers and Content creators can create and upload new files and folders and manage them, but Room managers can also manage users and access settings. To add a Room manager, you should select a Room or DocSpace admin from existing DocSpace contacts.
Editors can perform various actions with existing files (edit, comment, review, view them), while Viewers can only view existing documents. All the actions available for all permission levels are listed here.
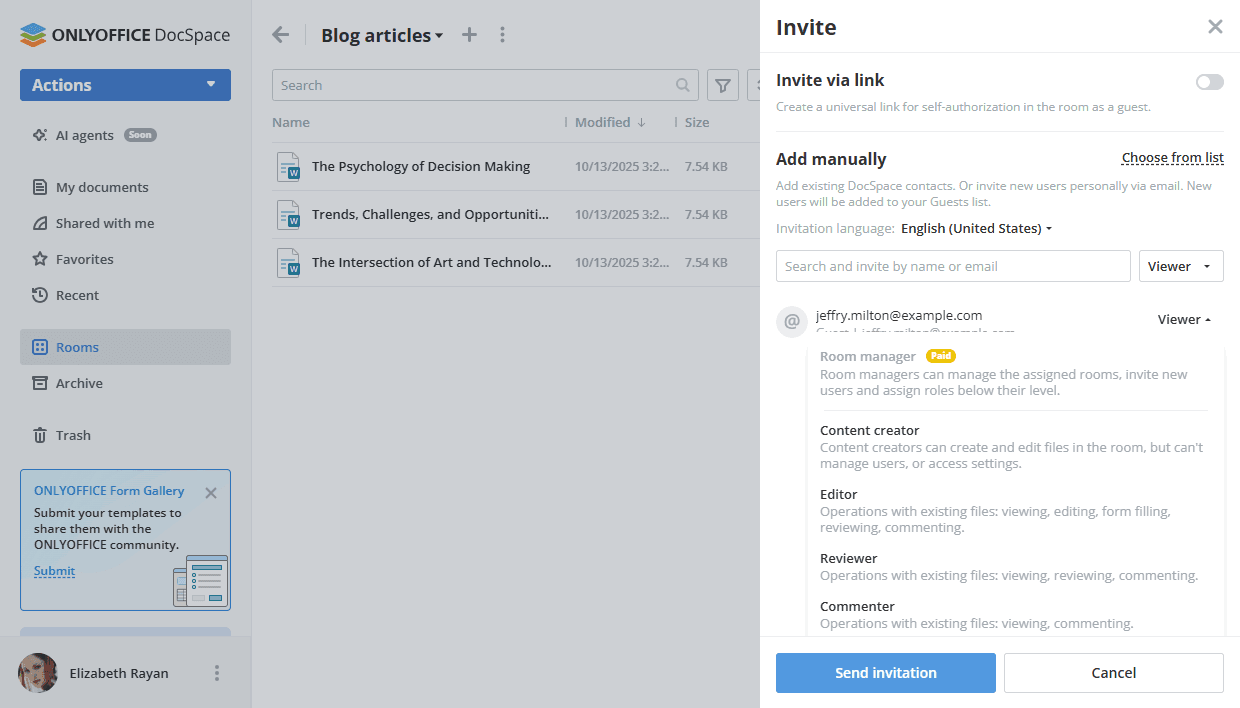
To invite guests and users:
- Go to the room Info -> Contacts screen and use the
 Invite contacts icon.
 - Turn on the switcher to create a universal link for self-authorization in the room. If necessary, change the permission level. The link will be copied to the clipboard. In this way, you can invite guests only.
- Alternatively, use the Add manually section below to add existing DocSpace contacts or invite new guests personally via email. Type in an email and press Enter or choose an existing contact from the list. If necessary, change the permission level. You can add several emails and then click Send invitation.
By default, guests and users will be added to the room as Viewers, who can only view documents. You can select the necessary permission level instead of the default Viewer option. New guests will be added to your Guests list.
All available options for inviting users to rooms are listed here.
Step 4. Create an external link
If you want to provide access to the Custom room for third-party users, you can create an external link.
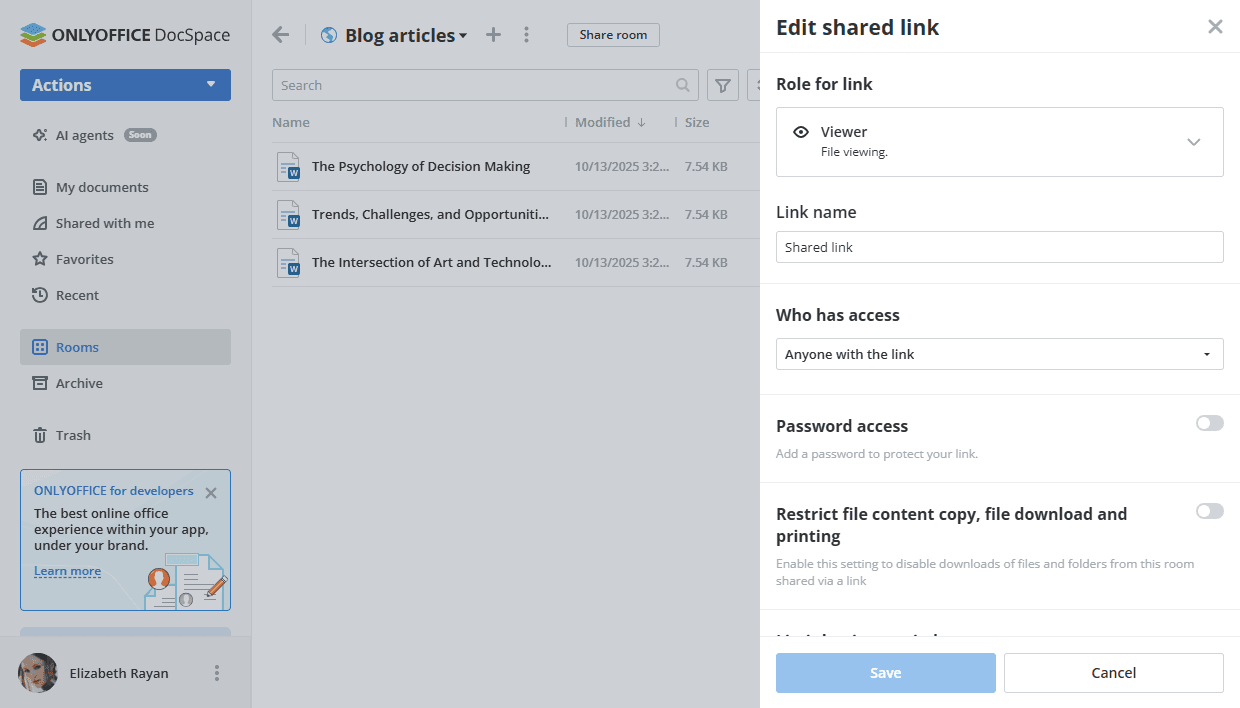
- On the Info -> Contacts screen, click the Create new link option in the Shared links section.
- Click the
 icon next to the Shared link and choose the Link settings option.
 - Choose a different permission level instead of the default Viewer: Editor, Reviewer, or Commenter.
- Change the link name to distinguish various links.
- Select who has access: Anyone with the link or DocSpace users only.
- Set a password to protect the link using the Password access switcher.
- Enable the Restrict file content copy, file download and printing switcher to disable copying content of the files to the clipboard, downloading files and folders, and printing files.
- If your link is limited by time, use the Limit by time period option to change the time limit during which the link stays valid.
- Click the Save button.
Click the Share room button next to the room name or use the  icon next to the Shared link option on the Info -> Contacts screen. Send the copied link to third-party users. They will have the specified permissions for all files in the room without registration.
If necessary, you can revoke the shared link using the option from the menu on the Info -> Contacts screen. The current link will be deactivated, and a new shared link will be created.
If you need more than one link for your Custom room, use the  Add new link icon in the Shared links section. It's also possible to set time limit for additional links, while the main link is valid for an unlimited time period.
All available options for external links are listed here.
Step 5. Edit documents in the room
For seamless co-editing, switch between the Strict and Fast co-editing modes, use Commenting, and Reviewing.
Learn more about collaboration tools in documents, spreadsheets, presentations, and PDF files.
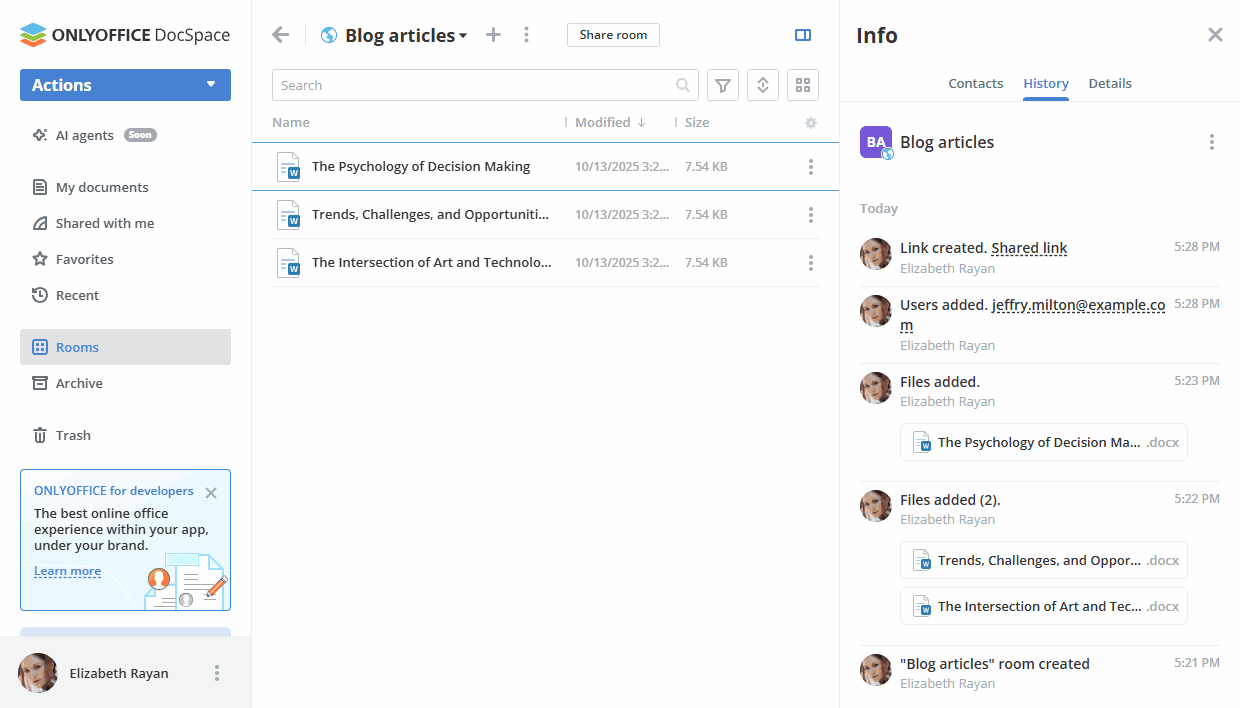
You can track all changes on the room Info -> History screen.