Working with Form filling rooms
Form filling rooms are designed to simplify filling out forms (questionnaires, applications, etc.) and tracking the completion of these documents.
You can create and edit PDF forms directly in the room, upload previously created forms, invite users to fill them out, review completed forms, and analyze data automatically collected in a spreadsheet.
Key features
- Creating and editing PDF forms directly in the room
- Submitting forms for completion while providing the form filling permissions
- Working with both DocSpace members and external users via external links
- Tracking the progress of completion
- Collecting data in a spreadsheet and analyzing the collected data
- Exporting form results to an external database automatically
- Embedding rooms into web pages to collect data from all visitors who complete the form
Possible use cases
- Collecting opinions and reviews from users
- Filling out vacation applications
- Testing students in educational institutions
- Collecting patient information in healthcare institutions
For example, you need to collect data about student performance. Let's see how this can be done with Form filling rooms.
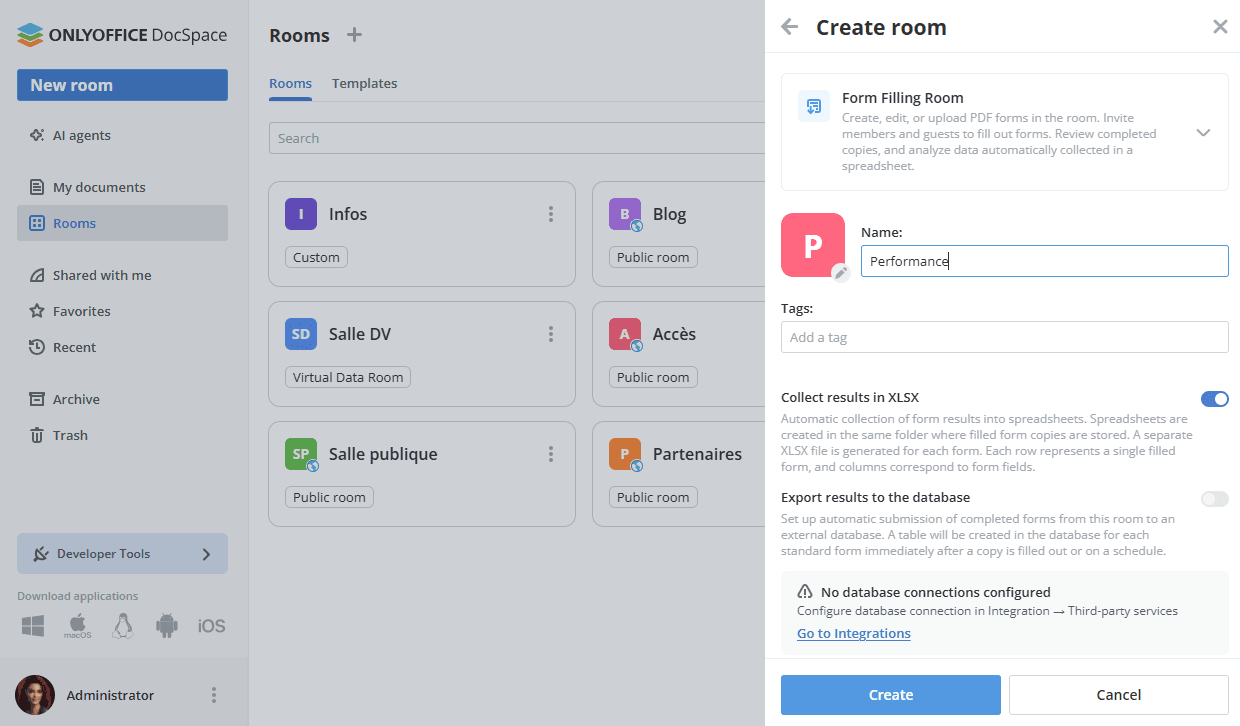
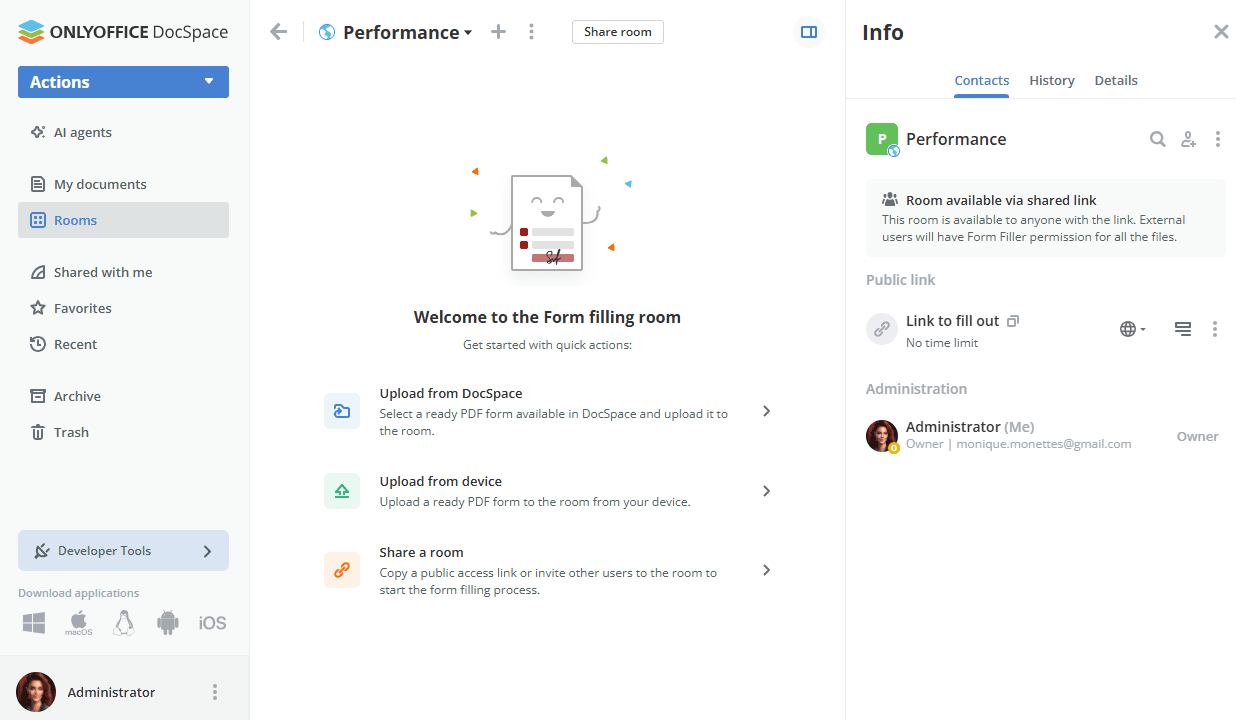
Step 1. Create a Form filling room
Create a new Form filling room in a few easy steps:
- Go to the Rooms section and click the New room button or the
 Plus icon.
 - Select the Form filling room type.
- Enter the room Name.
- Optionally, you can add tags or an icon.
-
Configure the data collection options:
- Collect results in XLSX — when enabled, form submission results are automatically collected into a spreadsheet. A separate XLSX file is generated for each form; each row represents a single filled form and columns correspond to form fields. The spreadsheet is stored in the same folder as the completed form copies.
- Export results to the database — when enabled, completed forms from this room are automatically submitted to a connected external database. A table is created in the database for each standard form immediately after a copy is filled out or on a schedule.
This option is only available when a database connection has been configured under Settings -> Integration -> Third-party services. For setup instructions, read this article.
- Click Create.
Step 2. Add forms to the room
You can create a new PDF form directly in the room or upload a previously created one. Click the Actions button in the upper left corner, or the Plus icon, and select the necessary option:
- PDF form — create and edit a PDF form directly in the room using the built-in form editor. You can create new form from Blank or From text file.
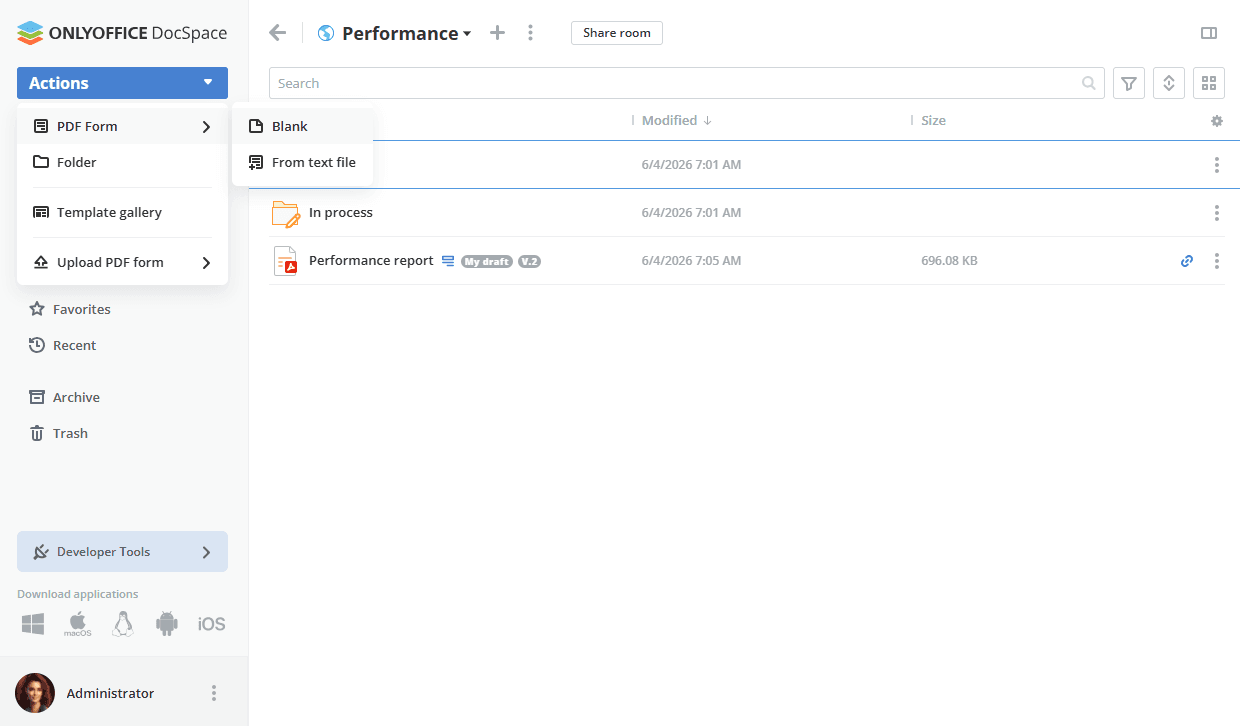
- Folder — create a new folder to save the forms.
- Template gallery — choose a template from the template library and click the Create button.
- Upload PDF form - upload a form and select From DocSpace to choose an existing form from your DocSpace or From device to choose a form in the file manager window.
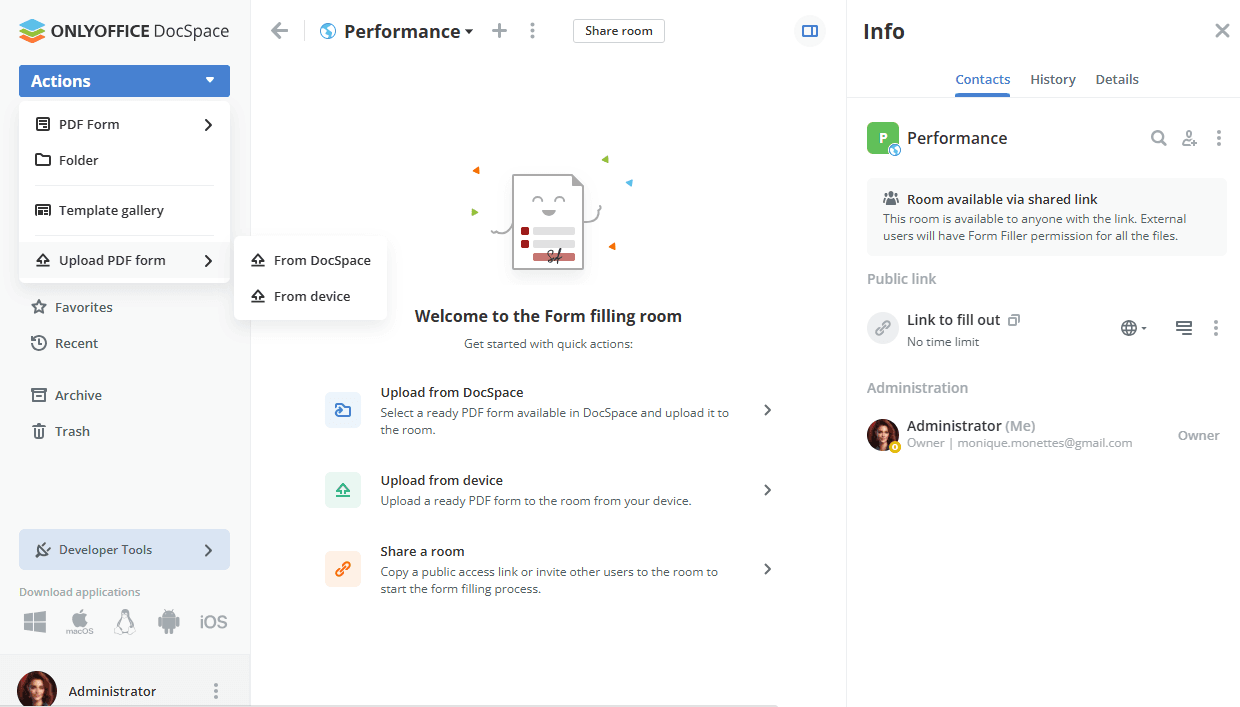
You can also use quick action links in the newly created room:
- Add existing forms from your DocSpace sections: My documents or Rooms.
- Upload existing forms from your device.
All available options for working with documents in rooms are listed here.
Step 3. Add authorized users to the room
Now you need to add guests or users registered in your DocSpace to the room for filling in forms.
In the Form filling room, the available permission levels are Room manager (Paid), Content creator, Form filler. Both Room managers and Content creators can create and upload new files and folders and manage them, but Room managers can also manage users and access settings. To add a Room manager, you should select a Room or DocSpace admin from existing DocSpace contacts.
Form fillers can fill out forms and view only their completed/started forms within the Complete and In Process folders.
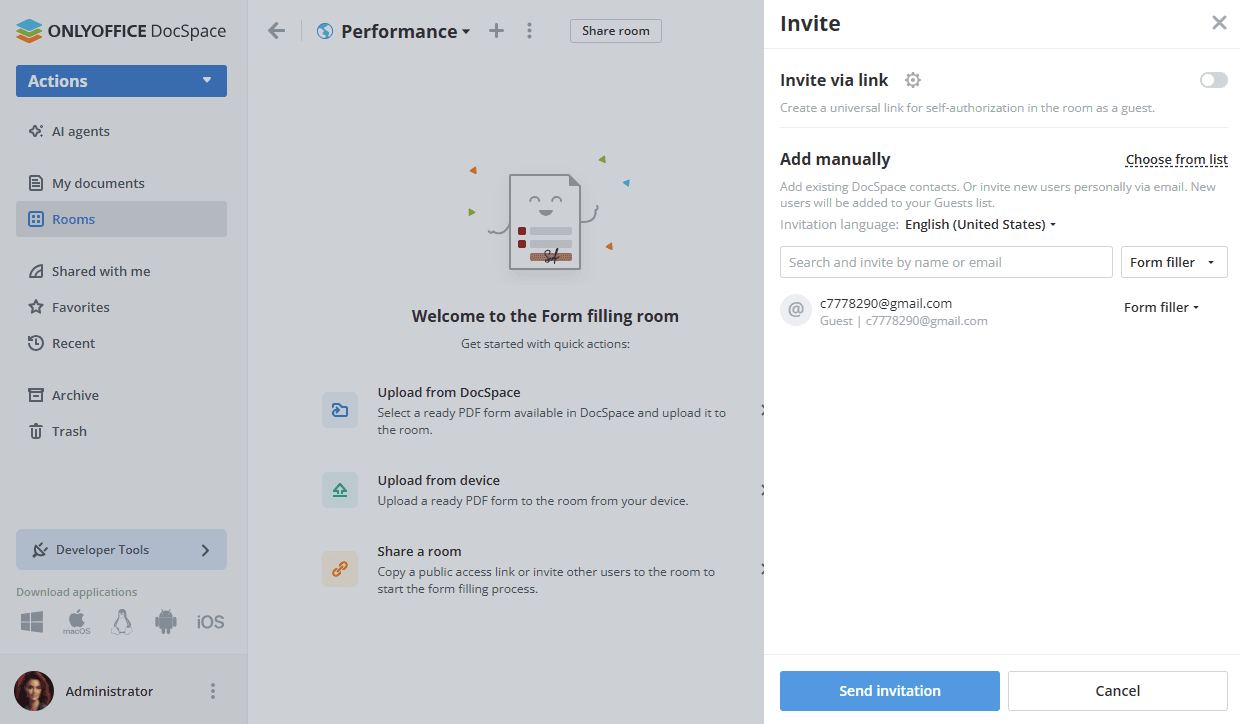
To invite guests and users:
- Go to the room Info -> Contacts screen and use the
 Invite contacts icon.
 - Turn on the switcher to create a universal link for self-authorization in the room. If necessary, change the permission level. The link will be copied to the clipboard. In this way, you can invite guests only.
- Alternatively, use the Add manually section below to add existing DocSpace contacts or invite new guests personally via email. Type in an email and press Enter or choose an existing contact from the list. If necessary, change the permission level. You can add several emails and then click Send invitation.
By default, guests and users will be added to the room as Form fillers, who can only fill out the forms but cannot edit them. You can select the necessary permission level instead of the default Form filler option. New guests will be added to your Guests list.
All available options for inviting users to rooms are listed here.
Step 4. Adjust and share the external link
Your newly created Form filling room already has an external link activated, so you can just copy it.
Click the Share room button next to the room name or use the  icon next to the Link to fill out option on the Info -> Contacts screen. Send the copied link to third-party users. They will have Form filling permission for all files in the room without registration.
You can also edit the external link:
- On the Info -> Contacts screen, click the
 icon next to the Link to fill out caption.
 - Choose the Link settings option.
- Change the link name to distinguish various links.
- Select who has access: Anyone with the link or DocSpace users only.
- Set a password to protect the link using the Password access switcher.
- Click the Save button.
If necessary, you can revoke the shared link using the option from the menu on the Info -> Contacts screen. The current link will be deactivated, and a new shared link will be created.
The main link is valid for an unlimited time period. You cannot create additional links for the Form filling room.
All available options for external links are listed here.
If you want to embed a Form filling room into your website, read this instruction.
Step 5. Start filling mode
Before a form becomes available for filling, it must be explicitly switched to filling mode. Until then, the form is in edit mode and is hidden from users with the Form filler role.
To start filling mode, open the context menu for the form and select Start filling. Once activated, the form becomes visible and available to all room members.
If a room member opens the form from the Documents section and selects the room, the form automatically switches to filling mode and becomes available to all room members immediately.
Step 6. Fill out forms in the room
Now invited users can fill out the forms in the room. Learn more about Form filling.
When a form is opened for filling, it acquires the  'My draft' status. An individual copy is also automatically created for each responder and is saved to the In process folder. This means that the form has been started but has not been completed yet.
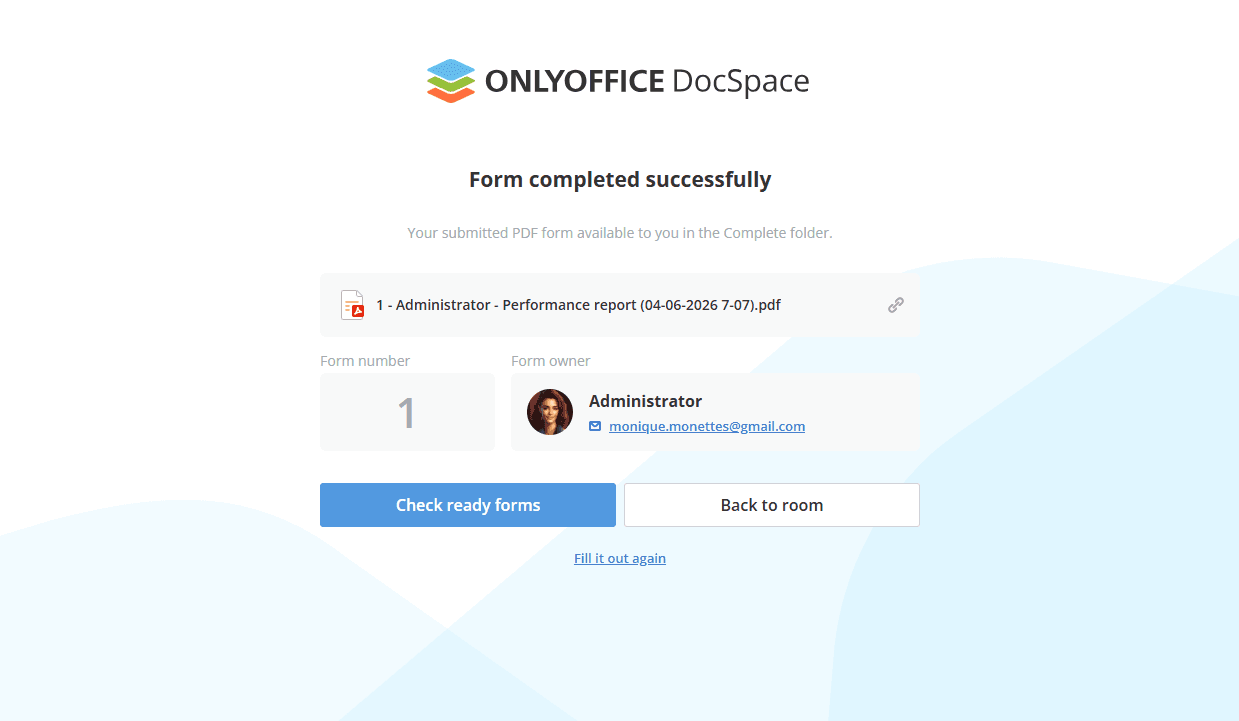
When the form is complete, click the Complete & Submit button in the top toolbar of the opened form. Once the 'Complete & Submit' button is clicked, the form copy is moved to the Complete folder. The form owner will receive a notification that the form has been filled out.
Users can download the completed form by using the arrow icon or Download button, fill out the same form again by using the Fill it out again link, return to the room to continue completing other forms by clicking the Back to room button, or contact the form owner via email by clicking the email address.
Step 7. Reviewing completed forms
To review completed forms, admins can use the Complete and In process folders which appear in the room when users start the form filling process.
- The In process folder contains forms which users have started to fill out but haven't yet completed.
-
The Complete folder contains forms which users have completed by clicking the Complete and Submit button.
If the room contains several PDF forms, the Complete and In process folders will include separate subfolders for each form.
If the Complete and In process folders contain new forms, they are marked with a badge indicating the number of new forms. A badge also appears next to the Rooms section in the left-side menu.
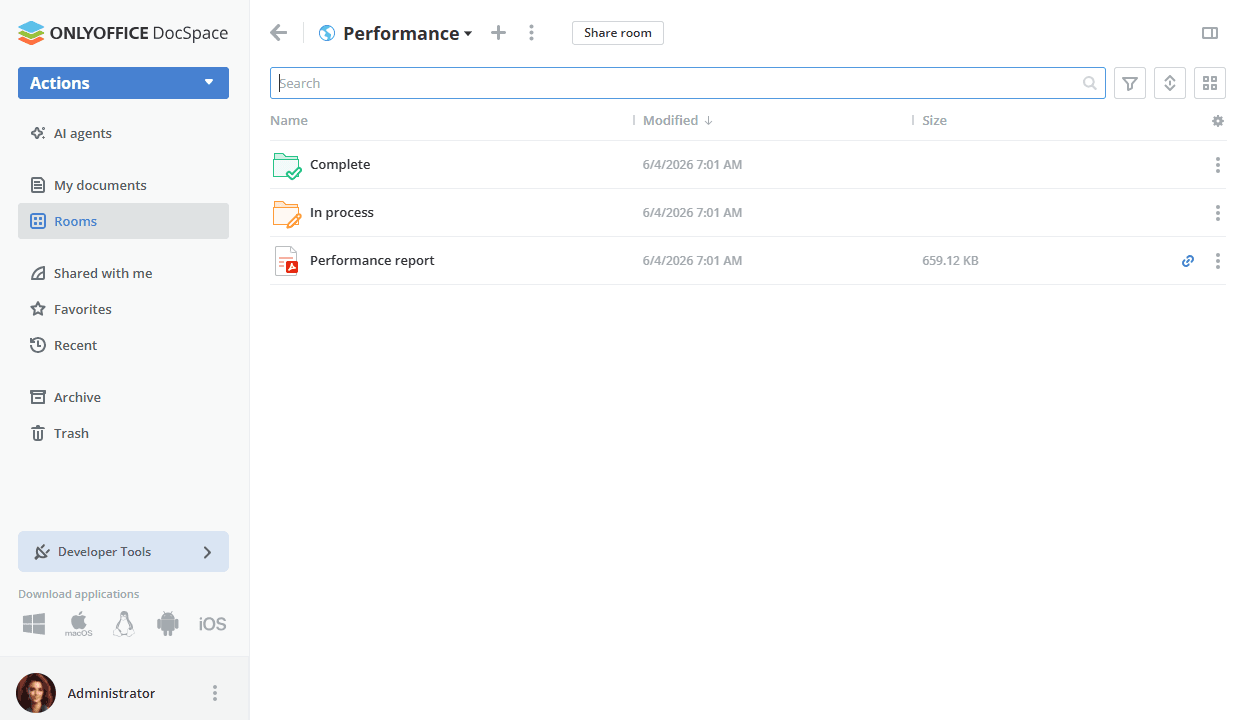
The automatically generated spreadsheet with the forms data is also available in the Complete folder. Each row contains the data of one form. The columns correspond to the form fields. You can use the spreadsheet editor tools for building charts, creating pivot tables, sorting and filtering data, etc.
To refresh the spreadsheet with the latest submission data, open the context menu on the XLSX file and select Update XLSX data. This will pull in any new responses submitted since the file was last generated.