Working with Virtual data rooms
Virtual data rooms are designed to ensure increased security when working with confidential documents.
You can use multiple capabilities for working with data in a Virtual Data room: indexing of data with the ability to change the index and generate a summary report on the file structure of the room, setting the lifetime of files, prohibition on copying and downloading files, setting watermarks.
Key features
- Automatic indexing of data, generating a summary report
- Setting the lifetime of files
- Restricting copying and downloading files
- Adding watermarks to documents
- Role-based form filling
Possible use cases
- Due diligence
- Financial transactions
- Real estate transactions
For example, you need to organize a deal which includes a lot of sensitive financial records. The following steps describe how this can be done with Virtual data rooms.
Step 1. Create a Virtual data room
Create a new Virtual data room in a few easy steps:
- Go to the Rooms section and click the New room button or the
 Plus icon.
 - Select the Virtual Data Room type.
- Enter the room Name.
- Optionally, you can add tags or an icon.
-
Enable the necessary switchers in the room settings panel:
- Automatic indexing - Enable automatic indexing to index files and folders by serial number. Sorting by number will be set as default for all users.
-
File lifetime - Set file lifetime to automatically delete the files in this room after a defined period. Lifetime begins on the date of upload/creation of the file.
Set a number of days, months, or years and select the necessary action: Move to trash or Delete permanently.
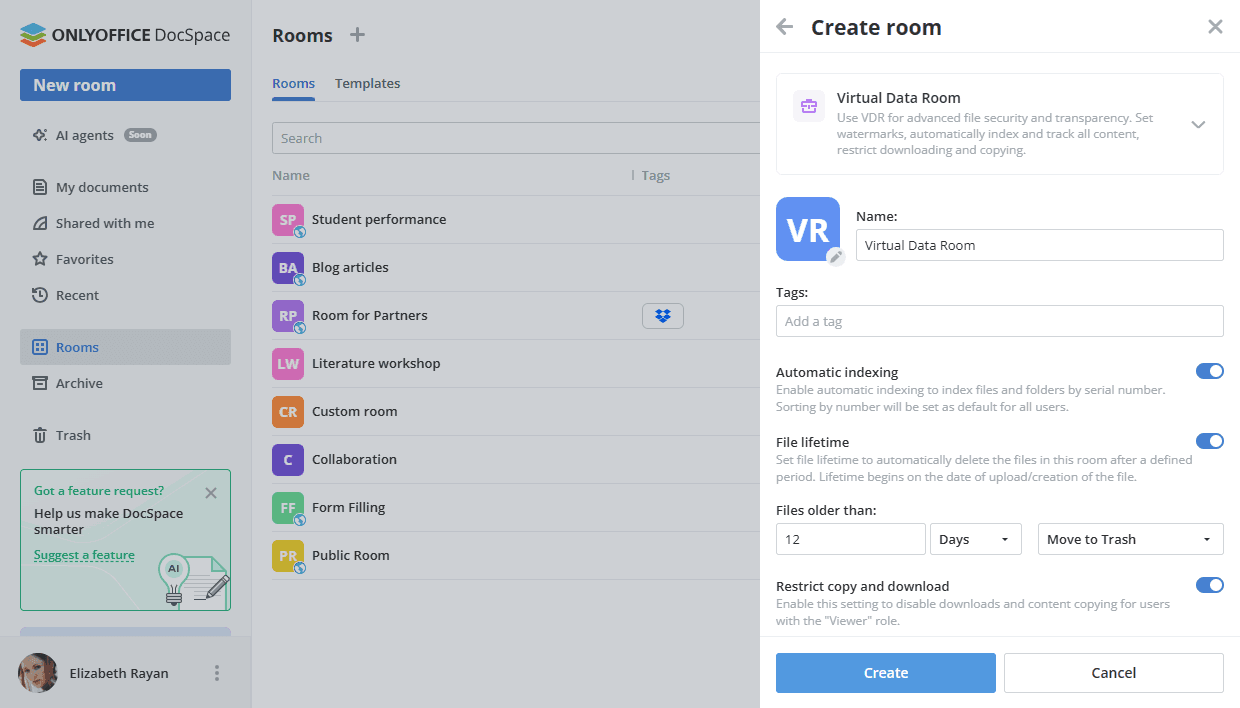
- Restrict copy and download - Enable this setting to disable downloads and content copying for users with the "Viewer" role.
-
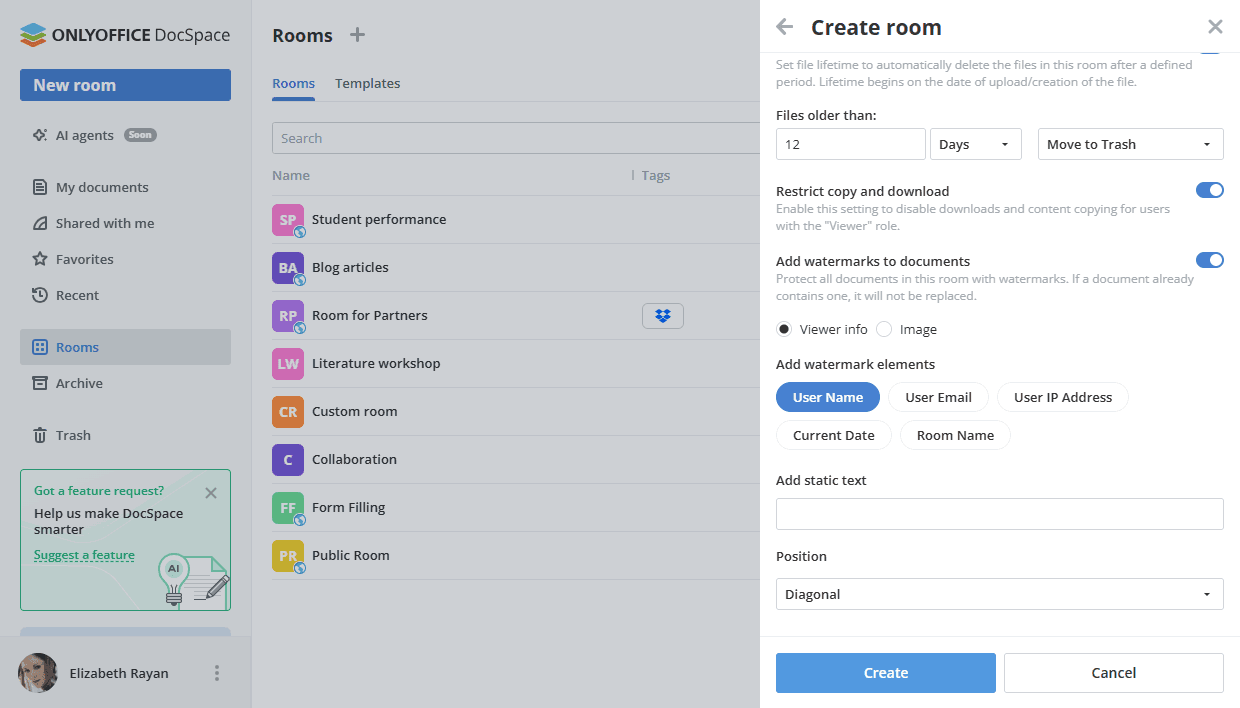
Add watermarks to documents - Protect all documents in this room with watermarks. If a document already contains one, it will not be replaced.
If this option is enabled, files from the room will be downloaded in the PDF format.
You can select the Viewer info option and adjust the following settings for a text watermark:
- Add watermark elements: User Name, User Email, User IP Address, Current date, Room Name.
- Add static text
- Position: Diagonal or Horizontal.
You can select the Image option, upload an image file and adjust the following settings for an image watermark:
- Scale - select the necessary scale value from the available ones: 100%, 200%, 300%, 400%, 500%.
- Rotate - select the necessary value: 0°, 30°, 45°, 60°, 90°.
It's also possible to adjust these settings when editing the Virtual data room. - Click Create.
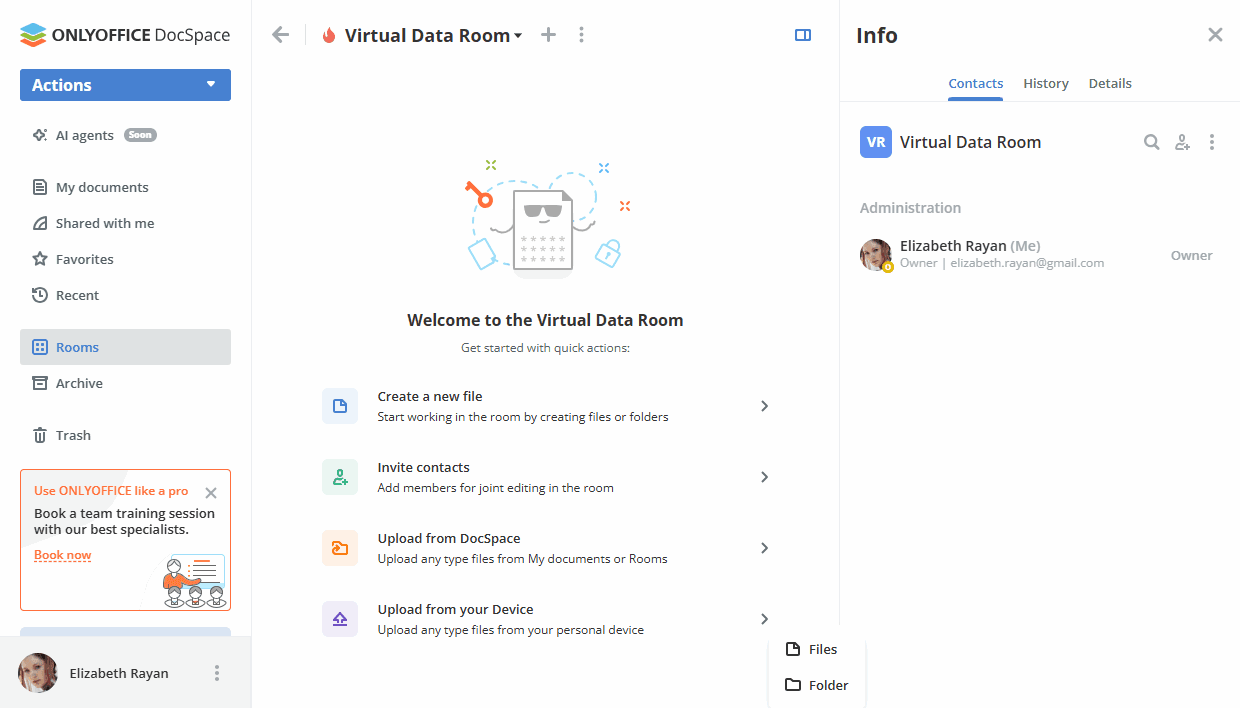
Step 2. Add documents to the room
Use quick action links in the newly created room or the Actions menu to add documents:
- Create new documents, spreadsheets, presentations, and PDF forms online.
- Add existing files and folders from your DocSpace sections: My documents or Rooms.
- Upload existing files and folders from your device.
All available options for working with documents in rooms are listed here.
Step 3. Add authorized users to the room
Now you need to add guests or users registered in your DocSpace to the room for working with documents.
In the Virtual data room, the available permission levels are Room manager (Paid), Content creator, Editor, Viewer, Form filler. Both Room managers and Content creators can create and upload new files and folders and manage them, but Room managers can also manage users and access settings. To add a Room manager, you should select a Room or DocSpace admin from existing DocSpace contacts.
Editors can perform various actions with existing files (edit, comment, review, view them, fill forms), while Viewers can only view existing documents. Form fillers can fill out forms.
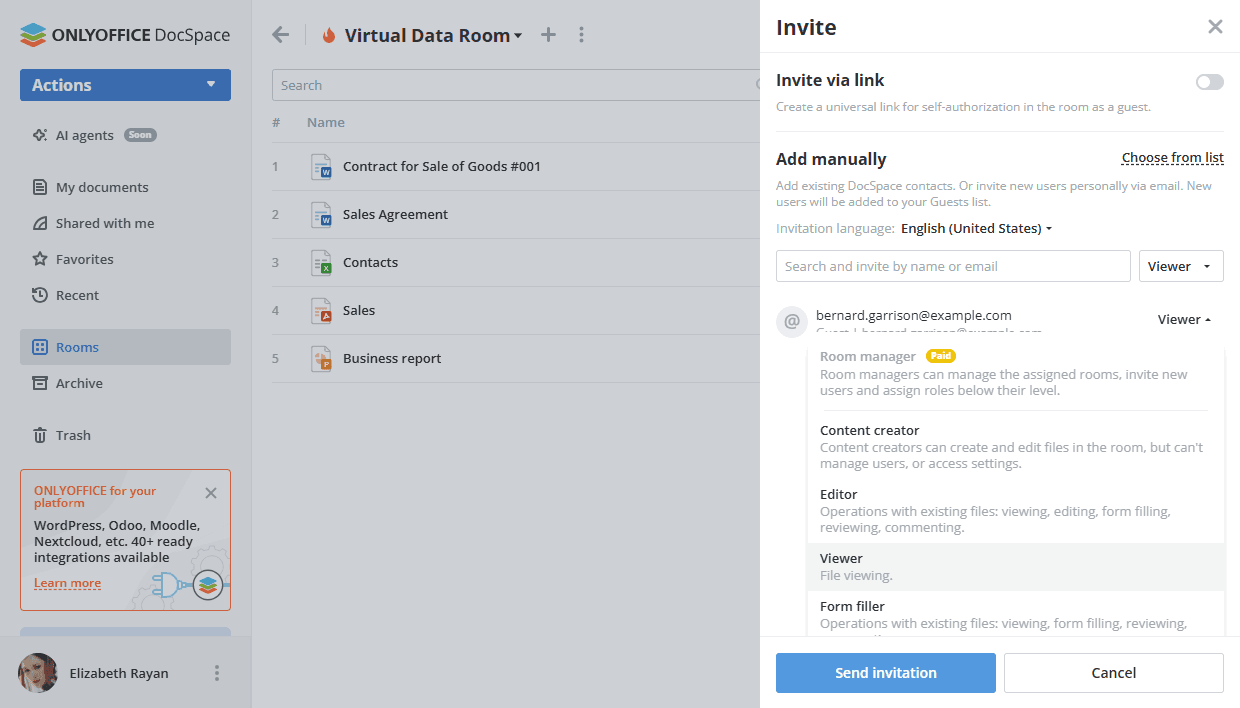
To invite guests and users:
- Go to the room Info -> Contacts screen and use the
 Invite contacts icon.
 - Turn on the switcher to create a universal link for self-authorization in the room. If necessary, change the permission level. The link will be copied to the clipboard. In this way, you can invite guests only.
- Alternatively, use the Add manually section below to add existing DocSpace contacts or invite new guests personally via email. Type in an email and press Enter or choose an existing contact from the list. If necessary, change the permission level. You can add several emails and then click Send invitation.
By default, guests and users will be added to the room as Viewers, who can only view documents. You can select Content creator or Editor instead of the default Viewer option. New guests will be added to your Guests list.
If you want to use the role-based form filling feature, assign the Form filler permissions.
When working with PDF forms in Virtual Data Rooms, the following actions are available depending on the permission level:
| Action\Permission level | Room manager | Content creator | Editor | Viewer | Form filler |
|---|---|---|---|---|---|
| View all content of the room | |||||
| Create PDF forms in the room | |||||
| Upload PDF forms to the room | |||||
| Edit PDF forms | |||||
| View PDF forms that are not configured | |||||
| Configure filling | |||||
| Stop filling | |||||
| View configured PDF forms in which he does not participate | |||||
| View configured PDF forms in which he participates | |||||
| View completed PDF forms |
Form fillers can view only configured PDF forms in which they participate.
All available options for inviting users to rooms are listed here.
Step 4. Fill in forms based on recipient roles
Starting from v3.1, you can fill in forms by roles in Virtual Data Rooms.
First of all, open the added PDF form and create the recipient roles by clicking the Managing Recipient Roles button on the Forms tab. For more details, read this article.
Click a form field and use the Who needs to fill this out? option in the 'Form settings' panel on the right to assign the necessary recipient role to the selected form field.
When all recipient roles are created and fields are adjusted, click the Start filling button in the upper right corner of the form.
On the 'Start filling' screen, assign recipient roles to the room members in the specified order. The role order corresponds to the one created in the recipient role manager. Click the Plus icon, choose the necessary member and click the Select button. To remove the selected participant, click the cross icon next to the user name.
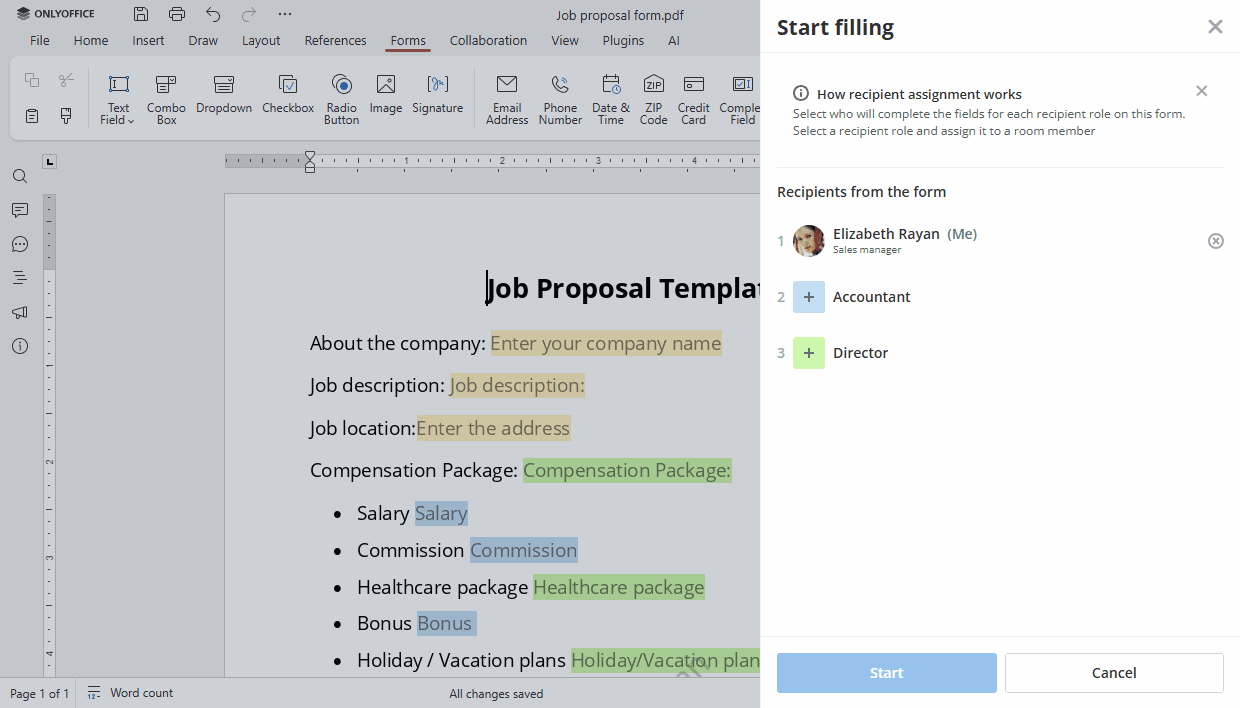
When the recipient roles are assigned to the room members, click the Start button.
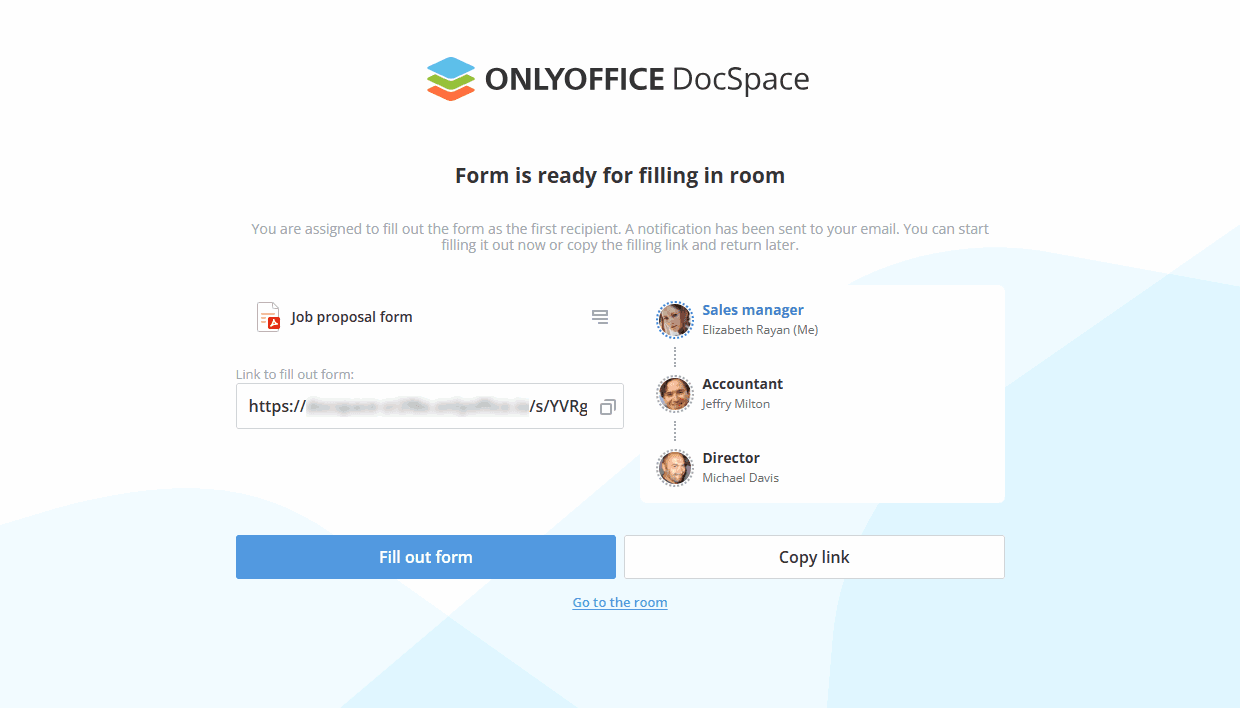
On the next screen, you can copy the link to the form and send it to participants, you can also see who has already filled in the form or accessed it for filling. It's also possible to go to the room or open the form.
The In progress status will appear next to the file in the room. The assigned person who must fill in the form will see the Your turn status. The filling is only possible when it is the user's turn. The user can fill out only the fields that are intended for him. When the member complete the form and click the Complete & Submit button, the turn passes to the next participant.
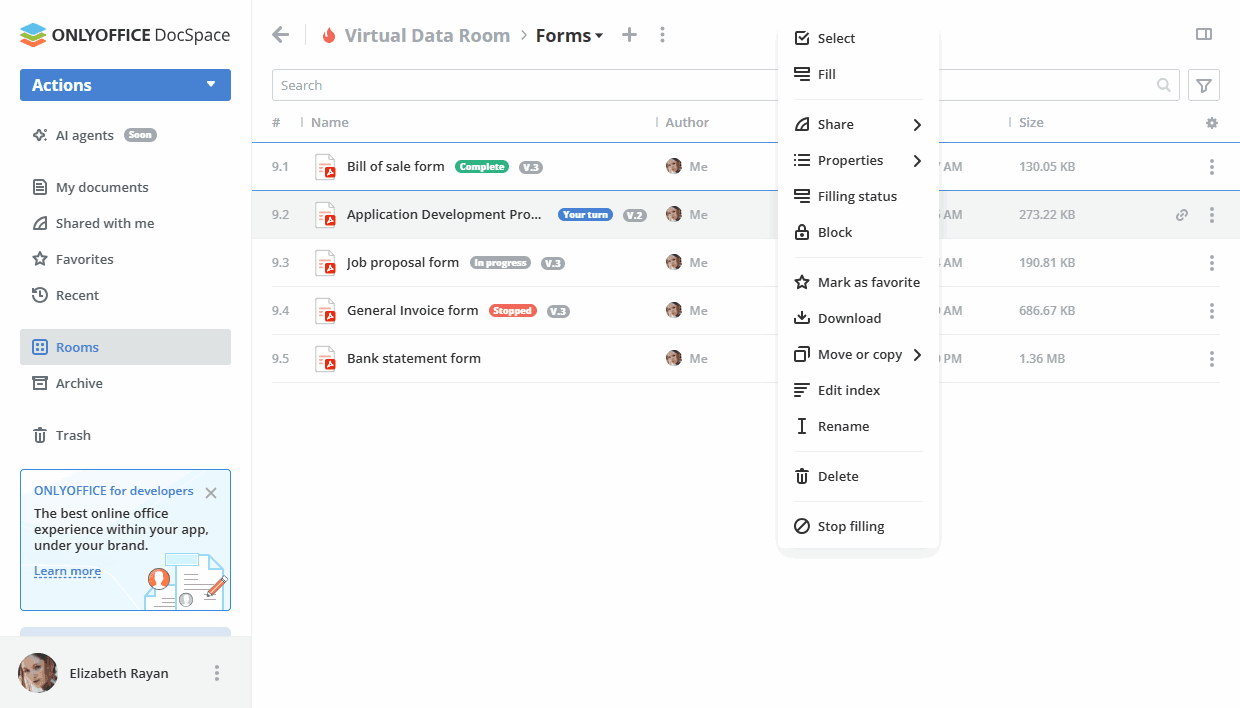
You can also select the Filling status option from the file context menu to see the completion progress. If you want to stop filling, use the Stop button on the Filling status screen or the Stop filling option in the form context menu. The Stopped status will appear next to the file in the room. To start the filling process again, you can use the  Reset and start filling button on the Filling status screen or the corresponding option in the context menu.
Once the form is completed by all participants, the Complete status will appear next to the file in the room.
PDF form statuses
 The Your turn status is displayed when it is the user’s turn to fill out the form. The file is displayed as 'New' in the room until the form is submitted to the next stage. When you click on the form, it will open in the filling mode.
 The In progress status is displayed for users who are participating in the filling process, but it is not their turn, e.g., if the form has been partially filled and sent to the next stage. The status remains until all participants have completely filled in the form or until filling is stopped.
 The Complete status is displayed after the form has been completely filled out by all participants. When you click on the form, it will open as a PDF file for viewing.
 The Stopped status is displayed after one of the administrators or the author of the form has stopped the form filling process.
Step 5. Track work with documents
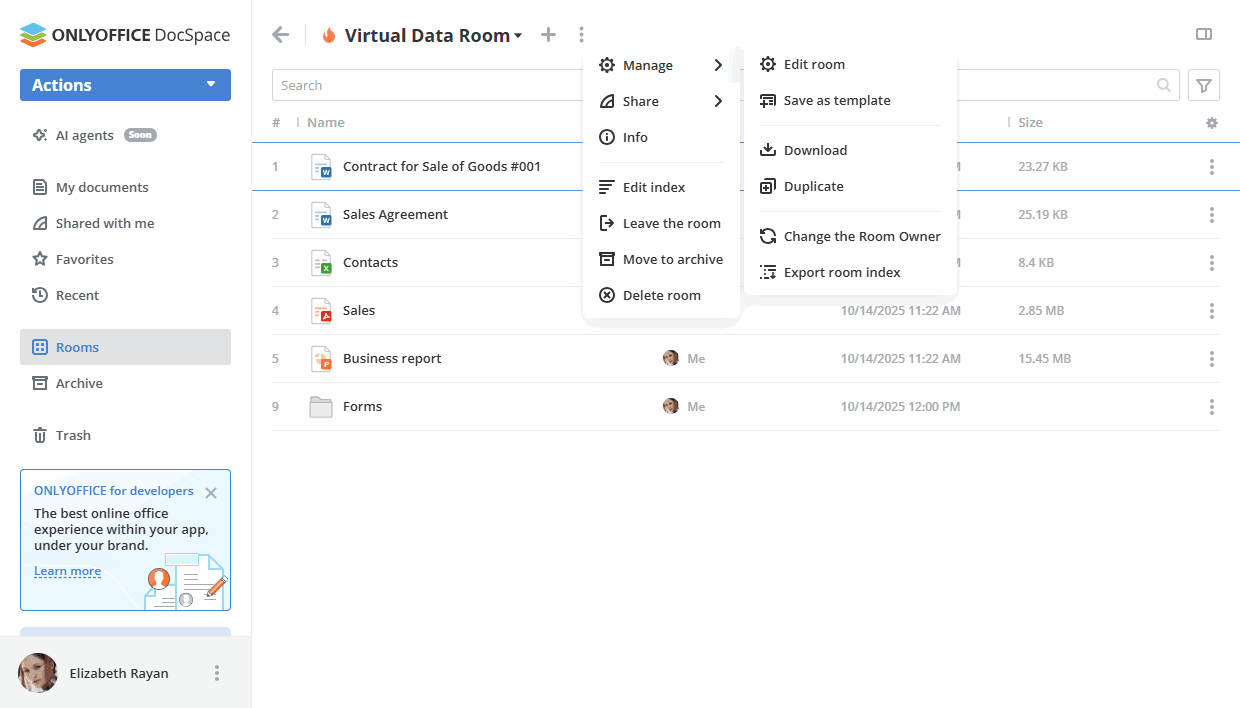
Use the  icon next to the room name on the top toolbar to perform the following actions within the room:
 Manage ->
  Export room index – to export the index for the Virtual Data Room. The
 xlsxfile with a summary report on the file structure of the room will be exported to the 'My documents' section. Edit index – to re-order files and remove spaces in the index of the Virtual Data Room. You will be able to use arrows to change the file order manually one by one or use the Reorder option on the top.
You can track all changes on the room Info -> History screen.