Sharing files and folders
Introduction
When working with files, you might need to collaborate on them or share a form to complete. You can share files and folders with an individual user or a user group and set access permissions depending on the tasks each co-editor should accomplish.
Sharing files directly from the editors
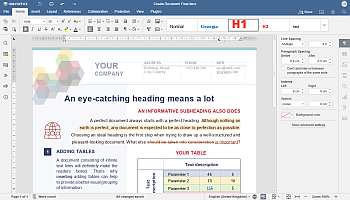
If you are editing a .docx/.xlsx/.pptx file or a .docxf form, you can open the Sharing Settings window directly from the editor interface in one of the following ways:
- click the
 Share icon on the right side of the editor header;
 - select the Collaboration tab and click the
 Sharing button on the top toolbar;
 - select the File tab, open the Access Rights... section in the left sidebar, and click Change access rights.

Sharing with individual users or groups
In the Sharing Settings window, click Add users. While sharing files and folders, you have four options:
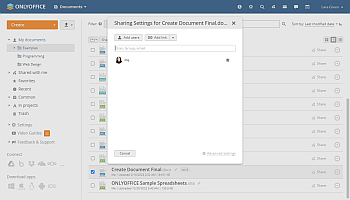
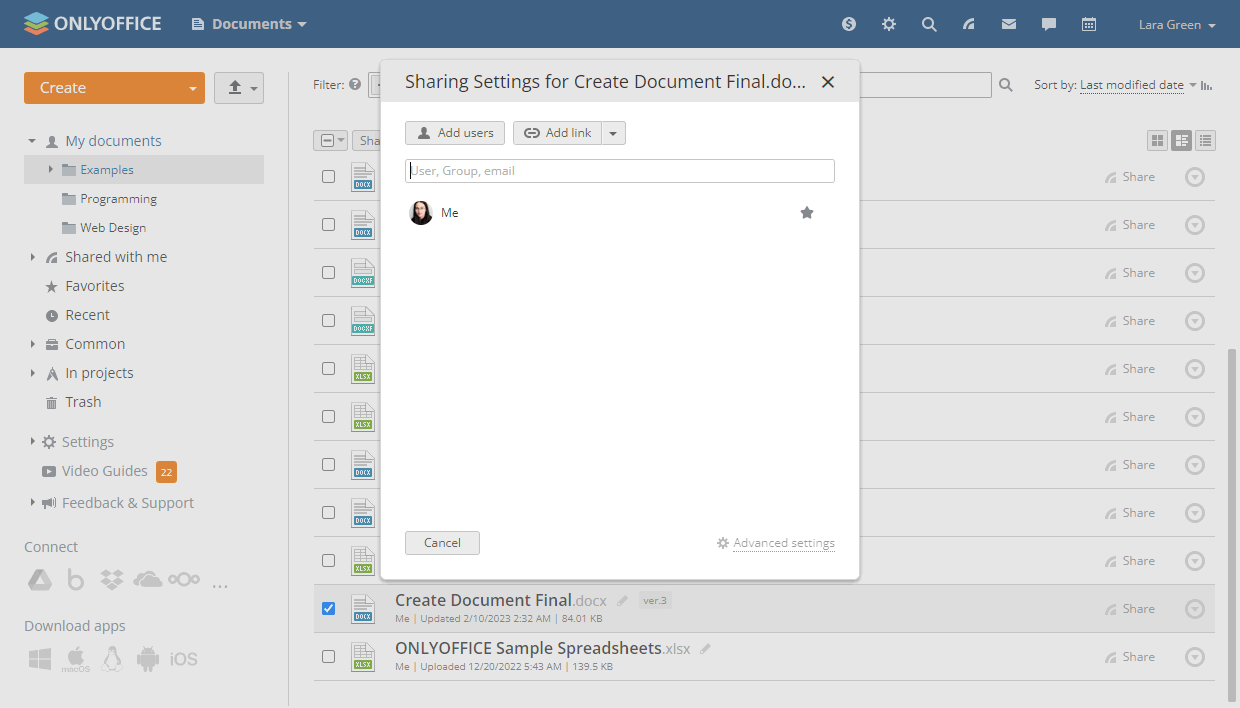
- share with an individual user: enter the user name or their email in the search field, or find and click them in the user list;
- share with a whole user group: enter the group name in the search field, or find and click the group in the user list. Note that you can deselect individual users in the selected group;
- share with everyone: click the Everyone option and select whether you need to share with all users or all groups;
- share with the portal administrator: click the Admin option.
To remove a user/group from the list, click the icon next to their name in the list and select the Remove option on the toolbar above.
Changing permission details for certain users
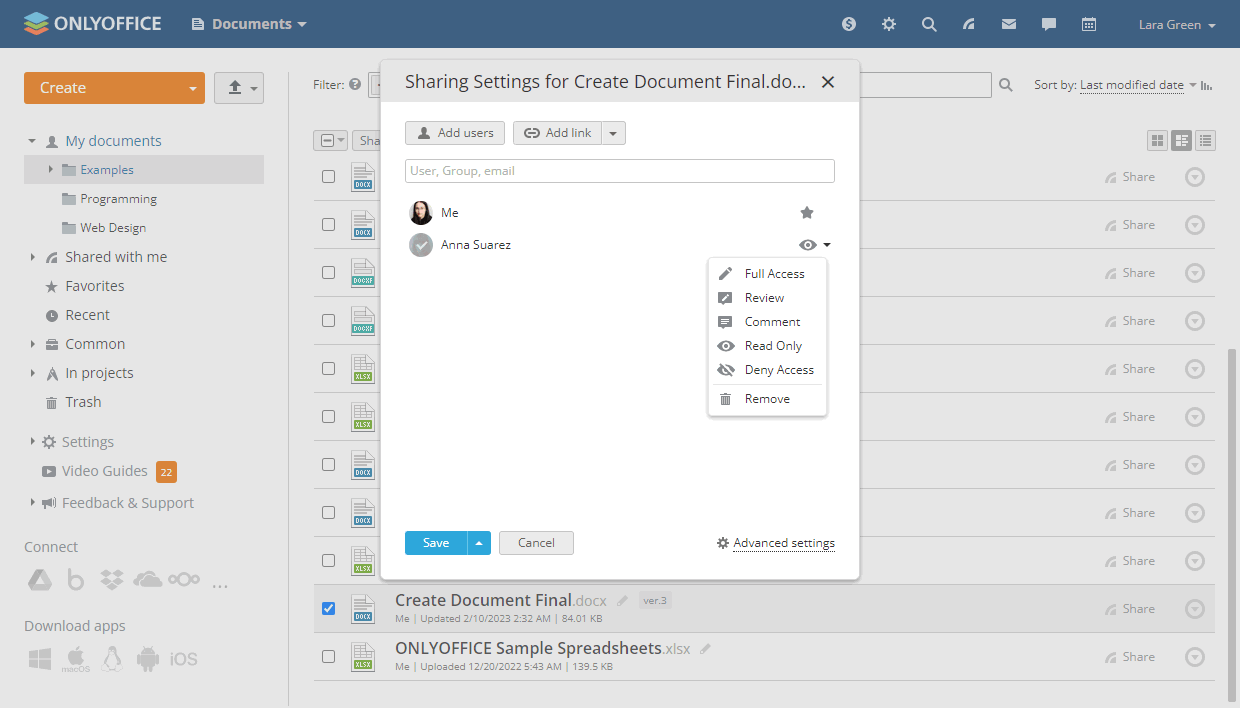
You may want to change the access type for a specific user who previously had other access rights, e.g., allow them to comment instead of reading only, or deny access to particular files in a previously shared folder. To change the permission details for each particular user/group, use either option:
- select one of the available access types from the drop-down list next to the user/group name;
- click the user/group name and select the access type you need in the Change access rights menu on the top toolbar.

Notifying users
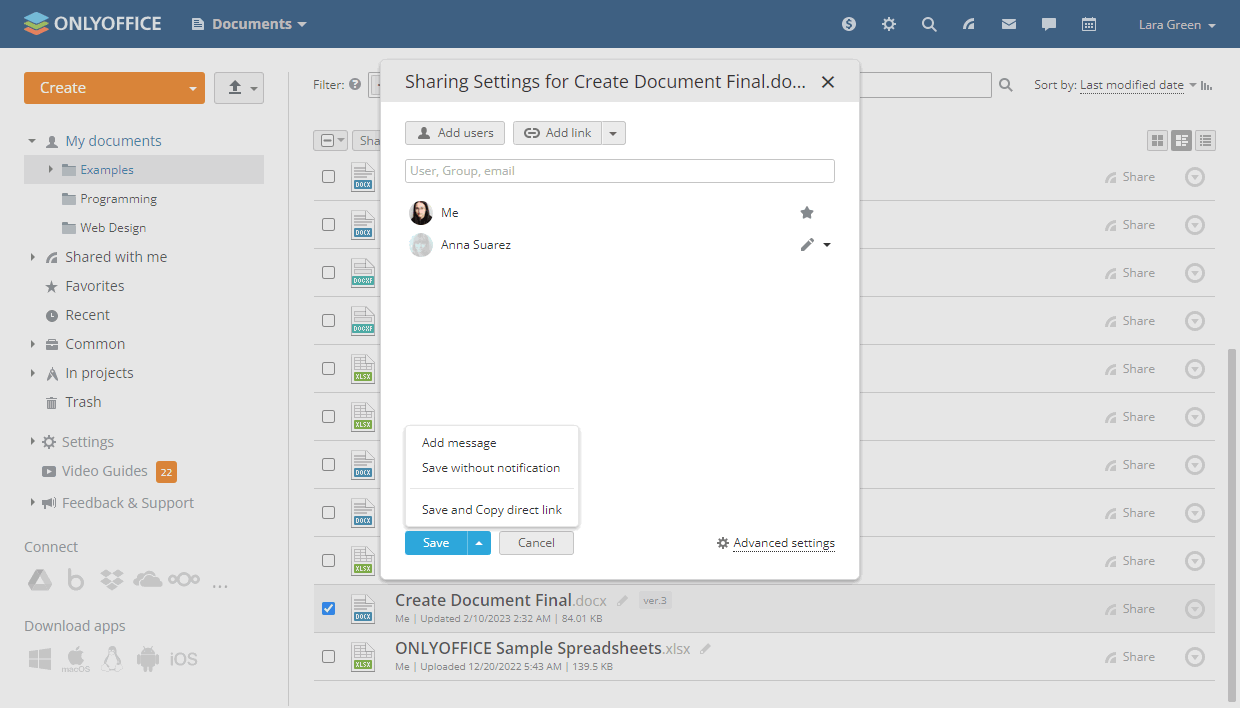
By default, when you click Save, the file or folder will be shared with a default notification.
By clicking the arrow next to the Save button, you can choose whether you want to:
- Add message: enter your notification message in the field that appears and click Save and Send;
- Save without notification: the settings are saved, but the users concerned are not notified;
- Save and Copy direct link: the settings are saved, and the direct link to the file or folder is copied to your clipboard.

Each portal user you shared the file with can find it in the Shared with me section.
Public sharing
You can share a link to the file or folder with a third party that does not have an account on your portal. The available access types for files remain the same. Folders can be shared with Full Access or Read Only permissions. You can create multiple external links with different access rights and security options.
To get a link to the shared file or folder:
- Click Add link within the Sharing Settings window. The New link menu item will appear in the list below.
Alternatively, you can click the arrow to the right of the Add link button and select the Create new external link option. Another option in this menu allows you to copy the direct link to the file or folder.
- Change the link name to distinguish various links and click the
 button.
 - Click the link name and select one of the following options:

- Copy external link: the link will be copied to your clipboard.
- Share: opens a window providing you with three options of sharing the link, i.e., via email, social networks, or copying the link.
More on sharing via email, social networks, or copying the link
Sending the link via email
Click the
 icon. If you are already using the Mail module, a message template will open in a new tab. You can specify the email addresses to send the link to, edit the accompanying message, and click Send.
In the To: field, enter the email address of the person you need to send the link to. You can start typing the recipient email address or name and select the one you need from the list. The contacts stored in your address book that match the entered characters are displayed there as you type (i.e., your personal, CRM, and portal contacts, as well as email addresses you have already sent emails to).
You can add as many recipients as you want. Select addresses from the list one by one or enter multiple new addresses separated by commas. If an email address is entered incorrectly, the address block will be highlighted in red. To edit an address, double-click the address block you need. To delete an address, click the
 icon.
icon.Sending the link via social networks
Click the Facebook or Twitter icons to share the link via your corresponding social account.
Copying the link
Select the link displayed in the window and click the Copy option or press the
Ctrl+Ckeys on your keyboard. You can also use the Shorten option to get the shortened link. - Shorten the link: get the shortened version of the link.
To enable this function, refer to the corresponding guide on connecting Bitly to your portal.
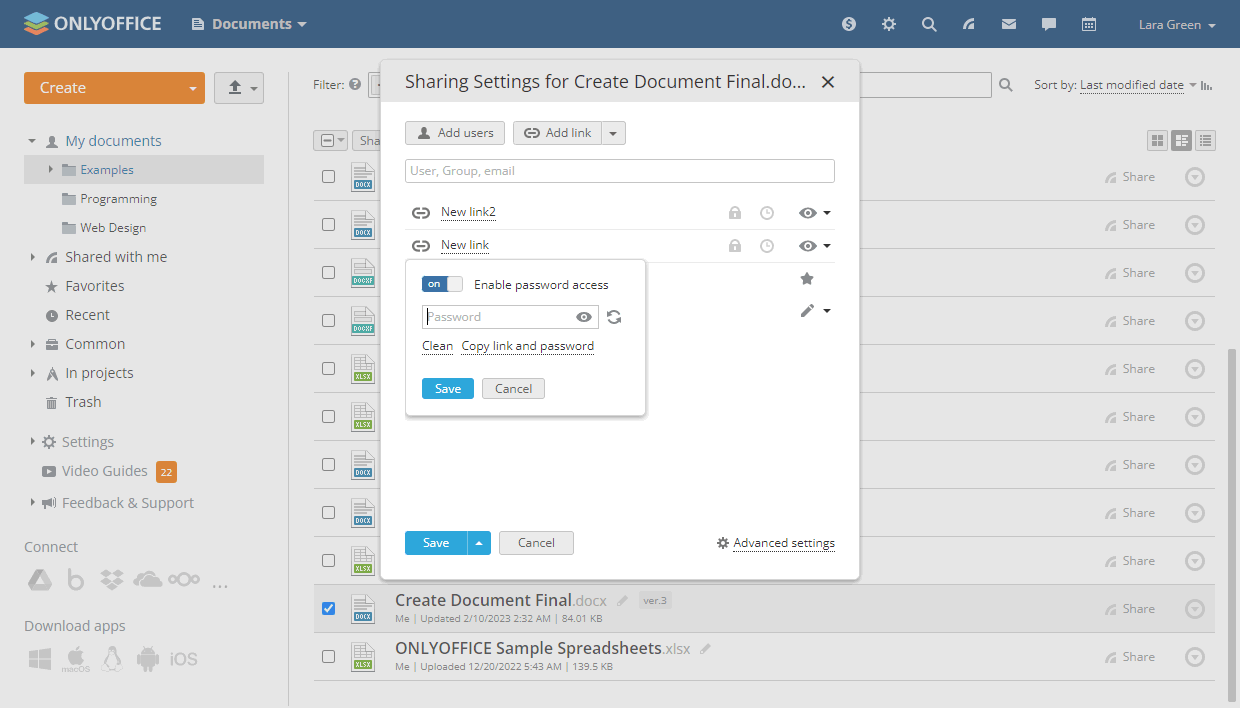
- Set a password: protect the link access to the file or folder by a user-customized or automatically generated password.
- Enable the Enable password access toggle.
- Click the
 icon to generate a password or enter it manually into the corresponding field.
 - To clear the password field, click Clean.
- To copy the link and the password to your clipboard for future sharing, click Copy link and password.
- You can disable/re-enable password access by disabling or enabling the corresponding toggle at the top of the window.
- Click Save to save the password access settings.
Note that the password is applied to the link access and not to the file itself. To learn more about document protection, refer to this guide.
You can also use the
 icon next to the link within the Sharing Settings window to set a password.
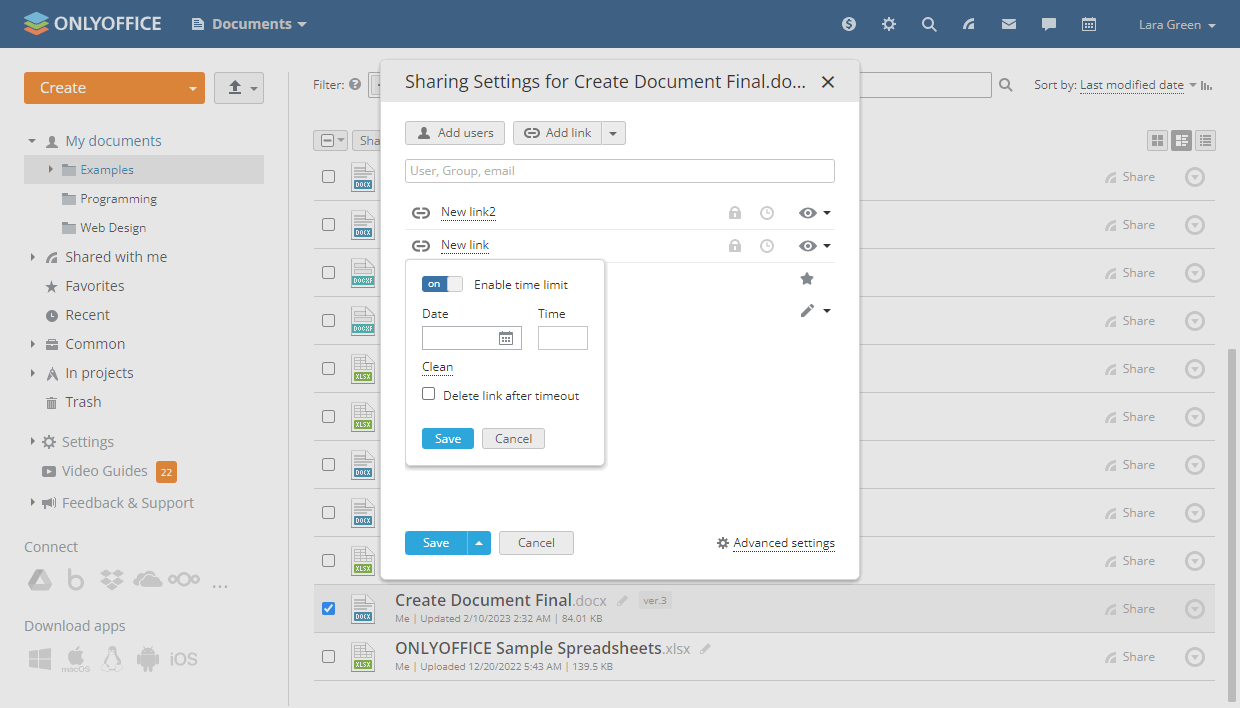
- Limit by time: set the time limit during which the link stays valid.
- Enable the Enable time limit toggle.
- Enter the date you need in the Date field or open the calendar
 and set the date there.
 - Enter the required time length in the Time field.
- To clear the date and time values, click Clean.
- To permanently delete the link after timeout, select the corresponding checkbox.
- Click Save to save the time limit settings.
You can also use the
 icon next to the link within the Sharing Settings window to set a time limit.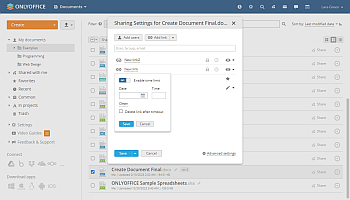
- Rename: set a customized name for the link displayed in the Sharing Settings window to distinguish various links to the file or folder.
- Delete: delete the link to the file or folder. The file/folder will become inaccessible through the previously shared link.
- To manage the access type provided by the link, click the
 icon next to it and select one of the available access types (see the Different access rights section of this guide for more information).
 - To save the changes made to the external link parameters, click Save. To save the changes and get the link copied to your clipboard, click the arrow next to the Save button and select the Save and Copy direct link option.
Alternatively, you can get a Quick external link to a file by using the corresponding option from the context menu in the file list. In this case, the default access type will be provided, and the link will be copied to the clipboard. The default access type is specified in Settings > Common > Default access rights in sharing settings > Default access rights for a specific file type. Note that the Set a password, Limit by time, and Rename options are not available for a quick external link within the Sharing Settings window.
Embedding
You can integrate files stored on your portal into other websites and pages through the embedding feature. To access the embedding settings:
- Open the External link menu.
- Click the Embedding settings option.
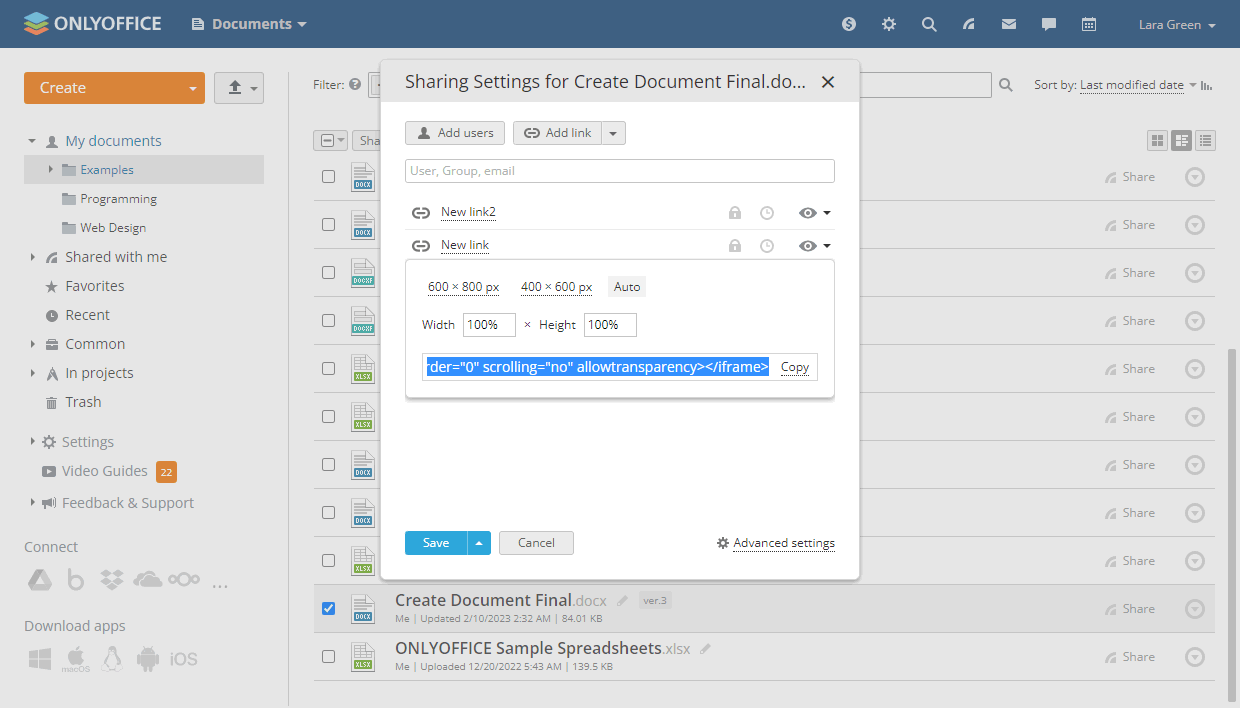
- Set the size using one of the presets in the Size field (600x800 px, 400x600 px, Auto) or customize it in the Width and Height fields by entering the required values.
- Copy the code and insert it into the website or page you need.
Different access rights
Depending on the provided access rights, users will be able to perform different operations.
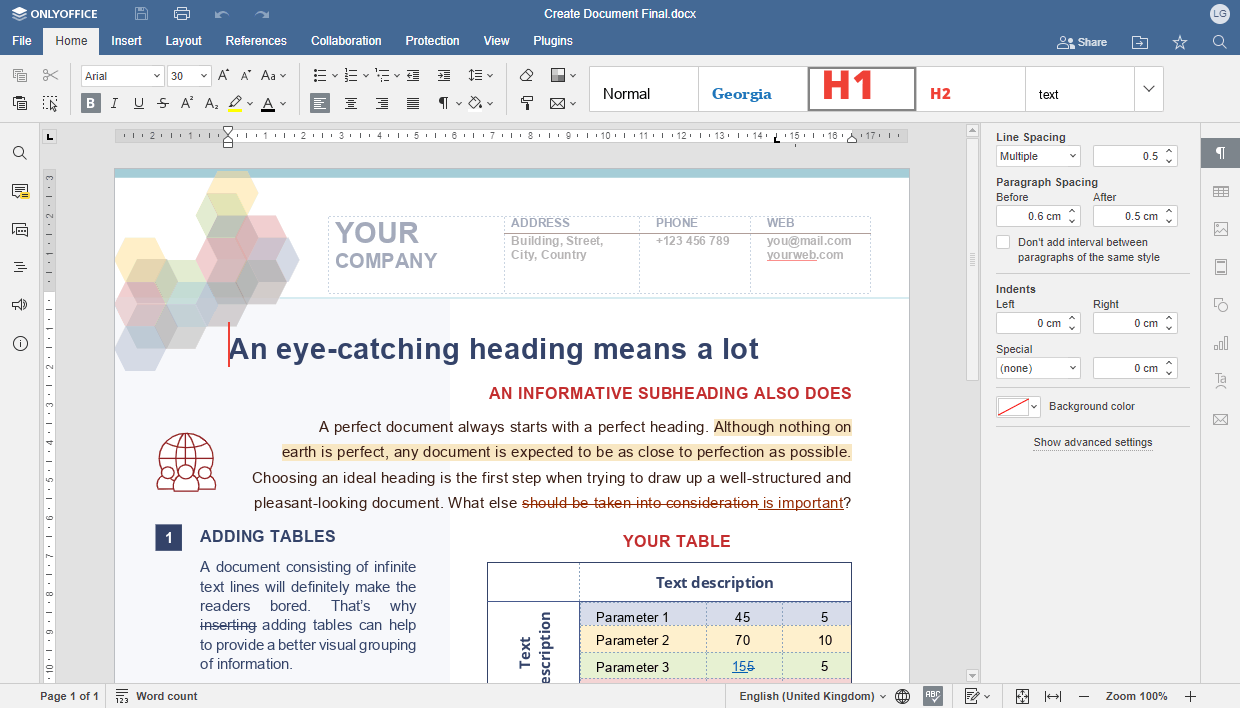
A user with Full Access permission can do the following:
For files:
- View all file formats.
- Edit files supported by the editors.
- Perform all actions provided by the Review access rights.
- Perform all actions provided by the Form Filling access rights.
- Perform all actions provided by the Comment access rights.
- Share the file.
- Set the file access rights (depending on the advanced settings set by the file owner).
For folders:
- Create files and subfolders.
- Upload and download data.
- Edit files supported by the editors.
- Move files to other subfolders.
- Create copies of the files.
- Rename files.
- See file version history and download the required version or revision.
- Copy external links to the files.
Note that, by default, the user cannot delete files from the folder they have been given full access to.
Review
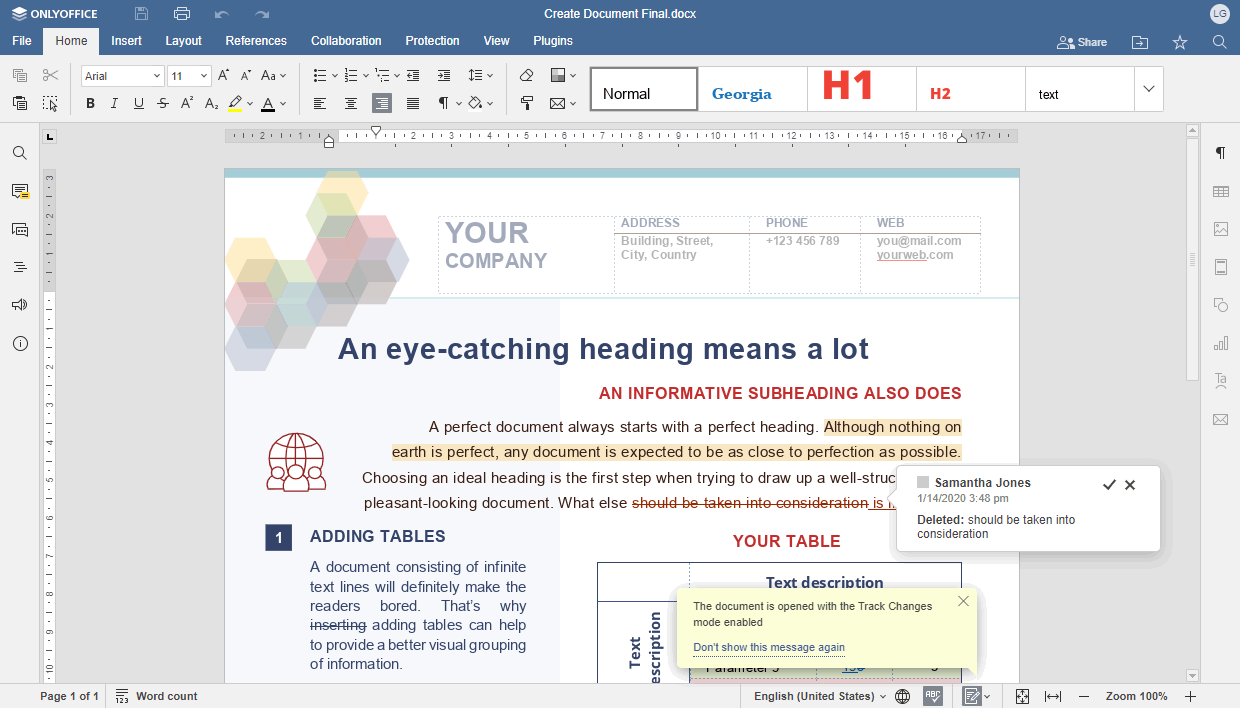
A user with Review permissions can do the following:
- View and change the
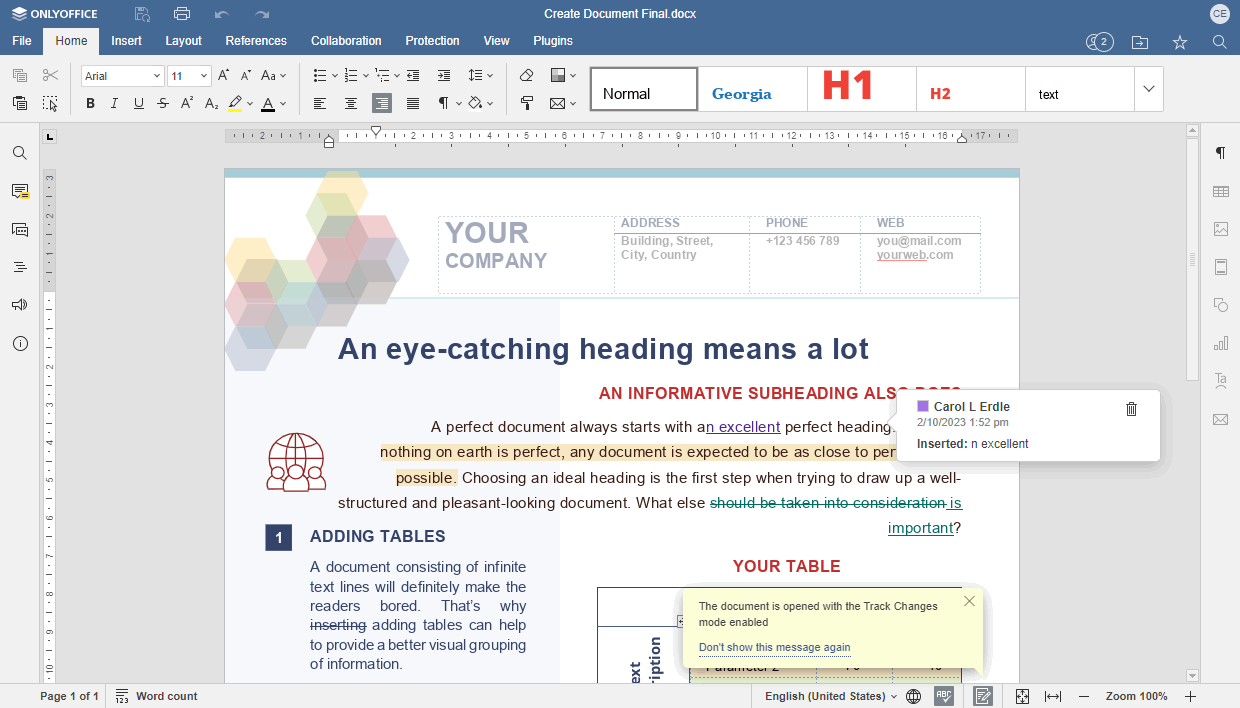
.docxfiles without actually editing them. - The Track Changes option is enabled by default for the reviewer and cannot be disabled. Changes made by the user are displayed in the pop-up windows.
- The user cannot accept or reject their own changes, they can only delete their own changes using the
 icon within the change pop-up window.
 - All the editing options, including form filling and commenting, are available, but all the changes made by the reviewer should be accepted or rejected by the file owner or a person who has full access to the file:
Custom Filter
A user with Custom Filter permissions can do the following:
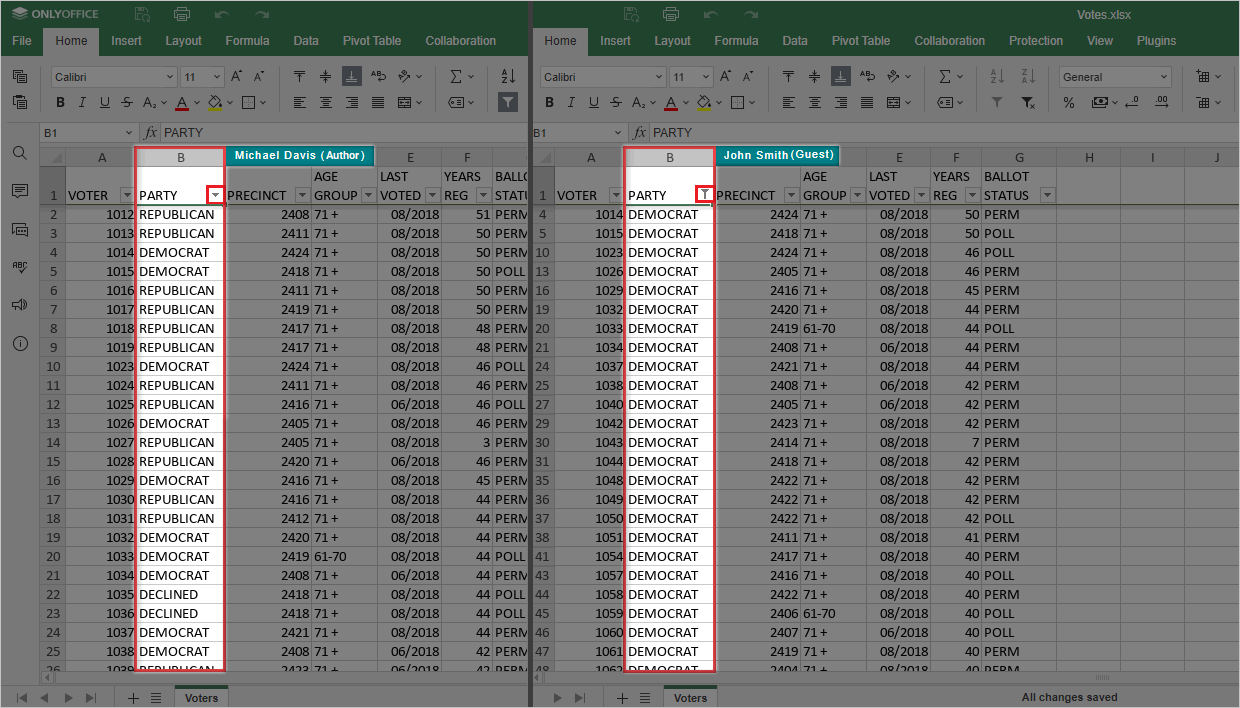
- View and edit the
.xlsxfiles. However, the portal users cannot add new or remove existing filters previously applied by the spreadsheet creator. In addition, the filters applied by a user with Custom Filter permissions will be displayed for them only. The displayed filter results will remain unchanged for the others. - The left half of the screenshot shows the Author's table view, while the right half shows the Portal user's table view with the Custom filter access level. The right half has a filter applied to column B set to display values equal to DEMOCRAT. Meanwhile, for the author, the same filter displays all the values of column B.
Form Filling
A user with Form Filling permissions can do the following:
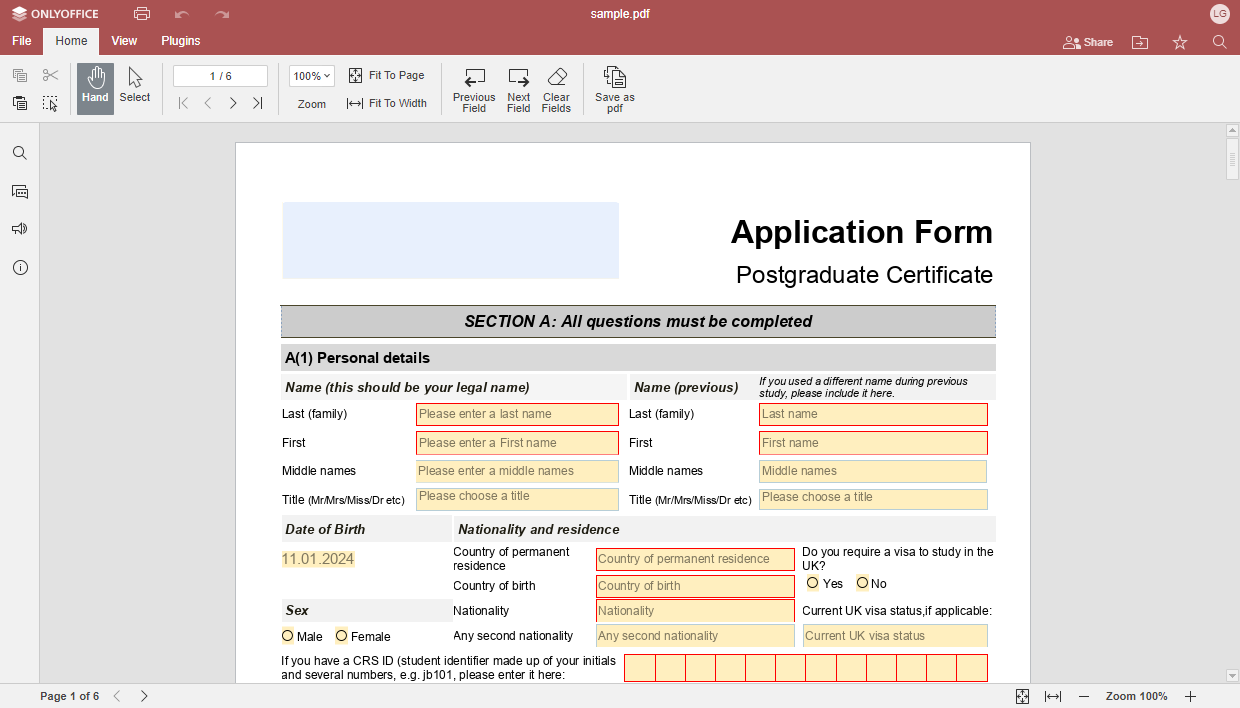
- View the
.pdffillable form, navigate between fields, and complete or clear the form fields. All other editing options except entering text into the form fields are not available. - The user can also save the file on the portal in the
.pdfformat, print the file, switch to the File tab and download the form in one of the supported formats, open the file location, and adjust advanced settings.
Comment
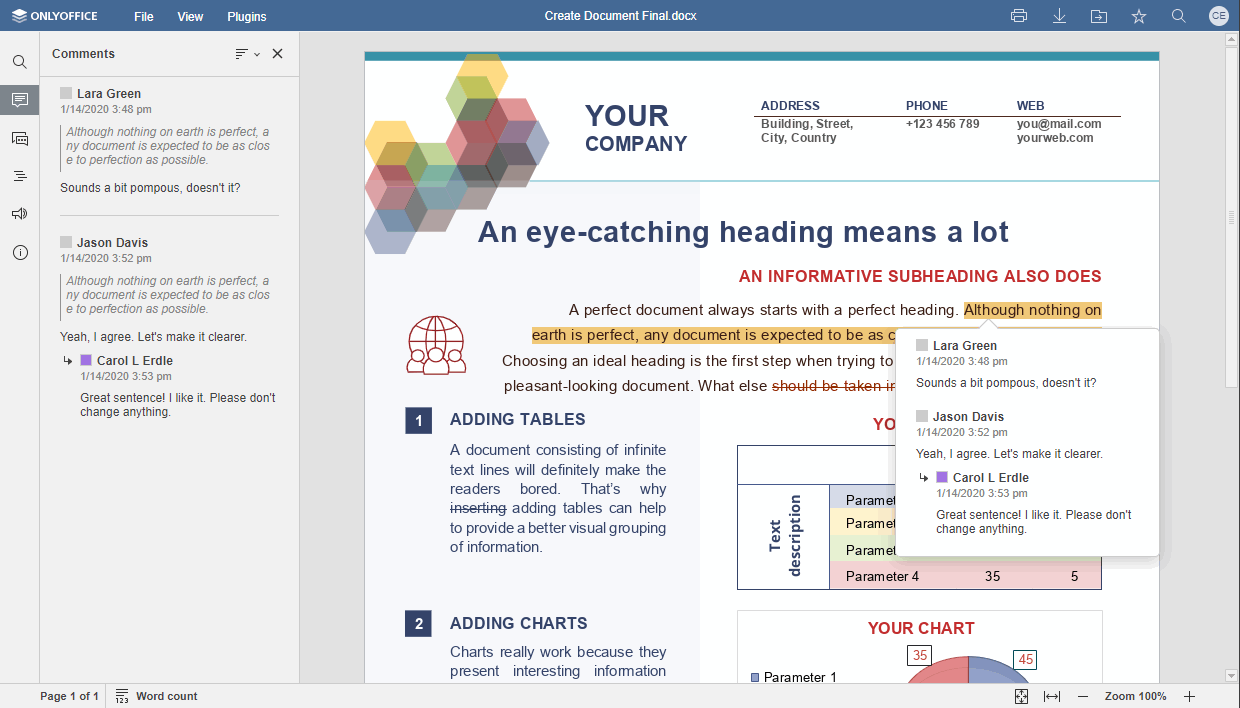
A user with Comment permissions can do the following:
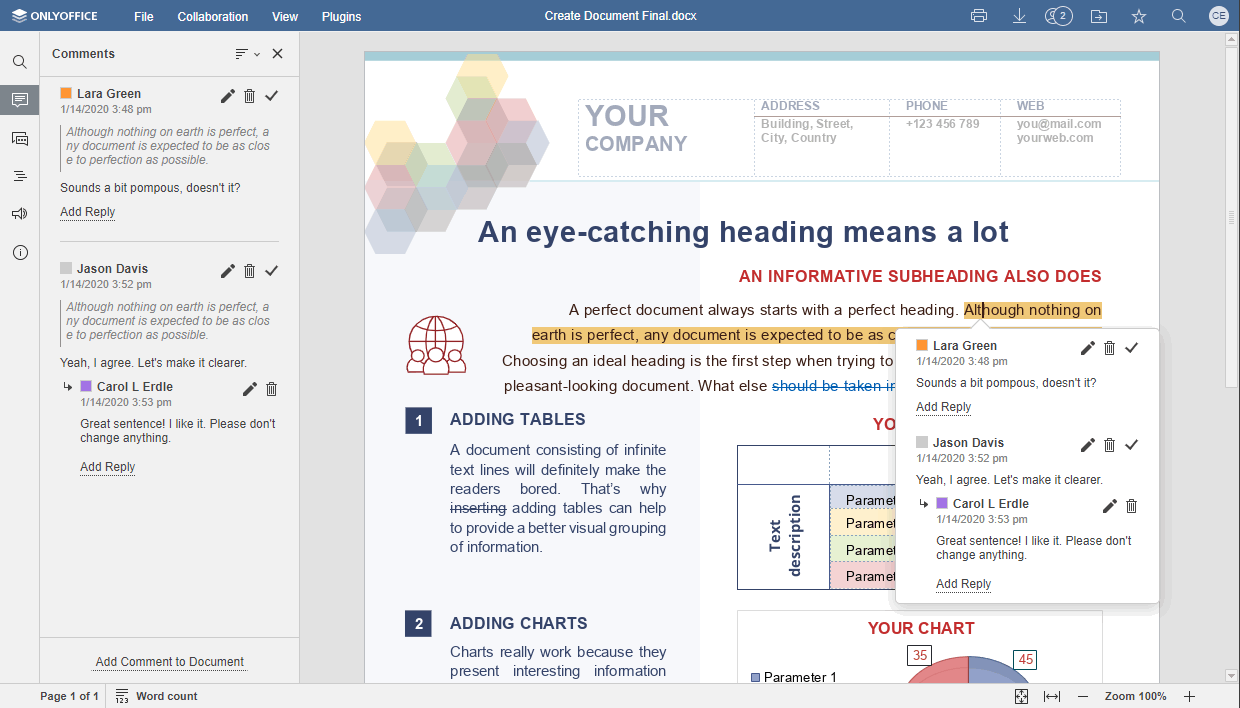
- View the
.docx/.xlsx/.pptxfiles or.docxfform templates and add and manage comments (edit or delete comments, add replies, or close the discussion). All other editing options except working with comments are not available. - Using the Collaboration tab, the user can:
- add/remove comments;
- use the Chat tool;
- view the version history.
- Using the File tab, the user can:
- print or download the file;
- view the file info and version history;
- set the following Advanced Settings:
- For the Document Editor: Commenting Display, Interface theme, Default Zoom Value, Font Hinting, Macros Settings;
- For the Spreadsheet Editor: Commenting Display, Reference Style, Interface theme, Default Zoom Value, Font Hinting, Unit of Measurement, Macros Settings, Page Settings;
- For the Presentation Editor: Interface theme, Default Zoom Value, Font Hinting, Macros Settings;
- use the Chat tool in the left sidebar;
- use the following plugins:
- For the Document Editor: Get and paste html, Telegram, Typograf, Count words and characters, Speech, Thesaurus, Translator;
- For the Spreadsheet Editor: Get and paste html, Telegram, Thesaurus, Translator;
- For the Presentation Editor: Get and paste html, Telegram, Thesaurus, Translator.
Read Only

A user with Read Only permissions to the .docx/.xlsx/.pptx/.oform files or .docxf form templates can do the following:
- View the file and existing comments. In this case, editing options are not available, and the file cannot be modified.
- Using the File tab, the user can:
- print or download the file;
- view the file info and version history;
- set the following Advanced Settings:
- For the Document Editor: Commenting Display, Interface theme, Default Zoom Value, Font Hinting, Macros Settings;
- For the Spreadsheet Editor: Commenting Display, Reference Style, Interface theme, Default Zoom Value, Font Hinting, Unit of Measurement, Macros Settings, Page Settings;
- For the Presentation Editor: Interface theme, Default Zoom Value, Font Hinting, Macros Settings;
- use the Chat tool in the left sidebar;
- add and use the available plugins.
Advanced sharing settings
While configuring the sharing settings, you can access the Advanced settings by clicking the corresponding icon in the lower-right corner of the Sharing Settings window. The advanced settings work for both internal and public sharing.
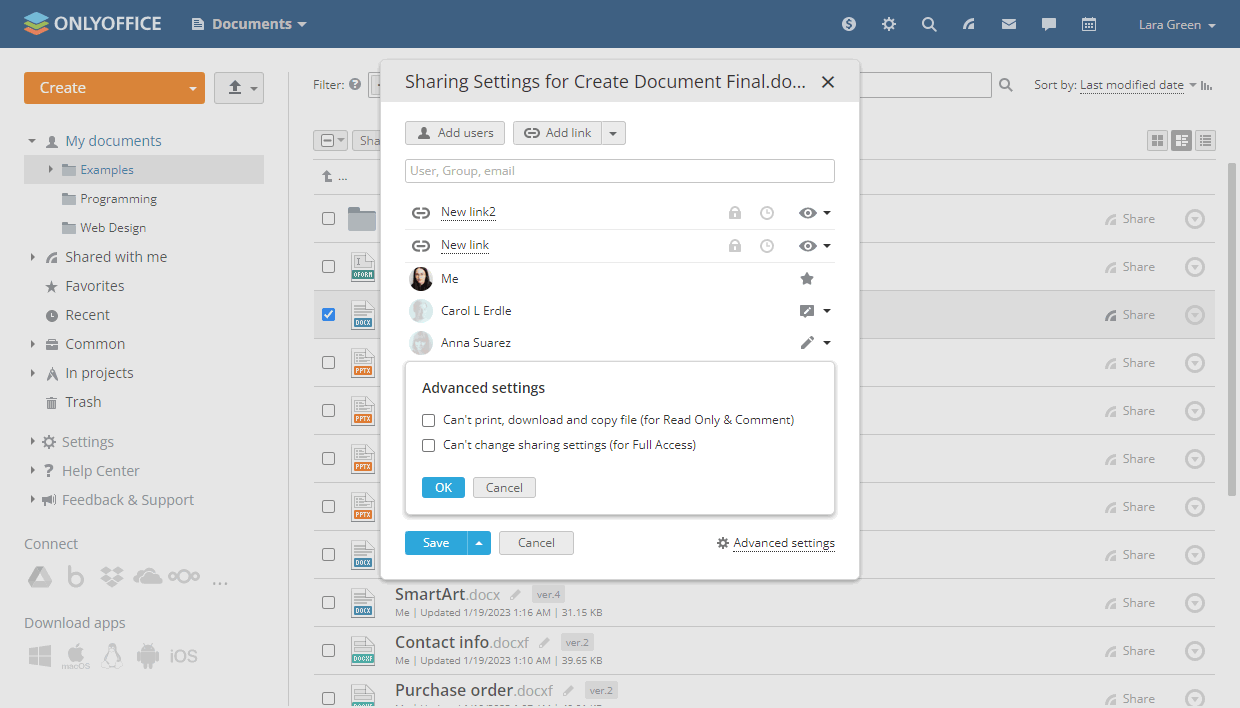
You can select one of the two options for sharing files:
- Can’t print, download and copy file (for Read Only & Comment): sets the corresponding restrictions for all users with Read Only and Comment access rights to the file.
- Can’t change sharing settings (for Full Access): sets the corresponding restrictions for all users with Full Access access rights to the file.