Creating ONLYOFFICE DocSpace in a cloud
Introduction
ONLYOFFICE DocSpace Cloud is a SaaS version of a document hub where you can connect users and documents in one place to boost collaboration.
Functionality
- Creating various room types: Public rooms, Form filling rooms, Collaboration rooms, Virtual Data Rooms, Custom rooms.
- Providing flexible access permissions: viewing, commenting, reviewing, form filling, editing.
- Creating and editing documents, spreadsheets, presentations, forms, PDFs, and ebooks. Viewing multimedia files (images, video and audio files). Working with markdown files and diagrams.
- Inviting users for collaboration: real-time co-editing, commenting, and communication via chat or video calls within online editors.
- Storing and managing personal documents within a dedicated space.
- Managing rooms: adding files, inviting members and assigning permission levels, viewing detailed info and recent activities, archiving rooms.
- Connecting any AI assistants to the editors for enhanced efficiency and faster workflows.
- Configuring integration features: connecting external services and storages. Currently, third-party storages can be used for performing backup only.
- Embedding ONLYOFFICE DocSpace or its parts into your own web application with JavaScript SDK.
- Adjusting customization and branding features.
- Using developer tools: webhooks, OAuth applications, API keys. Developer Tools is accessible directly from the left panel.
- Setting up security features: backup and restore, two-factor authentication, IP security, audit trail and more.
- Integrating ONLYOFFICE DocSpace into your platform with ready-to-use connectors for Drupal, Pipedrive, WordPress, Zapier, Zoom, Moodle, etc.
You don't need to install, configure, and update ONLYOFFICE DocSpace, just fill in the registration form to get your ONLYOFFICE DocSpace in a cloud.
Step 1. Filling in the registration form
Open the DocSpace registration form page of our official website. Go through several easy steps to create your DocSpace:
- Use the Continue with Google option and choose your Google account, then click the Create new account link. You will be redirected to your newly created DocSpace.
Later, you will be able to sign in to your DocSpace using your Google account.
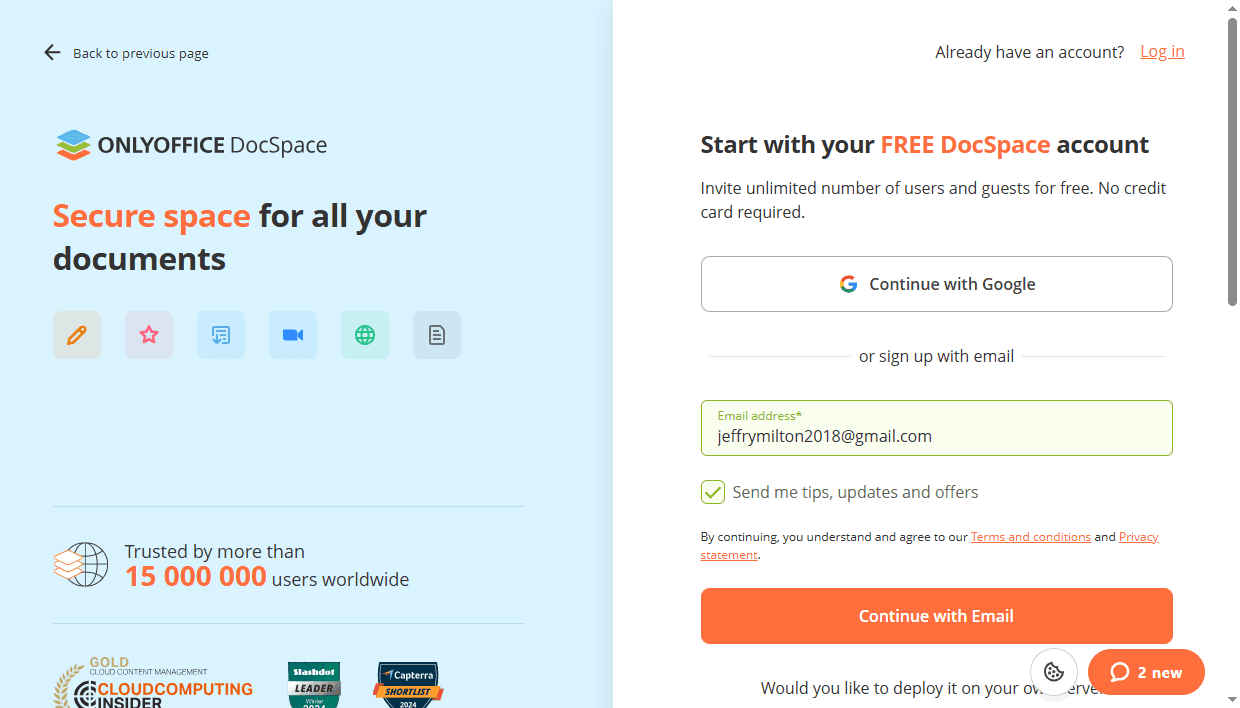
- Alternatively, you can use the sign up with email option:
- Specify your Email address.
- Check the Send me tips, updates and offers box if you want to be informed about the service possibilities, then review the service Terms and Conditions.
- Click Continue with Email button.
- The confirmation link will be sent to the email you have specified. The link is valid for 60 minutes and can only be used once.
- Click the LOG IN TO DOCSPACE button in the email message.
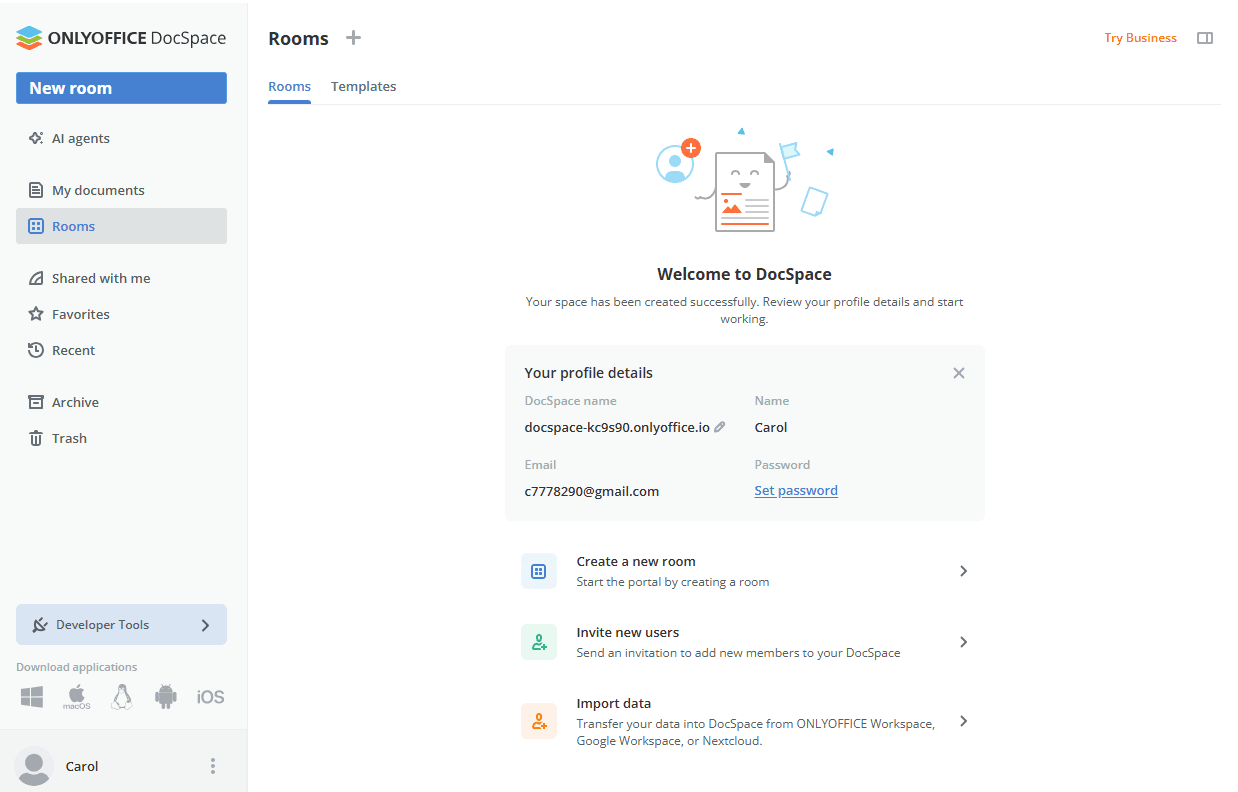
- In the browser window, click the CREATE NEW ACCOUNT button. You will be redirected to your newly created DocSpace.
A name for your DocSpace, your username and a password are generated automatically. First of all, you should set your own password. If necessary, you can change your first name and last name. The ability to change your DocSpace name is a paid feature.
To set a new password:
- Click the Change data and password link.
- You will be redirected to your Profile page.
- Сlick the
 icon next to the Password field.
 - In a new window, click 'Send' to request the password change instructions. The instructions will be sent to your email. By default, the password must be at least 8 but no more than 30 characters long.
For more details on editing your profile, refer to this article.
Step 2. Configuring DocSpace settings
Before you start working in your DocSpace, you can adjust some settings, if necessary.
To open the DocSpace settings, go to Settings in the left panel. The Customization -> General section will open.
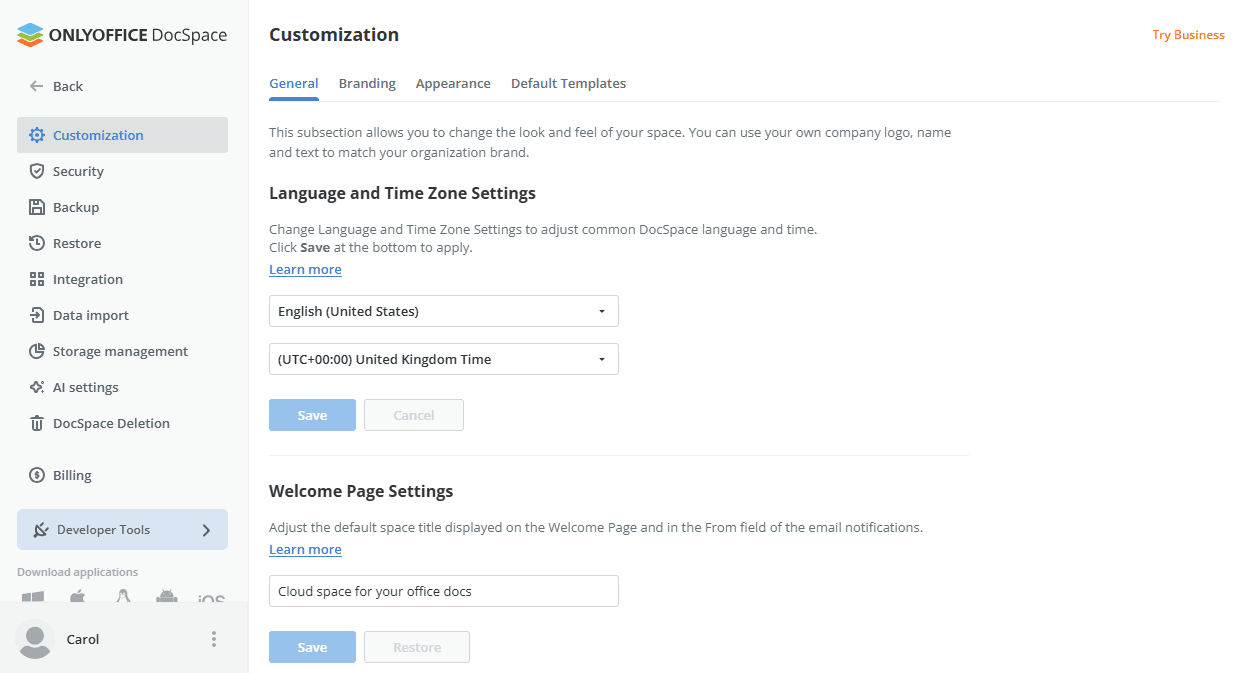
- Drop-down the Language list and select an appropriate language to display all DocSpace pages and notifications.
- Select the Time Zone that corresponds to your location from the drop-down list so that all the events of the portal will be shown with the correct date and time. When the necessary Language and Time Zone Settings are set, click the Save button below this section.
-
Adjust some other settings, if necessary: you can change the DocSpace name that you have specified during the registration, etc.
For more information on your DocSpace settings, please refer to the Configuring DocSpace settings section of our Help Center.
Step 3. Buying a subscription
Initially, the free Startup pricing plan is available for your DocSpace.
If you want to add more than 3 admins, you need more disk space, more rooms, and you want to use advanced features, such as Login History, Audit Trail, SSO, intergations with third-party services, automatic backup and restore, 2 free backups per month, etc., you need to buy the Business subscription. Your pricing plan will depend on the number of admins you added.
To buy a subscription, go to Settings and click Billing, or choose Settings and click Billing in the left panel.

- Set the necessary number of admins and click Upgrade now.
-
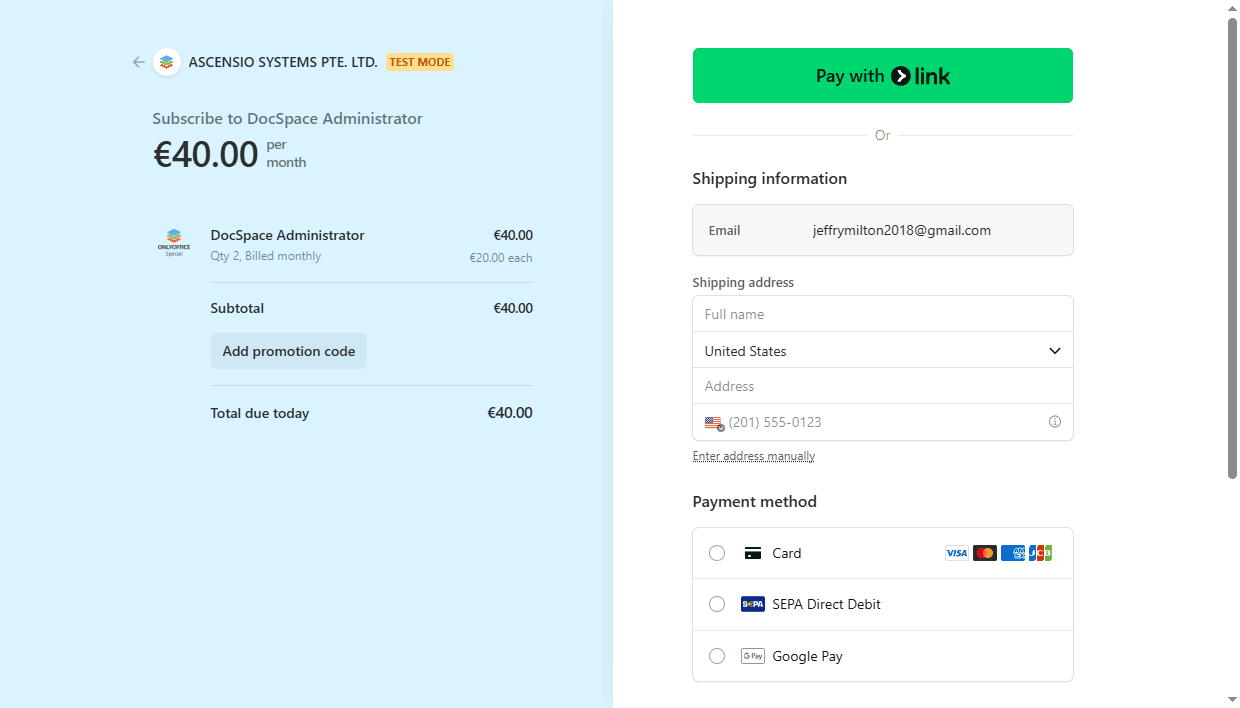
You will be redirected to the checkout.stripe.com payment page. In the section on the left, you can see the details of your subscription. The amount of your fee depends on the number of admins you added.
If you have a discount coupon, copy the coupon code, paste it in the Add promotion code field and click Apply.
-
In the section on the right, provide payment details of your card for future payments. You can use Link clicking the Pay with link button on the top or fill in the required fields manually:
-
In the Shipping information section, specify the following information:
- In the Email field, enter your active Email address.
-
In the Shipping address section, specify your real Name, select a Country and fill in the Address field. You can also click the Enter address manually option and fill in separate fields. The fields may differ depending on the selected country, for example:
- For United States, the fields are the following: Address line 1, 2, City, ZIP, State.
- For United Kingdom and other European countries, the fields are the following: Address, Address line 2, Town or city, Postal code.
- For China, the fields are the following: Postal code, Province, City, District, Address line 1, 2.
- Enter your phone number.
- For customers within the European Union, the VAT information may be required. If you represent a company, check the I'm purchasing as a business option and provide the VAT information: your Business name and VAT ID.
-
In the Payment method section, choose a payment method. The available methods may differ depending on your country, for example:
- For United States, you can choose Card, SEPA Direct Debit, or Google Pay.
- For European countries, you can choose Card, SEPA Direct Debit, or Google Pay.
If you select the Card, specify the information about the card you want to use to pay for the subscription:
- Enter your Card number.
- Enter your Card expiration date (month and year).
- Enter your card CVC code (the last three digits located on the back of the card. For the American Express cards, it is a four-digit code printed on the front side of the card, to the right and above the card number).
- Click the Subscribe button.
-
In the Shipping information section, specify the following information: