Developer Tools
Developer Tools
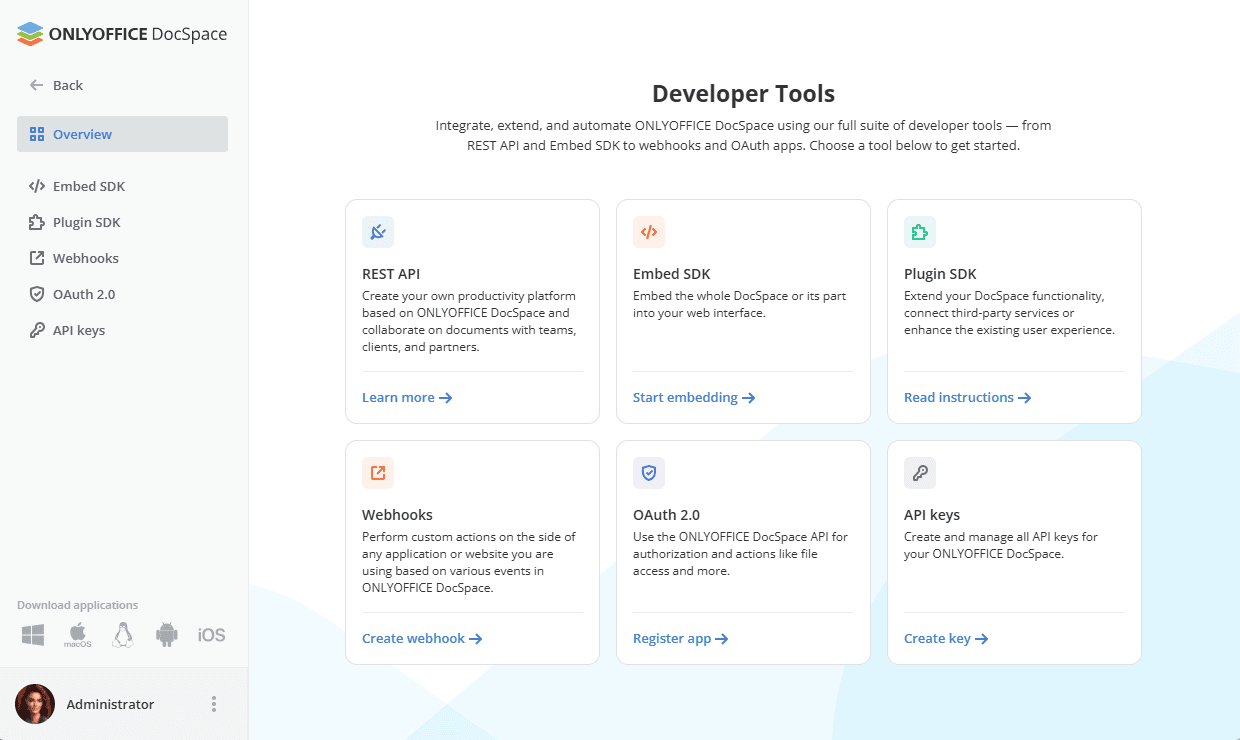
The Developer Tools section is used to integrate ONLYOFFICE DocSpace into your own web application, use Plugin SDK, webhooks, add OAuth applications and API keys.
By default, access to the Developer Tools section is enabled for all users except guests so that any user can access this page, accordingly, create own webhooks or own OAuth 2.0 apps, etc. If you want to make the Developer Tools page accessible to the DocSpace owner and administrators only, disable the Developer Tools section setting in the Security section.
Embed SDK
Use the ONLYOFFICE DocSpace SDK based on JavaScript which allows developers to use all the DocSpace possibilities with api.js. You can integrate ONLYOFFICE DocSpace into your own web application, allowing users to create and submit documents directly from your website. To learn more about using Embed SDK, read this guide
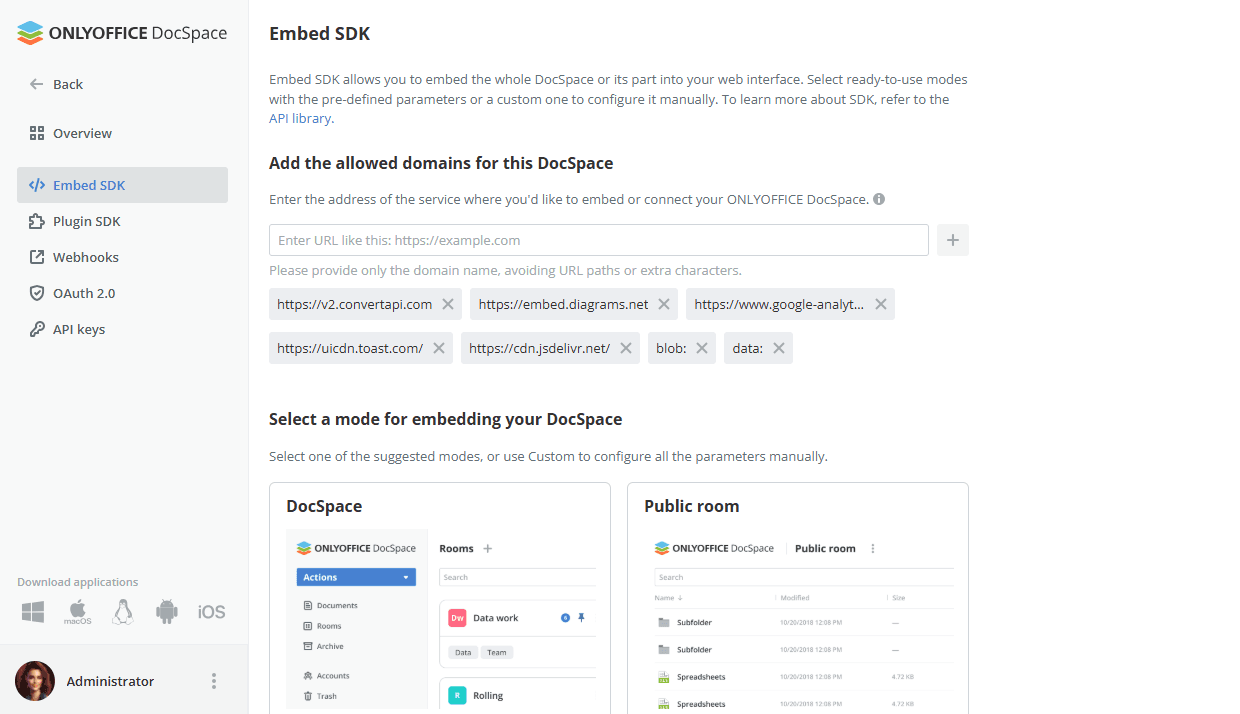
For more details on Embed SDK, please refer to api.onlyoffice.com.
Plugin SDK
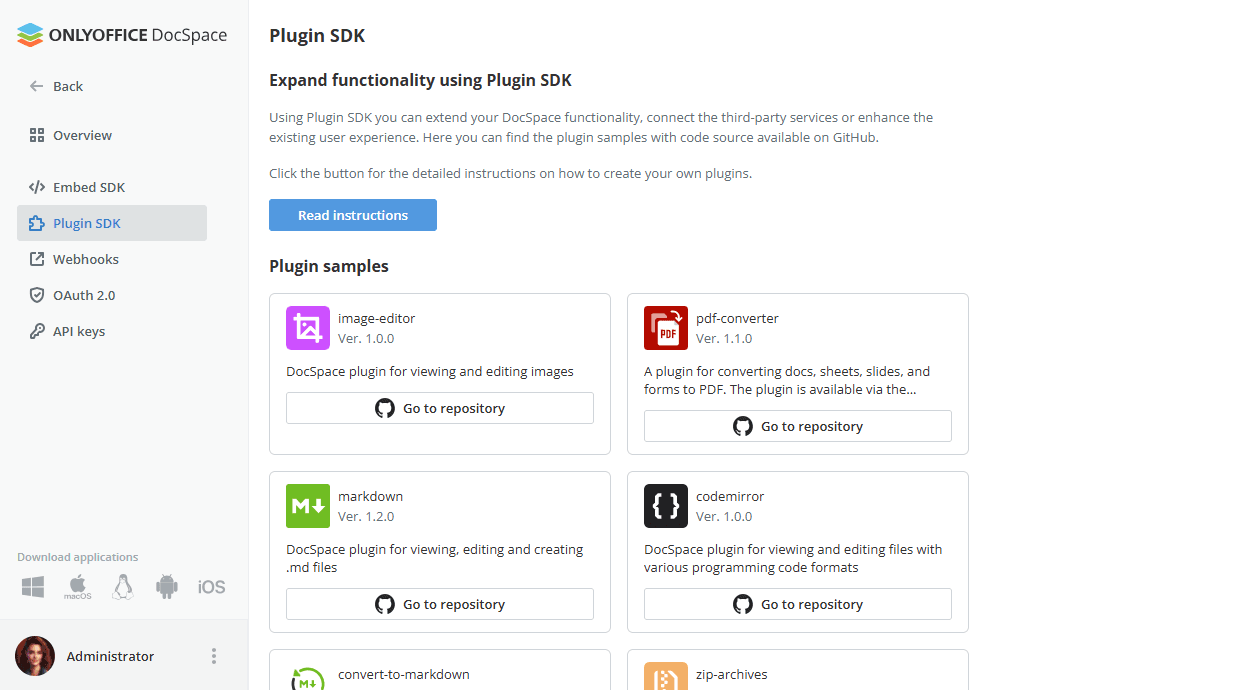
Use the Plugin SDK to extend DocSpace functionality, connect third-party services, or enhance the user experience with custom features. The Plugin SDK page also provides a collection of ready-made plugin samples with source code available on GitHub.
To get started with building your own plugin, click the Read instructions button on the Plugin SDK page for a step-by-step guide.
Plugin samples
The Plugin samples section lists officially supported plugins with links to their GitHub repositories:
- codemirror — view and edit files containing programming code in a wide range of formats.
- markdown — view, edit, and create Markdown (.md) files directly in DocSpace.
- convert-to-markdown — convert DOCX, TXT, and HTML files to Markdown format without leaving DocSpace.
- zip-archives — open and extract ZIP archives stored in DocSpace.
- speech-to-text — transcribe audio to text using speech recognition directly within DocSpace.
- pdf-converter — convert documents, spreadsheets, presentations, and forms to PDF format.
- url — create, edit, and open URL files with external links from within the file list.
- book-reader — open supported files in a dedicated full-screen reading viewer.
- draw.io — create and edit diagrams using the draw.io diagramming tool.
- image-editor — edit images directly within DocSpace.
Plugin capabilities
Plugins built with the Plugin SDK can make use of the following features:
- Localization — plugins support multiple languages via the built-in localization mechanism.
- CSS customization — apply custom styles to your plugin interface using standard CSS.
- Group menu actions — add custom actions to the group selection menu for files, folders, and rooms.
- Custom selectors — display built-in DocSpace selectors (basic, file, room, groups, users) within your plugin.
- Floating action button — add custom operations with custom icons to the floating action button, including progress indicator.
- Sidebar slots — place plugin entry points in the sidebar using 32×32 px icons. Up to 5 slots are available.
- Context menu actions — display plugin-specific actions in the context menu for a particular file, folder, or room.
- Media viewer integration — embed your plugin directly into the built-in media viewer.
- UI components — use the built-in IconButton and Link components for a consistent look and feel.
For more details on Plugin SDK, please refer to api.onlyoffice.com.
Webhooks
Use webhooks to perform custom actions on the side of any application or website you are using based on various events in ONLYOFFICE DocSpace. You can create and manage all your webhooks, configure them, and browse history of every webhook to audit their performance. To learn more about using webhooks, read this guide.

For more details on DocSpace API, please refer to api.onlyoffice.com.
OAuth 2.0
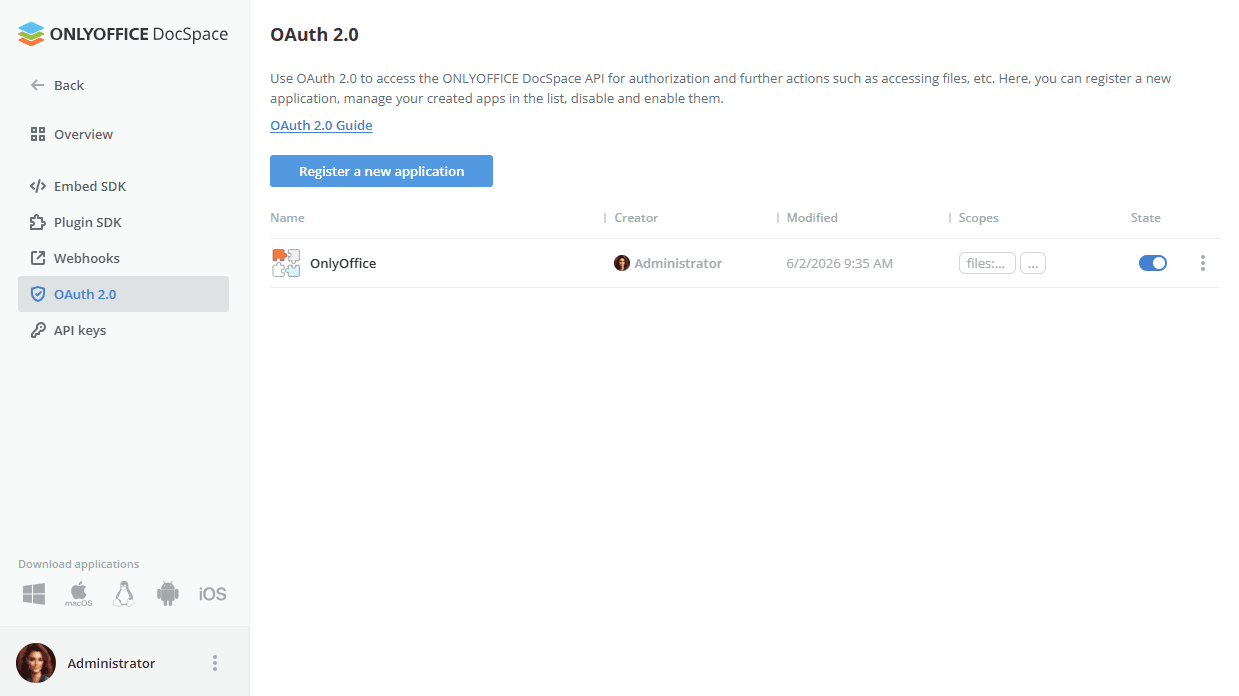
Use OAuth 2.0 to access the ONLYOFFICE DocSpace API for authorization and further actions such as accessing files, etc.
To create a new application,
- Click the Register a new application button.
-
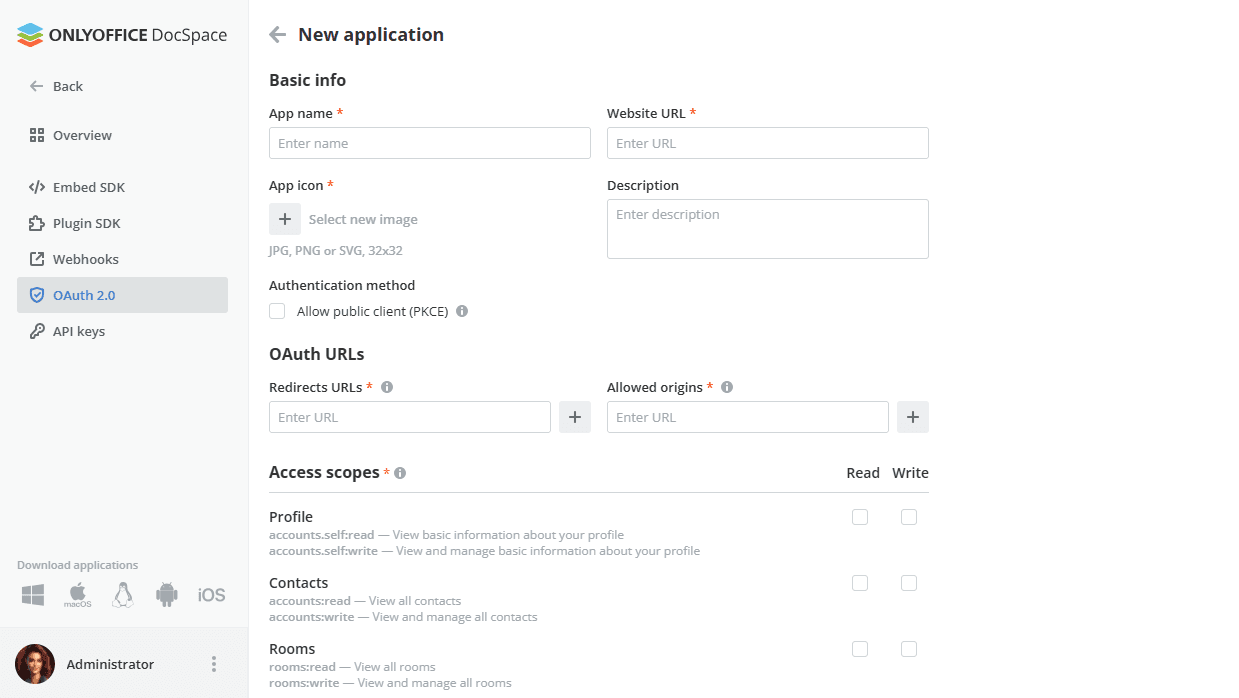
Fill in the form:
- App name - an application name that will be displayed on all consent screens and in the application list. Obligatory parameter.
- Website URL- a link to the site home page. Obligatory parameter.
- App icon - an image that will be displayed on all consent screens and in the application list. Obligatory parameter.
- Description - a short description of the application.
- Authentication method - a verification method when receiving a JWT token. To receive a token it's necessary to send the SHA key. Check the Allow public client (PKCE) box if necessary.
- Redirects URLs - links that the user can be redirected to after successful passing the consent screen. Enter the address and click the Add button. You can add several links, for example, for test and production versions. Obligatory parameter.
- Allowed origins - URLs of sources that can make requests to the DocSpace API without CORS blocking. Enter the address and click the Add button. You can add several links. Obligatory parameter.
- Access scopes - define the capabilities of a third-party application relative to the DocSpace API. Scopes are used to limit your app's access to all user-related data, and they'll let you specify exactly what kind of access you need. Check the Read or Write box next to the necessary options: Profile, Contacts, Files & Folders, Rooms, Open ID. When selecting a capability for writing data, it automatically enables reading data. Obligatory parameter.
- Privacy policy URL - a URL link to your Privacy Policy that must comply with applicable laws and regulations and that make clear how you collect, use, share, retain and otherwise process personal information. Obligatory parameter.
- Terms of Service URL - a URL link to your Terms and conditions that users must comply with when using this application. Obligatory parameter.
- Click the Save button.
You can manage your created apps in the list:
- View info about your app: app name, creator, modified date, scopes.
- Disable or enable the app using the State switcher.
-
Right-click the app and select the necessary option:
- Edit - to change some parameters, such as App name, App icon, Description, Authentication method. On this page, you can also copy the Client ID and Secret or reset the secret if necessary.
- Auth button - to view the authorization button, copy the HTML, CSS or JavaScript code to embed it into your website, get an authorize link or code verifier. By clicking the authorization button, you can also go through the entire flow.
- Info - to view the app info, such as creator, description, website, access, scopes, support and legal info, last modified date.
- Generate token - to generate a token for development (so that not to go through the flow each time). The generated token has a limited lifetime and will be automatically deprecated when a new one is created.
- Revoke token - to revoke the generated token.
- Disable - to disable the app and stop all active sessions.
- Delete - to delete the app and stop and remove all active sessions.

When following the authorization link, there are 3 possible scenarios:
- If the user is not yet authorized on the DocSpace portal, the authorization form opens. After successful authorization, the user will be redirected to the step 2 or 3.
- If the user has more than one portal, it will be possible to select the necessary one.
- If the user is already authorized on the DocSpace portal, they will be redirected to the consent page, which displays the capabilities of the application, links to the security policy and terms of service. The user can click the Allow or Deny button as well as choose another profile.
For more details on DocSpace API, please refer to api.onlyoffice.com.
API keys
Create and manage all API keys for your ONLYOFFICE DocSpace.

To create a new API key,
- Click the Create new secret key button.
-
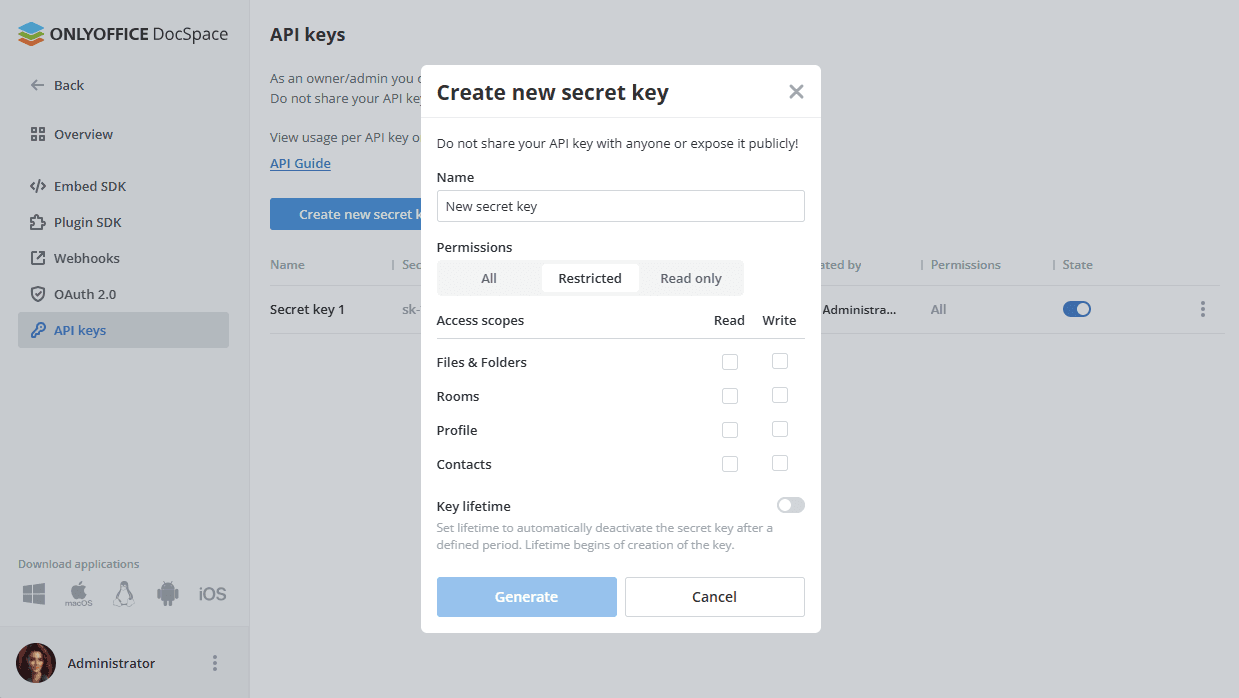
Fill in the form:
- Name - Specify the secret key name.
-
Permissions - Select the necessary option:
- All - Enable read and write permissions to all sections.
- Restricted - Enable read or write permissions to certain sections. Check the Read or Write box next to the necessary options: Files & Folders, Rooms, Profile, Contacts. When selecting a capability for writing data, it automatically enables reading data.
- Read only - Enable read only permissions to all sections.
- Key lifetime - Set lifetime to automatically deactivate the secret key after a defined period. The lifetime starts from the moment the key is created.
- Click the Generate button.
- In a new window, copy the generated key and click Done.
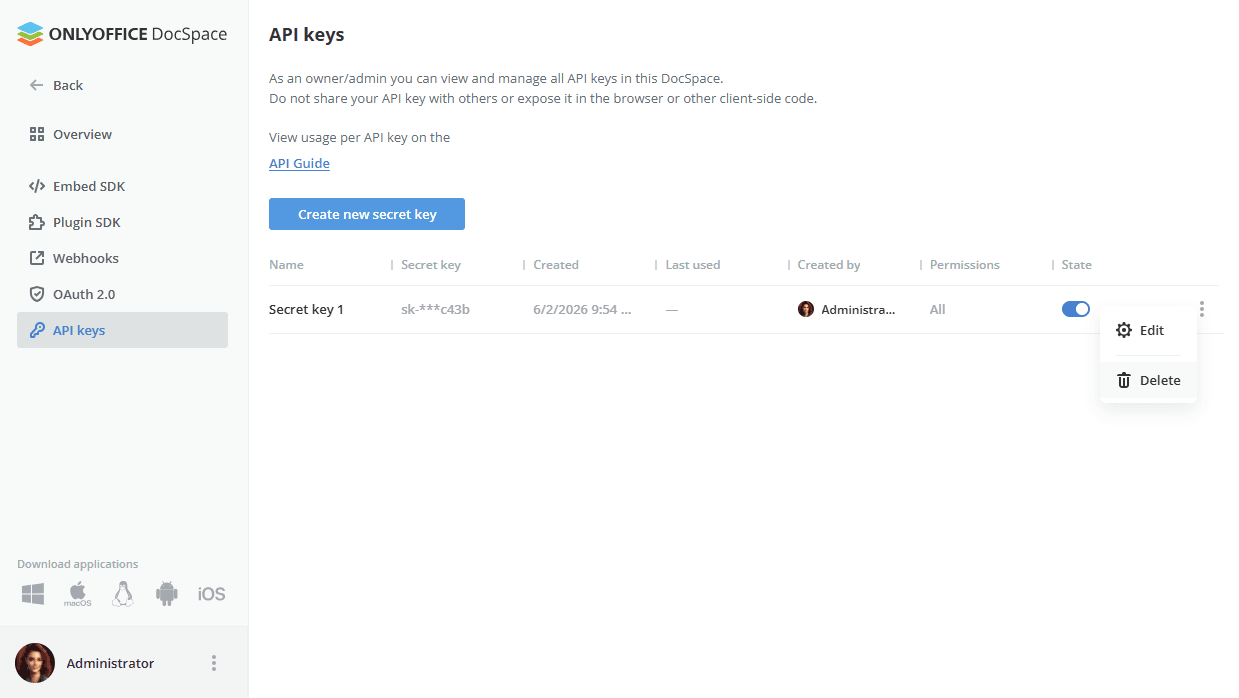
You can manage your created API keys in the list:
- View info about your key: Name, Secret key, Created, Last used, Created by, Permissions.
- Disable or enable the key using the State switcher.
-
Right-click the app and select the necessary option:
- Edit - to change the key Name and Permissions.
- Delete - to delete the key.
For more details on DocSpace API, please refer to api.onlyoffice.com.