Security
Security settings
The Security section allows you to control access to your DocSpace and monitor the activity of all users. It includes three subsections: DocSpace Access, Login History, and Audit Trail.
Controlling DocSpace access
The DocSpace Access subsection of the Security settings allows you to provide users with secure and convenient ways to access the DocSpace.
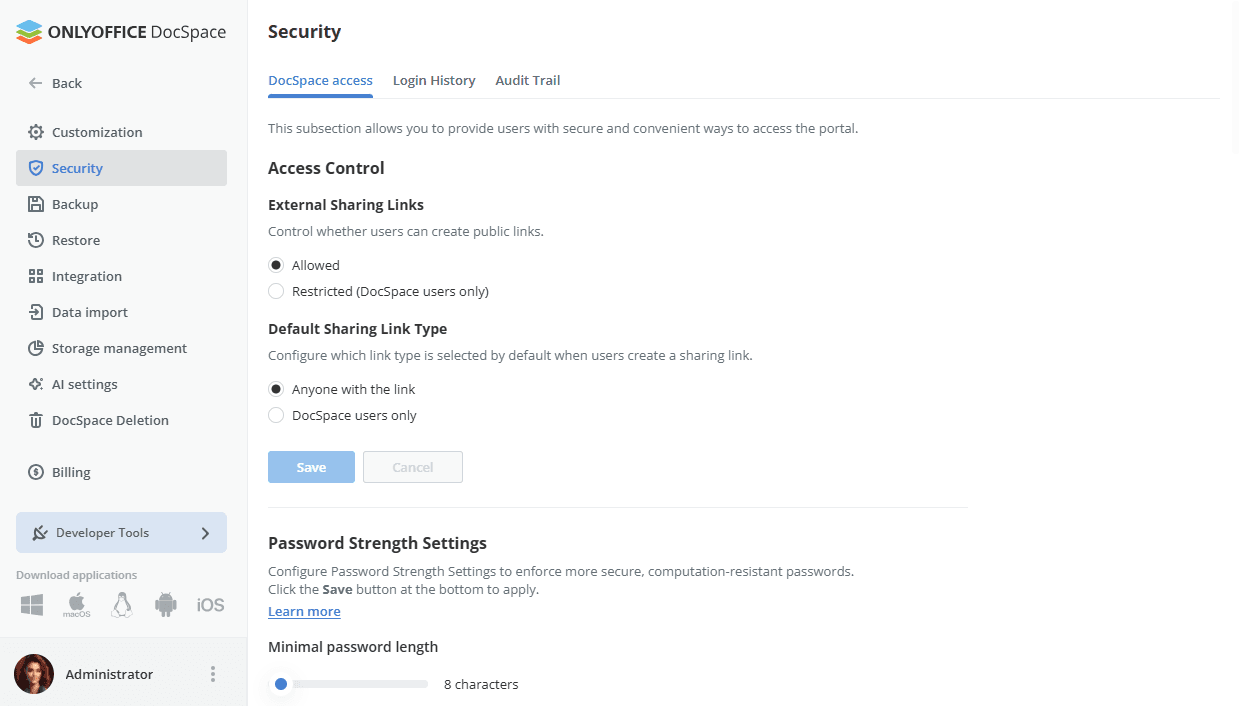
Password strength settings
This section allows you to determine password complexity (the effectiveness of a password in resisting guessing and brute-force attacks). To do that,
-
use the Minimum password length bar to determine how long the password should be to be considered strong,
The password must be at least 8 but no more than 30 characters long.
- check the appropriate boxes below the bar to determine the character set that must be used in the password: capital letters, digits, special characters,
- click the Save button at the bottom of the section to apply the changes you made.
Two-factor authentication
This section allows you to enable two-step verification with authenticator apps that ensures more secure DocSpace access.
To enable two-factor authentication with an authenticator app,
- check the By authenticator app radio button under the Two-factor authentication section,
- click the Save button at the bottom of the section to apply the changes you made.
When two-factor authentication with an authenticator app is enabled, a user can access the DocSpace data after entering their regular email and password or signing in via a social media account and typing in a six-digit verification code or a backup code generated by the authenticator app.
To access your DocSpace for the first time after enabling two-factor authentication:
- Enter your regular credentials to access your DocSpace. The QR code and your secret key are displayed on your DocSpace login confirmation page.
- Install an authenticator app on your mobile device. You can use Google Authenticator for Android and iOS or Authenticator for Windows Phone.
-
Open the authenticator app on your mobile device and configure it in one of the following ways:
- Scan the QR code displayed in the browser, or
- Manually enter your secret key displayed in the browser,
- On your DocSpace login confirmation page, enter a 6-digit code generated by your application.
- Click the Connect app button.
To learn more on how to use two-factor authentication in your DocSpace, you can read the following article.
Trusted mail domain settings
This section allows you to specify the mail servers used for user self-registration in your DocSpace. By default, this option is disabled. To enable it,
- check the Custom domains radio button,
- enter the trusted mail server in the field which appears below,
- click the Save button at the bottom of the section to apply the changes you made.
To add more mail servers, use the Add trusted domain link. To delete a server added by mistake, click the corresponding  icon to the right of the field.
After that, any user who has an account at a specified mail server will be able to register on their own by clicking the Click here to join link on the Sign In page and entering the email address. An invitation email with a link to the DocSpace will be sent to the specified email address. To sign in, the user will need to follow the link provided in the email, enter a password and confirm it.
To disable this option again, just check the Disabled radio button.
Limited Developer Tools access
Thе Developer Tools section setting allows you to manage and control user access to the Developer Tools page, ensuring that all users except guests can access this page, accordingly, create own webhooks or own OAuth 2.0 apps, etc. This setting is enabled by default.
Any user can access the Developer Tools section by clicking the corresponding link on the left panel.
To make the Developer Tools page accessible to the DocSpace owner and administrators only,
- check the Disabled radio button,
- click the Save button at the bottom of the section to apply the changes you made.
Invitation Settings
This section allows you to configure the invitation options for internal members and external guests of your DocSpace. These settings can help you comply with your company's security guidelines, for example, if you use LDAP or other user management systems. By default, all the invitation settings are enabled. Uncheck the options you want to disable:
- Invite DocSpace members via Contacts - enable this option to allow invitations to be sent to new DocSpace members through the Contacts section. Disable this option in case you want to invite new members through LDAP only.
When this option is disabled, the Invite option will be hiddden in the Contacts section.
- Allow inviting guests - enable this option to allow all DocSpace members to invite external guests to rooms.
When this option is disabled, it's not possible to add a new user with a non-existent email in the invitation panel within a room. In this case, only existing DocSpace users can be invited to a room.
Click the Save button at the bottom of the section to apply the changes you made.
IP security settings
This section allows you to prevent unwanted visitors from accessing your DocSpace by allowing access to the DocSpace from trusted networks only. If a user attempts to log in to your DocSpace from any IP address except those you specify, this login attempt will be blocked. To restrict access to your DocSpace based on the IP addresses,
- check the Enable radio button;
- click the Add allowed IP address link;
-
in the entry field that appears, specify a single IP address in the IPv4 format (#.#.#.#, where # is a numeric value from 0 to 255) or set an IP addresses range by entering the starting and ending IP addresses of the range in the #.#.#.#-#.#.#.# format;
You can find the information on your DocSpace visitors IP addresses in the Login History subsection of the Security settings by clicking the Download and open report button.
- in the same way, add as many trusted IP addresses as you need;
- click the Save button at the bottom of the section.
If necessary, you can delete the added IP addresses by clicking the corresponding icon to the right of the IP address. To disable this option again, just check the Disable radio button and click the Save button.
Brute Force Protection Settings
This section allows you to protect the portal against brute-force attacks.
- in the Number of attempts field, set up the limit of unsuccessful login attempts by the user;
- in the Blocking time (sec) field, set up the time interval for blocking new login attempts;
- in the Check period (sec) field, set up the time interval for counting unsuccessful login attempts.
When the specified limit of unsuccessful login attempts is reached, attempts coming from the associated IP address will be banned (or, in the SaaS version, captcha will be requested) for the chosen period of time.
By default, this feature is disabled in the server version. If you want to use it, it's necessary to enable the feature in the configuration file. To learn more, read the following article.
Administrator message settings
This section allows you to display the contact form on the Sign In page so that people can send a message to the DocSpace administrator in case they have troubles while accessing DocSpace.
To enable it, just check the corresponding radio button and click the Save button at the bottom of the section to apply the changes you made.
Session Lifetime
This section allows you to set a time limit (in minutes) during which the DocSpace users will need to enter their DocSpace credentials again in order to access the DocSpace.
To set a session lifetime, check the Enable radio button, enter the necessary time value measured in minutes in the Lifetime field that appears and click the Save button at the bottom of the section to apply the changes you made. After that, all the users will be logged out from the DocSpace.
Tracking login history
The Login History subsection of the Security settings is used to monitor the latest user login activity including successful logins and failed attempts with an indication of reasons. In the SaaS version, this is a Paid feature (available for the paid Business plan only).
This page displays only the last 20 records. Each record shows which action took place, who performed it and when the event occurred.
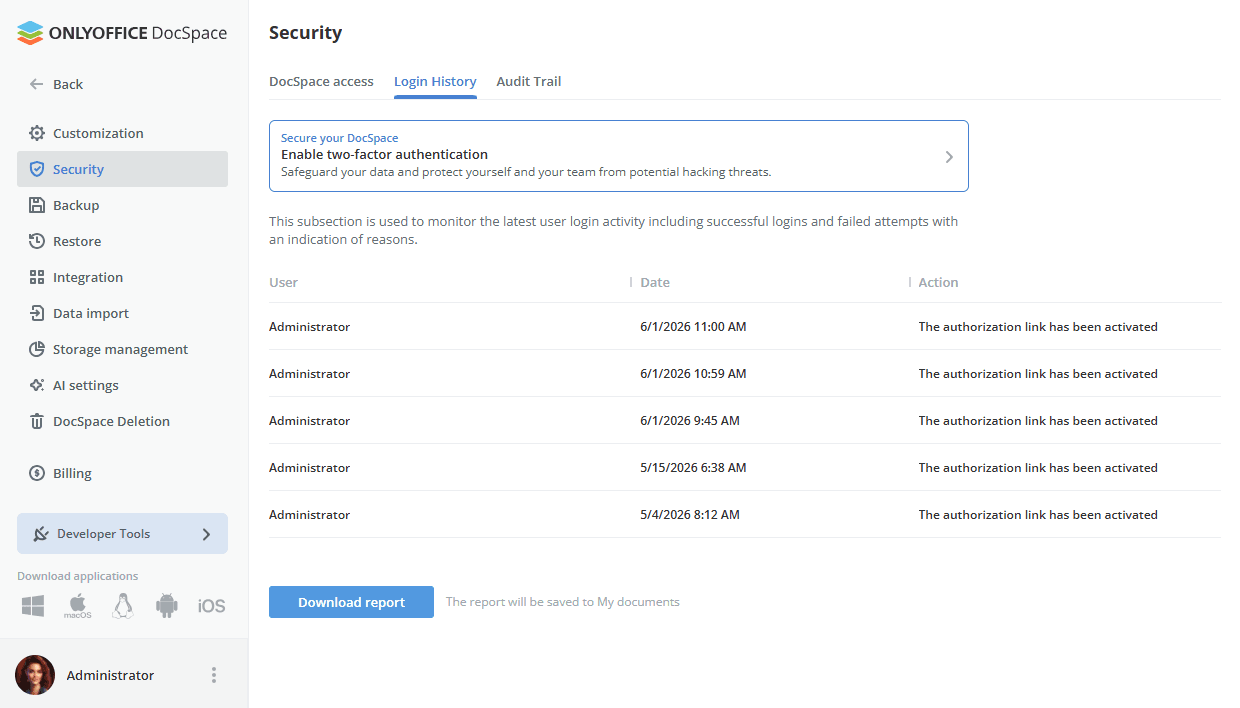
To view the detailed statistics for the latest half year, click the Download and open report button. The report will open in a .csv file (LoginHistory_ReportStartDate-EndDate.csv).
The login history report includes the following details: user IP address, Browser and Platform which were used when the registered event occurred, Date and time of the event, name of the User who made an attempt to log in/log out, DocSpace Page where the action has been performed, specific Action (for example, Login Fail. Associated Social Account Not Found).
The records are sorted chronologically in descending order, but you can easily sort and filter the data by any parameter or use the search tool to quickly find a specific record.
Receiving audit trail data
The Audit Trail subsection of the Security settings allows you to browse through the list of the latest changes (creation, modification, deletion, etc.) made by users to the entities (files, folders, etc.) in your DocSpace. In the SaaS version, this is a Paid feature (available for the paid Business plan only).
This page displays only the last 20 records. Each record shows which action took place, who performed it and when the event occurred.
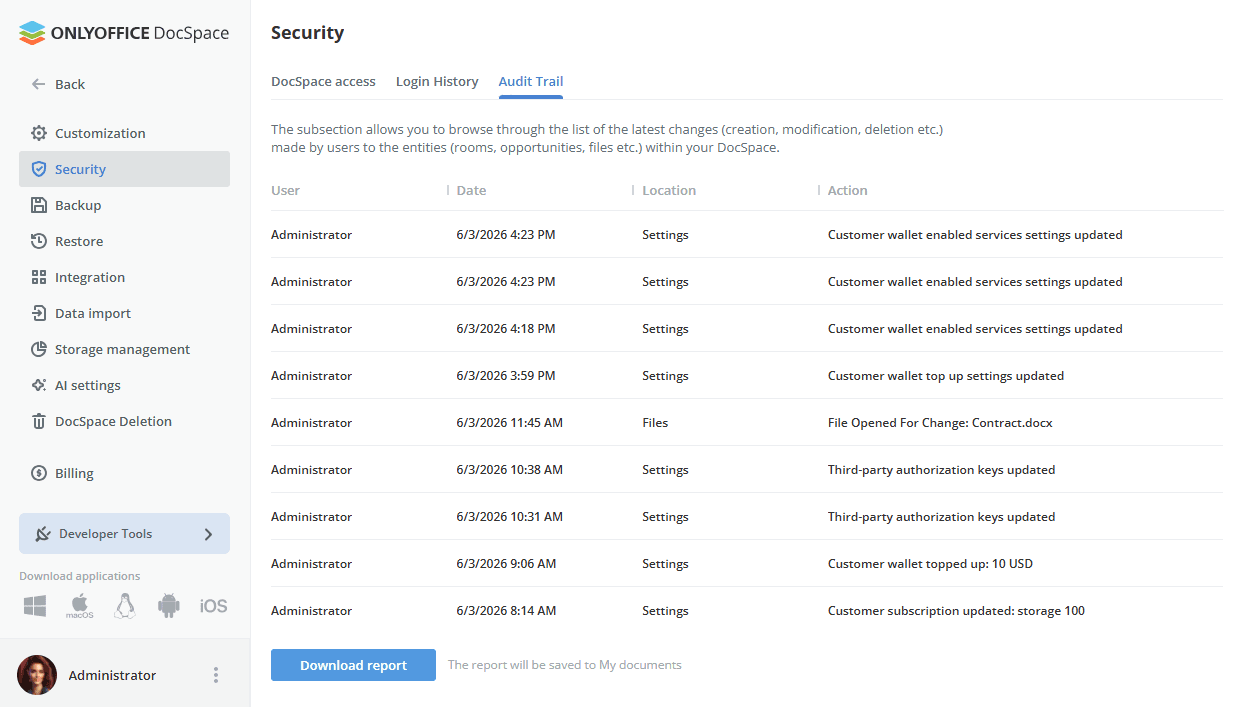
To view the detailed statistics for the latest half year, click the Download and open report button. The report will open in a .csv file (AuditTrail_ReportStartDate-EndDate.csv).
The audit trail report includes the following details: user IP address, Browser and Platform which were used when the registered event occurred, Date and time of the event, name of the User who performed the operation, DocSpace Page where the action has been performed, generic Action Type (for example, download, updated access), specific Action (for example, File Uploaded: Timetable.ods ), Product and Module that the changed entity is referred to.
The records are sorted chronologically in descending order, but you can easily sort and filter the data by any parameter or use the search tool to quickly find a specific record.