Embedding your workspace
You can integrate ONLYOFFICE Apps or its parts into your own web application, allowing users to create and submit documents directly from your website.
For this purpose, use the ONLYOFFICE Apps SDK based on JavaScript which allows developers to use all the capabilities of ONLYOFFICE Apps with api.js.
To embed the whole workspace, a certain room, or a folder to your website,
-
Open the Developer Tools section by clicking the Developer Tools link available on the left panel in any section (Files, Rooms).
By default, access to the Developer Tools section is enabled for all users except guests so that any user can access this page and create their own integrations.
- In the Developer Tools, go to the Embed SDK section.
-
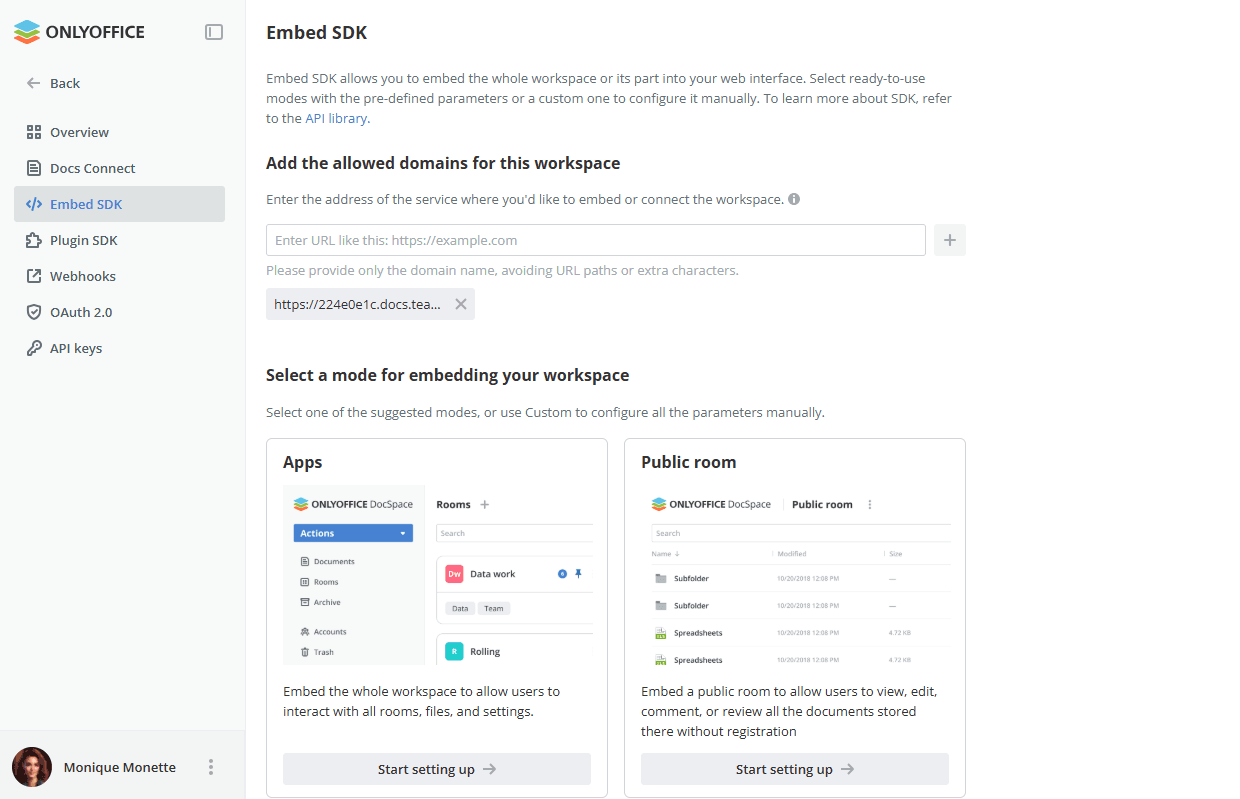
On the Embed SDK page, go to the Add the allowed domains for this workspace section, enter the address of the service where you want to embed or connect the workspace and press the + icon. Provide the domain name only, without URL paths or extra characters. The added domains are listed below the field, and each of them can be removed by clicking the x icon.
If you are using the server version, it is necessary to switch your workspace to HTTPS first. You can follow our instructions in the Installation section.
-
In the Select a mode for embedding your workspace section, choose one of the suggested modes: Apps, Public room, Editor, Viewer, Room selector, File selector, Custom, Uploader.
- Apps – embed the whole workspace to allow users to interact with all rooms, files, and settings.
- Public room – embed a public room to allow users to view, edit, comment, or review all the documents stored there without registration.
- Editor – embed an editor to allow users to edit a file from the corresponding room.
- Viewer – embed a viewer to allow users to open a file for viewing from the corresponding room.
- Room selector – embed a room selector to allow users to access any room from the list of the available ones. You can embed all types of rooms or select the necessary ones in the Advanced display settings -> Room type display menu. Select the necessary option: All types, Public room, Collaboration room, Virtual Data Room, Custom room.
- File selector – embed a file selector to allow users to access any file from the list of the available ones.
- Custom – manually configure the parameters for embedding your workspace.
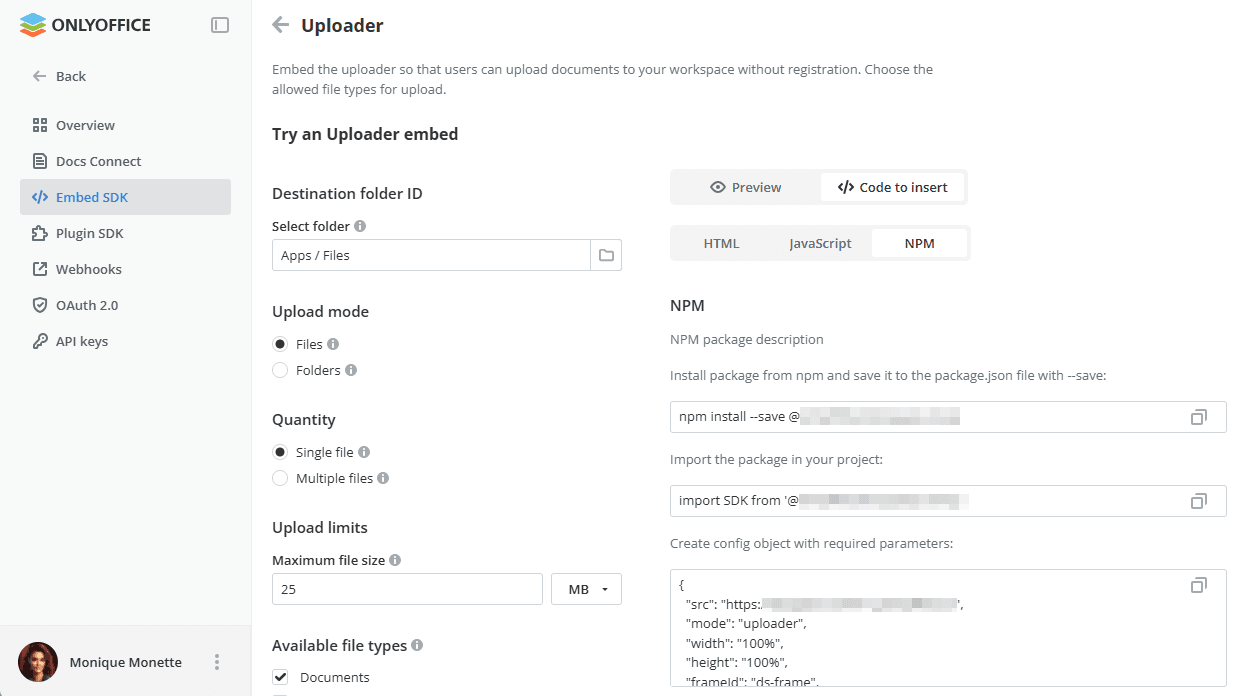
- Uploader – embed an uploader so that users can upload documents to your workspace without registration. Choose the allowed file types for upload. The following settings are available:
- Destination folder ID – select the workspace folder where uploaded files will be saved. Use the folder picker to browse and choose the target location.
-
Upload mode – select what users will be able to upload:
- Files – allow uploading individual files.
- Folders – allow uploading entire folder structures.
-
Quantity – define how many items can be uploaded at once:
- Single file – restrict the uploader to one file per session.
- Multiple files – allow uploading several files at once.
- Upload limits – set the Maximum file size and unit (KB, MB, or GB) to restrict how large an individual uploaded file can be.
- Available file types – select one or more categories to restrict what file types can be uploaded: Documents, Spreadsheets, Presentations, Images, Video, Audio, Archives, PDF.
- Button text – customize the label on the upload button (defaults to Upload).
- Helper text – customize the secondary hint text displayed below the button (defaults to or drop file here).
- Customizing the display – set the Width, Height (in % or px), and the Frame ID used to identify the embedded frame in your page.
- Click the Start setting up button.
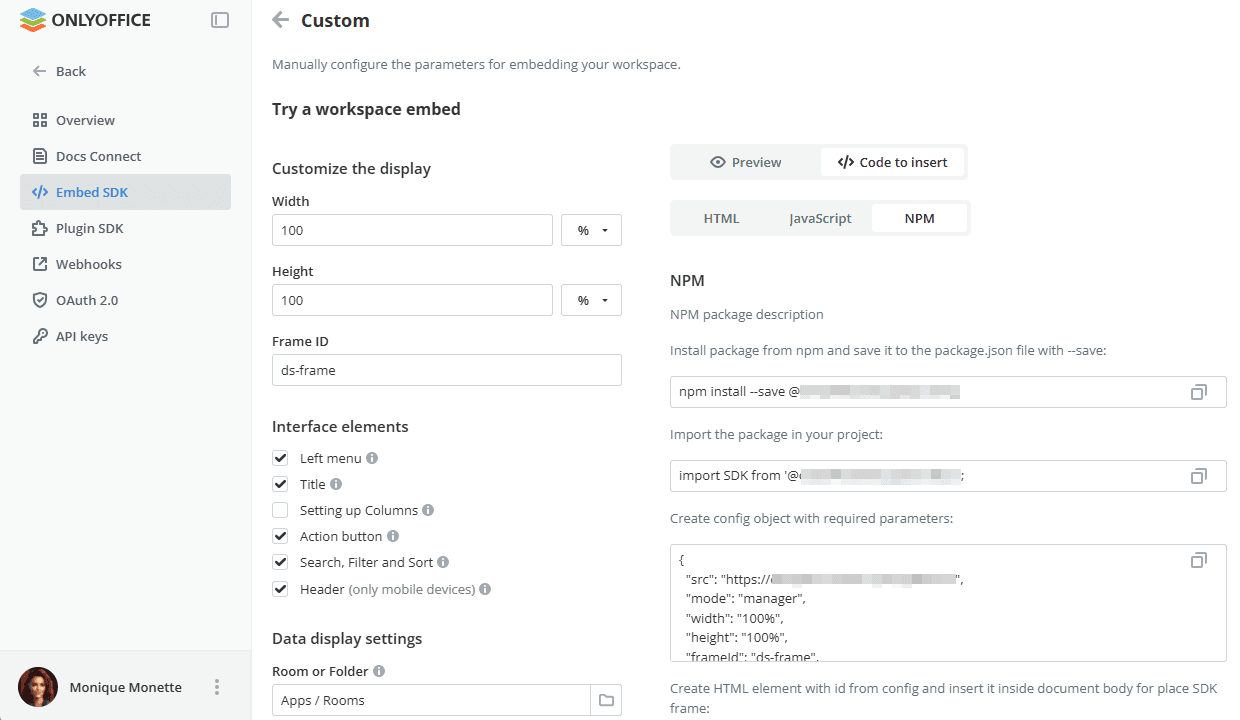
- Customize the available display options which differ depending on the selected mode. For example, the following options are available for the Custom mode: Width, Height, Frame ID, Interface elements (Left menu, Title, Setting up Columns, Action button, Search, Filter and Sort, and Header (only for mobile devices)), Data display settings (select the section, room or folder you want to display), and Advanced display settings, such as Search term, Sort by parameter, Sort order, the number of files / folders displayed on one page, Display page, Displaying columns in a file row.
- Preview the result in the Preview section.
- Switch to the Code to insert tab and copy the generated code from the HTML, JavaScript, or NPM tab. For NPM, the commands for installing and importing the package are provided, as well as the config object with the required parameters and the HTML element to insert the SDK frame into.
- Embed the copied code into your website.
The Embed SDK page also includes an Integration examples section with ready-to-use integrations for popular platforms such as Zoom and WordPress. Click See all connectors to browse the full list of available integrations.
For more details on Embed SDK, please refer to api.onlyoffice.com.
Article with the tag:
Browse all tags