Webhooks
Introduction
Webhooks allow notifying a pre-configured recipient about events on the portal using the http/https callbacks. A user can configure webhooks so that events on the portal trigger actions on external services. This approach can be useful for synchronizing and tracking certain events.
Use webhooks to perform custom actions on the side of any application or website you are using based on various events in ONLYOFFICE DocSpace.
You can create and manage all your webhooks, configure them, and browse history of every webhook to audit their performance.
Creating a new webhook
First of all, you need to set up an endpoint for webhooks within your external service. This endpoint will be used to listen for DocSpace webhooks and receive event notifications.
Once you create and configure your endpoint, you can create webhooks in DocSpace. To create a new webhook,
-
Open the Developer Tools section by clicking the Developer Tools link which is available on the left panel in any section (Rooms, Documents).
By default, access to the Developer Tools section is enabled for all users except guests so that any user can access this page, accordingly, create own webhooks. Admins can see all created webhooks, while users can see own webhooks only.
Admins can both use the Developer Tools link on the left and switch to this section from the DocSpace Settings by using the
 menu in the lower left corner, selecting the Settings -> Developer Tools option.
 - In the Developer Tools, go to the Webhooks section.
- Click the Create webhook button.
-
Set the necessary parameters:
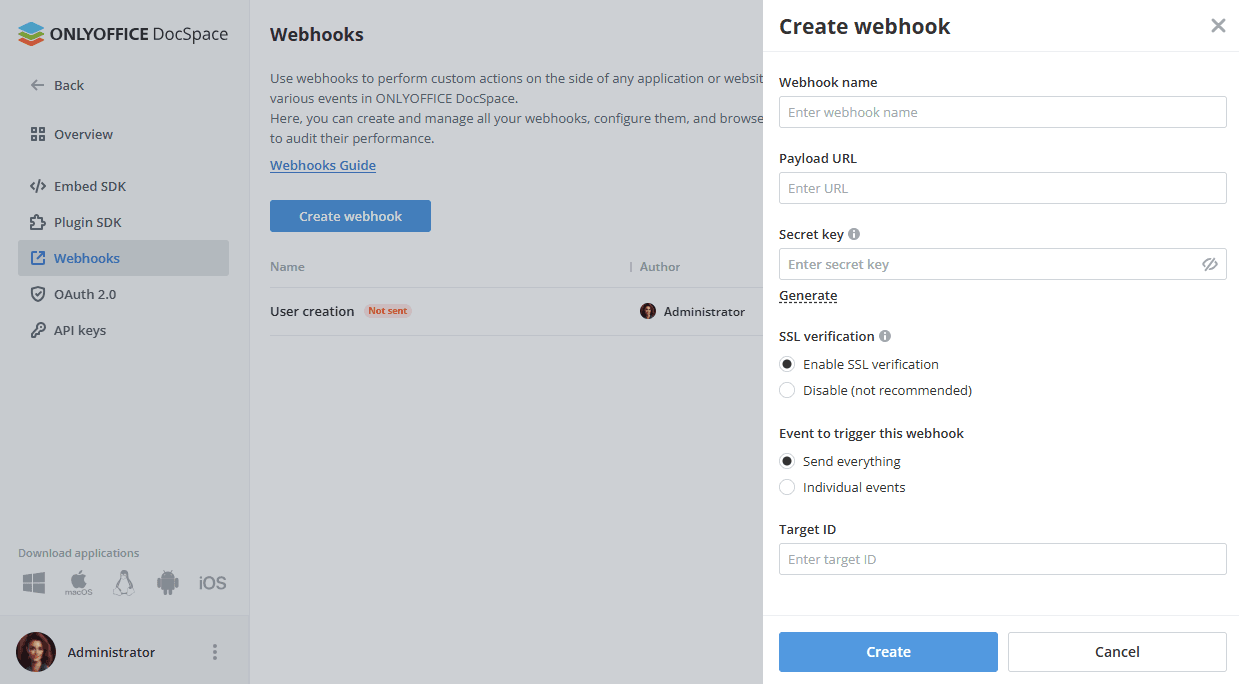
- Webhook name – an identifier name for convenient work with the webhook on the portal.
- Payload URL – an address of the endpoint where the webhook should be sent.
- Secret key – set a webhook secret which allows you to verify requests sent to the payload URL. Enter your own key or click Generate. Please note: you cannot retrieve your secret key again once it has been saved. If you've lost or forgotten this secret key, you can reset it, but all integrations using this secret will need to be updated.
- SSL verification – by default, this option is enabled to verify SSL certificates when delivering payloads. It’s not recommended to disable this parameter.
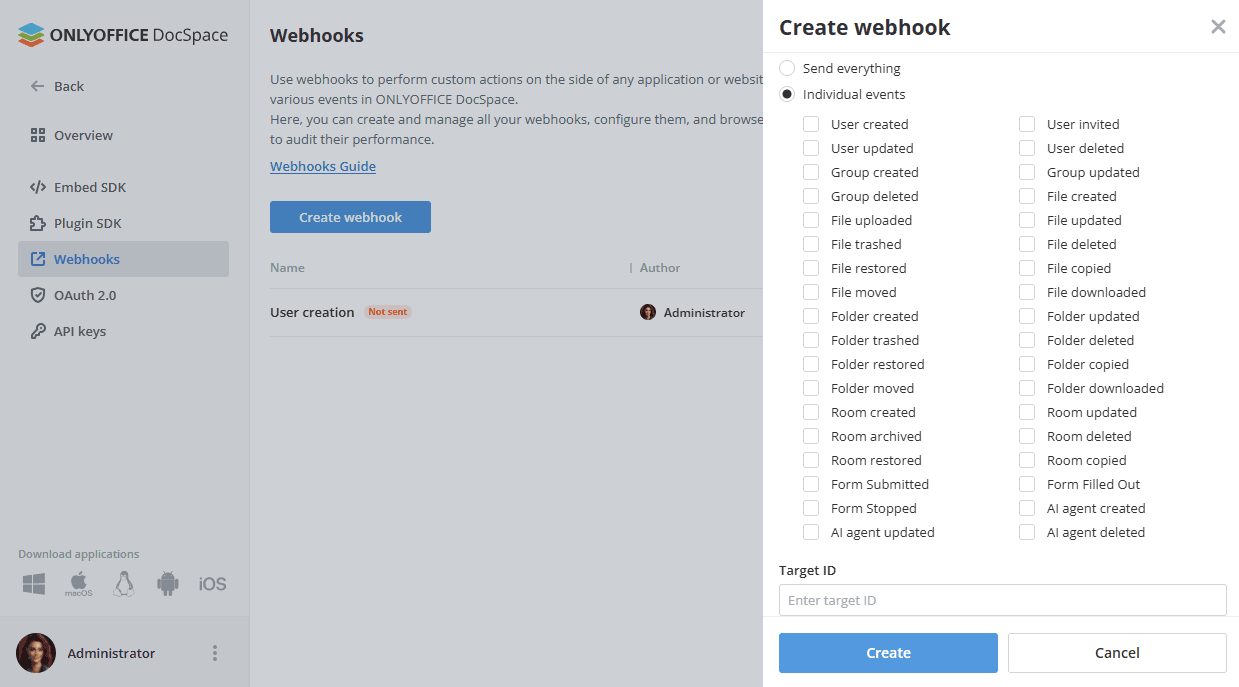
- Trigger - use the Send everything option or check the Individual events radio button and choose the certain triggers only, i.e. events on changes to portal entities such as Users, Groups, Documents, Folders and Rooms. For example, user created, invited, updated, deleted, etc.
- Target ID - an identifier of either a user, a group, a file, or a folder which allows you to track changes of one object.
- The payload URL must respond with status 200 to an http request with the HEAD method.
- Click the Create button.
Depending on the settings, the created webhook will be assigned to all DocSpace events or the selected trigger /several triggers only. You will receive automatic notifications on DocSpace events within your external service. Triggers selected during creation for a specific webhook are triggered only if the webhook owner has access rights to the modified DocSpace entity.
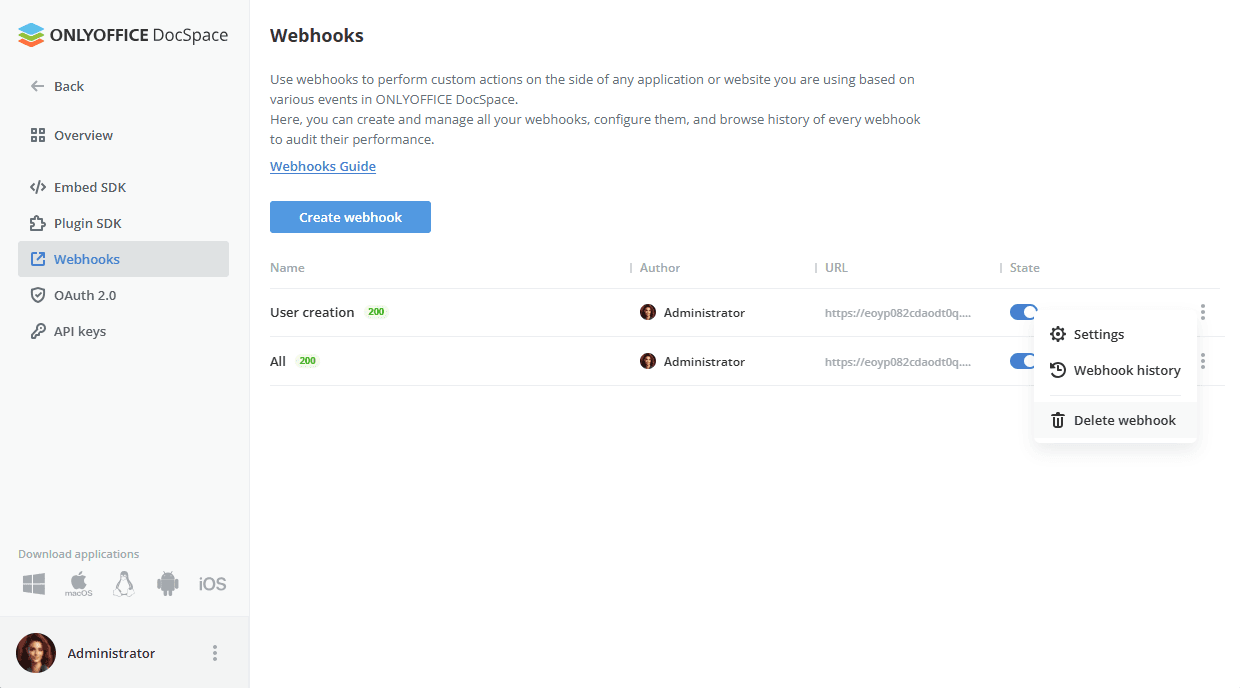
Managing webhooks
You can disable or re-enable the created webhook using the switcher next to it. Use the icon on the right to change the webhook settings specified during its creation, view the webhook history, or delete the webhook.
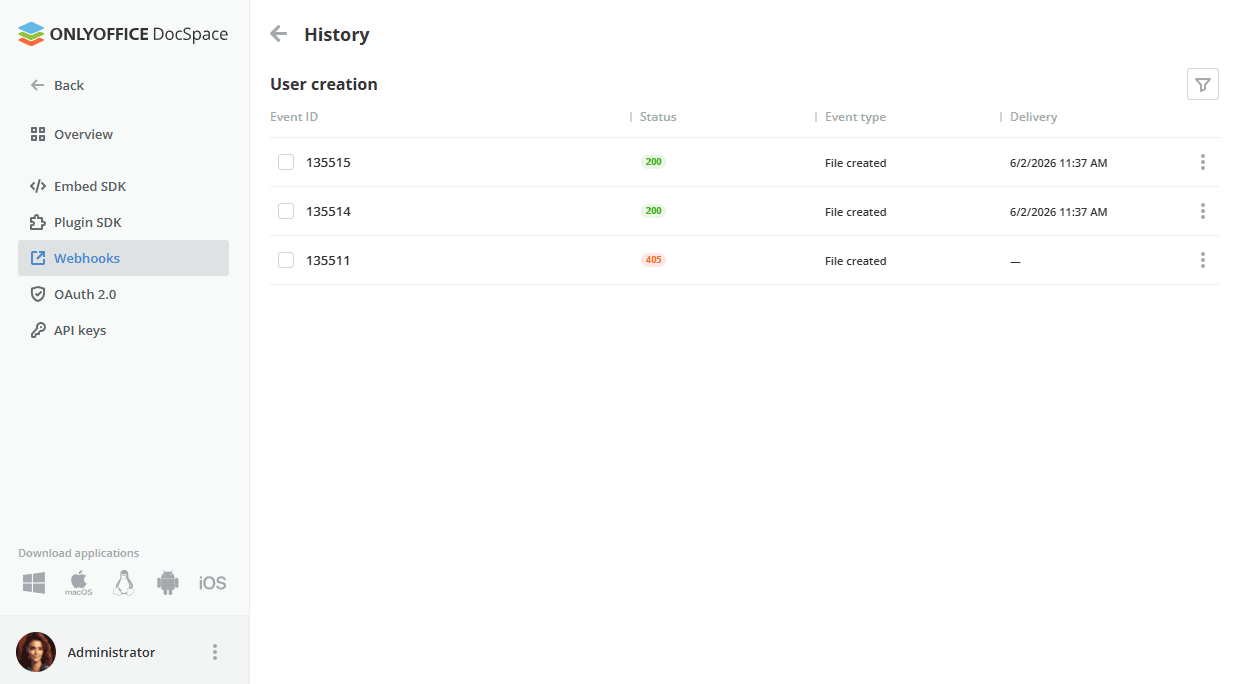
When viewing history, you can filter webhooks by delivery date or status (Not sent, 2XX, 3XX, 4XX, 5XX). Click the  filter button, choose the necessary parameters and click Apply.
You can select one or more webhooks in the list and use the  Retry option which appears on the top to redeliver the selected webhooks. Or click the icon next to the certain webhook and select the Retry option in the context menu.
Click the icon next to the certain webhook and select the  Webhook details option in the context menu.
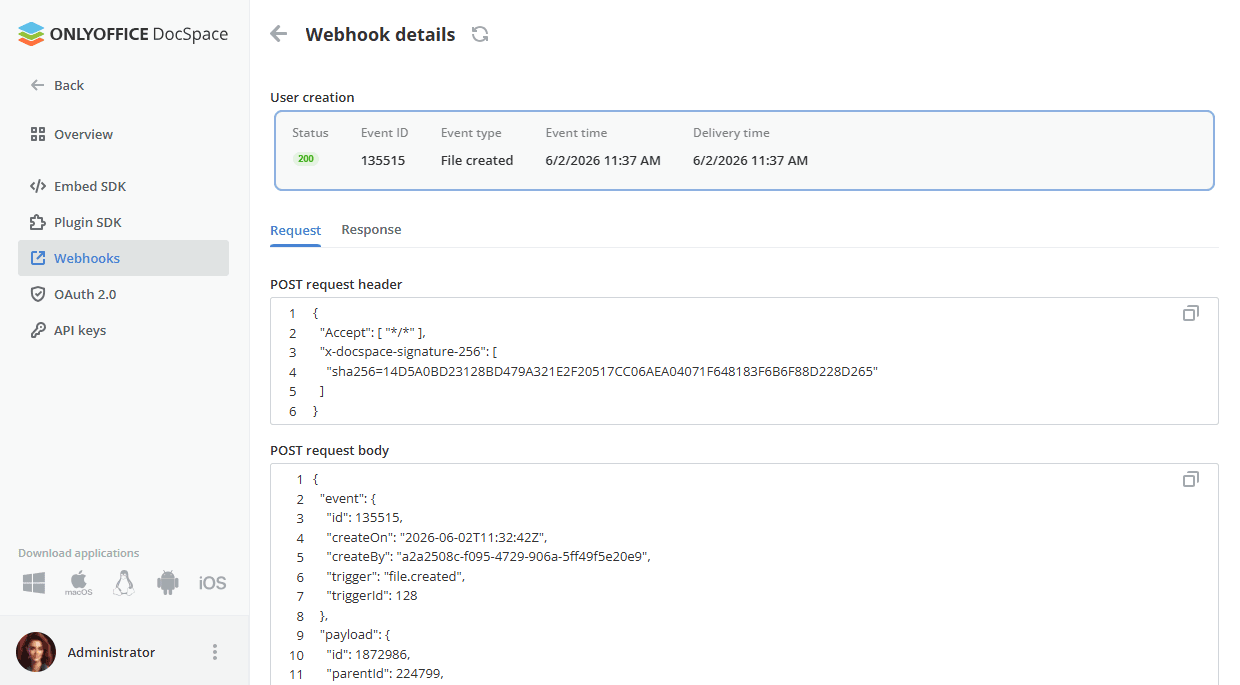
The following details are available:
- Status – a response status.
- Event ID – an ID of the event.
- Trigger – the trigger that caused the webhook to be activated.
- Event time – a date when the event occurred.
- Delivery time – a date when the response was received from the endpoint
In the Request/Response sections, you can also view the POST request header, POST request body, POST response header, and POST response body. Use the  icon to copy the request or response header/body to the clipboard.
Use the  icon next to the Webhook details caption to redeliver the webhook.
Technical details
The following two services are used for work:
-
ASC.Web.Studio provides methods for sending webhooks, launches WorkerService.
WorkerService – subscribes for receiving messages from a broker (for example, RabbitMQ is used by default), which stores information about new webhooks waiting to be sent. Messages received from the broker are placed in a queue, after that the queue is constantly queried and asynchronously contacts ASC.Webhoks.Service to send webhooks.
- ASC.Webhooks.Core provides methods for publishing webhooks to the database and the message broker, as well as methods for working with the database.
For more details on DocSpace API, please refer to api.onlyoffice.com.