Moodle
About the ONLYOFFICE and Moodle integration
ONLYOFFICE offers an official connector to integrate ONLYOFFICE Docs with Moodle and edit office documents attached to the course pages. You can download the ONLYOFFICE connector from the Moodle plugin library or the GitHub page.
To learn more about how the ONLYOFFICE connector for Moodle works, please visit our API documentation.
You can also install the Moodle Assign Submission ONLYOFFICE Integration plugin. This plugin is an extension of the main Moodle plugin and allows users to add a custom submission of the ONLYOFFICE document type in the pdf format.
Connecting ONLYOFFICE Docs to Moodle
Installing the ONLYOFFICE connector for Moodle
The ONLYOFFICE plugin for Moodle is an activity module.
Installing the ONLYOFFICE connector using the GitHub .ZIP archive
- Download the connector from the GitHub page.
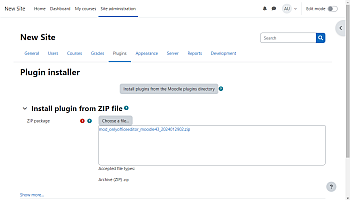
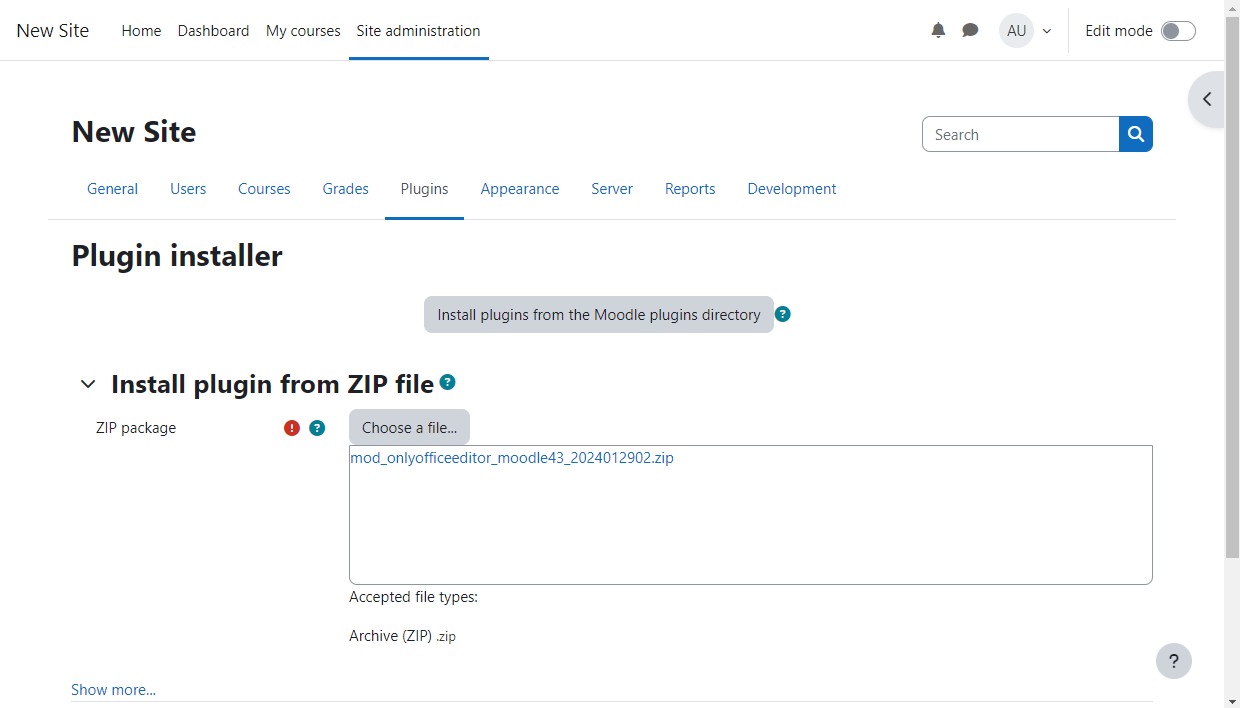
- Log into your Moodle instance as an administrator, go to the Site administration section, switch to the Plugins tab, and click the Install plugins link.
-
Upload the moodle-mod_onlyofficeeditor-x.x.x.zip file via the file picker or
drag-and-drop it to the corresponding field and click the Install plugin from the ZIP
file button.
-
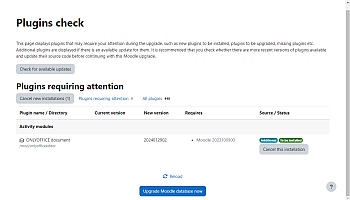
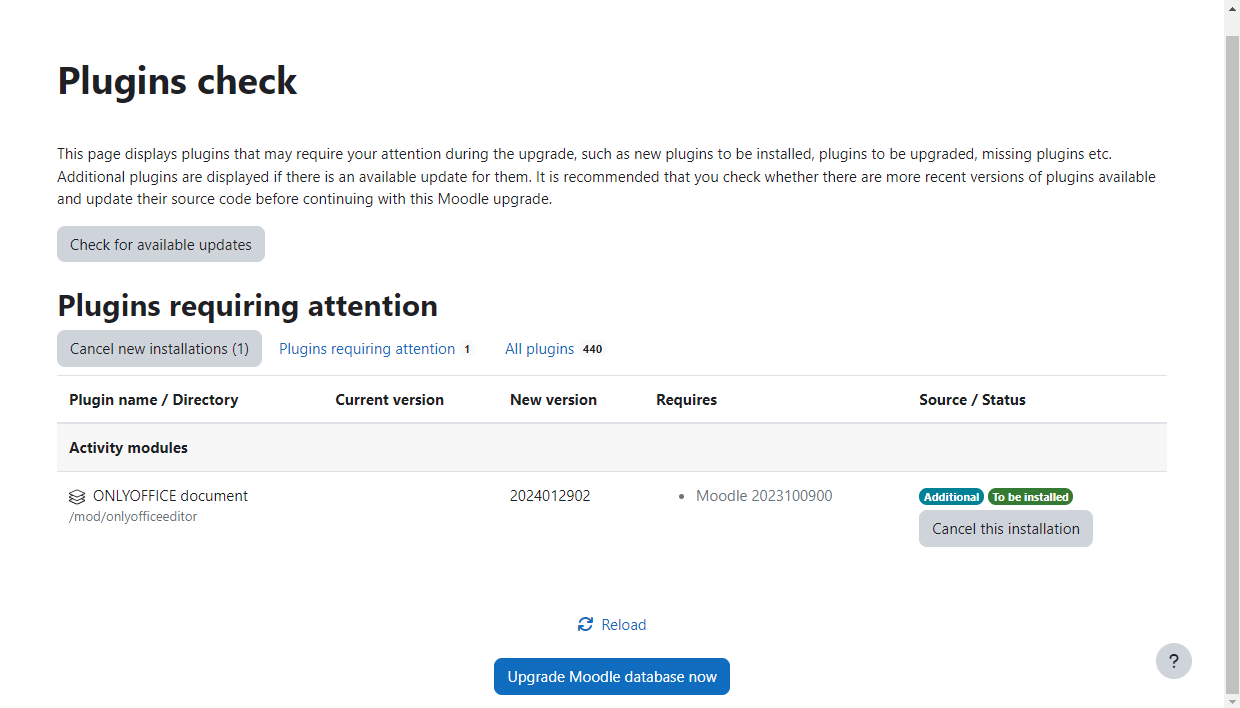
Check the plugin validation report and click Continue.
If your target directory is not writable, you will see a warning message, e.g.
[Error] Write access check [/var/www/html/moodle/mod]. In this case, you can temporarily make it writable by using the following command:sudo chmod -R 777 /var/www/html/moodleAfter that, repeat Step 3.
After installing the plugin, you need to revert permissions so that the directory is no longer writable. Use the following command:
sudo chmod -R 0755 /var/www/html/moodle - Click Continue in the Current release information -> Server checks page.
-
Click Upgrade Moodle database now in the Plugins check page.
- Click Continue in the Upgrading to new version page.
Configuring the ONLYOFFICE connector for Moodle
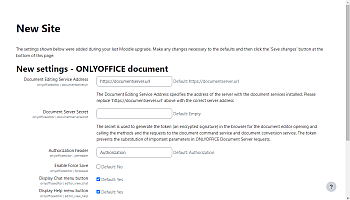
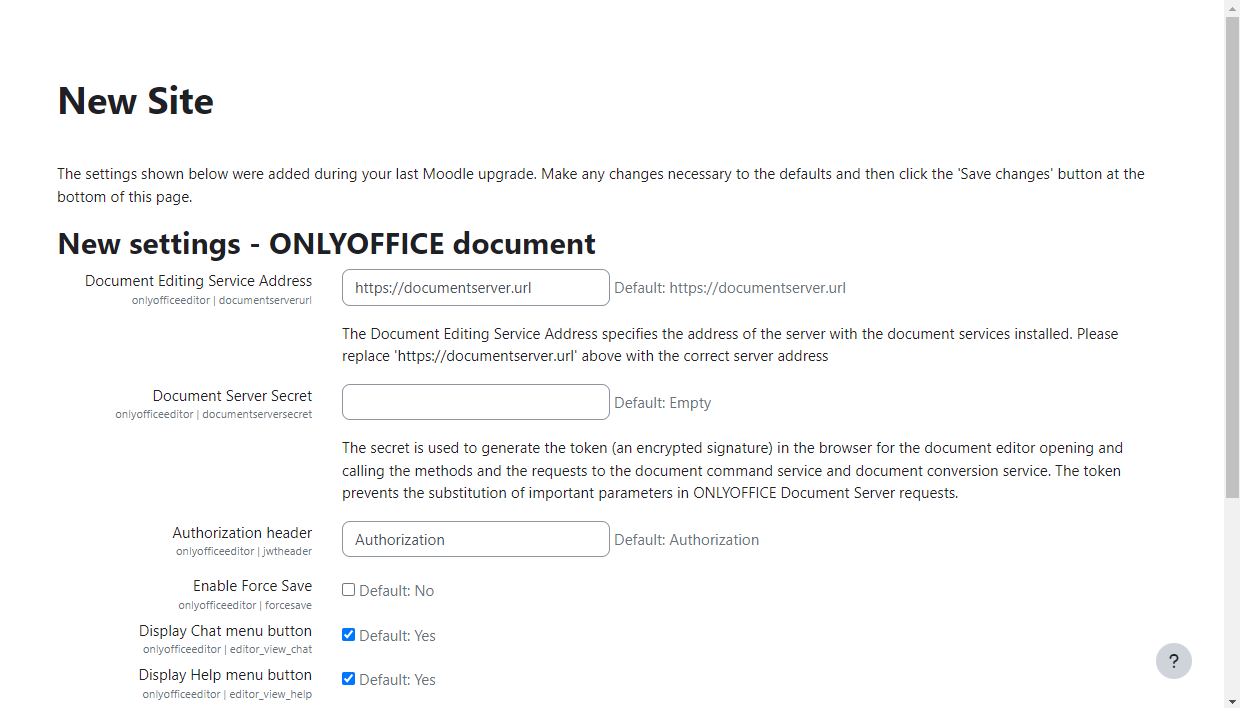
Once the plugin is installed, the plugin settings page will be opened. Alternatively, you can find ONLYOFFICE document on the Plugins overview page and click Settings. On the Settings page, you can configure the following parameters:
-
Enter the address that is used to access Document Editing Service from Moodle into the
Document
Editing Service address field. This field is mandatory.
The address of ONLYOFFICE Docs must be accessible from Moodle, as well as the address of Moodle must be accessible from ONLYOFFICE Docs.
-
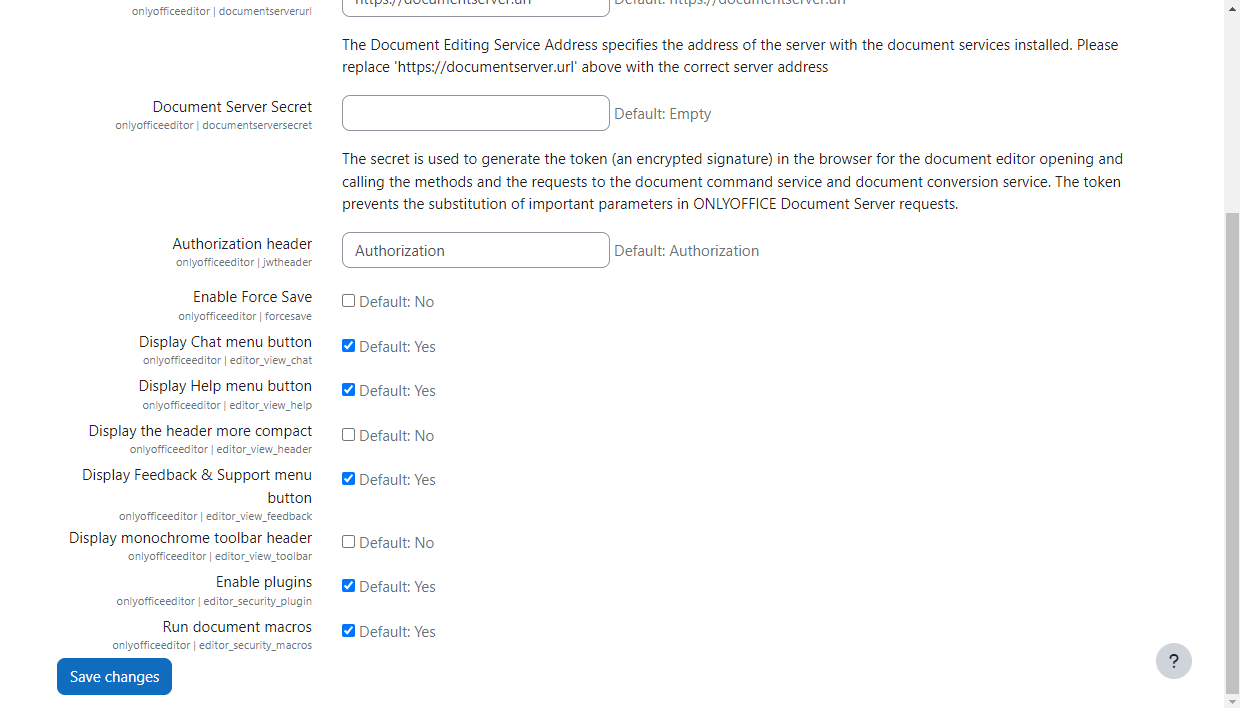
Optionally, specify the secret used to sign the data in the Document Server Secret field.
The
secret key is used to validate the JSON web token upon the request to Document Server. To learn
more, check the API
documentation for configuring JWT on the ONLYOFFICE Docs side.
Starting from ONLYOFFICE Docs v7.2, JWT is enabled by default and the secret key is generated automatically. You need to enable it on the Moodle side as well: find your secret key in the ONLYOFFICE Docs configuration file, then specify the same secret key in the connector settings. For more details, see the Enabling JWT for the ONLYOFFICE and Moodle integration section of this article.
- Enable Force Save - when this option is disabled, your changes are saved to the editors’
cache automatically. When this option is enabled, all changes to a document are sent to the
storage
directly when you click the Save button.
-
Optionally, specify the editor customization settings by checking the necessary boxes:
- Display Chat menu button - this option is used to display or hide the Chat menu button.
- Display Help menu button - this option is used to display or hide the Help menu button.
- Display the header more compact - this option is used to display the additional action buttons either in the upper part of the editor window header next to the logo or in the toolbar.
- Display Feedback Support menu button - this option is used to display or hide the Feedback Support menu button.
- Display monochrome toolbar header - this option is used to display the editor toolbar in monochrome.
- Enable plugins - this option is used to enable/disable the Plugins tab in the editors interface.
- Run document macros - this option is used to enable/disable autorun for all macros within the document. You can always run macros manually.
When ready, click Save changes.

Start using ONLYOFFICE Docs within Moodle
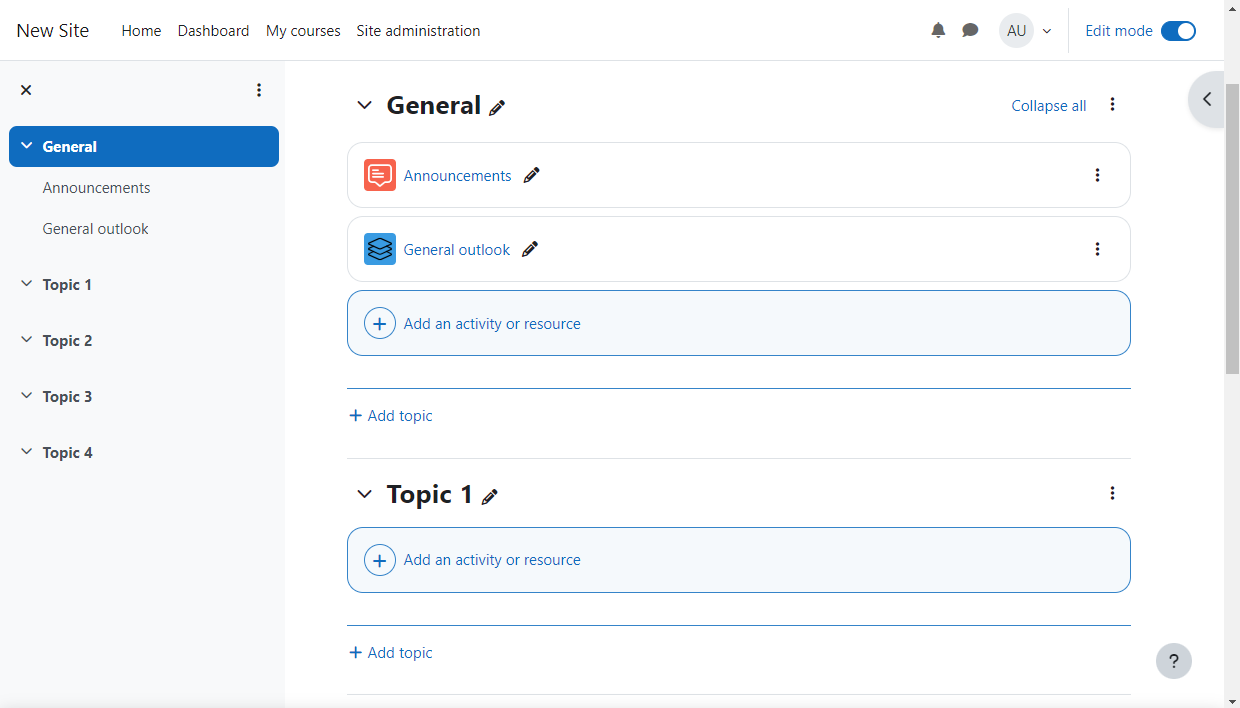
Adding ONLYOFFICE activities
To create a new ONLYOFFICE activity:
- Open the My Courses section and switch to the necessary course.
- Activate the Edit Mode using the switcher at the top right corner.
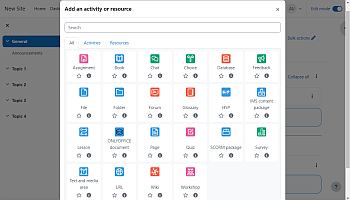
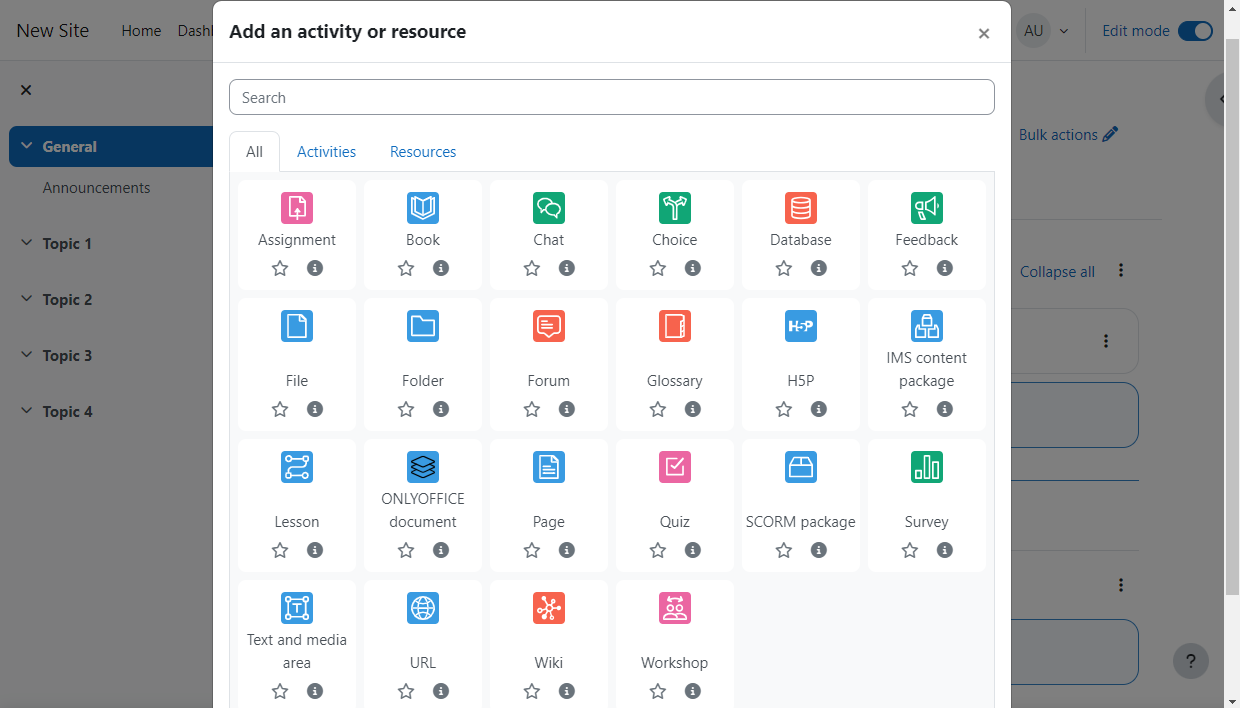
- Click Add an activity or resource.
-
Select the ONLYOFFICE document activity in the pop-up window.
-
Type in the activity name, create, upload or drag-and-drop the necessary document from your PC
and
click the Save and display button.
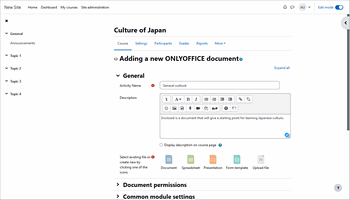
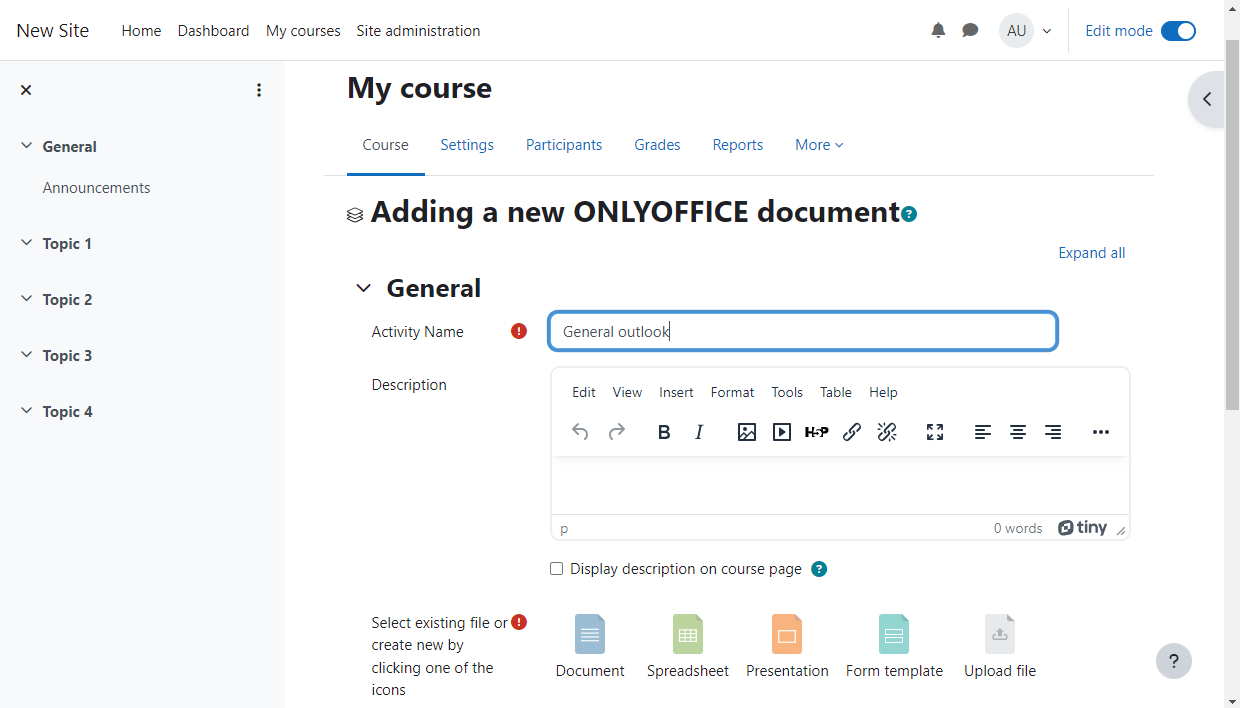
The activity can be an empty
.docx,.xlsx,.pptxor.pdffile.
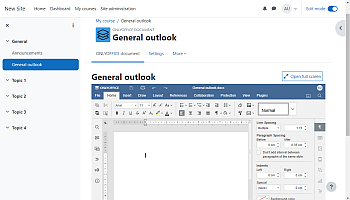
The document will be opened in the ONLYOFFICE Docs editor.
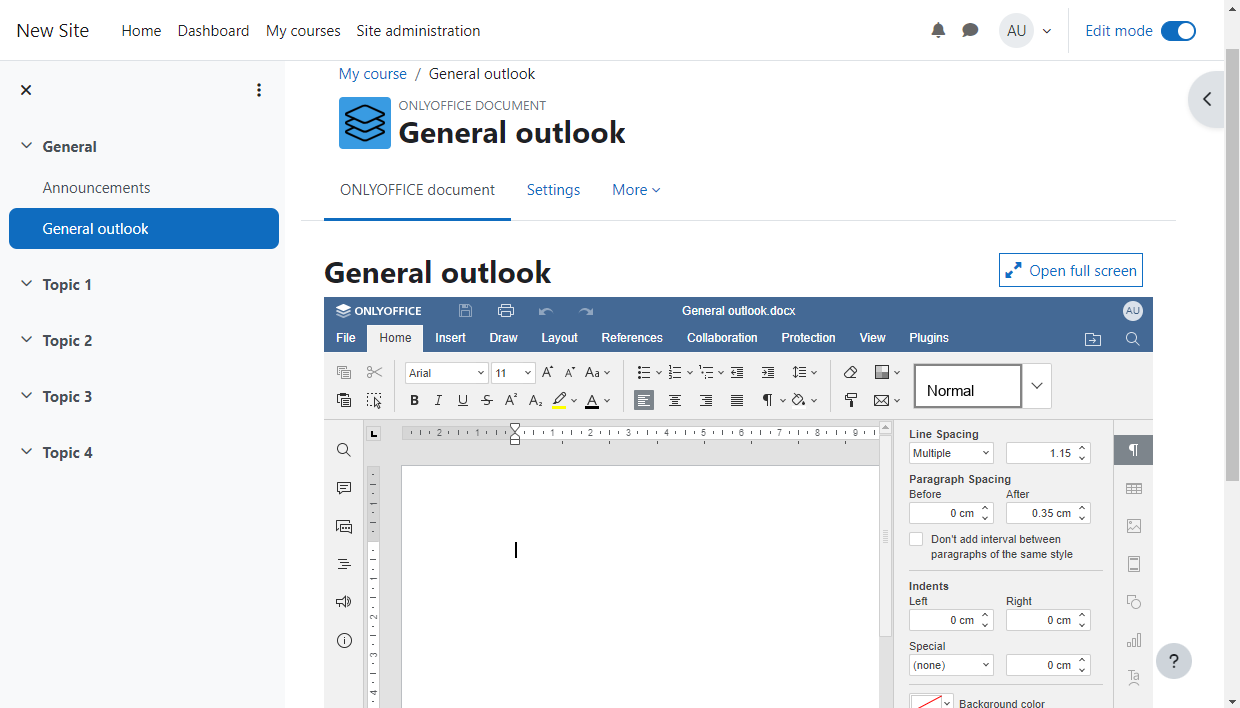
Viewing and editing files
ONLYOFFICE activities will be marked with the ![]() icon on your course pages. To
open
a document in the ONLYOFFICE Docs editor, just click its title.
icon on your course pages. To
open
a document in the ONLYOFFICE Docs editor, just click its title.

To open the editor in fullscreen mode, click the Open full screen button at the top right corner above the editor window.
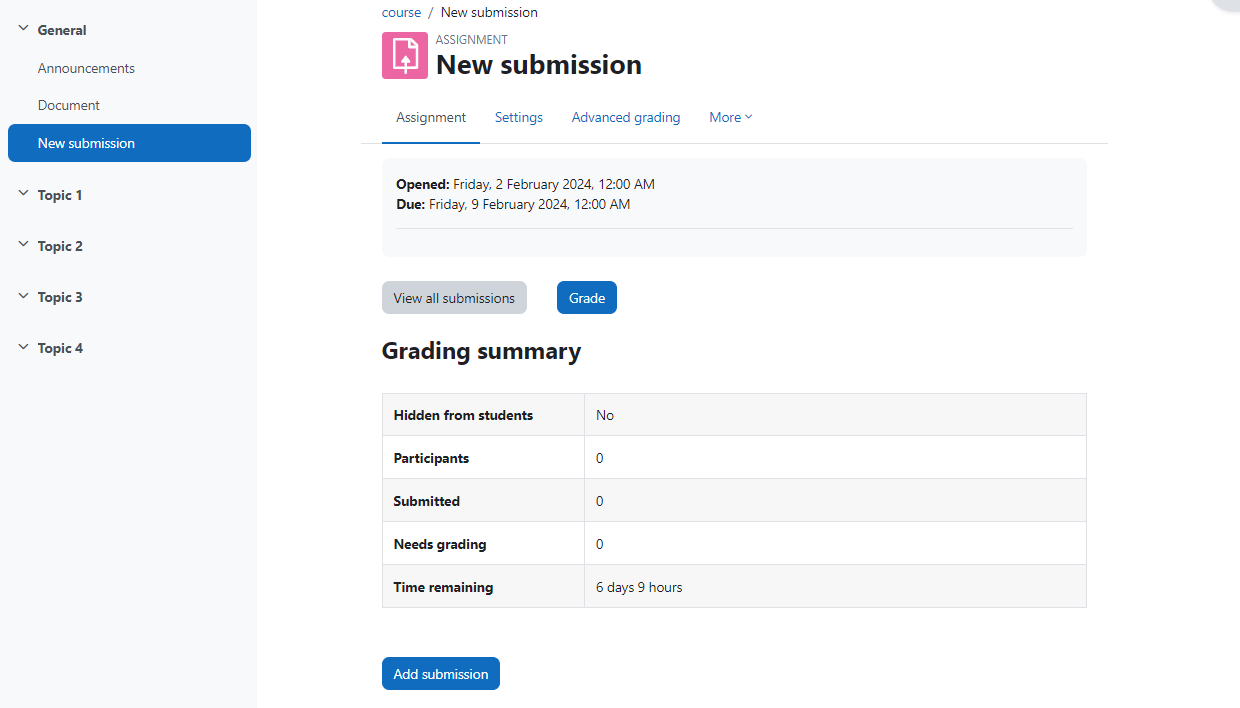
Adding submissions
To add a custom submission of the ONLYOFFICE document type in the .pdf format,
- Open the My Courses section and switch to the necessary course.
- Activate the Edit Mode using the switcher at the top right corner.
- Click Add an activity or resource.
- Select the Assignment activity in the pop-up window.
- In the Submission types tab, select the ONLYOFFICE document type. Once done, the
form
creator (
.pdf) will become available on the Assignment creation/editing page here you can prepare a form which will become available for students to fill out after saving. - Click Save and return to course or Save and display. The created assignment will appear in the course section.


Filling out forms
To fill out the form,
-
Select the created assignment and click Add submission.
- The form in the
.pdfformat will open (for Docs v8.0 or later. For older versions, the.oformformat is used). Each student gets their own copy of the pdf form and works on their own assignment. - Fill out the form and click Save changes.
A teacher can view all assignments by clicking the View all submissions button.
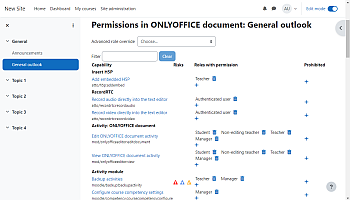
Managing permissions
Admins/Teachers can choose whether or not documents can be downloaded or printed from inside the ONLYOFFICE editor. This can be done in the Document permissions section.
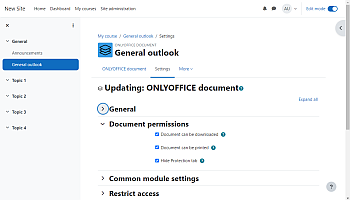
To change the document permission to read-only:
- Open the needed ONLYOFFICE document.
- Go to More > Permissions.
- Find the Edit ONLYOFFICE document activity/View ONLYOFFICE document activity entry.
- Add the required roles in the Prohibited section or remove the ones from the Roles with permission section.
To learn how to mark the document as favorite right in the editor, please follow the instructions from this article.