Workspace Enterprise
Introduction
After you have installed ONLYOFFICE Desktop Editors on your computer, you can easily connect the application to your ONLYOFFICE Workspace Enterprise server so that you can use all the product capabilities:
- collaborative features, such as collaborative editing, reviewing, commenting, and communicating via the built-in chat,
- online features, such as Mail Merge in the Document Editor,
- Private Room (for the server version only).
Step 1. Install ONLYOFFICE Workspace Enterprise
If you have not yet installed ONLYOFFICE Workspace Enterprise, the easiest way to start an instance of ONLYOFFICE Workspace Enterprise is to use Docker. Alternatively, you can install ONLYOFFICE Workspace Enterprise from RPM/DEB packages. If you are using Windows, please refer to the corresponding installation instructions.
The instructions on how to configure ONLYOFFICE Workspace Enterprise are available here.
Step 2. Connect to your server
To connect Desktop Editors to your server, perform the following actions:
- Switch to the Connect to cloud section on the left side panel of the main program window.
- Click the ONLYOFFICE button. Alternatively, you can use the Connect now link at the bottom.

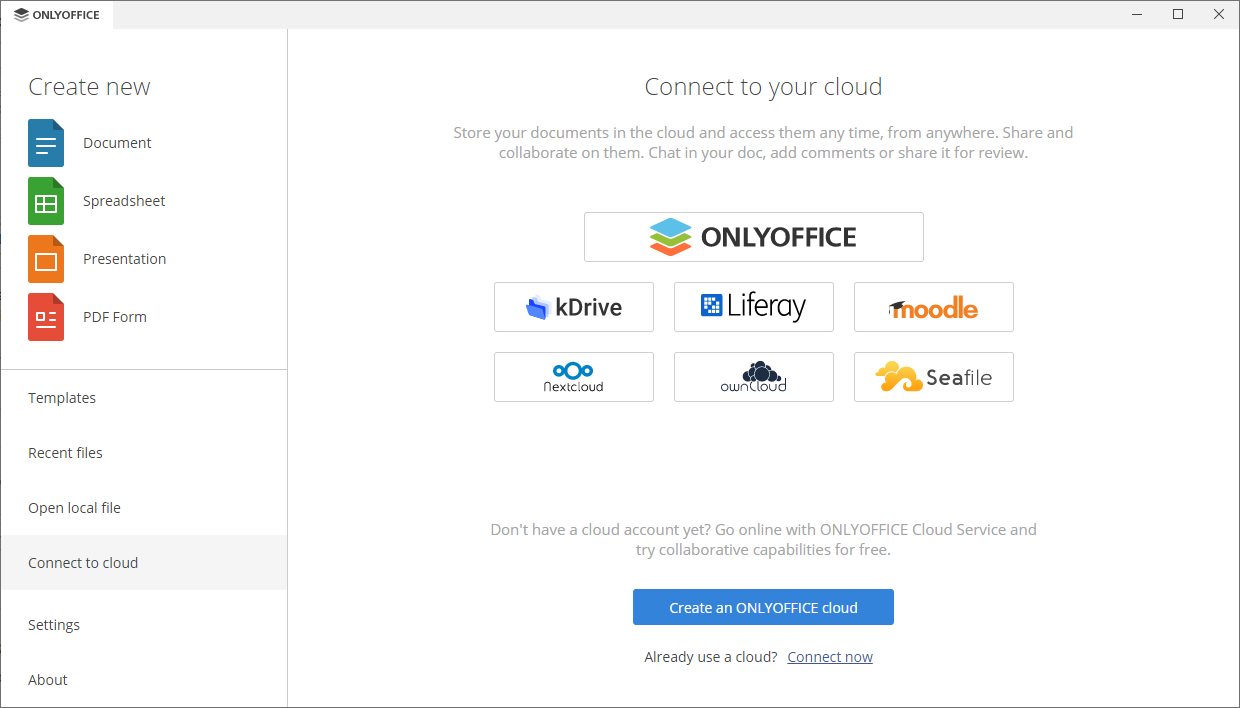
- The Connect to cloud office window opens with the ONLYOFFICE option selected.
- in the Cloud office URL field, enter your portal address in the form yourdomain.com or https://yourdomain.com. It's also possible to specify the IP address of the machine where ONLYOFFICE Workspace Enterprise is installed. When ready, click the Connect now button.


The ONLYOFFICE server sign in page will open in a new tab of the Desktop Editors interface.
- Specify your email and the password you use to access your account,
- Click the Sign In button.
If you want to use SSO when connecting ONLYOFFICE Desktop Editors to your ONLYOFFICE Workspace Enterprise, disable Private Rooms in the Control Panel.

- in the Cloud office URL field, enter your portal address in the form yourdomain.com or https://yourdomain.com. It's also possible to specify the IP address of the machine where ONLYOFFICE Workspace Enterprise is installed. When ready, click the Connect now button.
Your portal Documents module will open.
Step 3. Manage documents on your server
Once you connect Desktop Editors to your server, you can switch between the available sections (My documents, Shared with me, Favorites, Recent, Private Room (for the paid server version only), Common, In projects, Trash) manage your files stored on the portal, create or upload new ones, view, share, and edit them together with other portal users or external users.


To be able to edit a file collaboratively, share it with other portal users or provide access to the file via an external link. If you wish to edit files with external users outside of your local network, the portal should be accessible over the Internet.
- click the Share button to the right of the necessary document - the Sharing Settings window opens,
- click the Add Users or Add Groups button to open the user/group list, then check the users/groups you want to share the document with and click Save,
- change the permission details for each particular user/group by selecting one of the available options from the drop-down list next to the person/group name:
- Full Access - to allow a user to edit the document,
- Review (this option is available for the .docx files only) - to allow a user to suggest changes that can be accepted or rejected,
- Form Filling (this option is available for the .oform files only) - to allow a user to fill forms only,
- Custom Filter (this option is available for the .xlsx files only) - to allow a user to apply changes to filters only locally,
- Comment - to allow a user to work with comments only,
- Read Only - to allow a user to view the document only,
- Deny Access - to block previously granted access.
When ready, click Save at the bottom of the Sharing Settings window.
- to provide access to the file via an external link, turn on the External link access switcher, click the Read only link, and select the necessary permissions described above. When ready, copy the link and close the Sharing Settings window.
For more details on how to share files, refer to these instructions.


Step 4. Manage your connected accounts
Click the logo in the upper left corner of the Desktop Editors interface to return to the main program window, then switch to the Connect to cloud section to view the Connected clouds list. Right-click on a connected portal and use one of the available contextual menu options:
- Open - to switch to the corresponding portal tab if you are already logged in to this account, or to open the Connect to cloud office window if you are not currently logged in (in this case, you will need to enter your credentials),
- Logout - to exit from your account,
You can also click the
 icon to the right of the account to exit from it.
- Remove from list - to disconnect the selected account and remove it from the list.
If you have several accounts or portals, use the Add cloud button to connect one more account.

