Working with Public rooms
Public rooms are intended to simplify file sharing with external users, i.e., those who are not a member of your DocSpace.
You can provide people with external links to view documents without registration. The room will be available to anyone with the link. By default, external users will have View Only permission for all the files in a Public room, but you can create additional links with different access rights.
You can also embed this room into any web interface so that people can access files stored in the room directly from your website or service.
Key features
- Creating external links for accessing multiple documents without registration
- Adding several links with different settings
- Protecting links with a password, setting restrictions on copying, downloading, and printing
- Time limit for additional links
- Embedding rooms into web pages to demonstrate a set of documents to all visitors
- Using third-party services (Box, Dropbox, etc.) as data storage
Possible use cases
- Demonstrating ready documentation to partners, customers, or other third parties
- Publishing a set of documents on a website or blog
- Sharing content both from DocSpace and a third-party service connected as storage
For example, you need to share demo materials or project documentation with your partners. Let's see how this can be done with Public rooms.
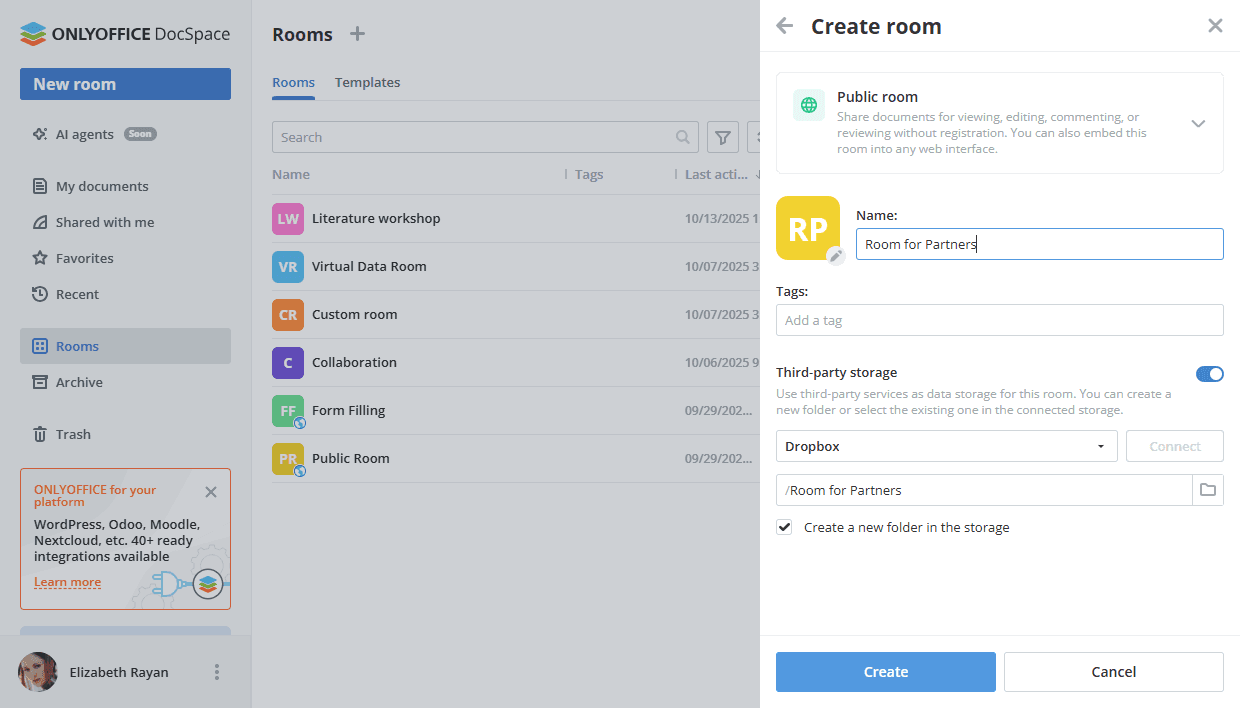
Step 1. Create a Public room
Create a new Public room in a few easy steps:
- Go to the Rooms section and click the New room button or the
 Plus icon.
 - Select the Public room type.
- Enter the room Name.
-
Optionally, you can add tags or an icon and connect a third-party storage. For more details on connecting third-party storages, read this instruction.
If you want to connect a third-party service, this can be done at the room creation step only, not when editing existing rooms.
- Click Create.
Step 2. Add documents to the room
Use quick action links in the newly created room or the Actions menu to add documents:
- Create new documents, spreadsheets, presentations, and PDF forms online.
- Add existing files and folders from your DocSpace sections: My documents or Rooms.
- Upload existing files and folders from your device.
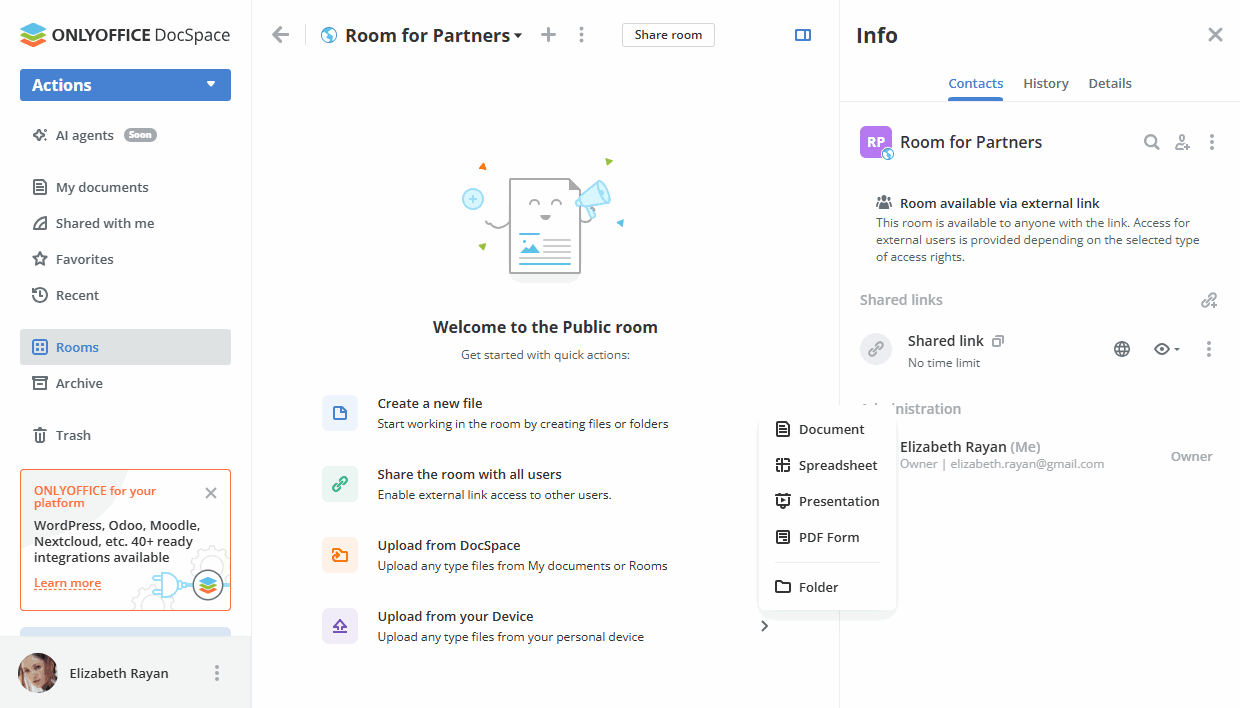
All available options for working with documents in rooms are listed here.
Step 3. Add authorized users to the room
If necessary, you can add guests or users registered in your DocSpace to the room for working with documents and managing its contents.
In the Public room, the available permission levels are Room manager (Paid) and Content creator. Both Room managers and Content creators can create and upload new files and folders and manage them, but Room managers can also manage users and access settings. To add a Room manager, you should select a Room or DocSpace admin from existing DocSpace contacts.
To invite guests and users:
- Go to the room Info -> Contacts screen and use the
 Invite contacts icon.
 - Turn on the switcher to create a universal link for self-authorization in the room. The link will be copied to the clipboard. In this way, you can invite guests only.
- Alternatively, use the Add manually section below to add existing DocSpace contacts or invite new guests personally via email. Type in an email and press Enter or choose an existing contact from the list. You can add several emails and then click Send invitation.
Guests and users will be added to the room as Content creators who can create and edit documents. New guests will be added to your Guests list.
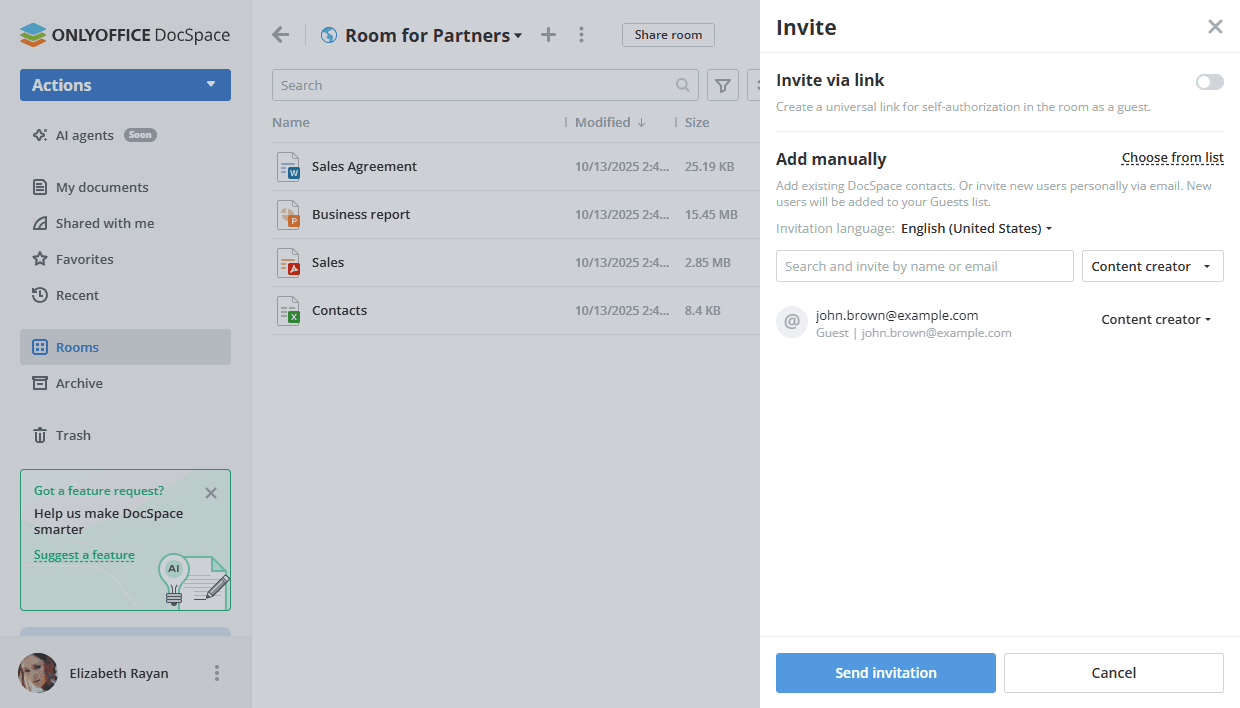
All available options for inviting users to rooms are listed here.
Step 4. Adjust and share the external link
Since Public rooms are designed for working with external users, your newly created Public room already has an external link activated, so you can just copy it.
Click the Share room button next to the room name or use the  icon next to the Shared link option on the Info -> Contacts screen. Send the copied link to third-party users. They will have View Only permission for all files in the room without registration.
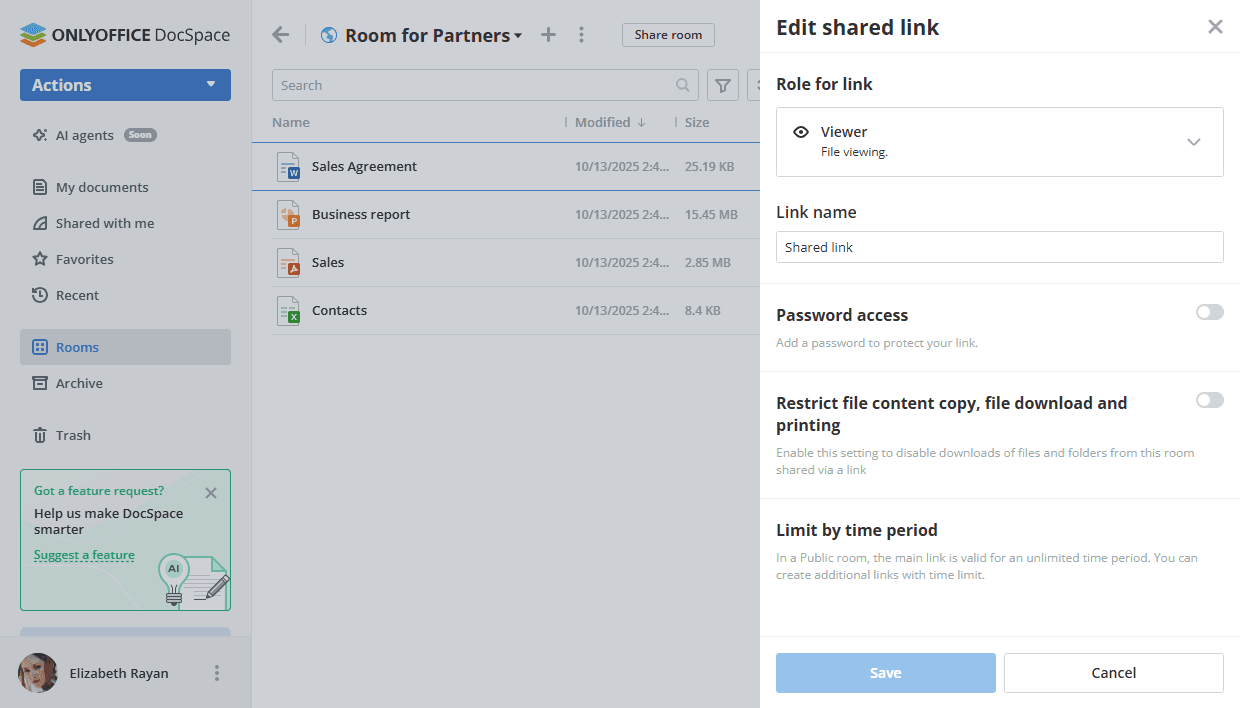
You can also edit the external link:
- On the Info -> Contacts screen, click the
 icon next to the Shared link caption.
 - Choose the Link settings option.
- Choose a different permission level instead of the default one: Viewer, Editor, Reviewer, or Commentator.
- Change the link name to distinguish various links.
- Set a password to protect the link using the Password access switcher.
- Enable the Restrict file content copy, file download and printing switcher to disable copying content of the files to the clipboard, downloading files and folders, and printing files.
- Click the Save button.
If necessary, you can revoke the shared link using the option from the menu on the Info -> Contacts screen. The current link will be deactivated, and a new shared link will be created.
If you need more than one link for your Public room, use the  Add new link icon in the Shared links section. It's also possible to set time limit for additional links, while the main link is valid for an unlimited time period.
All available options for external links are listed here.
If you want to embed a Public room into your website, read this instruction.