Paying for your portal
Introduction
You can use one of the following pricing plans available for ONLYOFFICE Cloud Service:
- free ONLYOFFICE Startup pricing plan
If the number of your portal users does not exceed 5 persons, the amount of disk space available for storing data on your portal does not exceed 2 GB, and you don't want to use advanced features, such as LDAP, SSO, pro integrations, you may use ONLYOFFICE Cloud Service free of charge.
- paid ONLYOFFICE Business pricing plan
If you want to add more than 5 portal users, you need more disk space, and you want to use advanced features, such as LDAP and SSO, pro intergations with DocuSign and Twilio, automatic backup and restore, full-text search, and other features, you need to buy the ONLYOFFICE Business subscription. Your pricing plan will depend on the number of portal users you added.
Did you use a free portal version for testing purposes? Are you satisfied with the results? It´s time to buy a subscription and add all your team to the portal. To do that, you don't need to go to our official website or any other resource. Just switch to the Payments page on your portal and follow these easy steps described below.
This instruction will help you to switch from the free ONLYOFFICE Startup pricing plan to the paid ONLYOFFICE Business pricing plan or prolong your current ONLYOFFICE Business subscription with the same parameters (number of users and billing cycle). If you want to change some parameters of your current subscription, please refer to this instruction.
Step 1. Enter your portal and go to the Payments section
- First of all, enter the portal using your email address and password. If you have already logged in to the portal and have been using it for a while, let's move on.
-
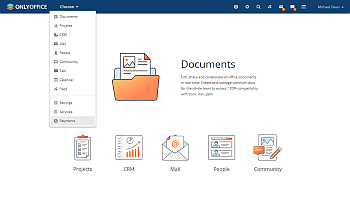
Open the Payments section in one of the following ways:
- click the
 icon in the upper right corner of the page,
 - open the Choose drop-down list next to the logo of the portal and choose the Payments option,
- choose the Payments section on the left-side panel in the portal settings.
- click the

Step 2. Select an appropriate pricing plan
On the Payments page, you can prolong the current plan or change it.
The currently used pricing plan, the current number of users, the disk space used, and the date of expiration of the subscription are displayed on the top of the page.
Choose the appropriate options using the menu on the right:
- Billing cycle - select one of the available options: 1 month, 1 year, or 3 years.
- Number of users - type in the necessary number of users and press Enter, or use arrows to increase/decrease the current number.
Verify your tariff details below: price per user/month, number of allowed active users, billing cycle, and total amount.
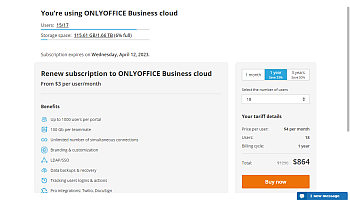
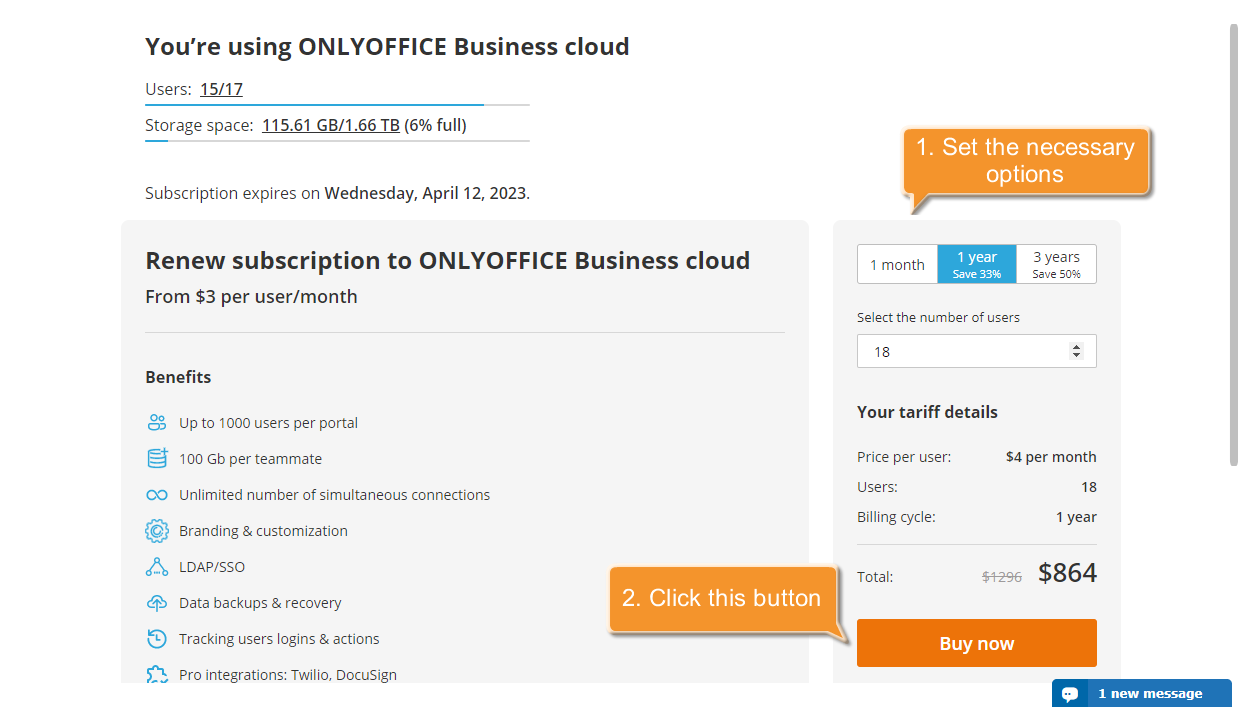
Сlick the Buy now button (or the Prolong button for the current pricing plan with the same characteristics).
- If either the storage space or the current number of users exceeds the limitations of the selected pricing plan. You have to reduce the required parameter or select another pricing plan.
- If the current subscription ends in more than one month. The pricing plan is not available until the end of the paid period.
- If you want to buy the plan with a smaller number of users. The pricing plan is not available until the end of the paid period.
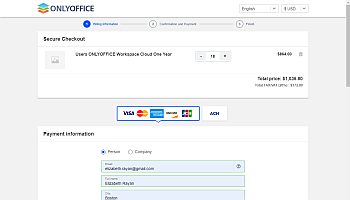
Step 3. Fill out the forms in the 'Billing Information' section
You will be redirected to the 2Checkout payment page, the Billing Information section. Here you need to fill out all the fields.
For your convenience, select a currency in which you want the price to be displayed.
Complete the form under the Payment Information title:
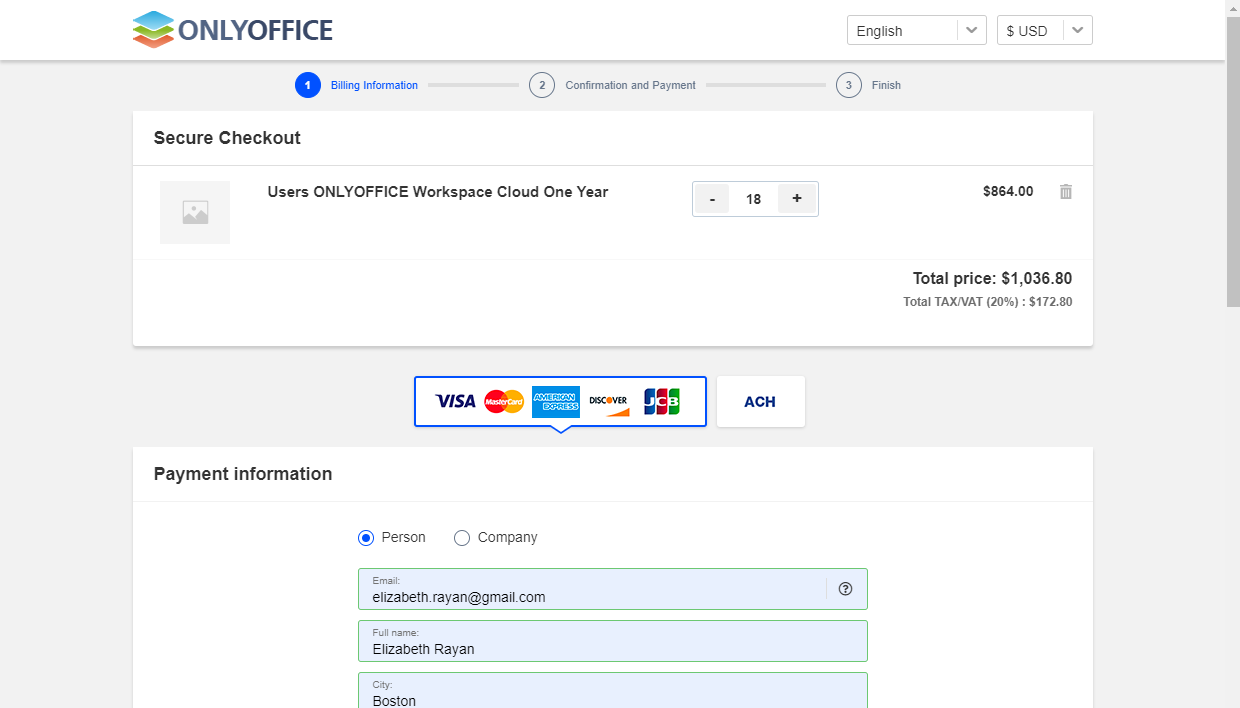
- select the Company radio button if you represent a company (if not, leave the Person option selected).
- enter your active email address.
- type in your real first and last name.
- choose a country from the drop-down list.
- type in your city and zip code.
- choose your state or province from the drop-down list.
- for companies, it's also necessary to specify the address, company name, phone number, and fax number.
- Specify the information about the card that you are going to use to pay for the service:
- type in the card number.
- in the drop-down lists, choose a card expiration date (month and year).
- enter the three-digit security code (CVV2/CVC2 code).
- enter your name exactly as it appears on the card.
Click the Continue button.
Step 4. Verify the data in the 'Confirmation and Payment' section and place the order
In the Confirmation and Payment section, verify the Billing address and Payment information data:
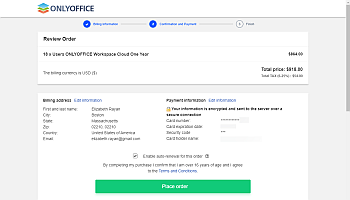
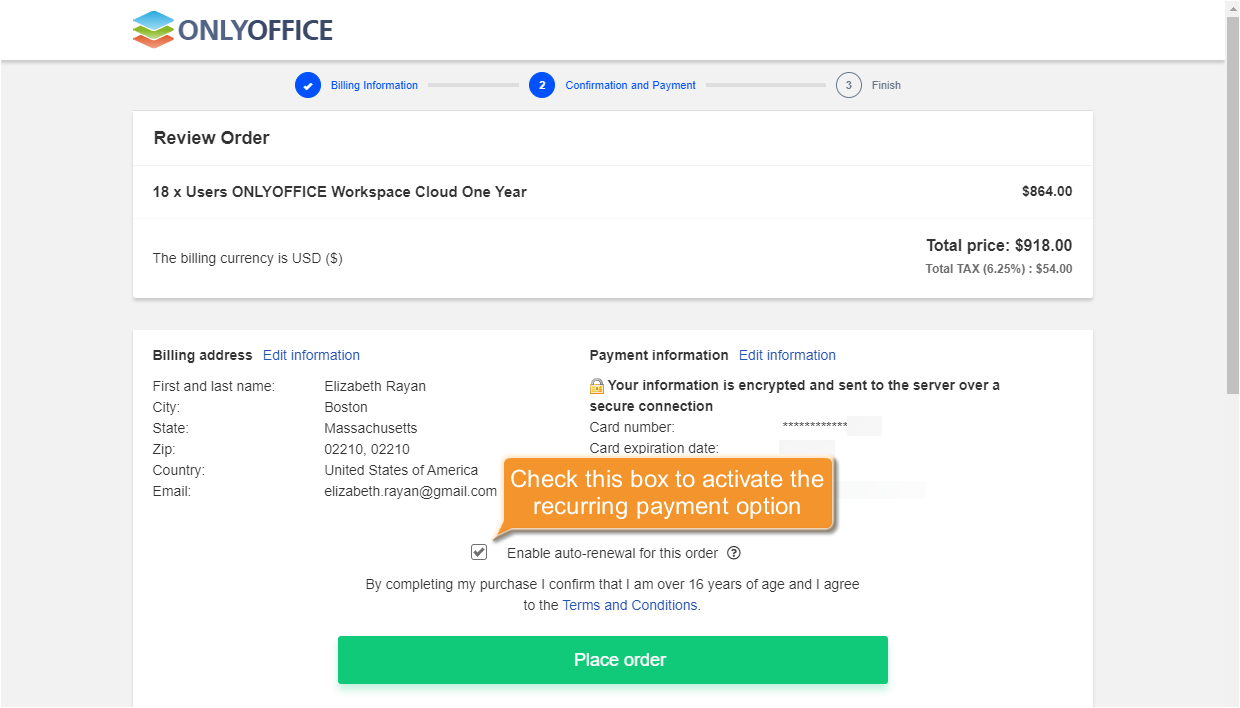
Check the Enable auto-renewal for this order box if you want to repeat the payment automatically every payment period.
You can stop the recurring payments by logging into the 2Checkout myAccount, go to the My Products area, and click the Stop automatic license renewal beneath the product that has this option enabled.Click the Place order button.
That's all. You can continue to work on your portal. If the number of active users on your portal increases or decreases, you can easily change the pricing plan following the instructions here.
To receive an invoice, download the necessary invoice in the Order History section of your 2Checkout account.