Using AI agents
In ONLYOFFICE DocSpace, you can streamline your work with documents by using AI tools. For example, you can use AI agents for analyzing content of documents attached to an AI chat, searching for the necessary information in files and on the Web, generating texts and much more.
Once an AI agent is created, it’s possible to perform different tasks by interacting with AI in the chat, perform web search, use MCP Server tools for working in DocSpace, upload existing files to the knowledge base, save the AI responses in separate files and share them with other users.
Interacting with AI in the chat
When you open an AI agent, the AI Chat tab opens.
Just enter your prompt in the 'Chat with AI' field and click the  arrow button.

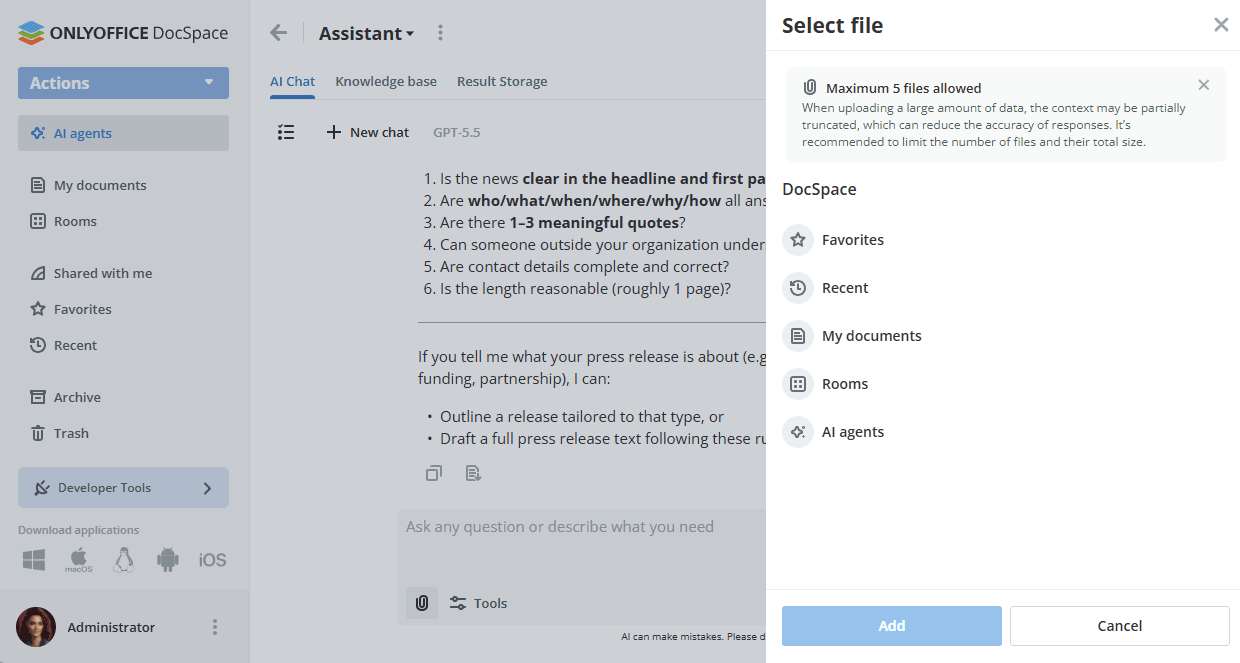
You can attach up to 5 documents to your prompt. Once a file is entered into the chat, its content will be passed to the model. Based on this, the model will provide a response.
Click the  icon, select the necessary documents stored in your DocSpace, then click the Add button.
You can also attach images to your chat messages to provide visual context for the AI. Use the same icon to select and upload an image from your device.
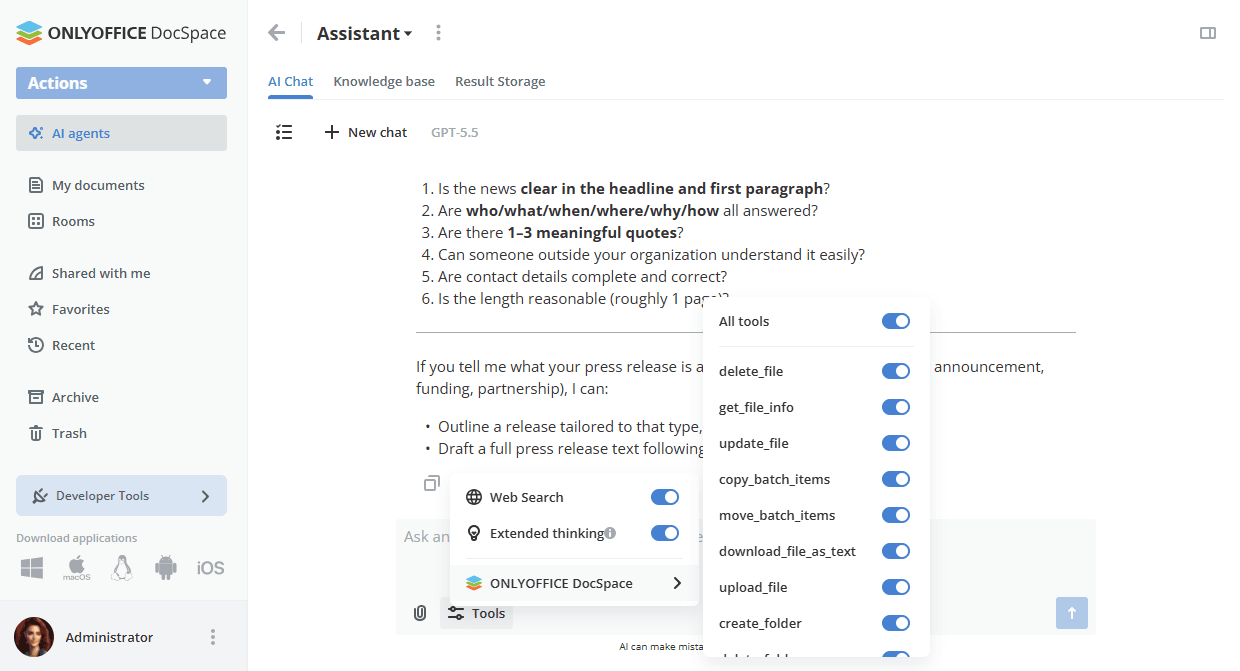
The  Tools button allows you to disable or re-enable web search and MCP server tools.
You can copy the received AI response to the clipboard by using the  icon below or save it to a file by using the
  icon.
icon.
When saving the response to a file, you can select the Result Storage or any room/folder in your DocSpace.
It's also possible to enter a prompt, for example, 'Save as docx'. In this case, the result will be stored in the Result Storage.
You can also generate DOCX files, PDF forms, and PPTX presentations directly in the AI chat. The generated file is displayed inline within the message and is saved automatically to the Result Storage folder. You can open the generated file for editing in a new tab.
For complex requests, the AI may display a Thinking block showing its reasoning process before presenting the final answer. This block appears automatically depending on the complexity of the request and is not available for all queries.
Click the  button in the upper left corner to display all chats within this agent. The chats are related to the current user and cannot be shared.
You can click the  icon next to the chat name to Rename, Save to file, or Delete the chat.
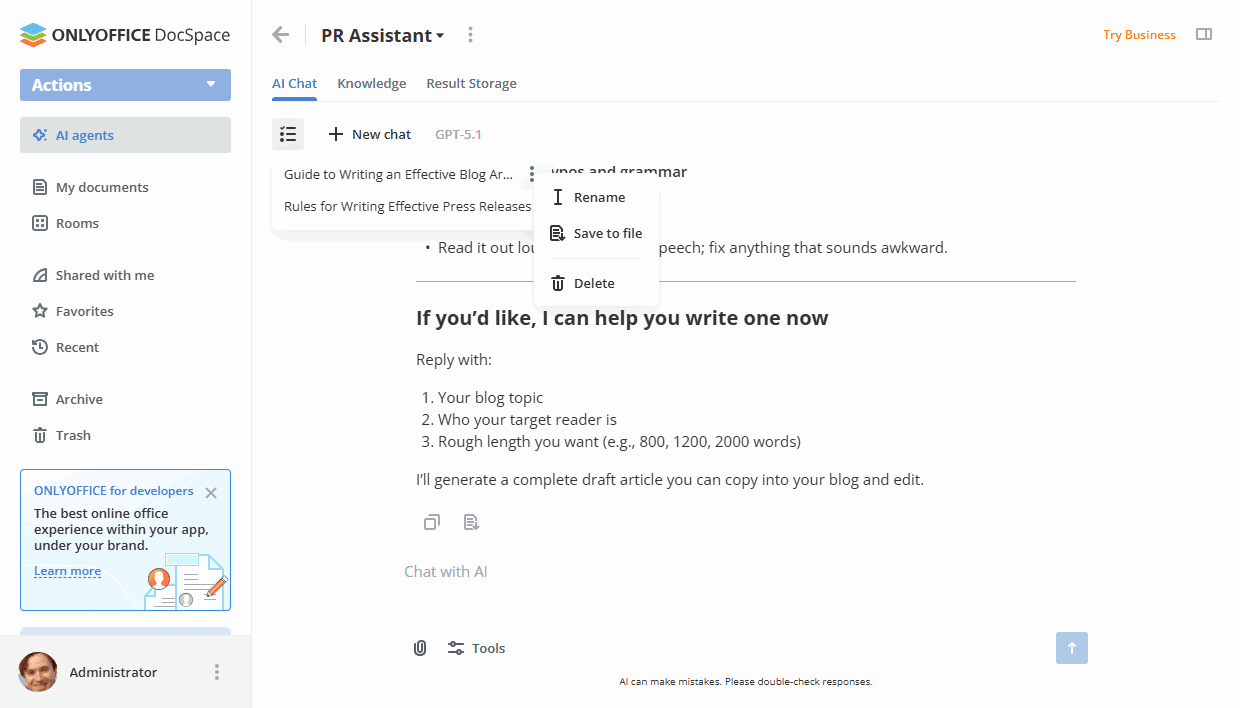
When one of the existing chats is opened, you can use the  'New chat' button to start a new chat.
Using web search
To make Web Search available, first you need to enable it in the DocSpace settings -> AI settings.
Just enter your search request in the 'Chat with AI' field and click the arrow button.
You can see the result in the chat. By clicking the arrow icon, you will see the list of sites on the Web used for performing search. When you click on a site, it will open in a separate tab.
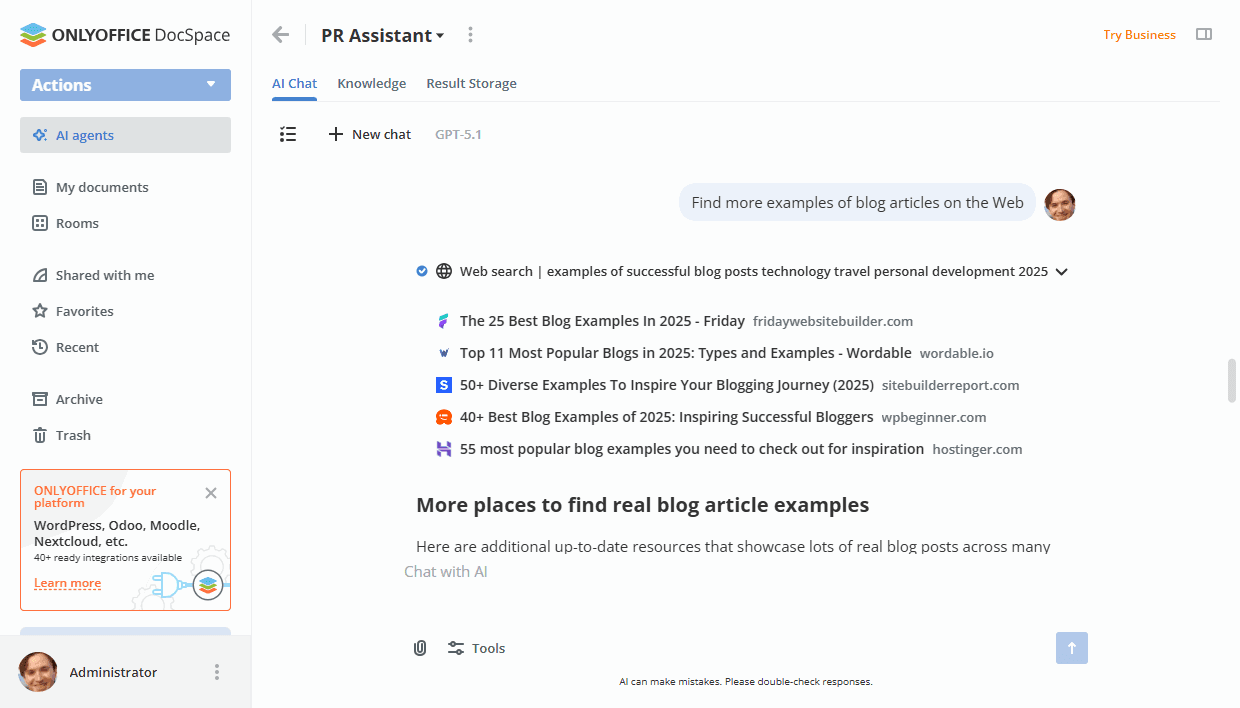
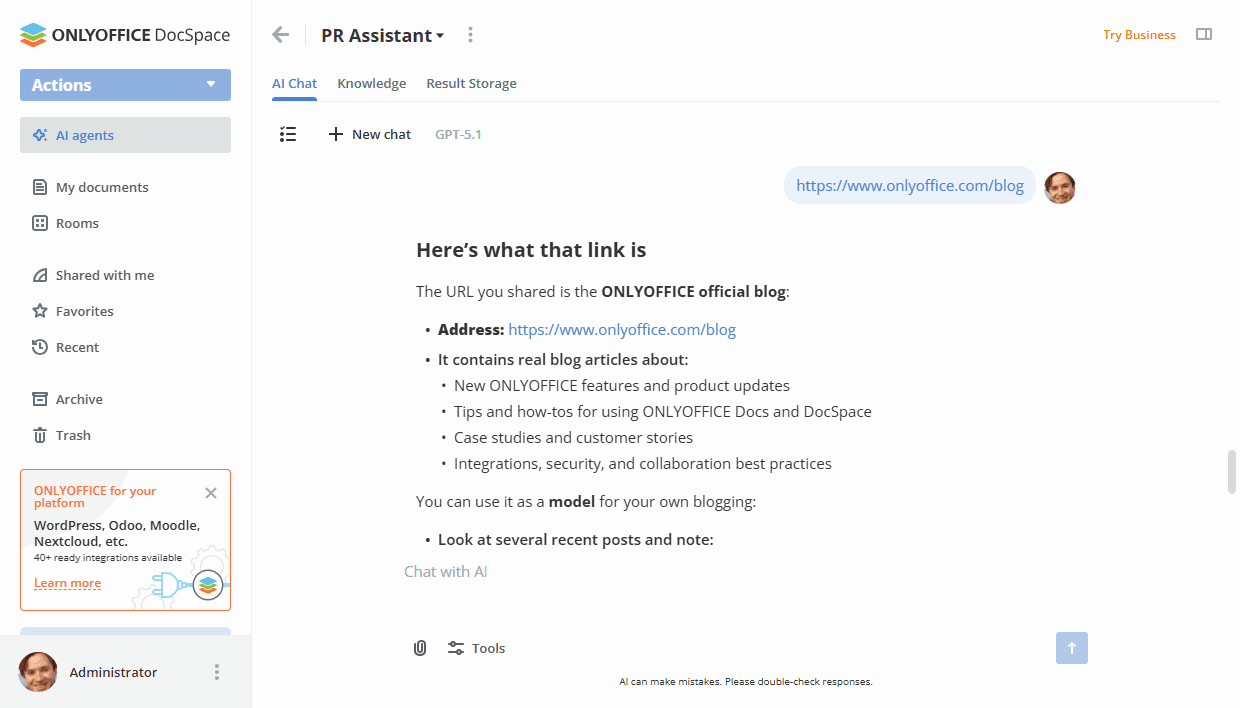
Web crawling is also enabled along with web search. This is an in-depth internet search that opens a specific website and retrieves all its contents. To activate it, you can simply enter any link into the chat, or it can be activated automatically after performing the web search. When you click on a site, it will open in a separate tab.
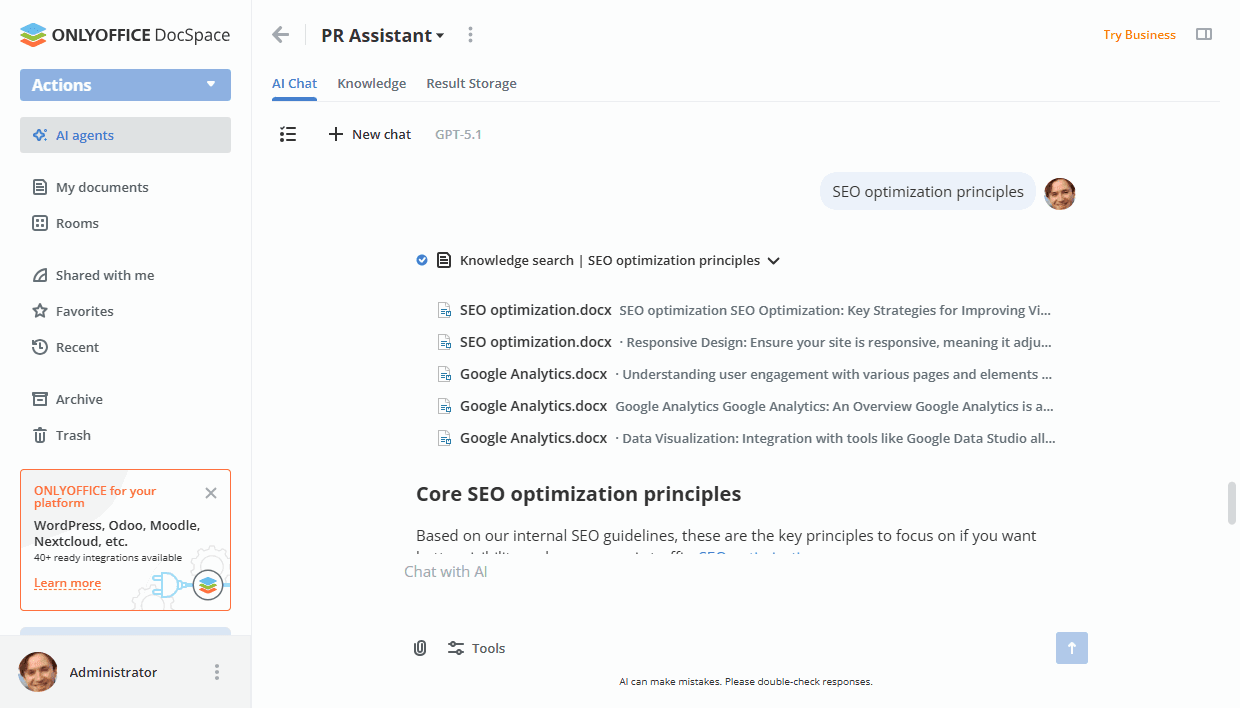
There's also a Knowledge base search. It searches for the most relevant pieces of content in documents from the Knowledge section and builds a response based on them.
Using MCP server tools
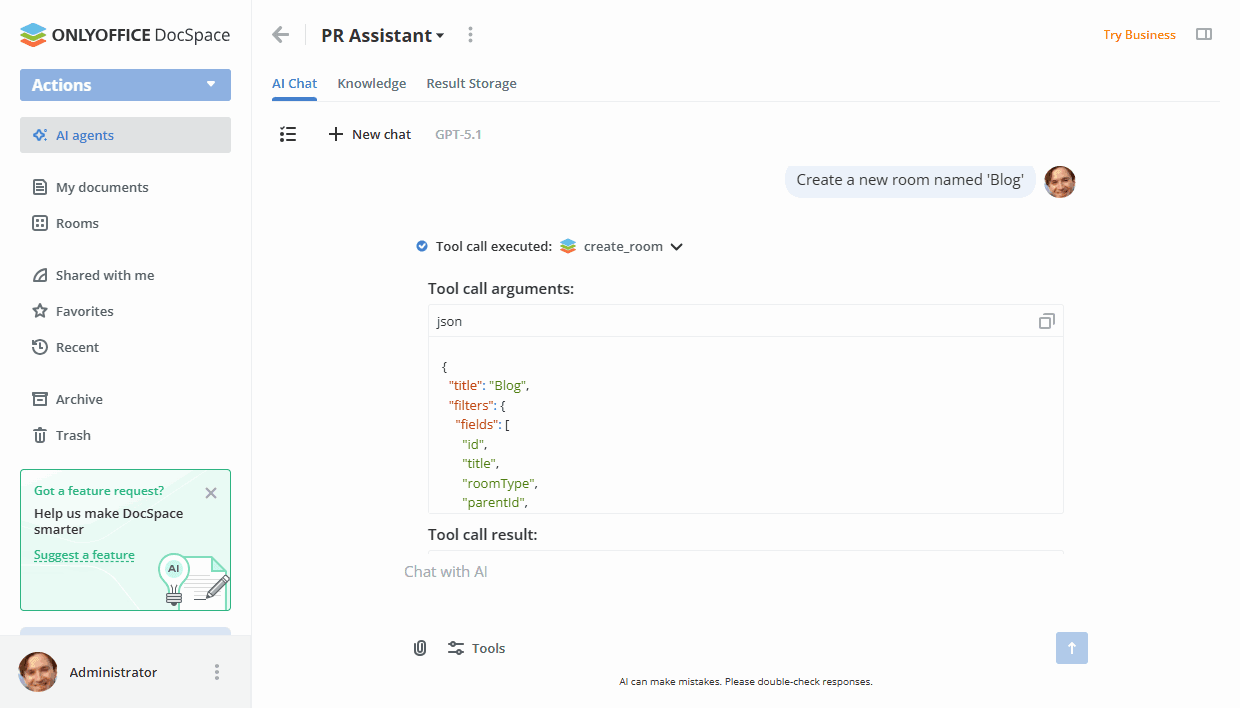
The ONLYOFFICE DocSpace MCP Server is enabled by default in the DocSpace settings -> AI settings, so you can start using the MCP server right away. It allows AI agents to interact with different DocSpace elements, for example, you can ask AI to create a new room or list the files stored in a specified folder, etc.
The following tools are currently available for the ONLYOFFICE DocSpace MCP Server: delete_file, get_file_info, update_file, copy_batch_items, move_batch_items, download_file_as_text, upload_file, create_folder, delete_folder, get_folder_content, get_folder_info, rename_folder, get_my_folder, create_room, get_room_info, update_room, archive_room, set_room_security, get_room_security_info, get_rooms_folders, get_room_types, get_room_access_levels, get_all_people.
You can click the Tools button below the prompt field and disable or re-enable all tools or certain tools separately by using the corresponding switchers.
When calling MCP server tools, a confirmation dialog will be displayed before the function is executed. In this dialog, you can see the arguments this function is called with. Click the  arrow button to show the arguments.

You can check the 'Always allow this tool to perform this action without asking again' box. If you click the checkbox, this function will always be called automatically, without confirmation.
If you click the Deny button, the function call will be cancelled and the model will continue responding. If you click the Allow button, the function will be called, and its result will be sent to the chat.
You can see the result of the function execution in the chat by clicking the arrow icon.
Uploading files to the knowledge base
To be able to add files to the knowledge base, first you need to add a provider in the Knowledge settings.
In the Knowledge section of the AI agent, you can upload files from DocSpace or from your device.
E.g., if you want to create contracts using AI, you can upload the contract examples used in your organization, and AI will use information from them, such as your company name, etc.
To upload a file from DocSpace to the Knowledge tab:
- Click the Actions button in the upper left corner.
- Select the
 Upload from DocSpace option from the menu.
 - Choose the files you want to upload to the knowledge base in the room selector panel and click the Select button.
To upload a file from your device to the Knowledge tab:
- Click the Actions button in the upper left corner.
- Select the
 Upload from your device option from the menu.
 - Choose the files you want to upload to the knowledge base in the file manager window and click the Open button.
This can also be done by dragging the necessary files from the file manager window to the working area.
When files are uploaded, they appear in the list with the 'preparing' badge, indicating that the vectorization operation has begun.
If an error occurs, an error badge appears, allowing you to restart the operation. Badges are visible to all users. Only those who can add files can restart the operation.
Once the upload is complete, you can ask questions about the uploaded files without attaching them to a chat. These files can only be viewed, not edited.
Saving results
The Result Storage tab within an AI agent is set by default for creating files/folders using AI. You can only export separate messages or chats here, or create files using AI (by entering a prompt). There is no other way to add files to this section. You can edit files stored in this section.
It's also possible to save messages or chats to any room in the Rooms section or a folder in My documents.
To save a chat to a file:
- Click the icon to open the chat list.
- Click the icon next to the necessary chat name.
- Use the Save to file option.
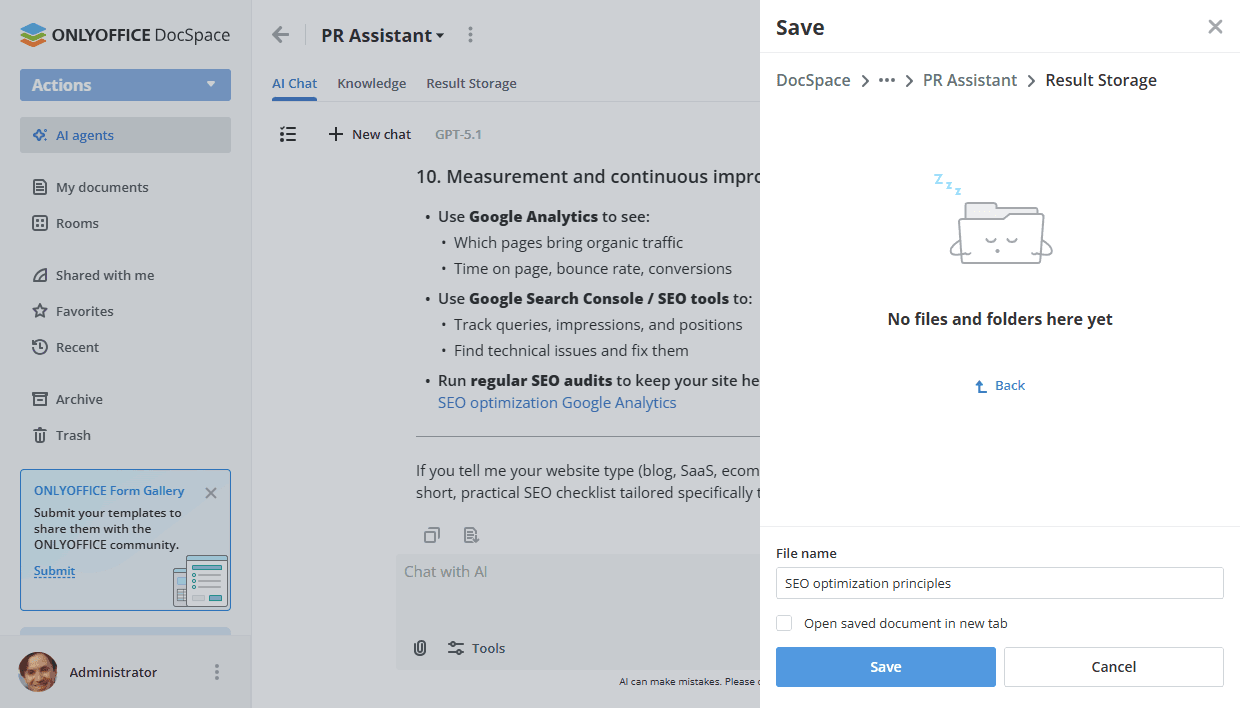
- In the selector, the current AI agent -> Result Storage is selected by default. To choose a different location, click DocSpace in the path at the top and choose AI agents, My documents, or Rooms. Then choose a certain AI agent -> Result Storage, a folder in My documents, or a room.
- If necessary, change the file name.
- Optionally, check the 'Open saved document in new tab' box.
- Click the Save button.
To save a message to a file:
- Open the necessary chat.
- Click the icon below the necessary message.
- In the selector, the current AI agent -> Result Storage is selected by default. To choose a different location, click DocSpace in the path at the top and choose AI agents, My documents, or Rooms. Then choose a certain AI agent -> Result Storage, a folder in My documents, or a room.
- If necessary, change the file name.
- Optionally, check the 'Open saved document in new tab' box.
- Click the Save button.
Inviting other users
You can share AI agents with other users.
The following permission levels are available in AI agents:
-
Agent manager (Paid) - Agent managers can manage the assigned AI agent, invite new users, and assign roles below their level. They can use the chat, upload knowledge files, work with the Result Storage, and manage chat settings.
Guests and Users cannot be assigned as Agent managers. Only Room and DocSpace admins are suitable for the specified role.
-
Content creator - Content creators can use the chat and work with files in the Result Storage. They can upload files to the knowledge base but can’t manage users or access agent settings.
Guests cannot be assigned as Content creators. Only Room and DocSpace admins and Users are suitable for the specified role.
-
Viewer - Viewers can only view files in the Result Storage with outputs generated by others. They do not have access to the chat or the knowledge base.
Unlike rooms, in agents, guests can only be assigned as Viewers.
To invite a user to an AI agent,
- Open the necessary AI agent where you want to invite users.
- Click the
 icon next to the AI agent name.
 - Select the
 Invite contacts option from the menu.
 -
Invite external users (guests) via the link:
- Turn on the Invite via link switcher – the link with will be copied to the clipboard. You can send the copied link in any convenient way.
The Viewer permission level is only available for guests.This link is valid for 7 days only.
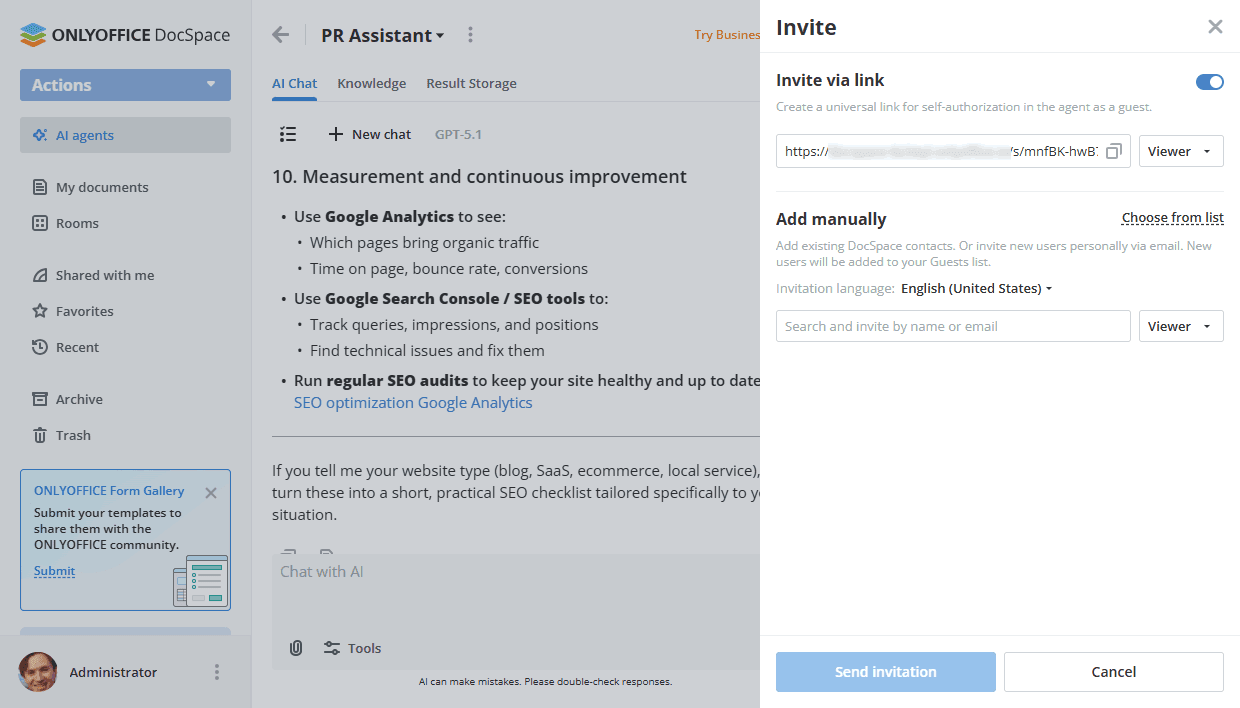
- Turn on the Invite via link switcher – the link with will be copied to the clipboard. You can send the copied link in any convenient way.
-
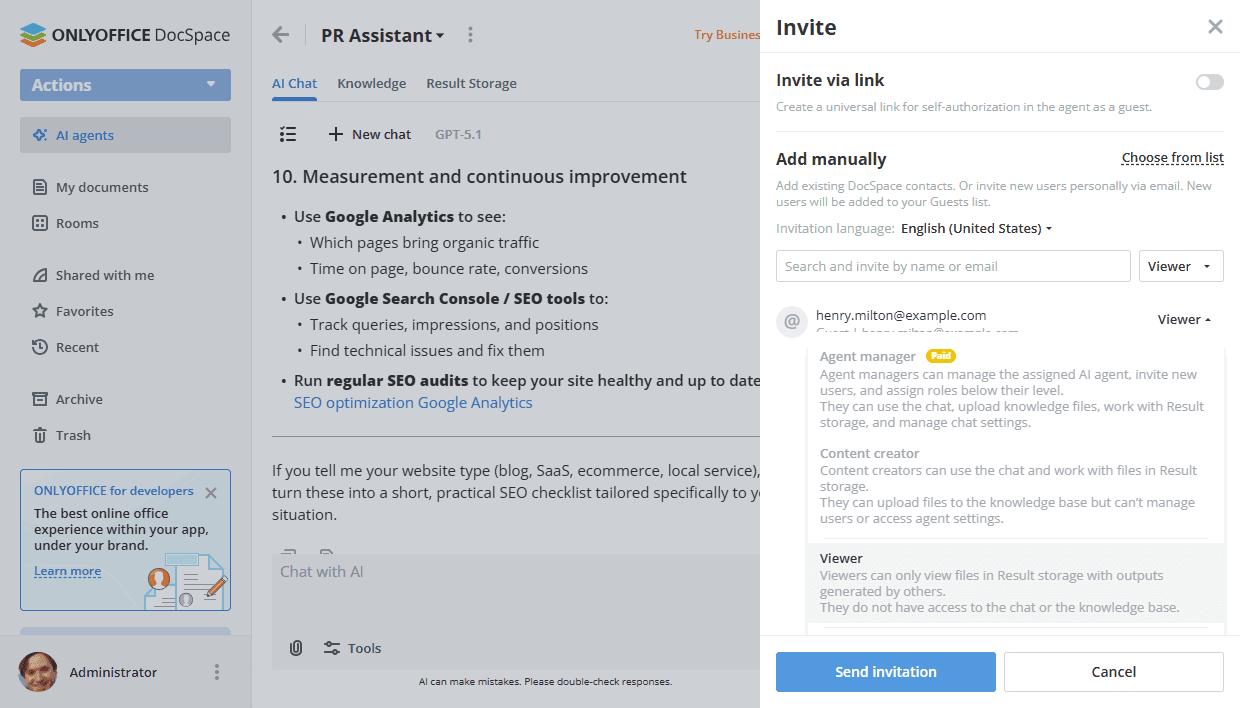
Alternatively, you can use the Add manually section to add email addresses manually one by one:
-
Click the Choose from list option to select the existing DocSpace users. Check them in the list and click the Select button.
- Use the Members tab to select internal users.
- Use the Groups tab to select all users who belong to a certain group. It's also possible to choose the Everyone group to select all DocSpace users.
- Use the Guests tab to select external users.
You can also start typing the existing user or group name or email in the entry field and select the found users or groups. The existing contacts or groups that match the entered characters are displayed there as you type.
- To invite new external users (guests) by email, enter a valid email address and click ‘Add’ below or press Enter. In the same way, add several email addresses if necessary.
- Change the permission level if necessary. The following permission levels are available: Agent manager, Content creator, Viewer.
-
When ready, click the Send invitation button. Invitations will be sent to the specified email addresses.
-
Click the Choose from list option to select the existing DocSpace users. Check them in the list and click the Select button.
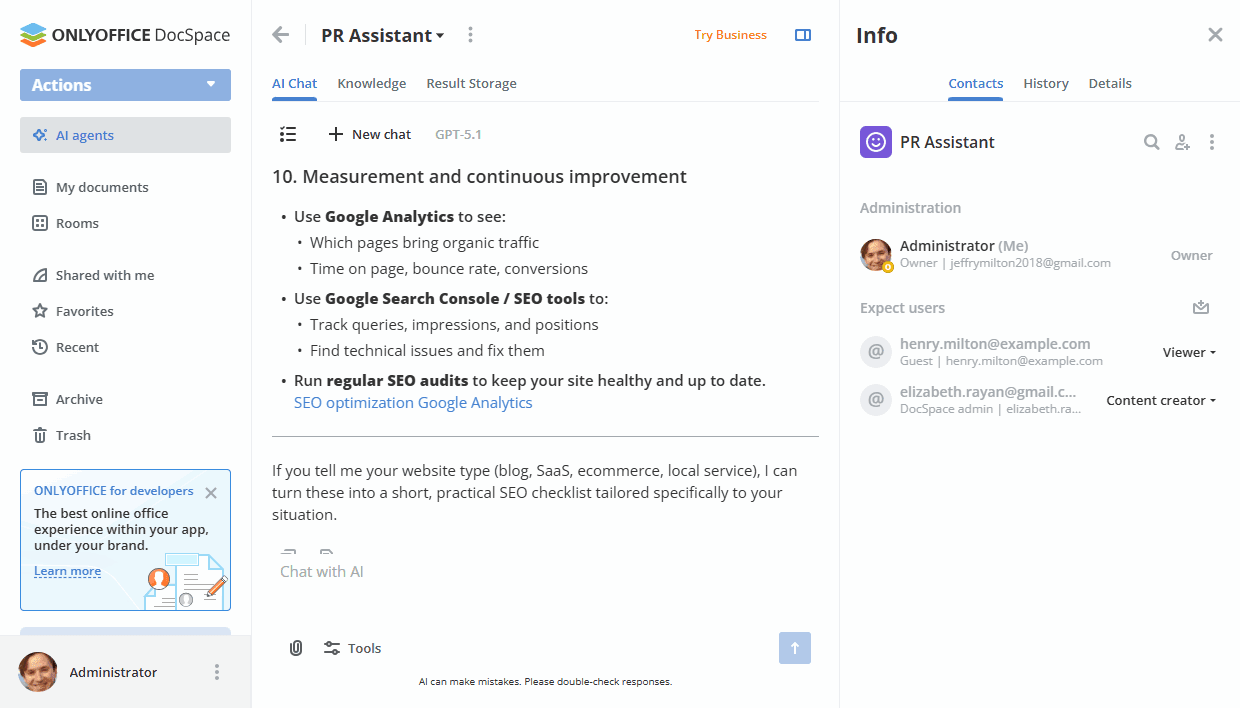
It’s also possible to invite members to the AI agent from the Info -> Contacts screen. Click the  icon to add new members.
When a user accepts the invitation to the AI agent, they can view the agent in the AI agents space and participate in collaboration with access rights according to the permission level.