Sharing files and folders
You can share separate files and folders stored in rooms and in the My documents section via a link. Documents from the My documents section can also be shared individually with a certain DocSpace user.
Sharing files and folders via a link
To quickly create a link for a document within a room, click the  Copy shared link icon next to the file in the Compact view. The external link for viewing by anyone will be created and copied to the clipboard.
To create a link and adjust its parameters:
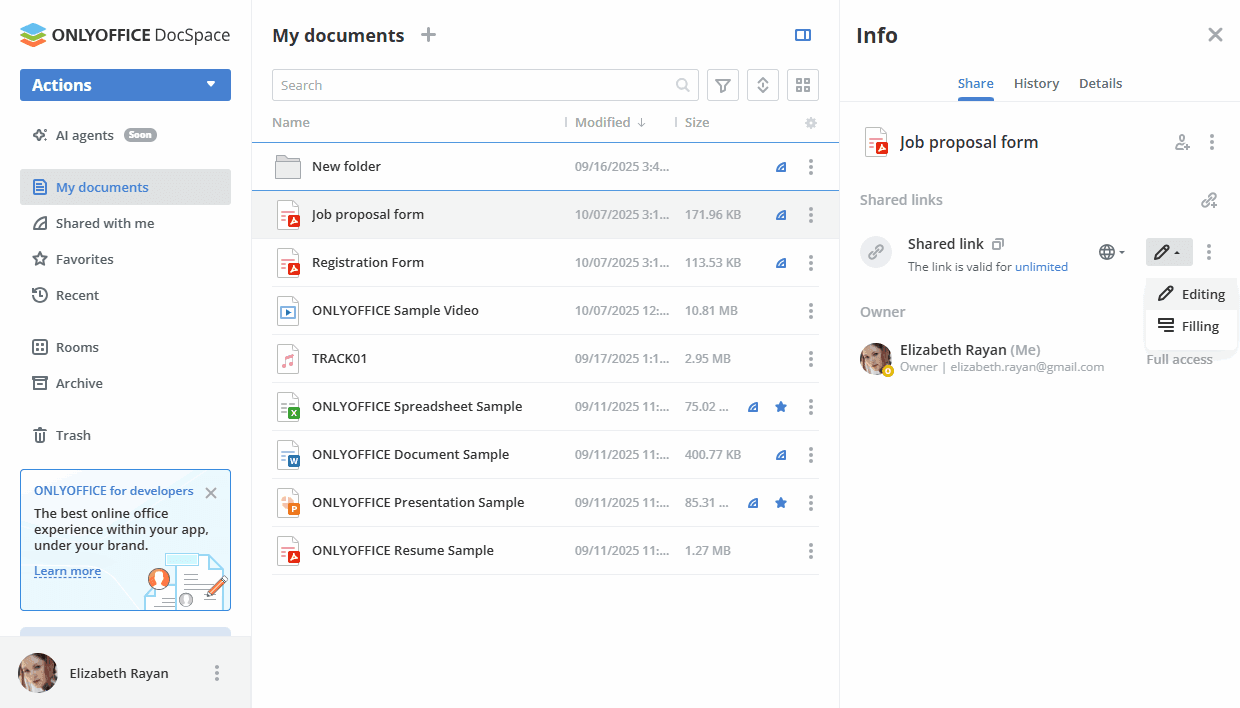
- Right-click the file and select the Share -> Manage links option or open the Info panel and switch to the Share tab.
-
In the Shared links section, click Create and copy. The Shared link appears where you can set basic link parameters.
- Click the
 icon and select who will have public access to your file: Anyone with the link or DocSpace users only.
 -
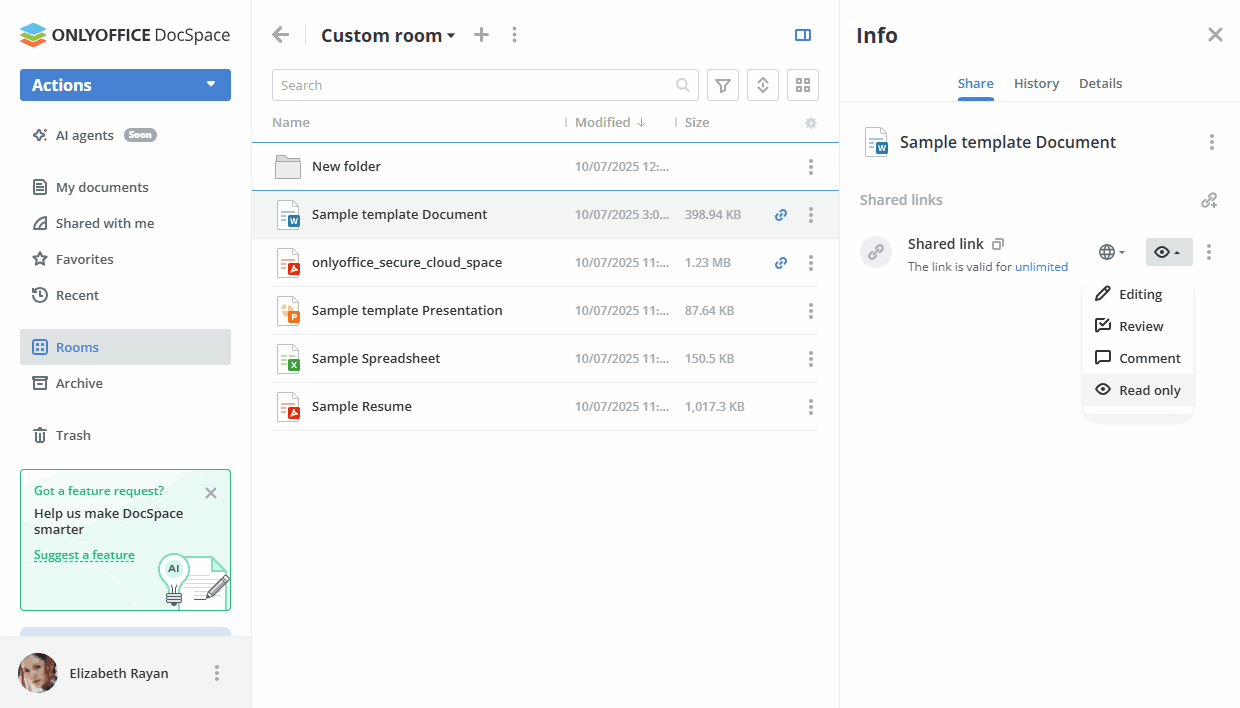
Click the
 icon and provide different access permissions. The following options are available for files (they differ depending on the file type):
- Editing – a user can edit the shared file but cannot manage or create shared links.
When a file is shared with Editing permission via a link, or shared with custom permissions where editing is enabled but sharing is disabled, the recipient's access to the Share panel is restricted — they cannot create or manage links for this file further.
- Review – a user can edit the file but the changes should be accepted or rejected by the file owner.
- Custom filter – a user can view .xlsx files as per their own filter.
- Filling – a user can only fill out .pdf forms.
- Comment – a user can comment the content of the file without editing it.
- Read only – a user can only view the file.
The following options are available for folders:
- Editor – a user can perform the following operations with files in the folder: viewing, editing, form filling, reviewing, commenting.
- Reviewer – a user can perform the following operations with files in the folder: viewing, reviewing, commenting.
- Commentator – a user can perform the following operations with files in the folder: viewing, commenting.
- Viewer – a user can only view files in the folder.
- Editing – a user can edit the shared file but cannot manage or create shared links.
- By default, the link is valid for unlimited time. Set the time period after which the link will expire: 12 hours, 1 day, 7 days, Unlimited, Custom.
-
Click the
 Show link actions icon to open the link settings, copy or delete the link.
Link settings allows you to change basic link parameters if necessary or set additional ones. The following settings are available:
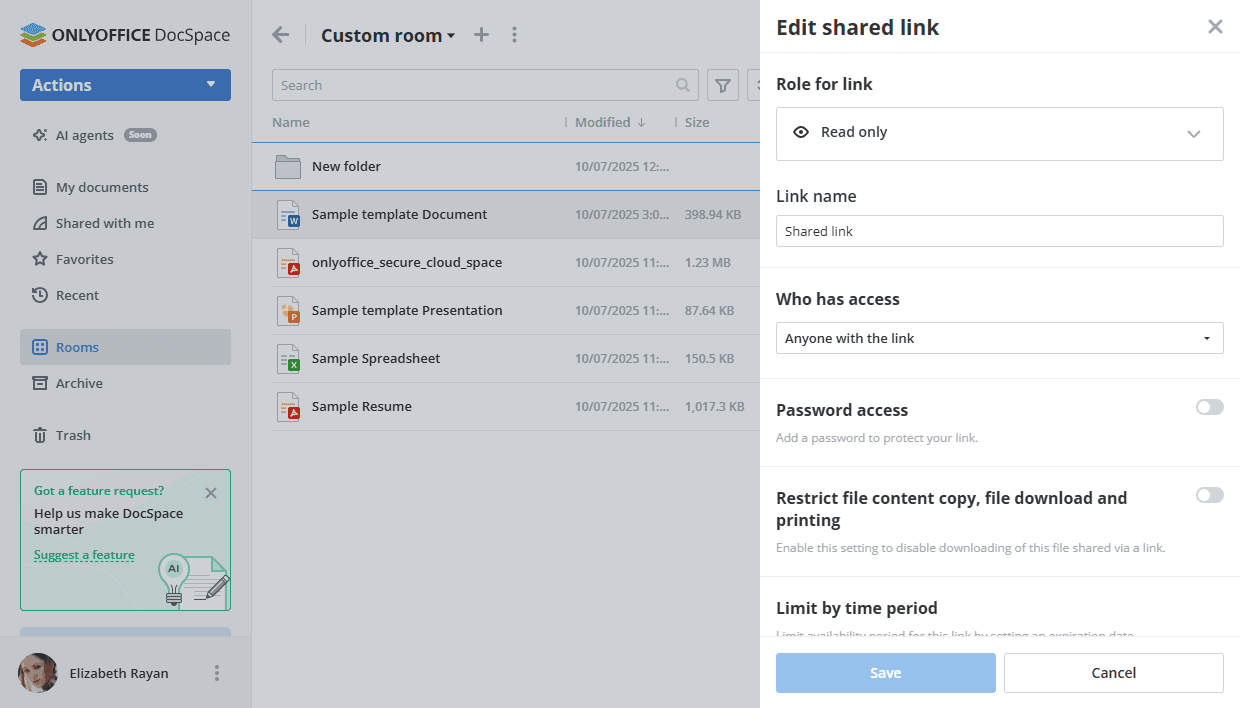
- Use the Role for link option to change permissions for a file (Editing, Review, Custom filter, Filling, Comment, Read only) or folder (Viewer, Editor, Reviewer, or Commentator). Note that recipients accessing the file via a link with Editing permission cannot manage or create further shared links.
- Use the Link name to distinguish various links.
- Who has access - select who will have public access to your file: Anyone with the link or DocSpace users only.
-
Set a password to protect the link.
- Turn on the Password access switch.
-
Click the
 icon to generate a password or enter it manually into the corresponding field.
The password must be at least 8 characters long. The following characters are allowed: a-z, A-Z, 0-9, !"#%&'()*+,-./:;<=>?@[]^_`{|}
icon to generate a password or enter it manually into the corresponding field.
The password must be at least 8 characters long. The following characters are allowed: a-z, A-Z, 0-9, !"#%&'()*+,-./:;<=>?@[]^_`{|} - To clean the password field, click the Clean button.
- To copy the password to your clipboard for future sharing, click the Copy password button.
- Enable the Restrict file content copy, file download and printing switch to disable downloads of files and folders shared via a link.
- Use the Limit by time period option to change the time limit during which the link stays valid.
- To save the changes made to the shared link parameters, click the Save button.
If you need more than one link, use the  icon in the Shared links section.
Sharing files and folders with certain DocSpace users
In the My documents section, you can also share the selected file/folder with certain DocSpace users or groups:
-
Open the Info -> Share screen by clicking the
 icon next to the file in the Compact view. Alternatively, right-click the file and select the Share -> Manage links option.
You can also click the Share button within the opened document.
- Click the
 icon.
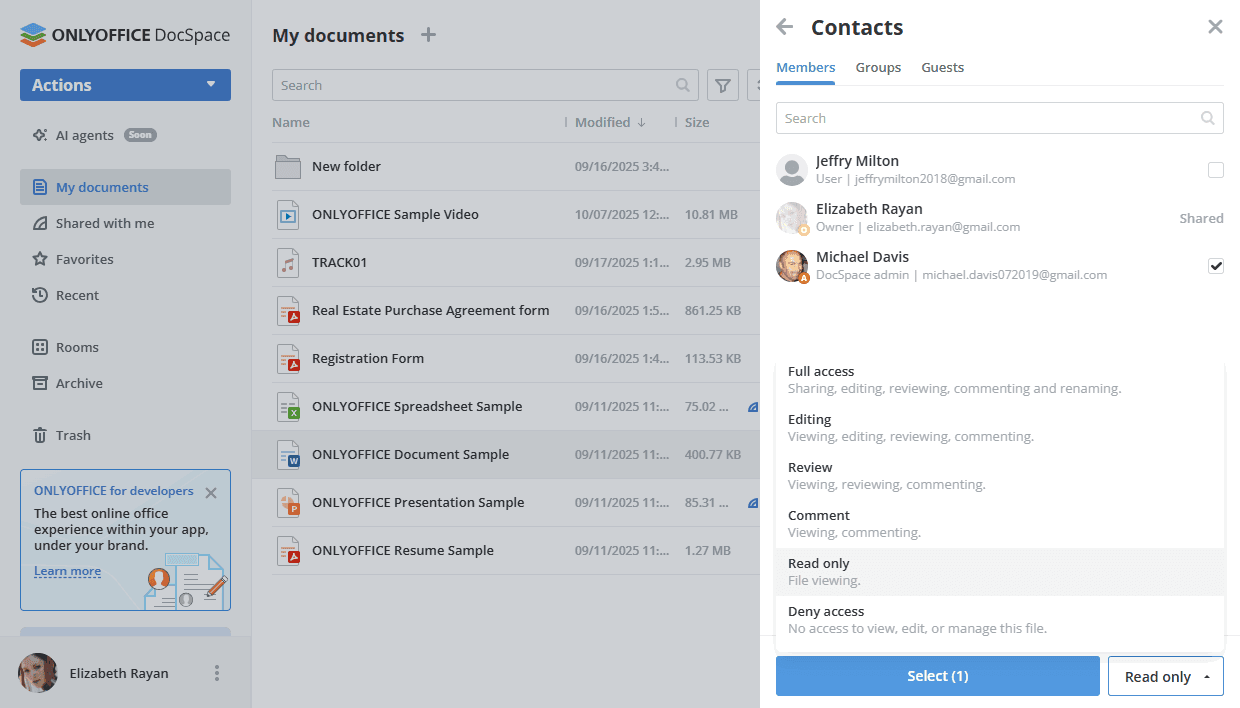
icon. - On the Contacts screen, switch between Members, Groups, and Guests tabs and check the necessary people or groups.
-
You can set a common permission level for all selected members, guests, and groups using the menu at the bottom of the screen. When ready, click the Select button.
The available options differ depending on the file type. See the table below for details about actions which can be performed depending on the permission level.
-
On the Info -> Share screen, you can change the selected permission level for each member, guest, or group using the menu near their names.
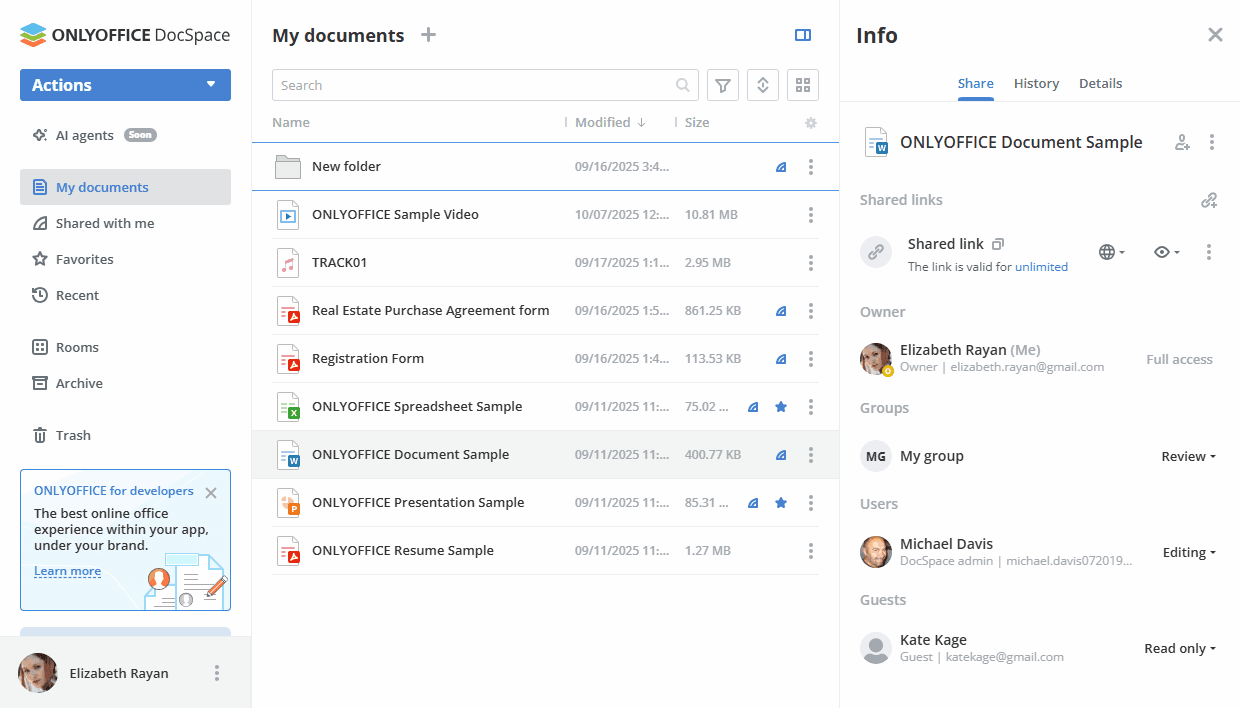
- The shared file/folder will be marked with the
 icon in the file list and will be available for the selected DocSpace users in the Shared with me section.
Depending on the permission level, the following actions with files are available:
| Actions | Full access | Editing | Review | Comment | Read only | Deny access |
|---|---|---|---|---|---|---|
| Editing the file | ||||||
| Editing text | ||||||
| Editing field properties (content controls) | ||||||
| Editing filters in a spreadsheet | ||||||
| Filling out form fields | ||||||
| Reviewing | ||||||
| Commenting | ||||||
| Viewing (reading) | ||||||
| Viewing content | ||||||
| Viewing comments | ||||||
| Copying content to the clipboard | ||||||
| Printing | ||||||
| Downloading | ||||||
| Save as | ||||||
| Viewing version history | ||||||
| Management | ||||||
| Access to the Share panel | ||||||
| Viewing history | ||||||
| Managing version history | ||||||
| Highlighting changes made by other users | ||||||
| Displaying users who are editing the file ("View users") | ||||||
| Renaming a file | ||||||
| Creating files/folders | ||||||
| Uploading files | ||||||
| Removing files/folders | ||||||
| Moving files/folders |
Sharing PDF forms
When sharing PDF forms, the link is created for editing.
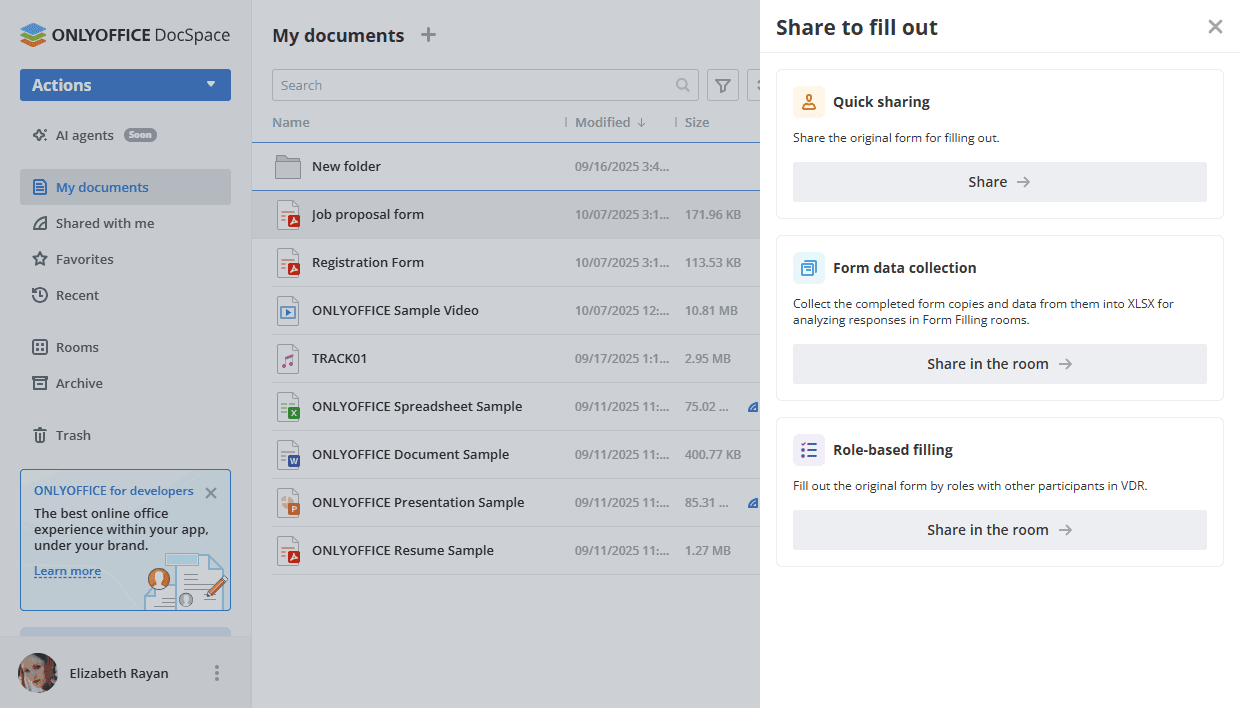
If you choose the Filling option, a new panel opens:
- The Quick sharing option allows creating an external link with the rights to fill in and share it directly without creating a room.
- The Form data collection option allows you to share the form via a form filling room. You can choose one of the existing rooms or create a new one. Learn more about form filling rooms.
- The Role-based filling option allows you to share the form via a Virtual Data Room. You can choose one of the existing rooms or create a new one. When you copy the PDF form to a Virtual Data Room, a new window appears with a proposal to assign roles. If you click Assign, the form will be opened with the active panel for role assignment. Learn more about Virtual Data Rooms.
Creating rooms based on the My documents section files
If you want to create a new room on the base of the selected files/folder from the My documents section, select several files/folders and use the Create room option that appears on the top toolbar. For separate files/folders, you can right-click the file/folder and select the Share -> Create room option from the context menu. Then follow the instruction for creating rooms.
All the selected files or contents of the selected folder will be copied there.
Afterward, you can invite other users to collaborate on the files within a room.