Managing your project using the Gantt chart
The Gantt Chart is a great way to build your project schedule and visually assess its progress. This guide describes how to plan milestones, manage tasks, and create task dependencies using the Gantt chart view.
Access the Projects
Sign in to your portal and click the Projects link.
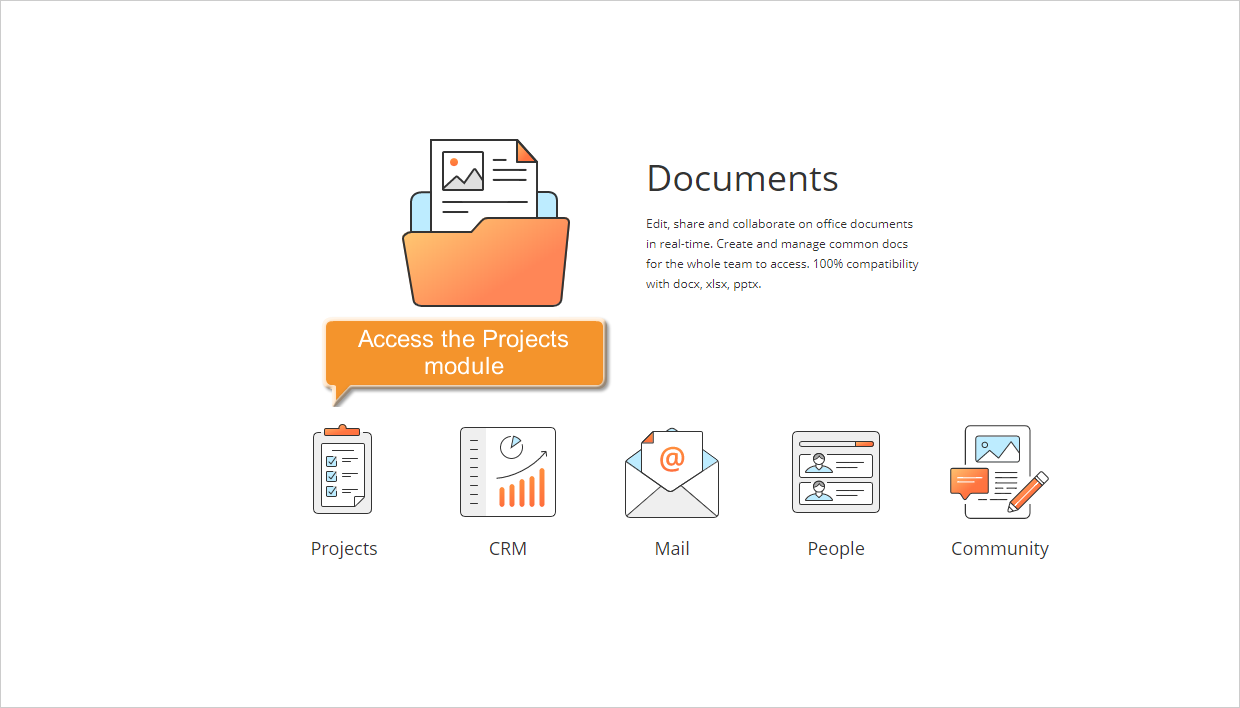
If you are already signed in and have been using the portal for some time, you can access the Projects module from any portal page: use the drop-down list in the upper-left corner of the page and select the corresponding option.
Activate the Gantt Chart view
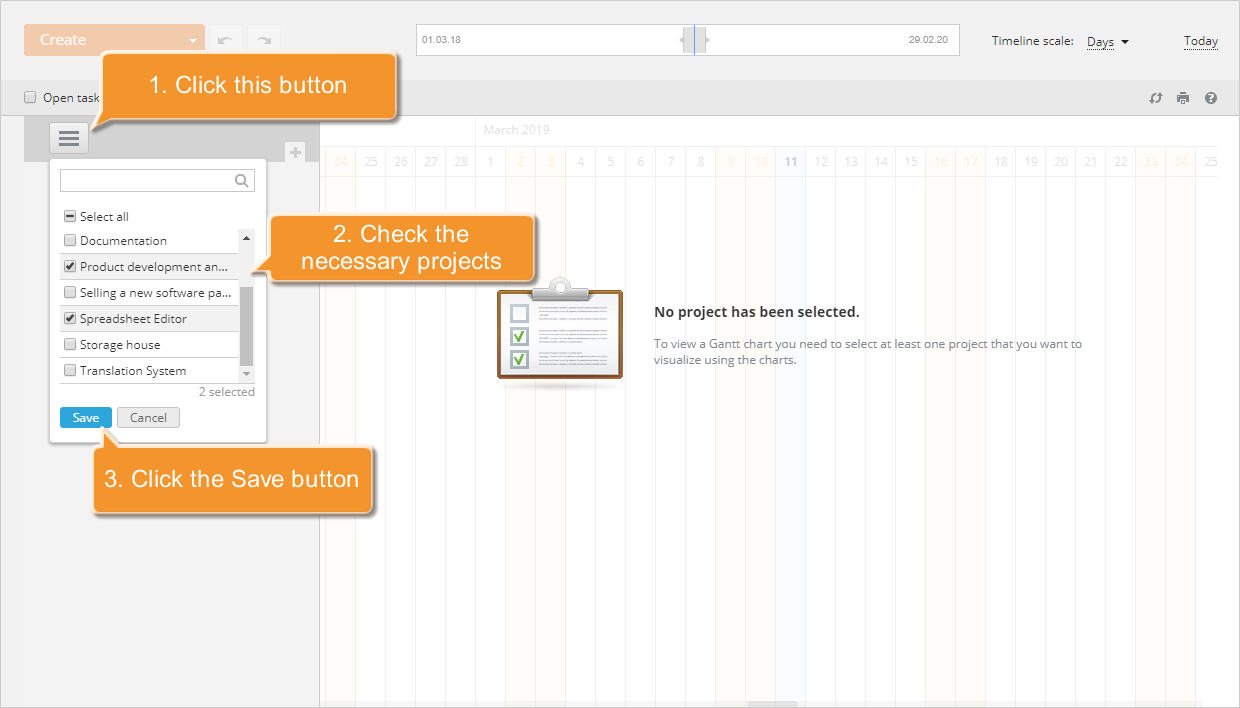
Click the Gantt Chart link in the left-side panel and select the project you need to activate the Gantt Chart for. To do that,
- Click the
 button in the upper-left corner.
 - Select the projects you need from the drop-down list.
- Click Save to close the list and display the projects.
Alternatively, you can proceed as follows:
- First, select the project you need. Click the Projects link in the left-side panel to open the list of all the created projects. To find the project you need, use the filter at the top of the list, or enter the project title, entirely or partially, in the filter field and press the Enter key.
- Click the project title to open the project overview page.
- Select the Gantt Chart tab on the project page.
The Gantt Chart for the selected project will be activated.
Adjust the Gantt Chart view
The Gantt chart is a bar chart where the horizontal axis represents the total amount of time you expect to spend on completing the project and the vertical axis represents the tasks you need to perform for completing this project on time. The horizontal bars of different lengths and colors show the sequence of tasks with the specified start and end dates. The horizontal lines mark the most important dates in the project progress (milestones).
The Gantt Chart gives you a panoramic view of all the project activities and their status:
 - open task/milestone,
 - closed task/milestone,
 - overdue task/milestone.
By default, the Gantt Chart is divided into one-day time increments and shows all the milestones and tasks created within this project. You can adjust its view: change the timeline increments and select the chart objects to be hidden or shown to set the most convenient way to work.
To change the timeline increment, open the Timeline scale drop-down list in the upper right corner and select one of the available options: Days, Week, Month. Alternatively, change the slider size of the scale bar at the top of the chart by dragging its margins or using the mouse wheel:

To select the chart objects to be shown, use the left-side panel:
- To add or remove projects from the chart, use the
 button in the upper-left corner.
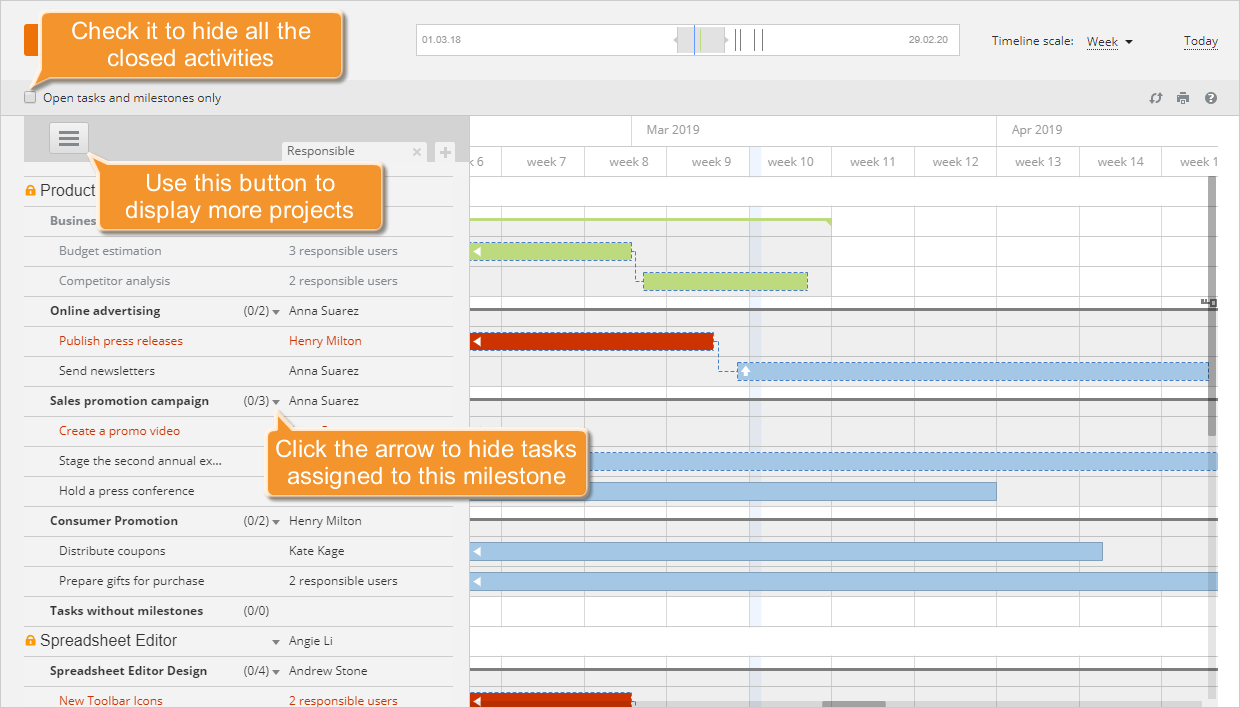
 - To hide all the closed tasks and milestones from the chart, select the Open tasks and milestones only checkbox right above the task list.
- To hide the tasks and milestones of a specific project, click the downward arrow next to the project title.
- To hide the tasks assigned to a specific milestone, click the downward arrow next to the milestone title.
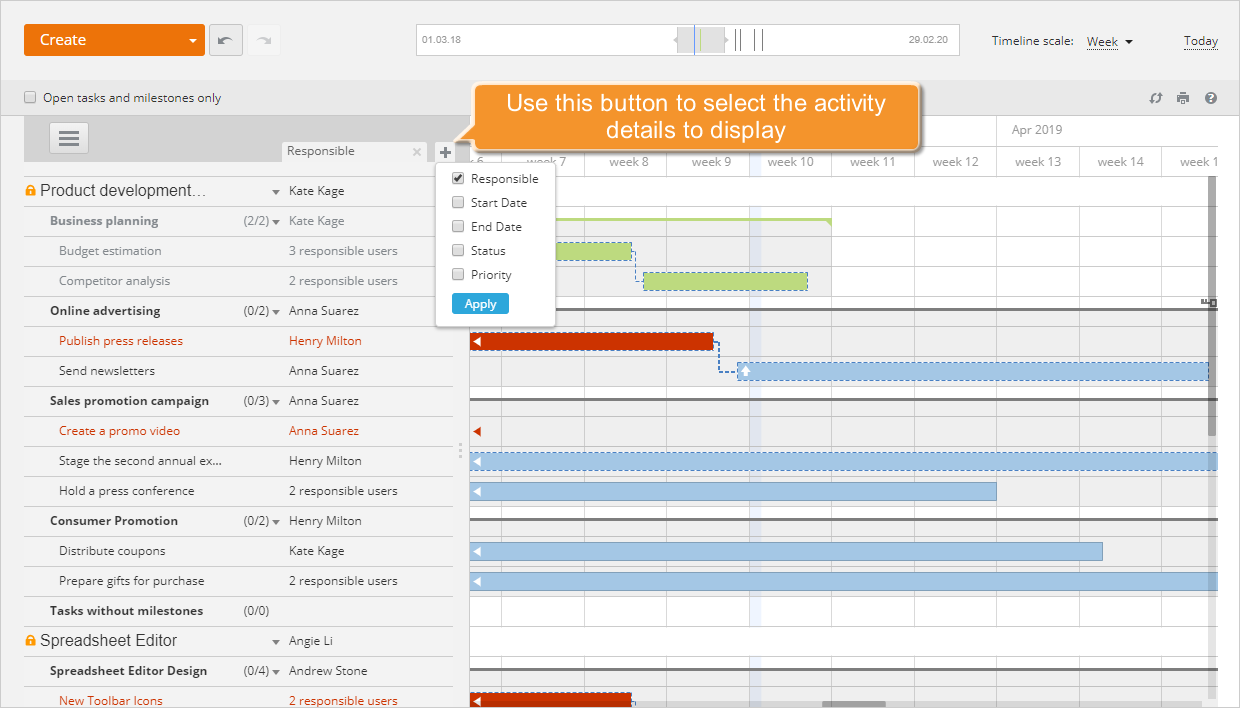
To select the activity details to be displayed in the left-side panel:
- Click the
 button in the upper-right corner of the left-side panel.
 - Select the details you want to be shown: Responsible, Start Date, End Date, Status, Priority.
- Click Apply to display the selected details.
To hide the details you do not need at the moment, close the unnecessary tabs using the cross icons.
When detail tabs are activated, you can adjust the left-side panel width using drag-and-drop.
Plan and manage milestones
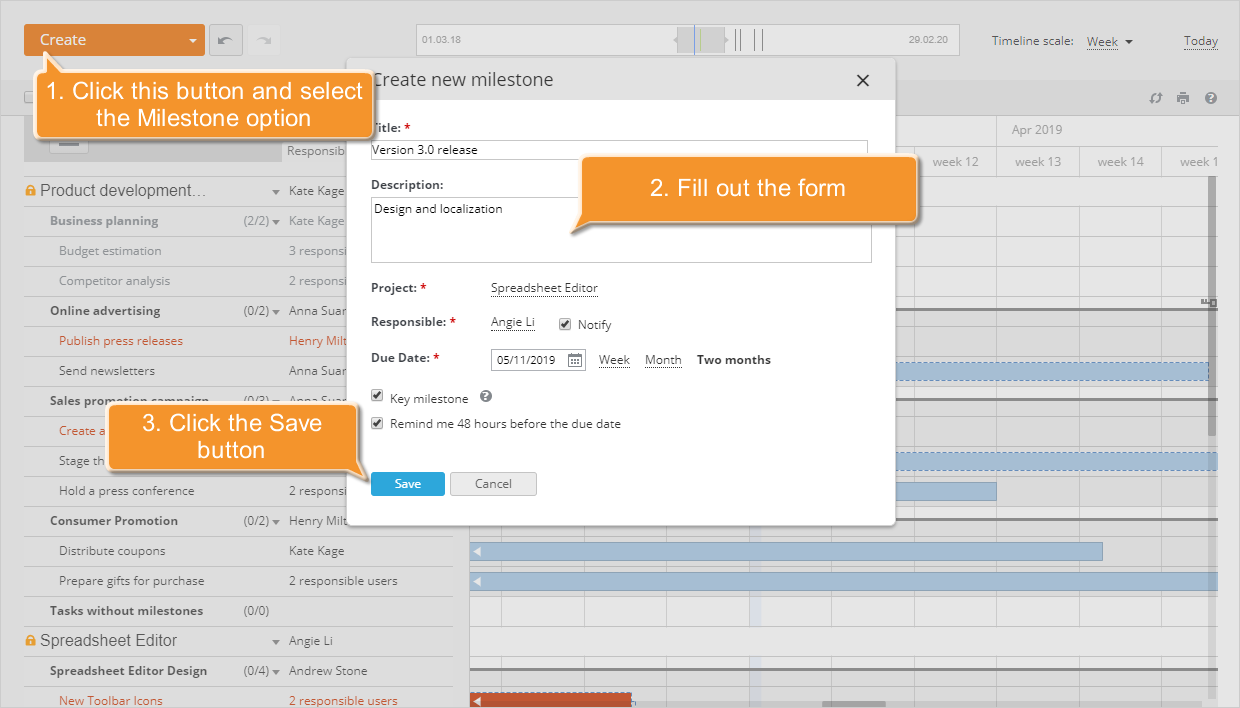
To add a key point in the progress of your project, create a milestone. To do that,
- Click Create in the upper-left corner.
- Select the Milestone option from the drop-down list.
- Specify your milestone Title and enter a short Description if necessary.
- Select the Project you need to add a milestone to.
- Select the Responsible person you want to assign the newly created milestone to.
- Set a desired Due Date.
- Select the Key milestone option if necessary.
- To be notified 48 hours before the due date, select the corresponding option.
- Click Save.
To change a responsible person,
- activate the Responsible tab using the
button in the upper-right corner of the left-side panel and click the responsible user name to the right of the milestone title in the left-side panel,
or
hover the mouse over the milestone shape on the Gantt chart and click the
button of the milestone floating menu that appears above it,
- select the user you need from the drop-down list, selecting the radio button next to it,
- click OK to confirm your choice.
To shift a milestone,
- hover the mouse over the milestone shape arrow,
- drag and drop the shape to the date you need.

To manage your milestones, you can use the milestone floating menu, which appears when you hover the mouse over the milestone shape, or the context menu, activated by a single right-click of the mouse. You can perform one of the following operations:
-
 - edit your milestone title,
 -
- assign a responsible user for your milestone,
-
 - delete an unnecessary milestone,
 -
 - add a task to the selected milestone,
 -
 - fit the milestone shape to your screen,
 -
 - close the milestone as soon as all the tasks are completed. To reopen the closed milestone, use the
 button.
Create and manage tasks
To add a new task, you can proceed in one of the following ways:
- click the Create New... button in the upper-left corner, select the Task option, and complete the standard Create new task form,
- use the Gantt chart,
- hover the mouse over the milestone you want to assign the task to and click the
button,
- or right-click within the Gantt chart area.
- hover the mouse over the milestone you want to assign the task to and click the
If you follow the first way, the task bar with all the specified parameters will be added and assigned to the corresponding milestone. If you use the second way, an empty task bar will be added to the Gantt chart. Enter a title for the task and press the Enter key. After that, you will be able to edit and manage your task.
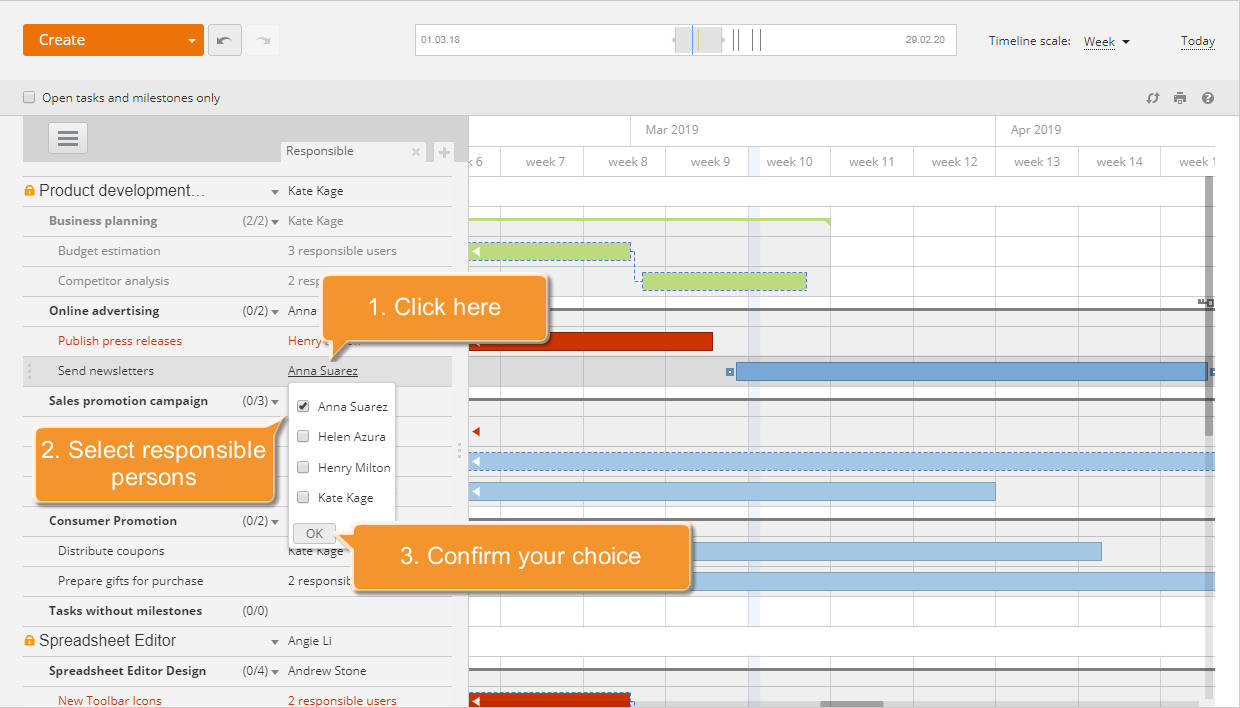
To assign/change responsible persons,
- activate the Responsible tab using the
button in the upper-right corner of the left-side panel and click the No Responsible link to the right of the task title in the left-side panel,
or
hover the mouse over the task bar on the Gantt chart and click the
button of the task floating menu that appears above it,
- select the users you need from the drop-down list, selecting the checkboxes next to them,
- click OK to confirm your choice.
You can easily change the task start and end date and the amount of time you expect to spend on completing this task using drag-and-drop. Hover the mouse cursor over the task bar border (the left border to change the start date or the right border to change the due date), and without releasing the mouse button, move it to set the appropriate date.
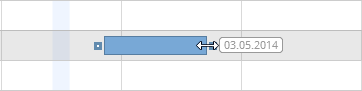
Using drag-and-drop functionality, you can also move your task bar horizontally or vertically:
- move it horizontally to change the dates without changing the amount of time,
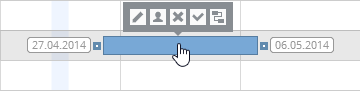
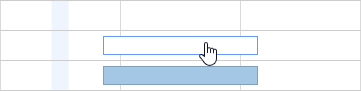
- move it vertically to shift the task to another milestone.
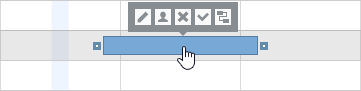
To edit the task title, change its status from Open to Closed and vice versa, or delete it altogether, use the task floating menu, which appears when you hover the mouse over the task bar, or the context menu, activated by a single right-click of the mouse.
Create task dependencies
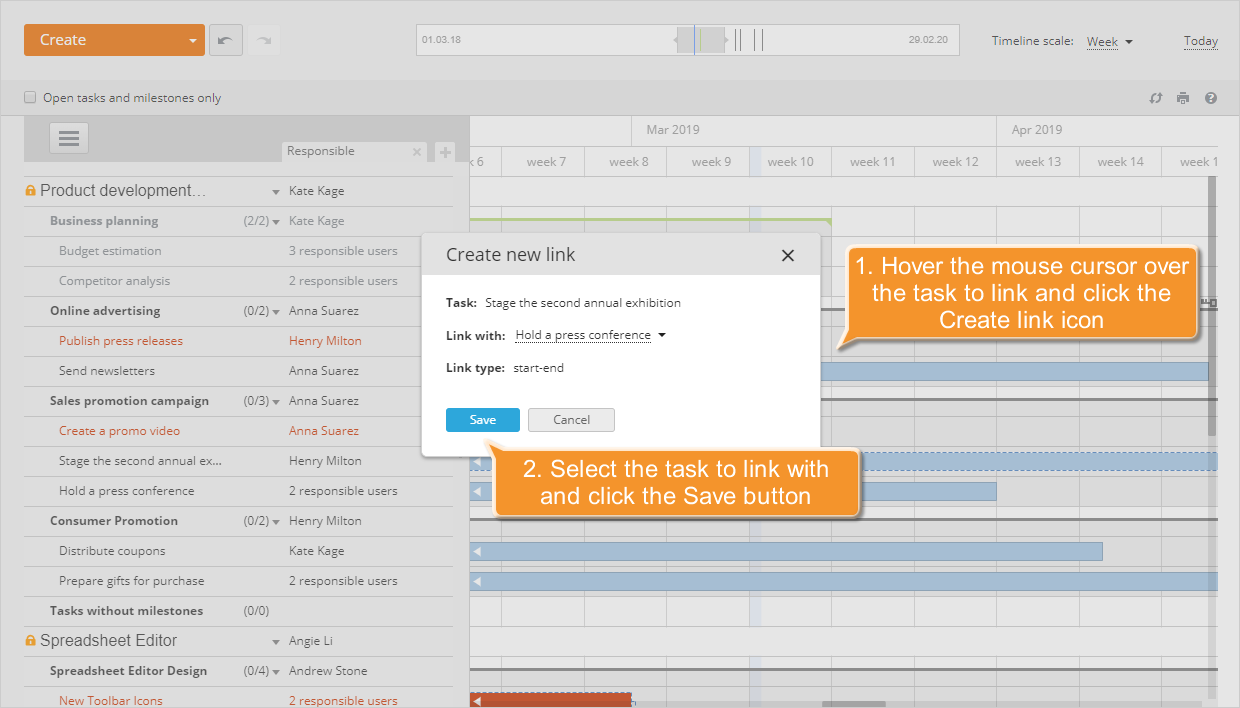
To determine the order of the tasks to be completed, link them. To do that, proceed in one of the following ways:
- Find the task you need to link in the left-side panel and click it. The Gantt chart will automatically scroll to its start date, i.e., the beginning of the bar representing this task.
- Hover the mouse over the task bar and click the
 button in the task floating menu.
 - In the Create new link window that opens, select the task you want to link with from the corresponding drop-down list.
- Click Save to create the link and close the window.
Alternatively, you can:
- Place the cursor at the end of the task bar you need to link.
- Left-click the square mark
 that appears.
 - Without releasing the mouse button, drag to the beginning of the task bar you need to link with.

The End-Start link will be created. This type of link means that the task you link with cannot begin until the task you link is completed. It will be represented by a blue dashed line. A red dashed line means that the created link is invalid. To make it valid, correct the task dates.
To delete an invalid or unnecessary link, right-click it.