Exporting calendar to devices
Starting from v. 10.0, it is possibile to synchronize calendars from the 'My Calendars' section using the CalDAV protocol. When you synchronize a calendar, all changes made to existing events, as well as newly created events, will be displayed in both the third-party calendar for which synchronisation is enabled and the portal web interface.
Starting from v. 10.5, it's also possible to export calendars from the Other Calendars section. The CalDAV calendar is created when obtaining a link for export (Export and Sync > CalDAV). When exporting a calendar to devices, access rights to the calendar and events remain unchanged (for example, events from the Users' birthdays calendar cannot be changed, but you can modify events from the shared calendar if you have been granted full access to it).
Export a calendar to your Android device
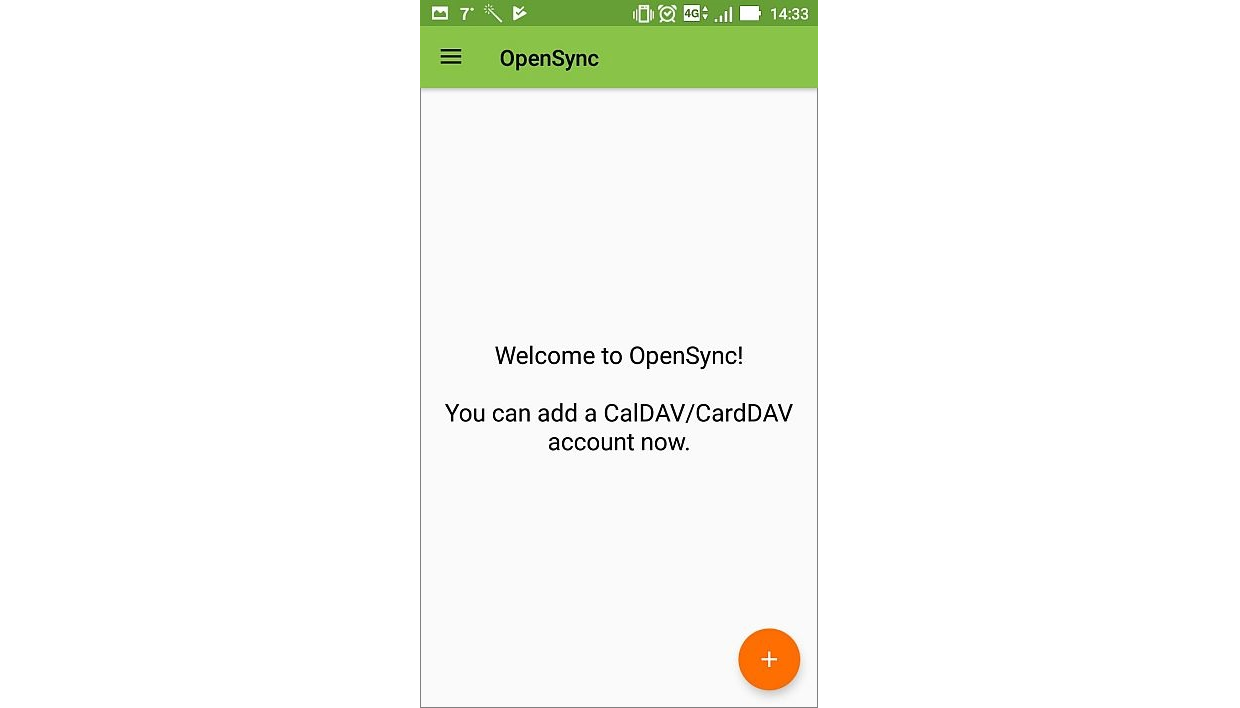
Android devices do not have the built-in support for the CalDAV synchronization. To export a calendar, first you need to install a third-party app on your device, for example, OpenSync.
When the app is installed, open it.
- In the OpenSync app, click the Plus button in the lower right corner to add a new account.
- Select the Login with URL and user name option.
- Specify the account settings:
- Base URL - specify your portal address + /caldav/, for example,
https://portalname.onlyoffice.com/caldav/ - User Name - specify the email address that you use to access the portal
- Password - specify the password that you use to access the portal
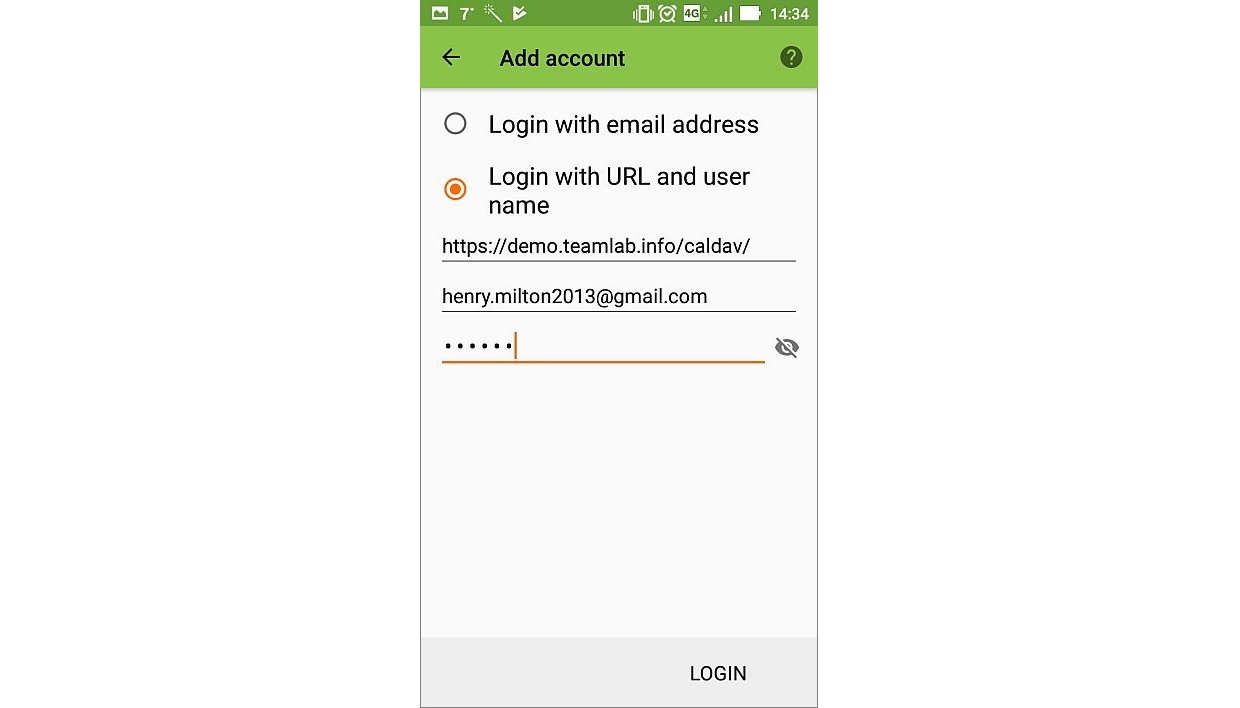
- Base URL - specify your portal address + /caldav/, for example,
- Tap Login in the lower right corner.
- Then tap Create account.
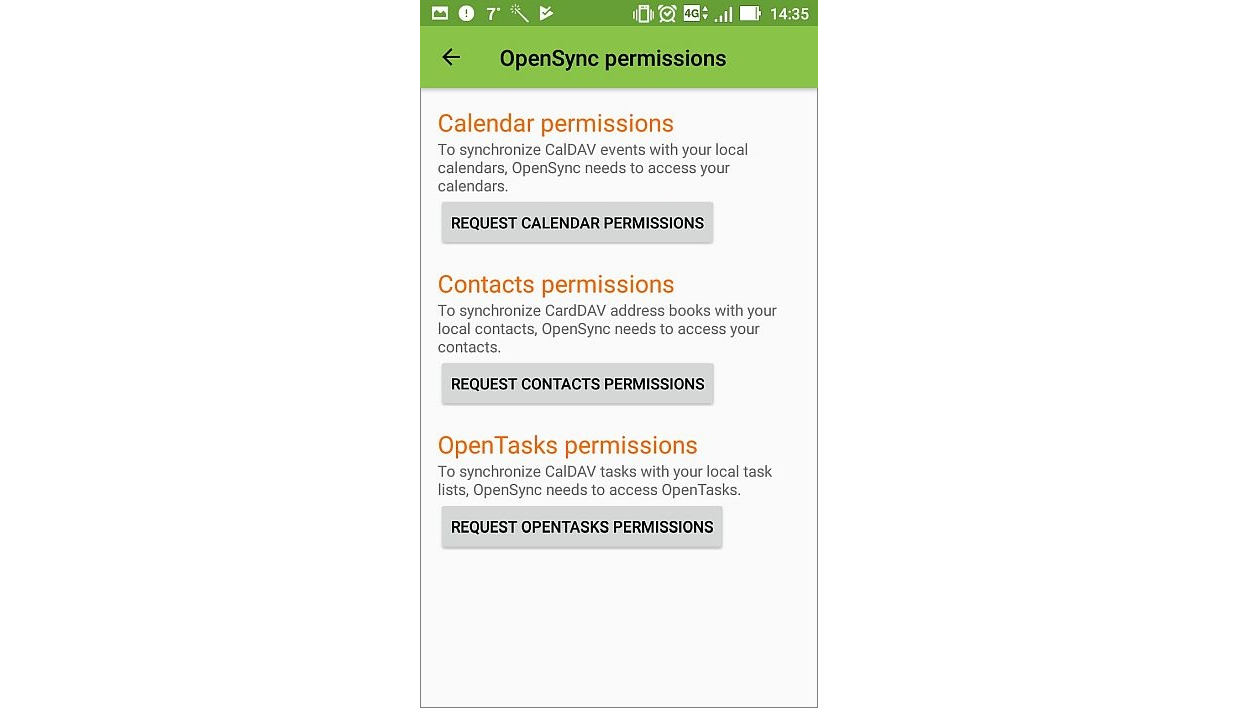
- In the notification bar, a notification will appear informing that the app requires permissions. Tap Request calendar permissions, then grant the requested permissions by tapping Allow button.
If you plan to export todos, provide permissions for the OpenTasks app. Tap the Request OpenTasks permissions button, then provide the corresponding permissions by tapping the Allow button. When you launch the OpenTasks app for the first time, you'll also need to provide permissions via the app interface.
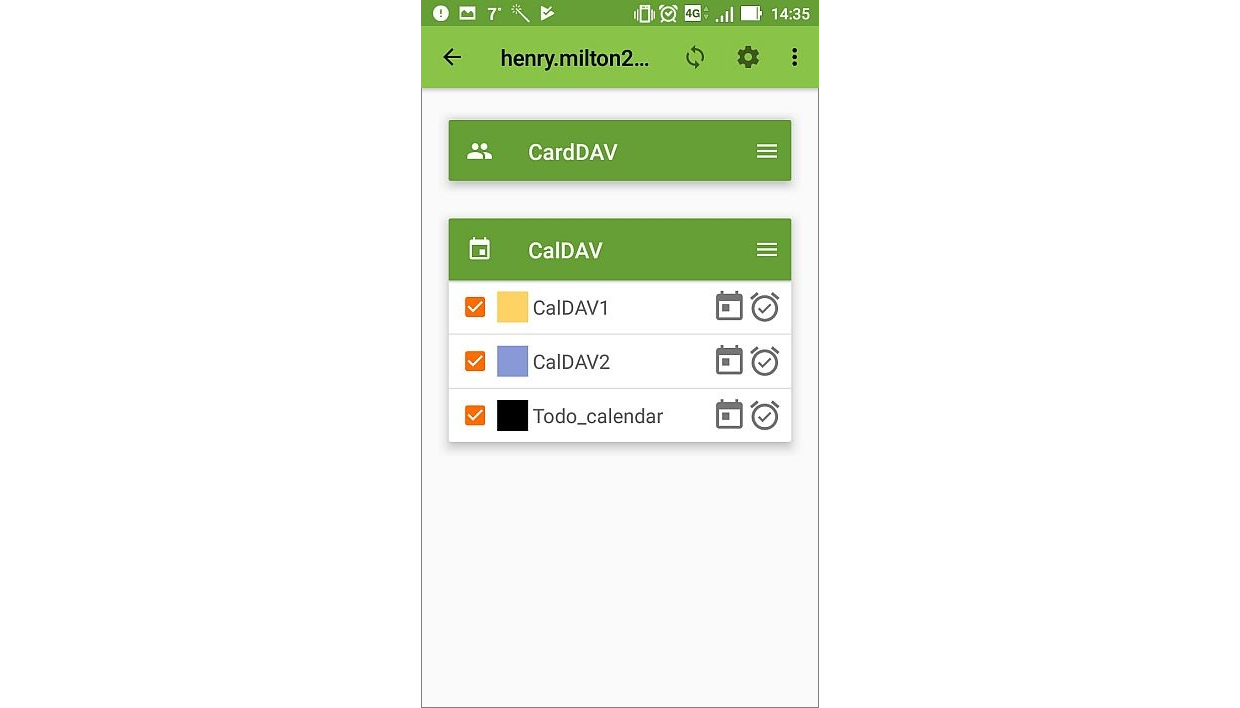
- In the OpenSync app, tap the added account (by default the email address is used as the account name).
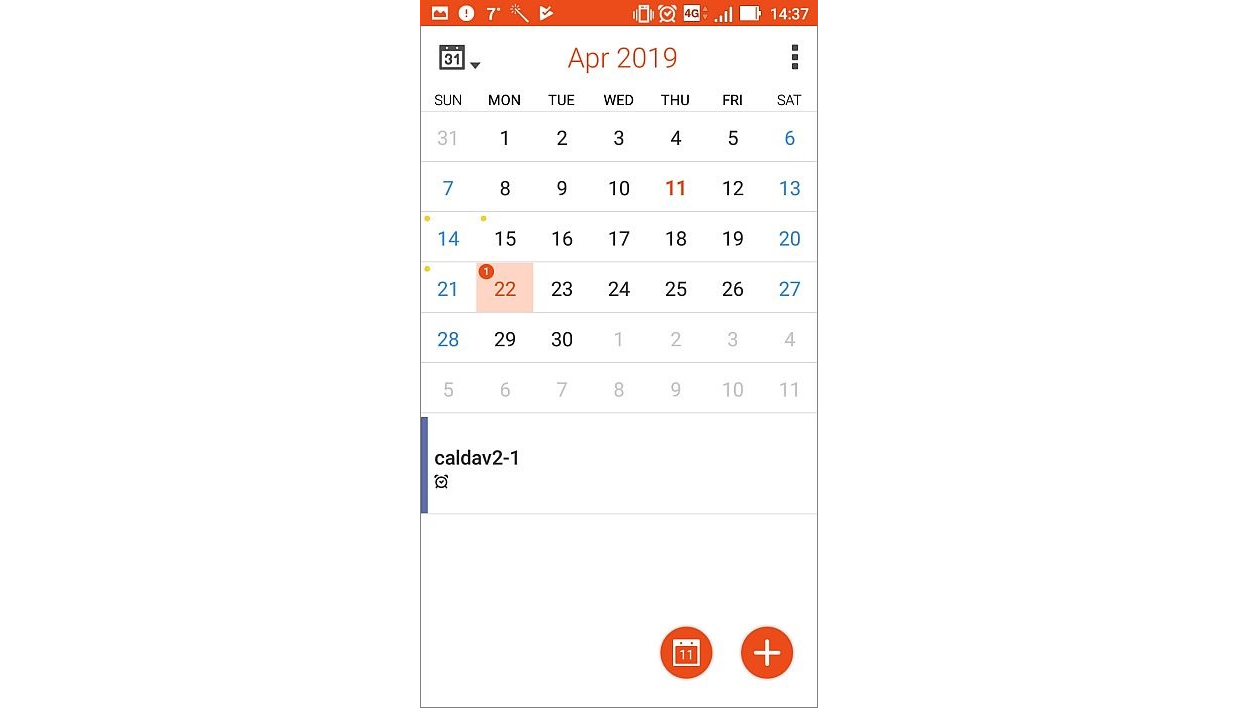
- All calendars from the My Calendars section of your account that support the CalDAV synchronization will be imported to the device and displayed in the CalDAV list. Select the calendars you wish to display in the default calendar app on your device.
If you plan to import to-dos, enable the Todo_calendar by selecting it in the list in the OpenSync app.
- Open the default calendar app on your device. Refresh the calendar by tapping the menu button in the upper-right corner and selecting Refresh from the menu. After that, the events from the exported calendar will be displayed in the default calendar on your device.
 If you are going to import todos, open the OpenTasks app and refresh the todo list by tapping the menu button in the upper right corner and selecting the Refresh menu item. After that, the Todo_calendar will be displayed within the OpenTasks app.
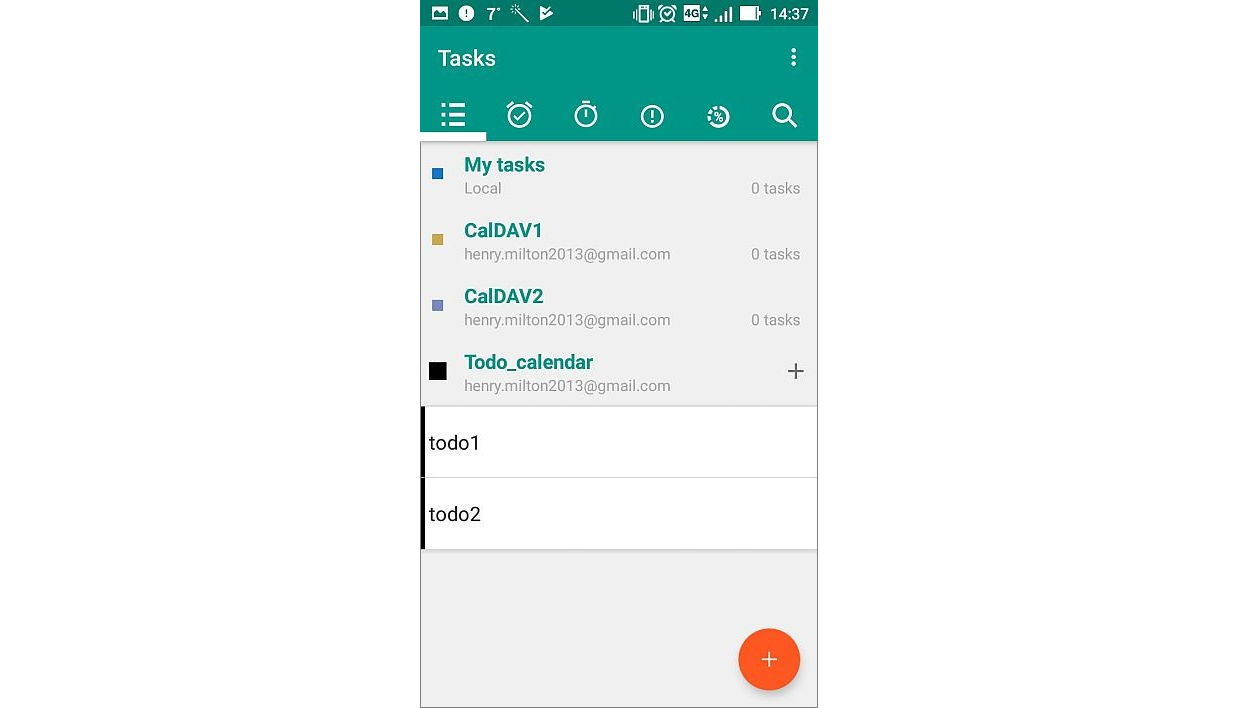
Export a calendar to your iOS device
To synchronise your portal calendar with the default calendar on your iOS device, follow the steps below:
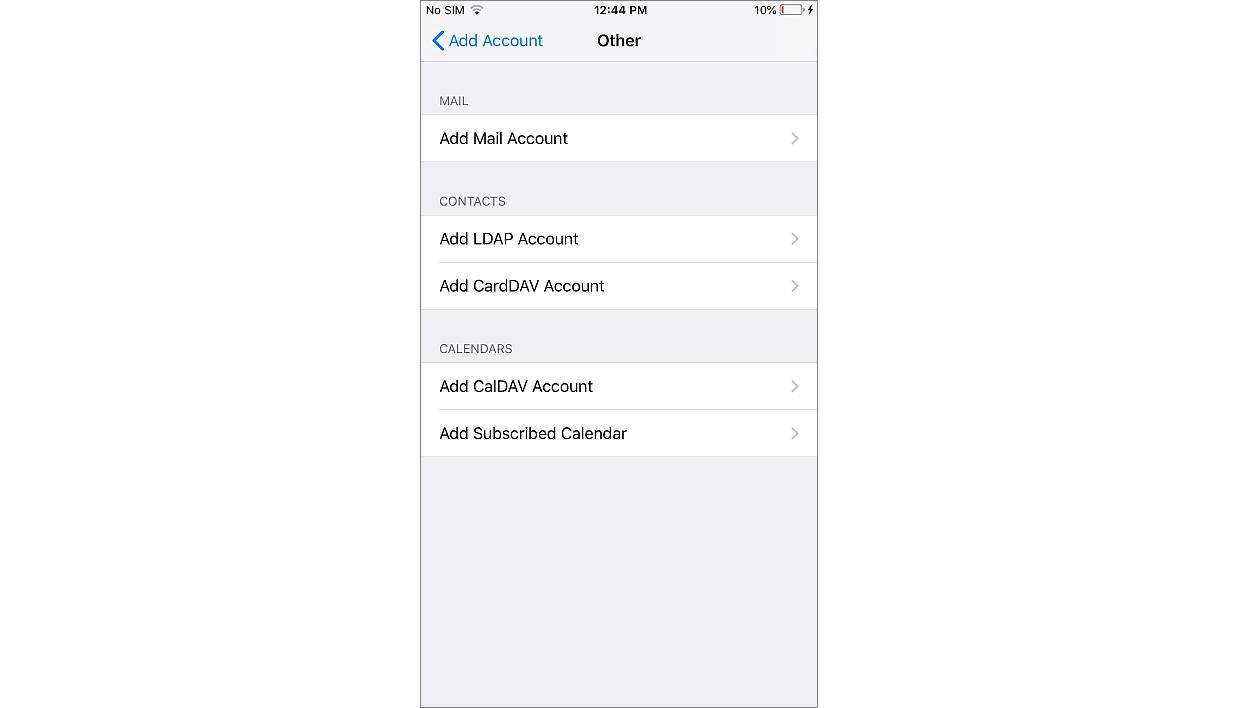
- On your iOS device, open the Settings menu and go to the Calendar (Passwords and accounts on iOS 13 and lower) section.
- Click Add account.
- Select the Other option in the list.
- Select the Add CalDAV account option.
- Specify the account settings:
- Server - specify your portal address + /caldav/, for example,
https://portalname.onlyoffice.com/caldav/ - User - specify the email address that you use to access your account on the portal
- Password - specify the password that you use to access your account on the portal
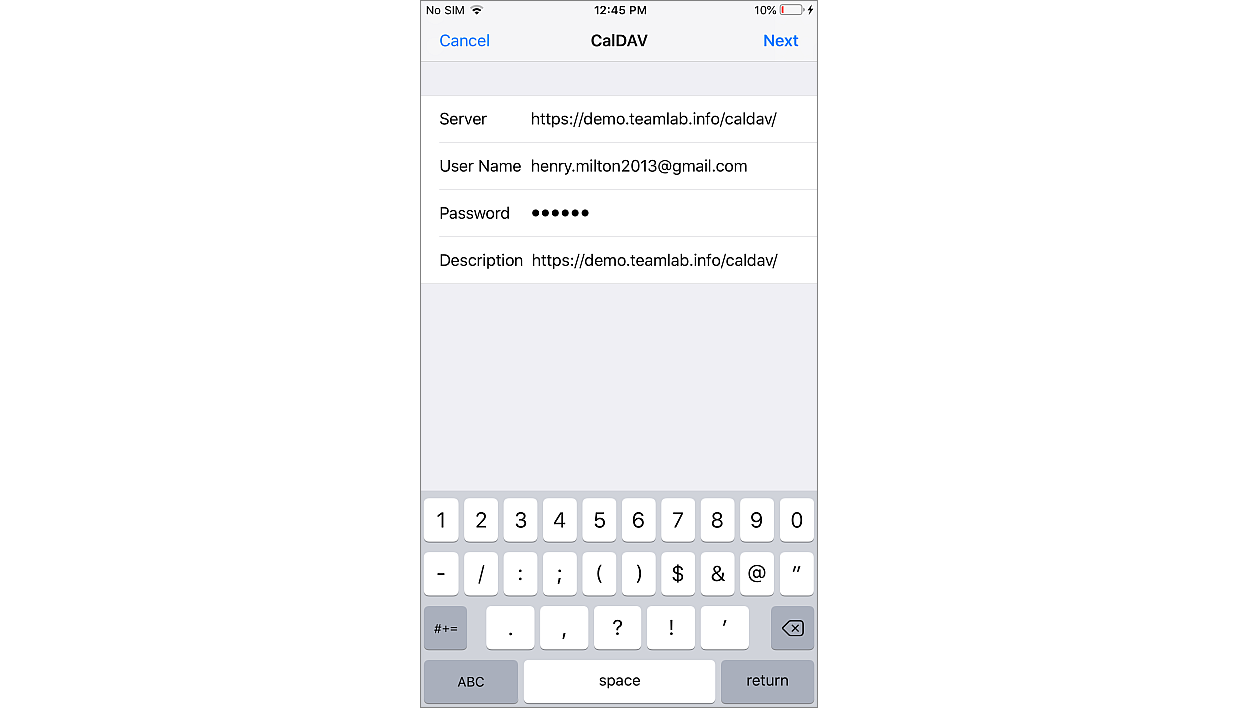
The settings will be verified and saved.
- Server - specify your portal address + /caldav/, for example,
- Tap the added account and go to the advanced settings.
- Tap Advanced.
- In the Account URL field, the URL address must be specified in the following form:
https://portalname.onlyoffice.com/caldav/login@example.com@portalname.onlyoffice.com/Correct the URL by adding
login@example.com@portalname.onlyoffice.com/Where
login@example.comis the email address that you use to access your account on the portal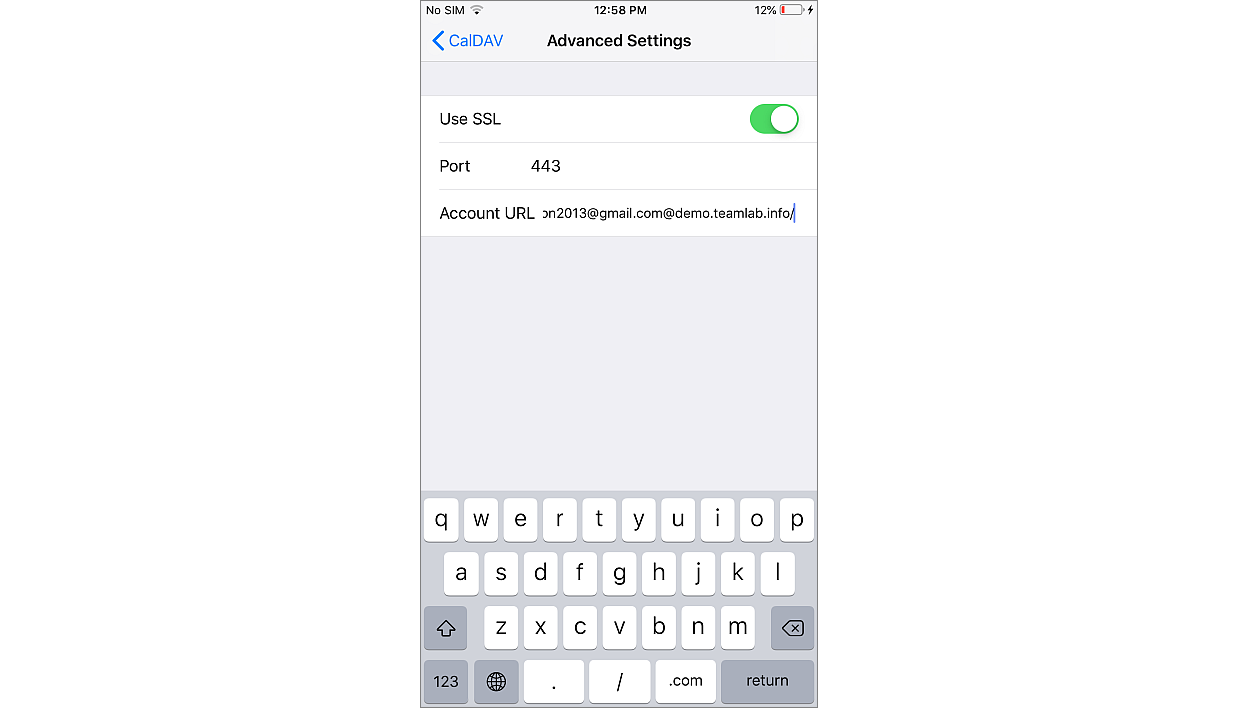
- Return to the previous screen and save the settings by tapping Done.
After tapping Done, return to the advanced settings and verify that the data is correct.
After that, the exported calendar will be available in the calendar list, and the events from it will be displayed in the default calendar on your device.
Export a calendar to the Thunderbird application
To synchronize your portal calendar with the Mozilla Thunderbird application, please follow the easy steps below:
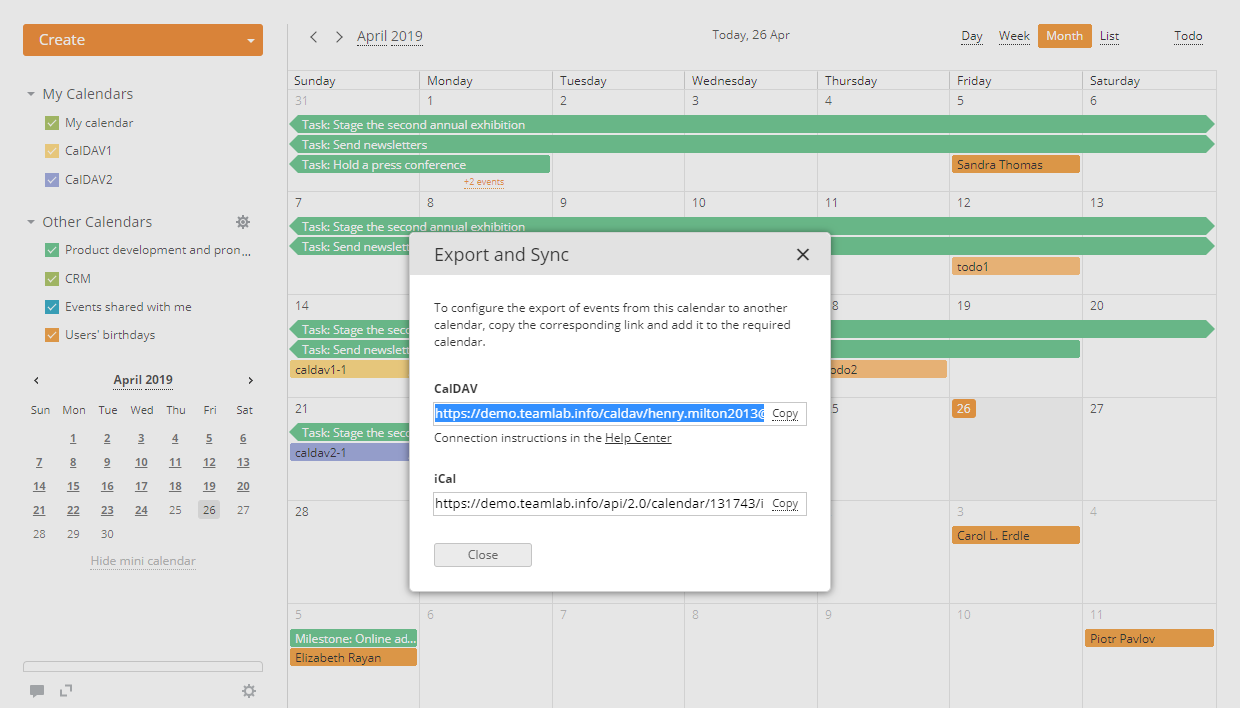
- In your portal calendar, copy the CalDAV link:
- Hover over the calendar in the "My Calendars" or "Other Calendars" section you wish to export,
- Click the
 icon that appears to the right of the calendar title,
 - ClickExport and Sync in the Edit calendar window,
- Copy the entire link provided in the CalDAV section by clicking the Copy option,
 It is also possible to connect the to-do list to Mozilla Thunderbird. To obtain the link, perform the following actions in your portal calendar:
- Click the Todo button in the upper right corner to open the To-do panel,
- Click the icon on the To-do panel,
- Click the Export and Sync option,
- Copy the provided CalDAV link by clicking the Copy option.
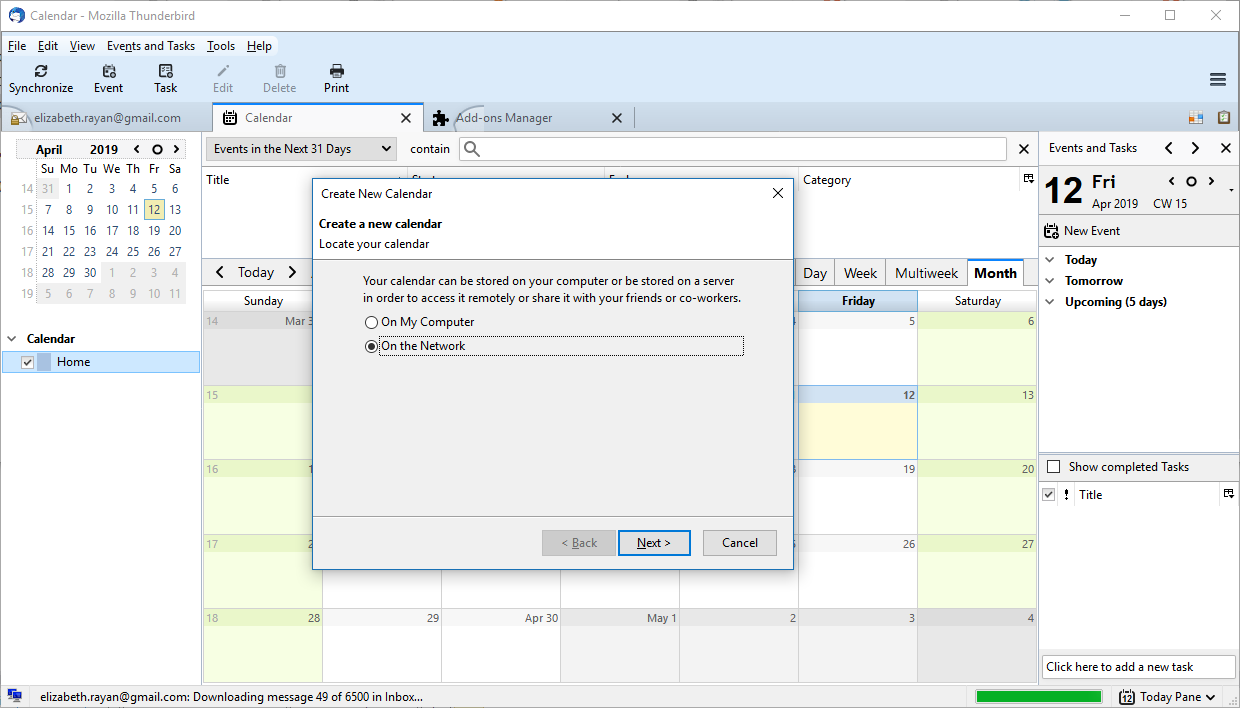
- Create a new calendar in the Mozilla Thunderbird:
- Right-click the calendar list on the left.
- Select the New calendar option from the drop-down menu.
- Select the On the Network option in the Create New Calendar window and click Next.
- Select the CalDAV option.
- Paste the copied CalDAV link into the Location field and press Next.
The Offline Support option is selected by default. It allows you to work with the calendar when you are in offline mode.

- Enter a title and choose a colour for the calendar. Click Next.
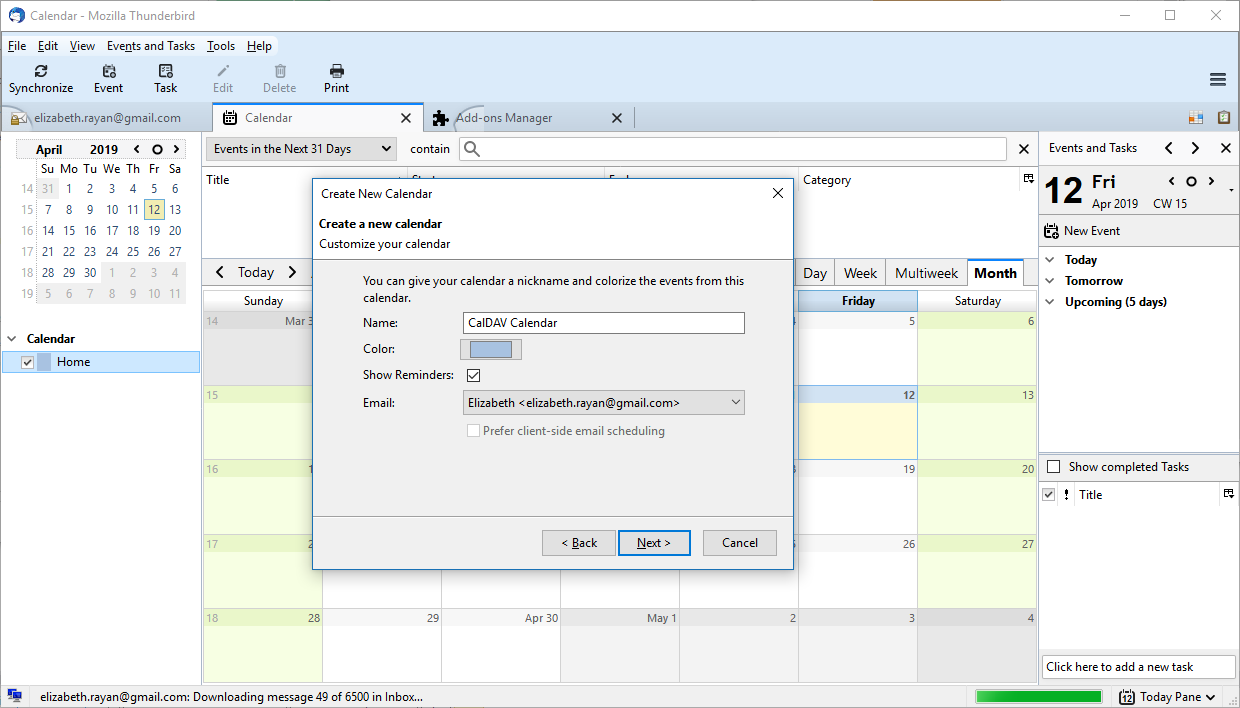
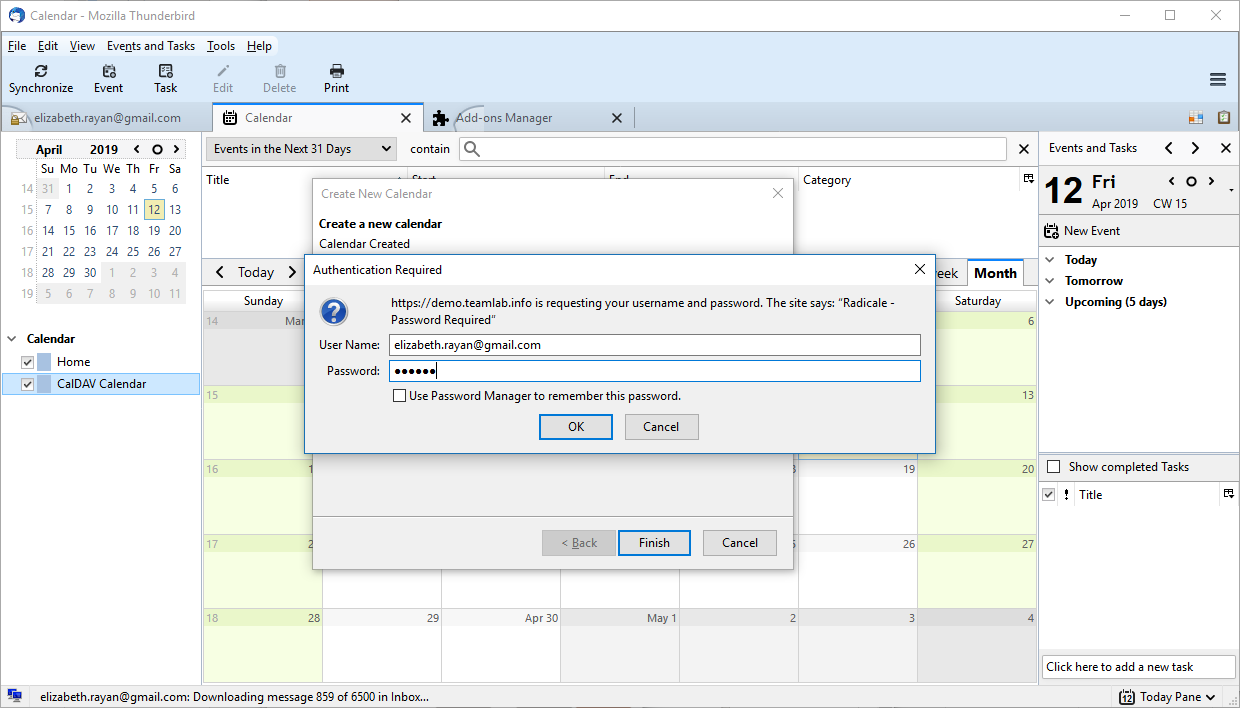
- A confirmation that the calendar has been created will appear. Click Finish.
- When the calendar is created, you'll also need to specify your credentials. Enter the email address and password used to access your portal account.
To refresh the calendar, click Synchronize at the top.