Inserisci forme automatiche
Inserisci una forma automatica
- Seleziona la diapositiva in cui desideri inserire la forma.
- Tocca l'icona
 nella barra degli strumenti superiore per aprire il pannello di inserimento nuovo oggetto.
 - Passa alla scheda
 Forma.
 - Seleziona una delle forme automatiche disponibili.
La forma automatica selezionata verrà aggiunta. Ora puoi modificarne le proprietà e la posizione.
Regola le impostazioni della forma
- Seleziona la forma toccando il suo bordo (la casella rettangolare attorno alla forma dovrebbe essere visualizzata come una linea continua).
- Apri il pannello delle impostazioni della forma
- toccando l'icona
 nella barra degli strumenti superiore, oppure
 - toccando l'opzione Forma nel menu a comparsa.
- toccando l'icona
- Tocca una delle due schede: Diapositiva o Forma.
-
La scheda Diapositiva contiene le seguenti sezioni: Tema, Layout, Transizione e Sfondo. Usa la freccia
 a sinistra per tornare alla sezione delle impostazioni precedente.
La scheda Forma contiene le seguenti sezioni: Stile, Sostituisci, Riordina e Allinea.
La sezione Stile contiene i seguenti quattro menu: Riempimento, Contorno, Ombra, Opacità.
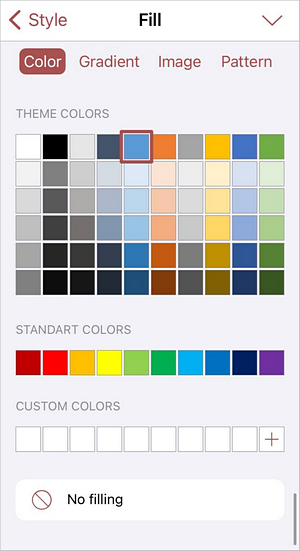
- Riempimento - per riempire lo spazio interno della forma automatica con un colore solido, un modello di gradiente, un immagine personalizzata, una texture predefinita o un motivo.
- Colore - scegli uno dei colori Tema o Standard disponibili o imposta il tuo Colore personalizzato. Se non vuoi usare un colore di riempimento, scegli l'opzione Nessun riempimento
 .
.
- Gradiente - scegli due colori per una transizione di colore uniforme, imposta l'angolo tramite il cursore e scegli uno degli stili di transizione colore disponibili: Lineare o Radiale. Per aggiungere più punti di gradiente, tocca e tieni premuto nella parte inferiore del campo colore del gradiente o tocca e tieni premuto il quadrato del colore del gradiente esistente e scegli l'opzione Duplica nel menu contestuale, quindi tocca il nuovo quadrato del colore e imposta il colore desiderato.

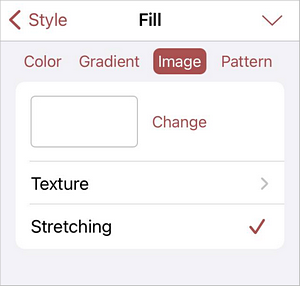
- Immagine - scegli l'immagine per riempire la forma.
- Tocca l'opzione Cambia e scegli una foto dalla tua libreria, scatta una foto, inserisci un'immagine dai File o elimina un'immagine.
- Tocca l'opzione Texture e scegli una delle texture disponibili.
- Abilita o disabilita l'opzione Estensione per estendere l'immagine/texture per riempire completamente la forma o per preservare la dimensione originale dell'immagine/texture rispettivamente.
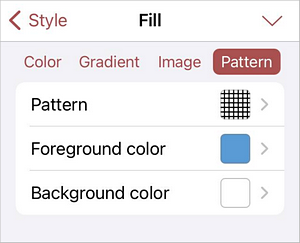
- Motivo - scegli un motivo per riempire la forma.
- Motivo - tocca questa opzione e scegli uno dei motivi disponibili.
- Colore in primo piano - scegli uno dei colori Tema o Standard disponibili o imposta il tuo Colore personalizzato per il primo piano del motivo.
- Colore di sfondo - scegli uno dei colori Tema o Standard disponibili o imposta il tuo Colore personalizzato per lo sfondo del motivo.
- Colore - scegli uno dei colori Tema o Standard disponibili o imposta il tuo Colore personalizzato. Se non vuoi usare un colore di riempimento, scegli l'opzione Nessun riempimento
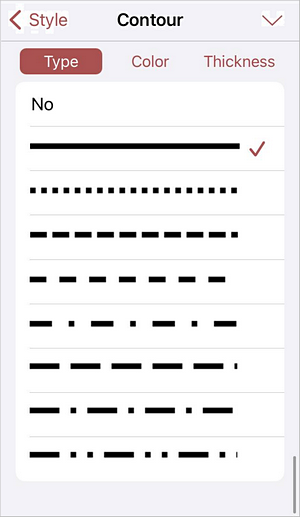
- Contorno - per impostare il tipo, il colore e lo spessore del bordo.
- Tipo - scegli uno dei tipi di bordo disponibili o l'opzione Nessuno per eliminare un bordo della forma.
- Colore - scegli uno dei colori Tema o Standard disponibili o imposta il tuo Colore personalizzato per il bordo.

- Spessore - usa il cursore per impostare lo spessore del bordo.

- Tipo - scegli uno dei tipi di bordo disponibili o l'opzione Nessuno per eliminare un bordo della forma.
- Ombra - abilita o disabilita l'interruttore per far sì che la forma proietti un'ombra o meno rispettivamente.
- Opacità - usa il cursore per impostare il livello di opacità della forma.
La sezione Sostituisci consente di sostituire la forma automatica corrente con un'altra selezionata dal menu.
La sezione Riordina consente di impostare la posizione della forma automatica selezionata rispetto ad altri oggetti quando diversi oggetti si sovrappongono. Per saperne di più, consulta la sezione Manipola oggetti di questa guida.
La sezione Allinea consente di allineare la forma automatica sulla diapositiva. Per saperne di più, consulta la sezione Manipola oggetti di questa guida.
- Riempimento - per riempire lo spazio interno della forma automatica con un colore solido, un modello di gradiente, un immagine personalizzata, una texture predefinita o un motivo.
Aggiungi testo all'interno della forma automatica
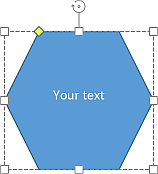
- Posiziona il punto di inserimento toccando all'interno della forma automatica (la casella rettangolare attorno alla forma dovrebbe essere visualizzata come una linea tratteggiata).
- Inizia a digitare il tuo testo utilizzando la tastiera su schermo.
Il testo che aggiungi in questo modo diventa parte della forma automatica (quando sposti o ruoti la forma, il testo si sposta o ruota con essa).
Puoi applicare le stesse opzioni di formattazione del testo come per il testo normale. Per modificare il testo aggiunto all'interno della forma automatica:
- Seleziona il testo: tocca due volte un pezzo di testo all'interno della forma e trascina le maniglie di selezione.
- Apri il pannello delle impostazioni
- toccando l'icona
nella barra degli strumenti superiore, oppure
- toccando l'opzione Modifica Testo nel menu a comparsa.
- toccando l'icona
- Passa alla scheda Testo e regola i parametri di testo necessari:
- cambia il tipo, dimensione, colore del carattere,
- applica stili di decorazione del carattere,
- applica il tipo di allineamento orizzontale/verticale necessario,
- cambia i rientri del testo,
- regola la spaziatura delle righe,
- crea elenchi puntati e numerati.
Rimuovi la forma
Seleziona la forma toccandola e procedi in uno dei seguenti modi:
- tocca l'elemento di menu Elimina nel menu a comparsa, oppure
- apri il pannello delle impostazioni toccando l'icona
nella barra degli strumenti in alto, passa alla scheda Forma, scorri verso l'alto e tocca il pulsante Rimuovi Forma.