OpenRouter
OpenRouter is an AI routing platform. It gives access to many models from different providers using one API key. You don’t need separate keys for each provider.
This is a step-by-step guide on installing and configuring OpenRouter for ONLYOFFICE Docs and ONLYOFFICE DocSpace.
Configuring OpenRouter for ONLYOFFICE Desktop Editors
ONLYOFFICE Docs 9.2 introduces a built-in AI agent that helps you generate and summarize documents, manage files, analyze content, and much more.
- Open the AI Agent in ONLYOFFICE Desktop Editors.
- Click on Add provider and choose OpenRouter from the drop-down list.
- Give a name to your Agent.
- Input your API key in the provided field. The API key is issued by the AI provider and can be generated on the OpenRouter official website.
- Click Save.
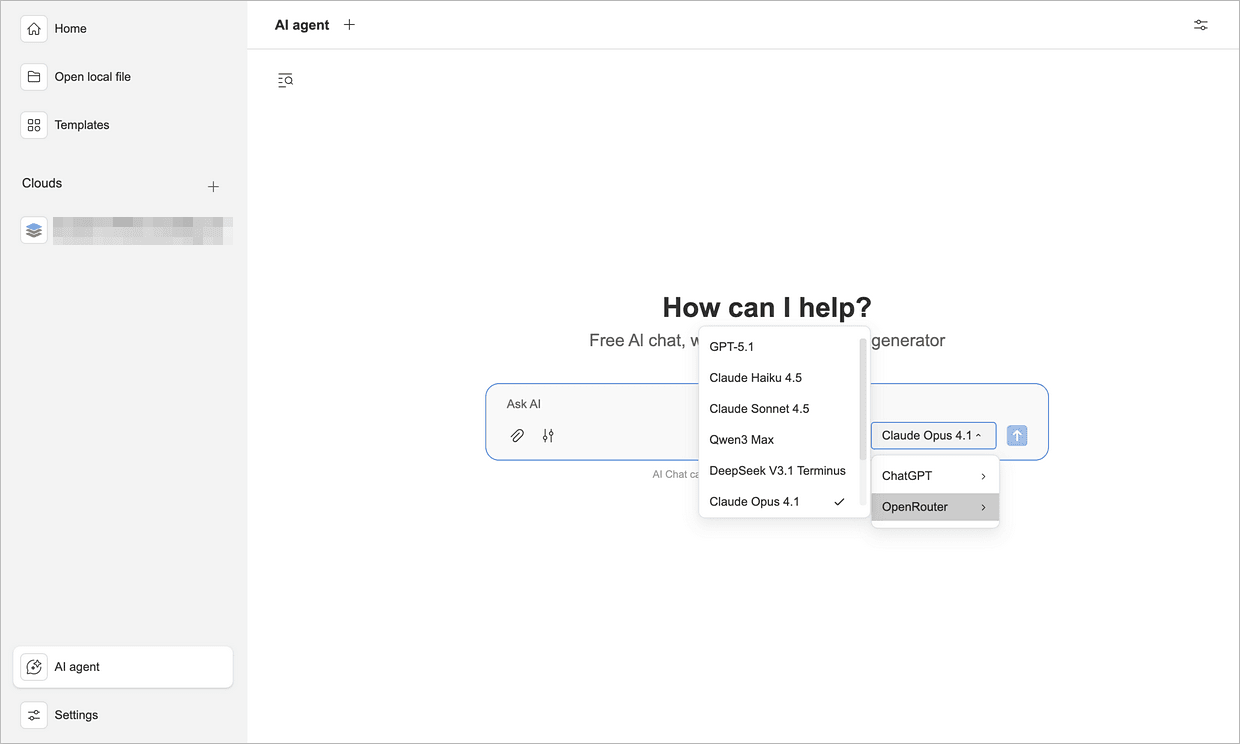
Now OpenRouter is available for your AI agents. You can also switch between different AI models at any time using the AI Agent menu on the home page.
Configuring OpenRouter for ONLYOFFICE DocSpace
Starting with version 3.6, ONLYOFFICE DocSpace comes with built-in AI agents to facilitate working with documents.
Step 1. Add OpenRouter as your AI provider
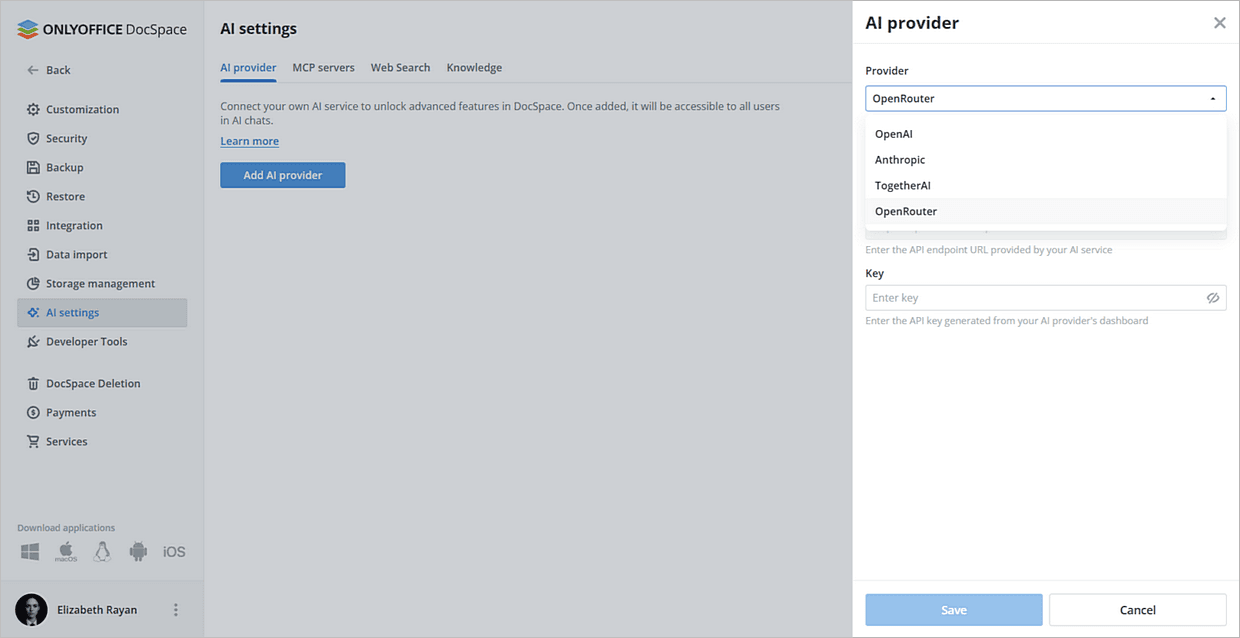
- Go to Settings → AI Settings → Add AI provider.
- In the drop-down list, select OpenRouter.
- Pick a name for your Agent.
- Input your API key in the provided field. The API key is issued by the AI provider and can be generated on the OpenRouter official website.
- Click Save.
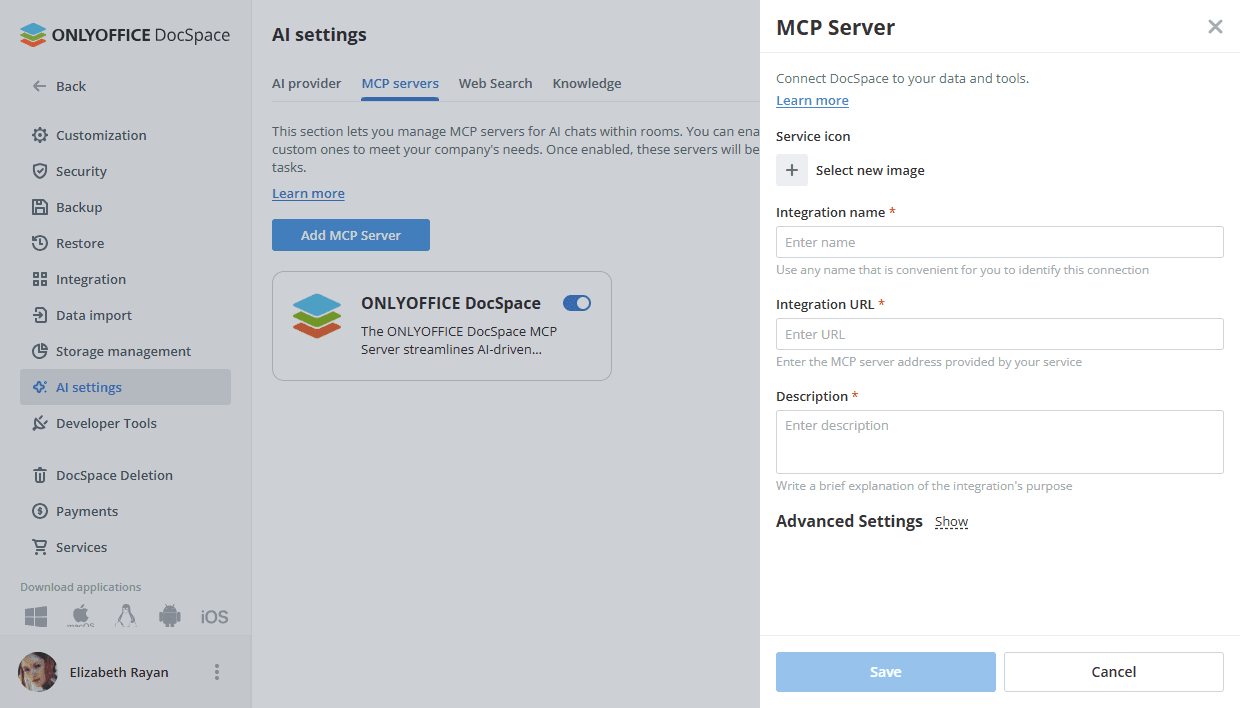
Step 2. Enable the MCP server
AI agents need an MCP server to work inside DocSpace.
- Open the MCP servers section.
- You can use the built-in ONLYOFFICE DocSpace MCP Server or connect your own.
Step 3. Configure Web Search and Knowledge Base
This is an optional but recommended step.
To allow agents to use live web data:
- Open the Settings → AI Settings → Web Search.
- Choose the Web Search Engine from the drop-down list.
- Enter the API Key in the corresponding field.
- Click Save.
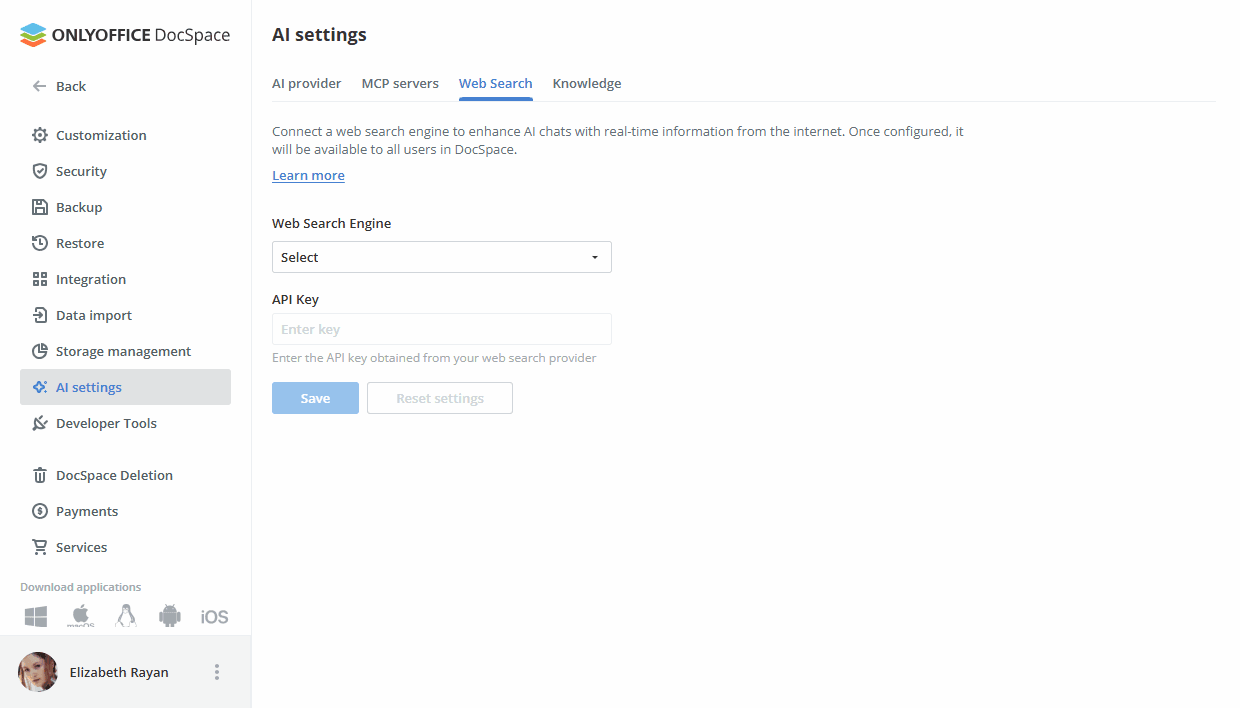
Please refer to the following article to learn more about Web Search.
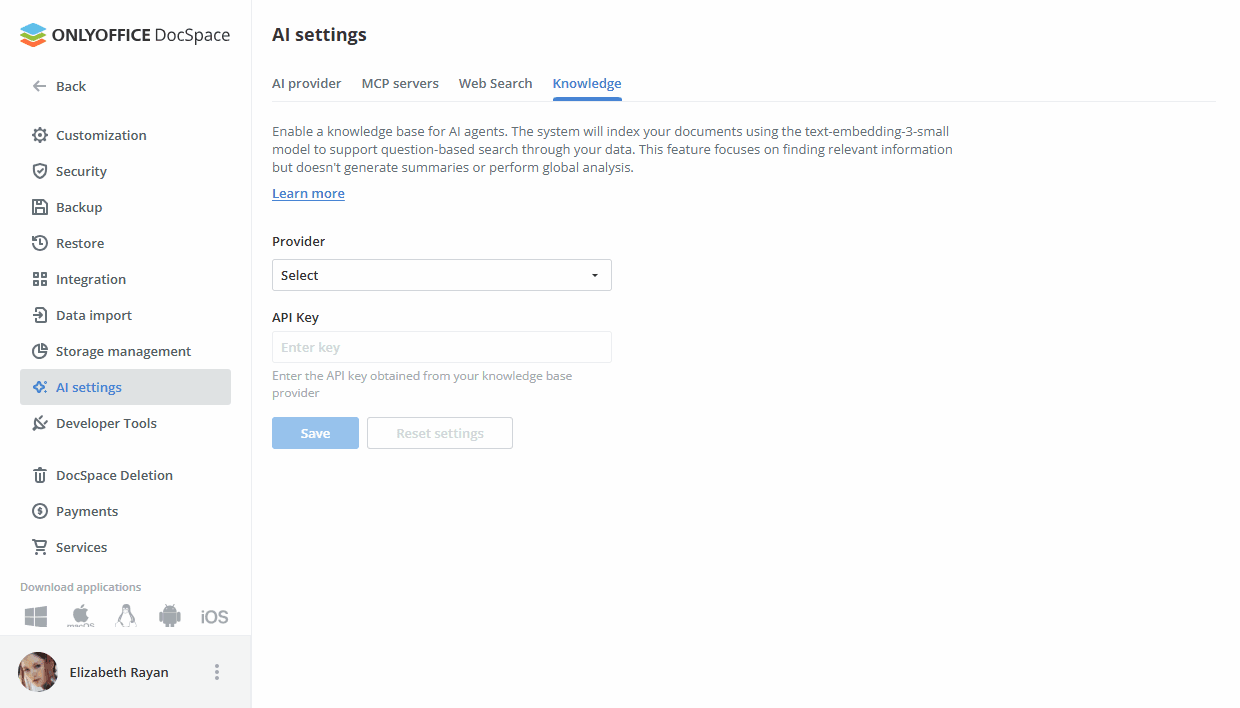
To enable the knowledge base:
- Open the Settings → AI Settings → Knowledge.
- In the Provider list, choose OpenRouter.
- Enter the API Key in the corresponding field.
- Click Save.
Please refer to the following article to learn more about Knowledge bases.
Step 4. Create your AI agent
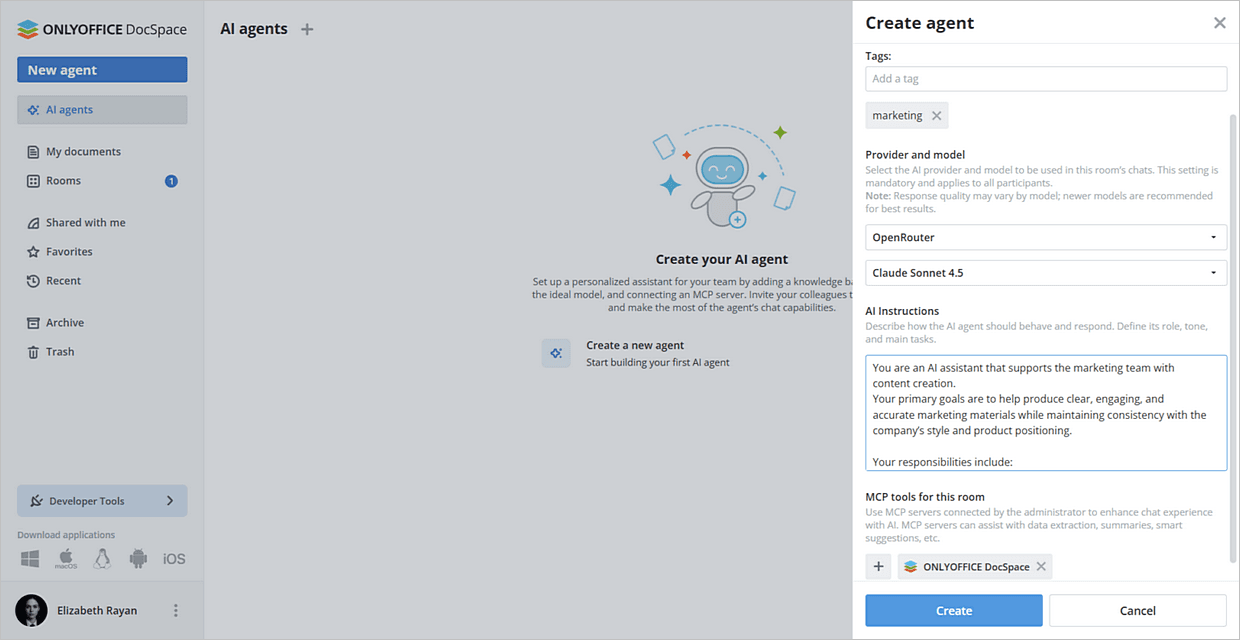
- Open AI agents → click the Create a new agent button.
-
Enter the following details:
- Name
- Cover image
- Tags
- Provider name and AI model
- AI instructions describing the agent's purpose
- MCP tools
- Click Create.
Configuring OpenRouter for ONLYOFFICE Docs editors
You can also use OpenRouter in ONLYOFFICE Docs online editors to assist in content-related tasks.
- Follow this guide for general configuration.
- Once the plugin is installed, add AI models. Go to the AI tab and open the Settings.
- Select Edit AI models in the bottom left corner of the window and click Add.
- In the window that appears, select OpenRouter from the drop-down list.
- Input your API key in the provided field. The API key is issued by the AI provider and can be generated on the OpenRouter official website.
- Select any OpenRouter model (OpenAI, Anthropic, Meta, DeepSeek, etc.) and assign it to various tasks listed under Use model for.
-
Click OK. The model will appear in the AI Models list.
Click OK again.
- In the AI Configuration window, select the model you want to use to perform the various tasks.
- Access the AI features through the AI tab or by selecting text and right-clicking it to open the context menu.