本文由AI翻译
SharePoint
使用 WOPI 连接 ONLYOFFICE 文档
您还可以通过 WOPI 将 ONLYOFFICE 文档与SharePoint连接,WOPI 是一种基于 REST 的协议,当客户端与您的数据服务器建立连接时,会向一组 REST 端点发出 HTTP 请求。
请注意,通过 WOPI 连接 ONLYOFFICE 文档由于 WOPI 架构的限制而缺少某些功能:
- 编辑器不支持版本历史功能。
- 不支持邮件合并功能。
- 编辑器不支持从您的存储中插入图像。
- 不支持比较来自您存储的文档。
- 不支持以下格式:DOC、XLS、PPT。
要通过 WOPI 将 ONLYOFFICE 连接到SharePoint,
- 确保您满足要求。
-
打开您的SharePoint 服务器。运行SharePoint 管理 Shell控制台,并使用以下命令设置所需的 WOPI 区域:
Set-SPWOPIZone -Zone "external-http"文档服务器默认使用external-http参数。 -
运行以下命令以检查当前场上是否有其他文档类型的 WOPI 绑定:
如果有,请运行以下命令删除这些绑定:Get-SPWOPIBindingRemove-SPWOPIBinding -All:$true -
根据文件类型创建默认操作的绑定。
运行以下命令以一次性为所有文件类型创建绑定:
运行以下命令仅为特定文件类型创建绑定:New-SPWOPIBinding -ServerName ip_or_domain.com:portNew-SPWOPIBinding -ServerName ip_or_domain.com:port -Extension DOCX如果未使用 SSL,请在命令末尾添加-AllowHTTP。
创建新文档
以下说明仅适用于 WOPI 连接方法。
要能够创建新文档,请设置以下描述的参数。此示例仅针对 DOCX 文件,但您可以类似地添加 XLSX、PPTX 和其他文件。
-
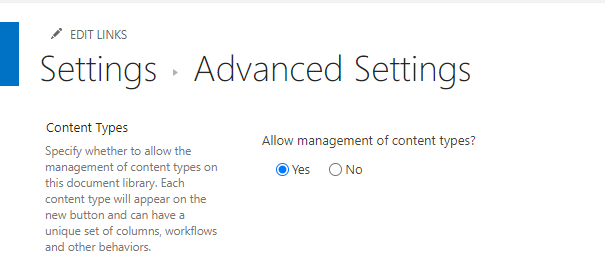
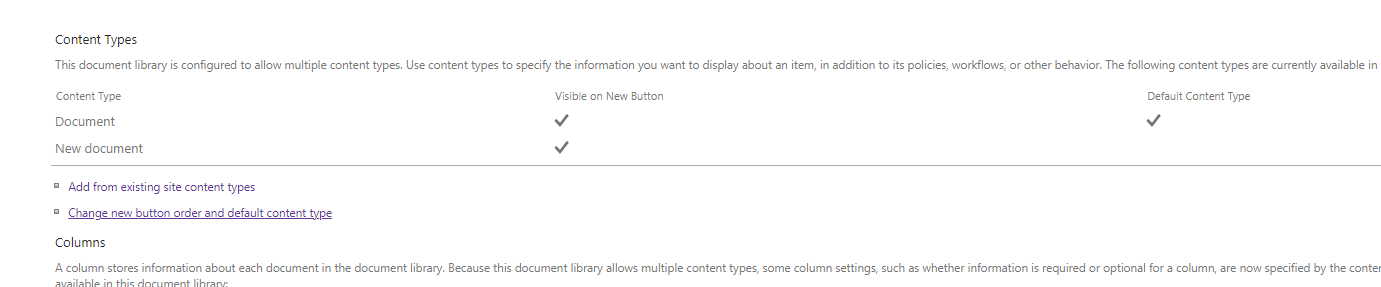
启用允许管理内容类型设置:转到文档 → 库设置 → 高级设置。在允许管理内容类型部分中,选择是并点击确定。
-
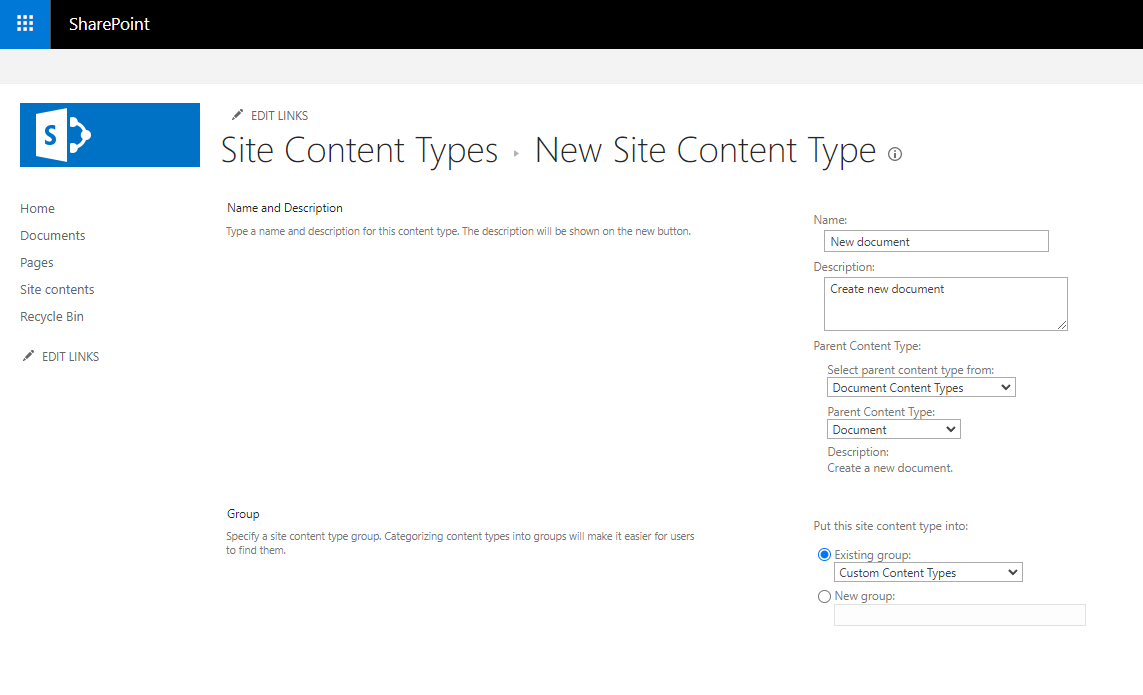
在文档库中,转到站点内容 → 站点设置 → 站点内容类型。点击创建。填写表单:名称(新文档)、描述。在父内容类型中,选择文档内容类型、文档。在现有组中,选择自定义内容类型并点击确定。
-
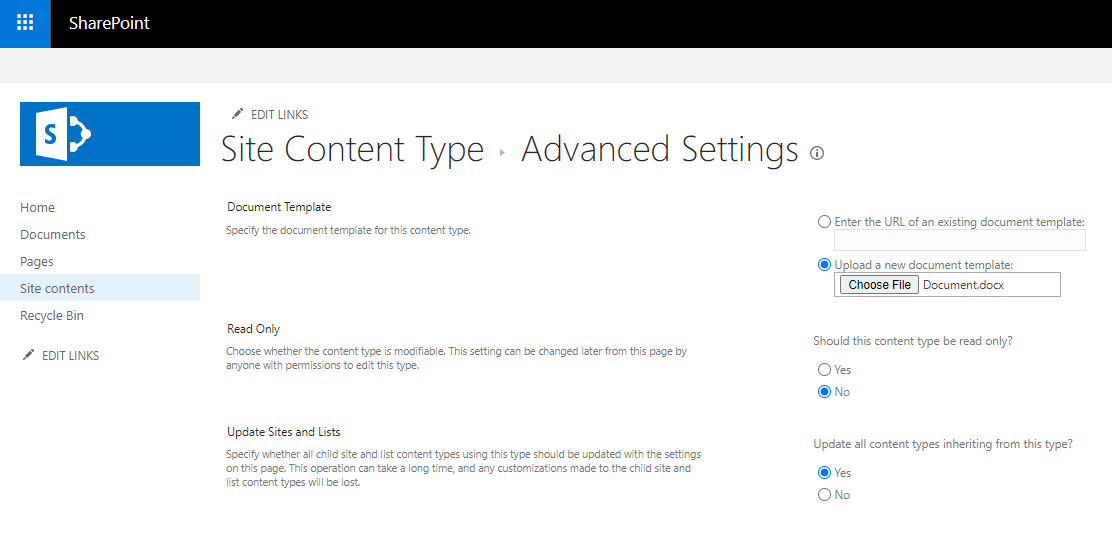
在文档库中,转到站点内容 → 站点设置 → 站点内容类型。选择最近添加的新文档。转到高级设置 → 文档模板 → 上传新文档模板。点击选择文件按钮,上传所需的文档并点击确定。
-
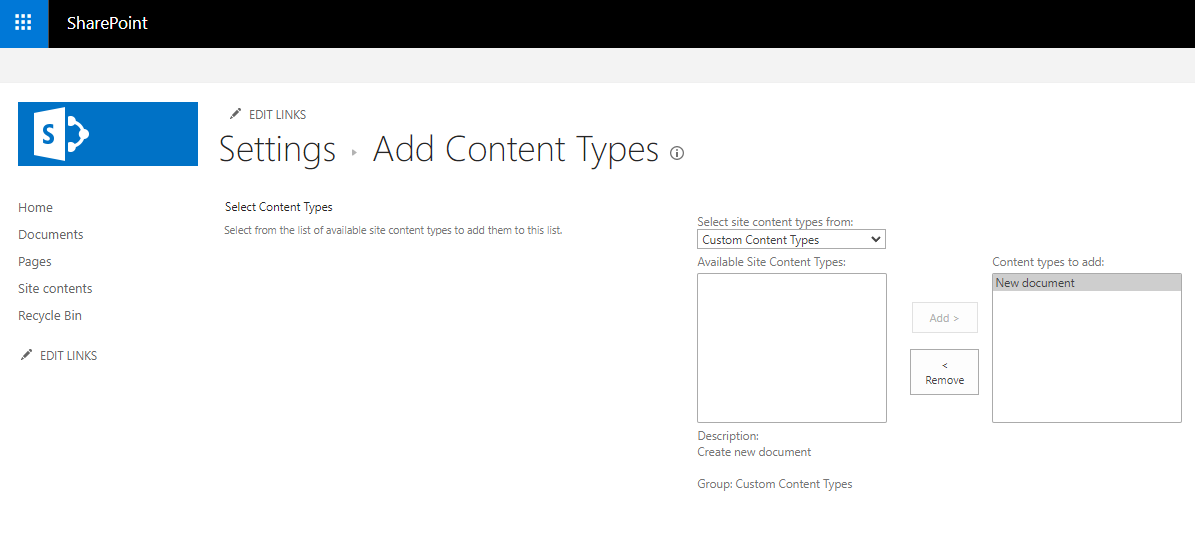
转到文档库 → 库设置。在内容类型部分中,选择从现有站点内容类型添加。在从中选择站点内容类型列表中,选择自定义内容类型。在可用站点内容类型字段中,选择新文档。点击添加 >按钮,然后点击确定。
-
在文档库中,刷新页面并按“新建”按钮。
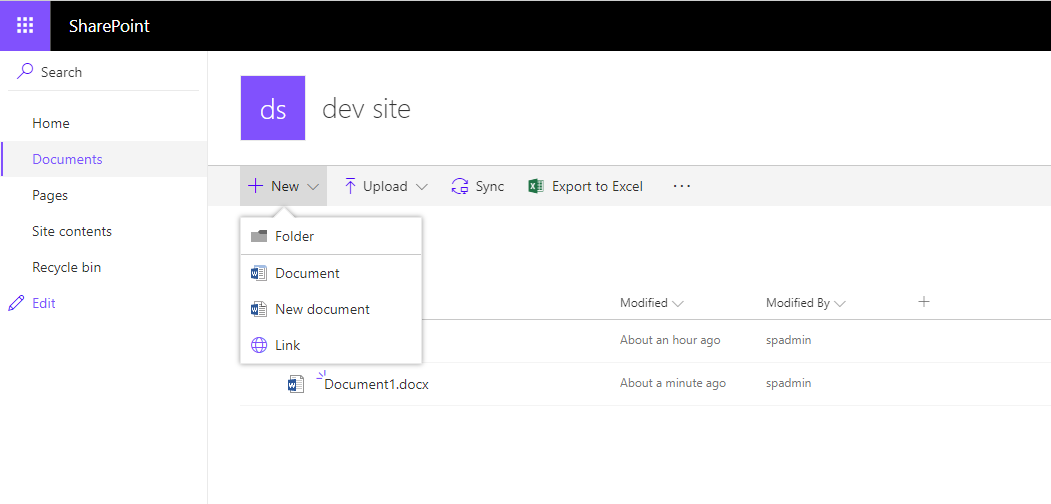
-
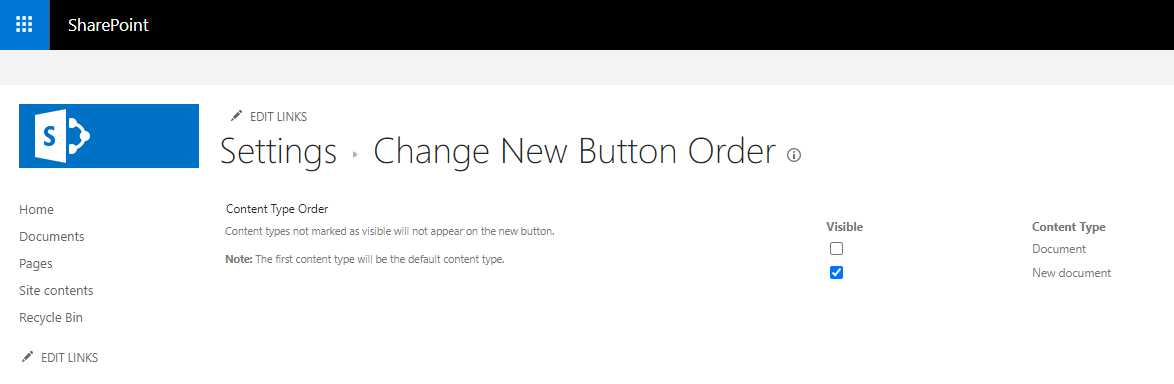
文档内容类型将自动添加;这是创建新文档内容类型的父类型。它必须在文档库 → 库设置中隐藏。在内容类型部分中,选择更改新按钮顺序和默认内容类型。
在可见列中,取消选中文档内容类型的复选框并点击确定。
-
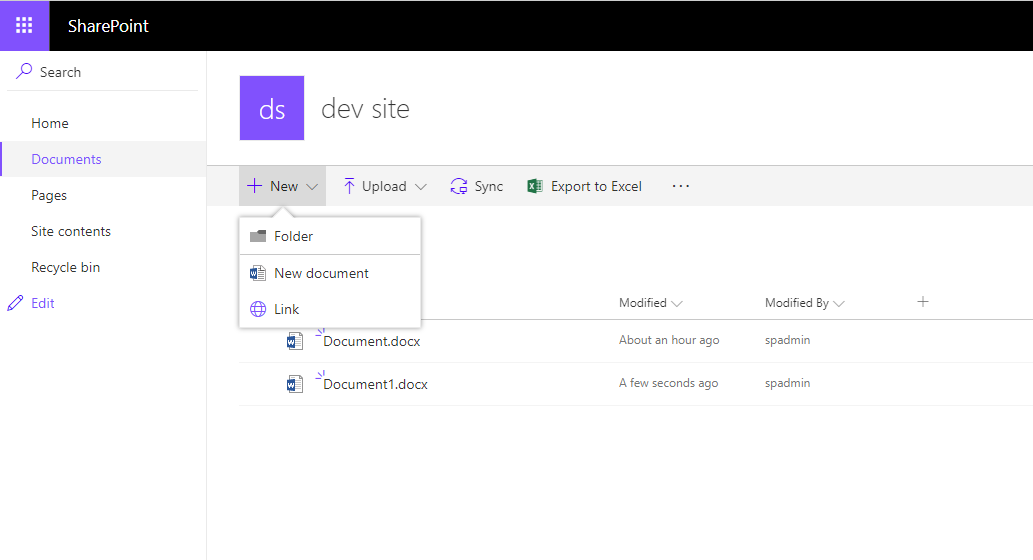
在文档库中,刷新页面并按“新建”按钮 – 只有新文档菜单项将可用。使用它来创建文档。
文章: 标签:
浏览所有标签