Creating CSV files
Introduction
Spreadsheets may suffice for small customer lists, but as your business grows, a dedicated tool such as CRM becomes essential.
This guide explains how to save an existing spreadsheet as a CSV file.
Step 1. Access the Documents
Sign in to your ONLYOFFICE portal and click Documents.


If you are already signed in, access the Documents module from the drop-down list in the top-left corner of the page.
Step 2. Open your spreadsheet
The My documents folder opens.
Locate your spreadsheet and click the  icon o the right of it, or select Edit from the context menu. The file will open in the new tab.
To open the file stored locally, first upload it to Documents by clicking Upload  in the upper-left corner and selecting Upload files.
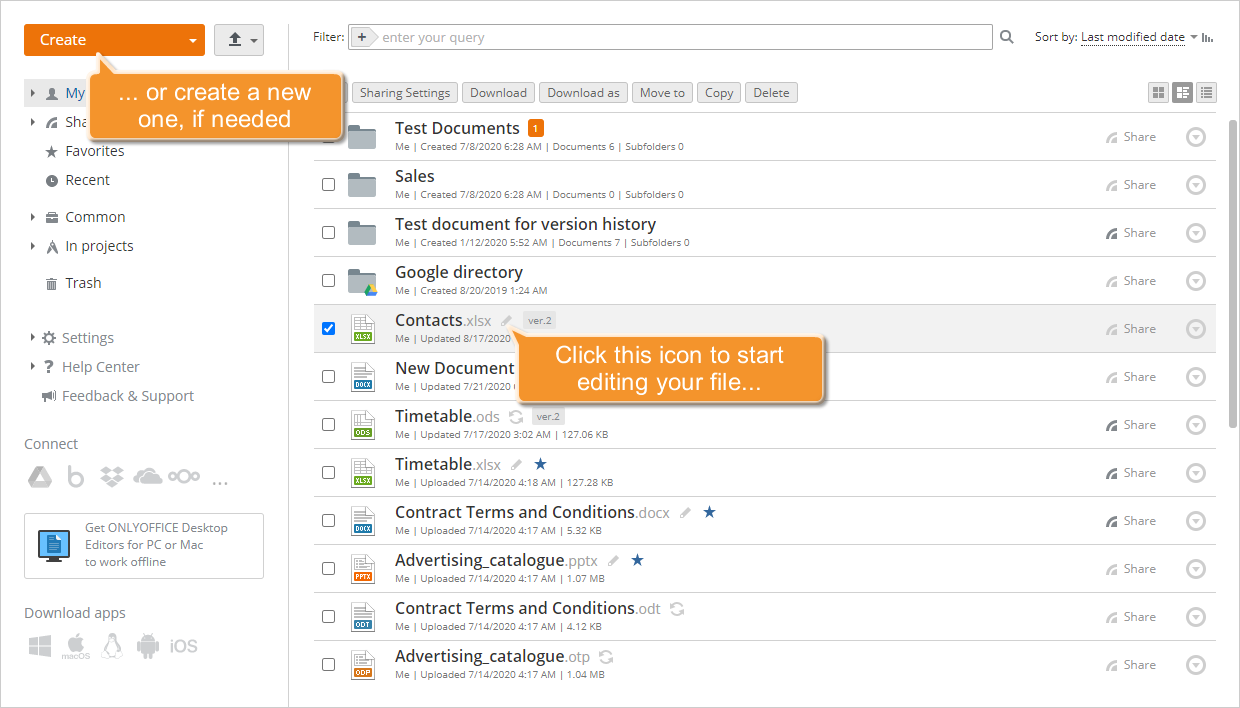
You can also create a new spreadsheet by clicking Create in the upper-left corner and selecting Spreadsheet from the drop-down list.
Step 3. Edit your spreadsheet
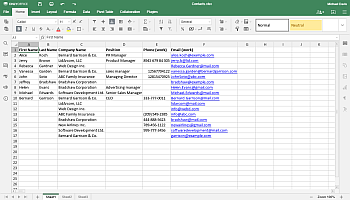
For a correct data import, you must follow some general rules:
- the first row is a header record containing column or field names;
To add a header record, select the first row with the mouse. Right-click and select Insert > Entire row. An empty row will be inserted above the row you selected. Enter the appropriate column or field names.
- the required fields are: First Name and Last Name for importing persons, Company Name for importing companies;
To add a new column (e.g., if the First Name and the Last Name are indicated in the same column to separate them or just to add some more information) to your spreadsheet, select a column before which you want the new column added. Right-click and select Insert > Entire column. The new column will be inserted to the left of the selected one. Enter the relevant values.
- there is one contact record per row.
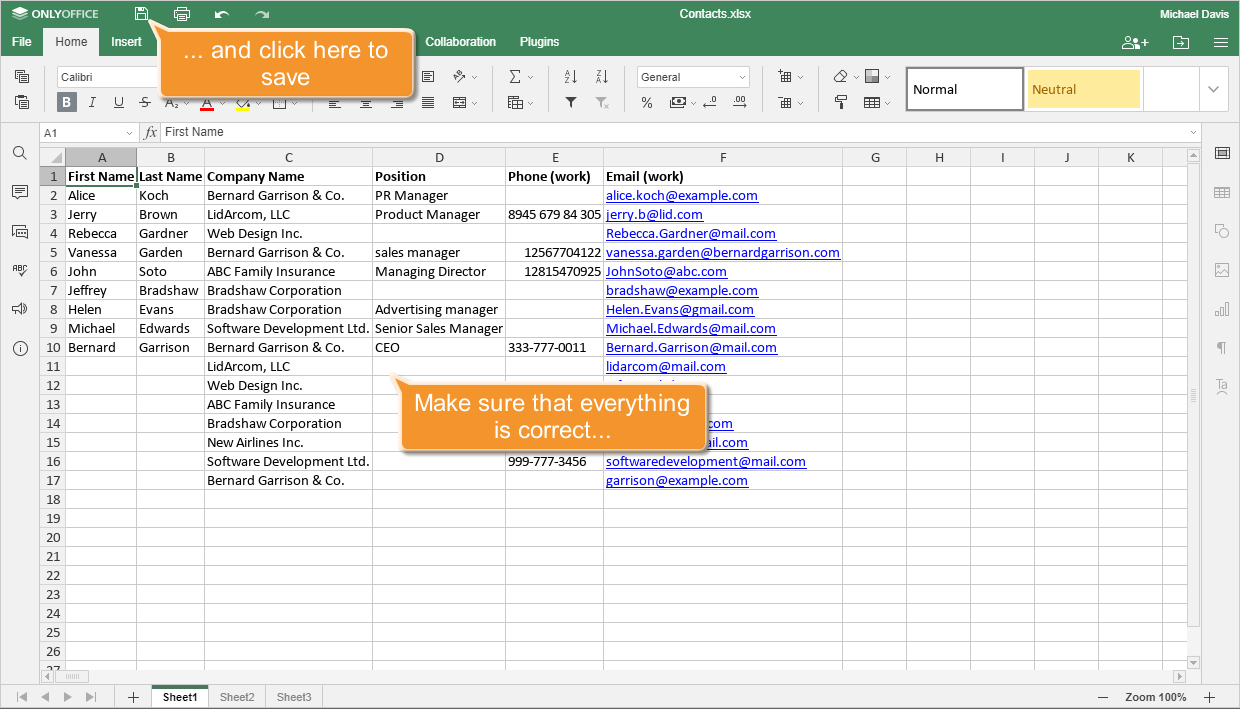
 icon to save changes manually.
Step 4. Save your spreadsheet as a CSV file
CSV (comma-separated values) is a widely supported file format used by many applications, including text editors, to store tabular data in plain text. Such files store tabular data in the plain-text form.
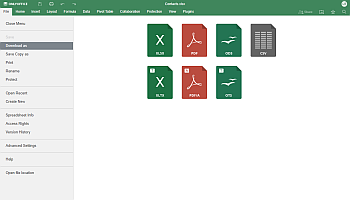
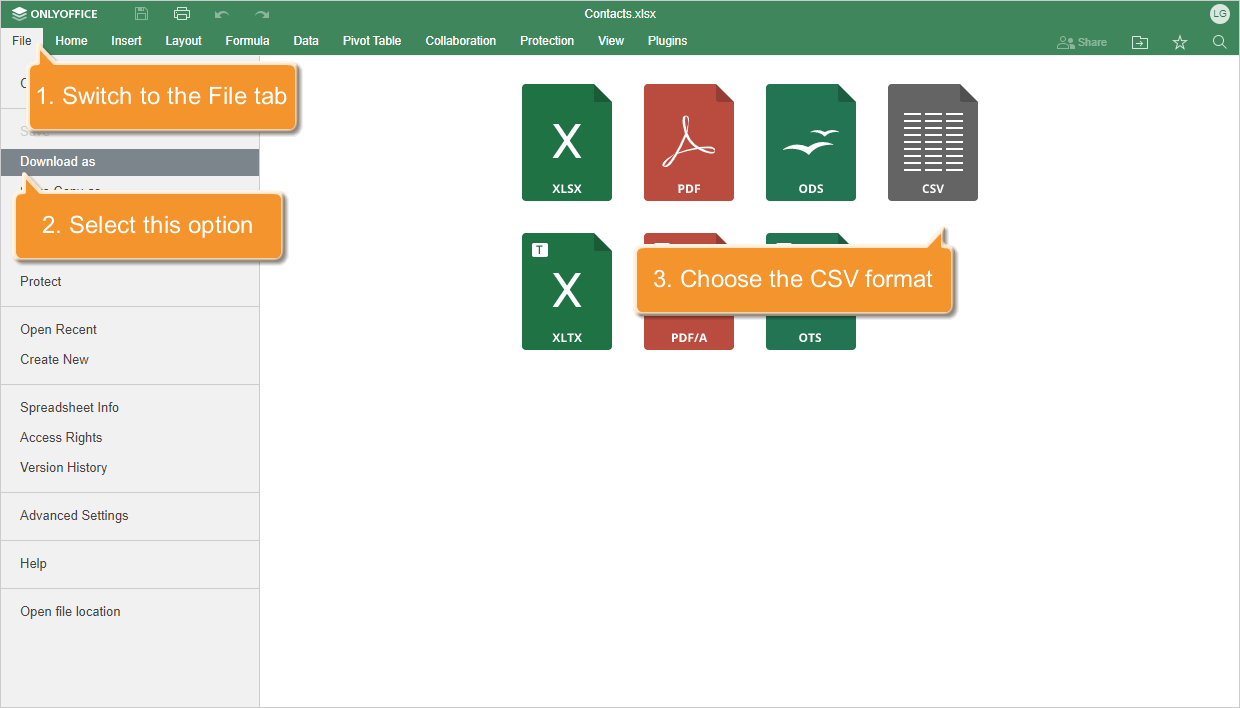
To save your spreadsheet as a .csv file, switch to the File tab on the top toolbar, select the Download as... in the left sidebar, and select CSV.
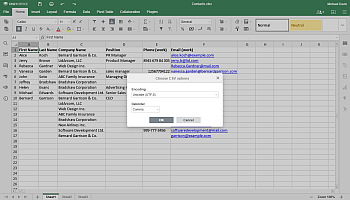
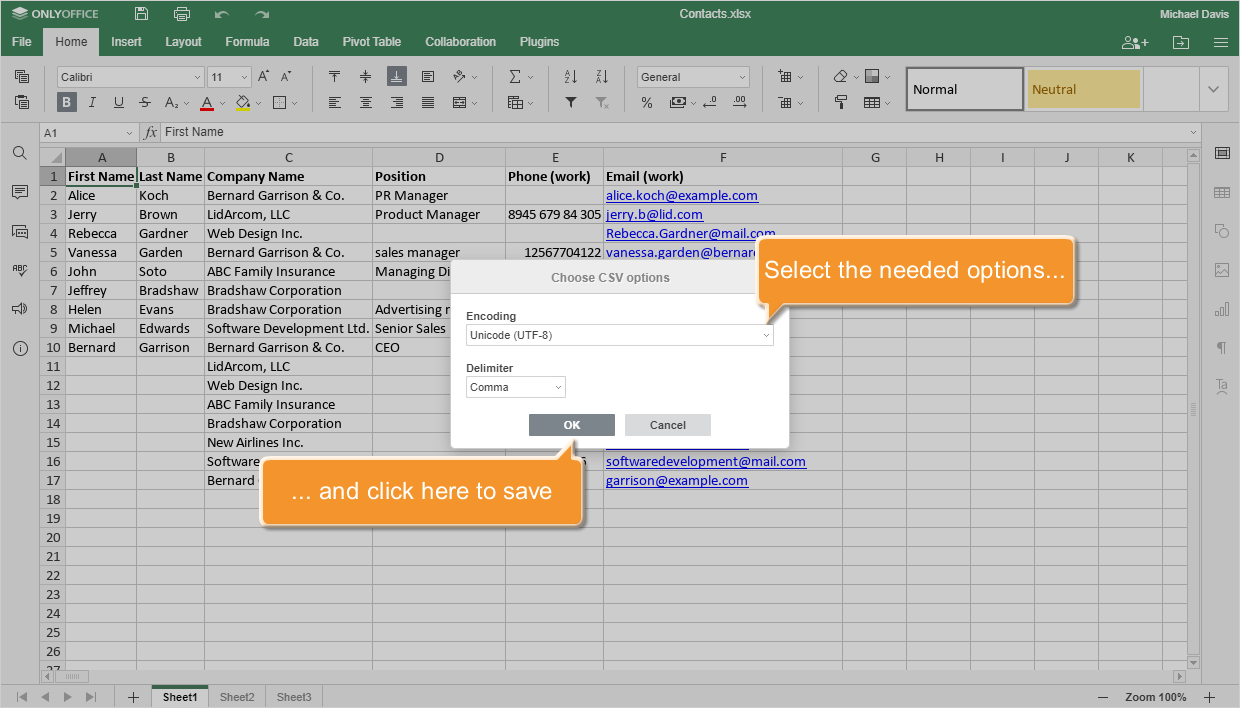
The Choose CSV Options window will open. Select Unicode (UTF-8) as the Encoding type and Comma as the Delimiter to separate the values in your file. Otherwise, may not load into CRM at all, or the information may be displayed incorrectly.
Click OK to save the file.
By default, the CSV file will be saved to the Downloads folder on your machine. You can now proceed to importing contacts into CRM.
Any spreadsheet can be converted to CSV format in the same way.