Linking an opportunity to a project
Introduction
Working on an opportunity may require the involvement of a whole team of specialists. In this case, creating a project and linking it with the opportunity will help you coordinate the work and manage it more efficiently.
Follow the steps below to link an existing opportunity with a project.
Step 1. Access the CRM
Sign in to your ONLYOFFICE portal and click the CRM link.

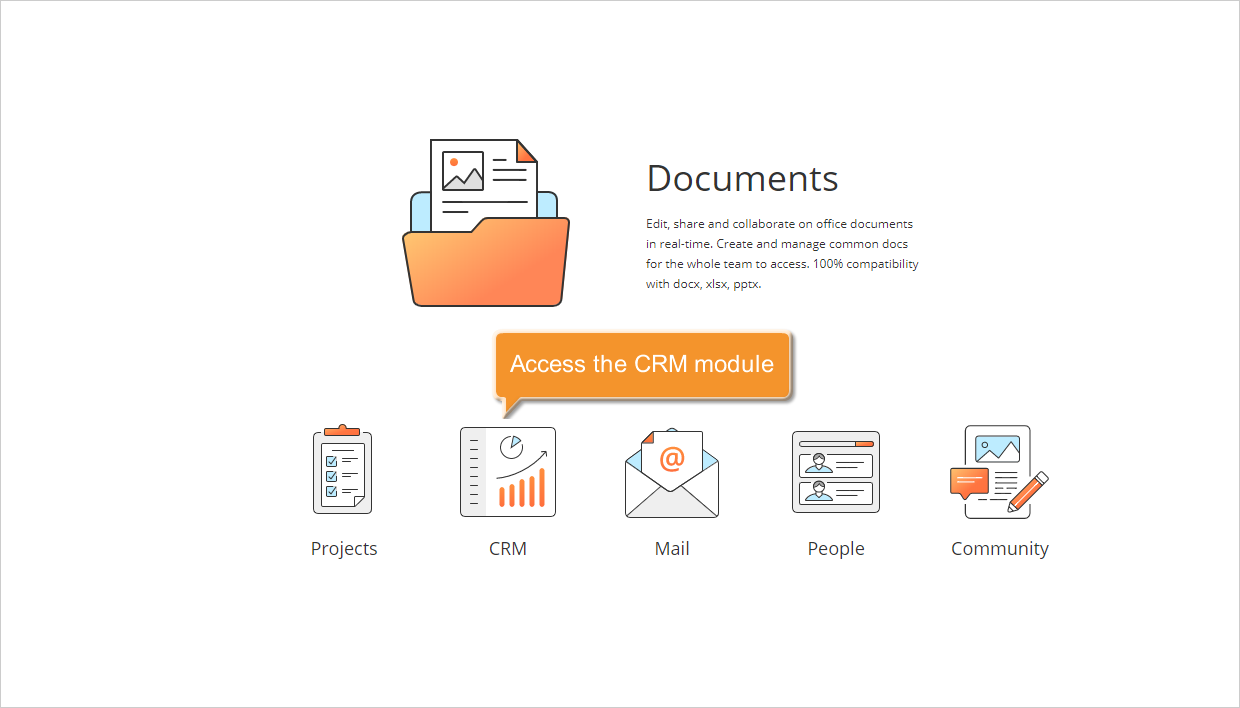
If you are already signed in and have been using the portal for some time, you can access the CRM module from any portal page: use the drop-down list in the upper-left corner of the page and select the corresponding option.
Step 2. Select an opportunity or create a new one
By default, all the available opportunities are displayed in the Opportunities list. To open it, click the Opportunities link on the left-side panel.
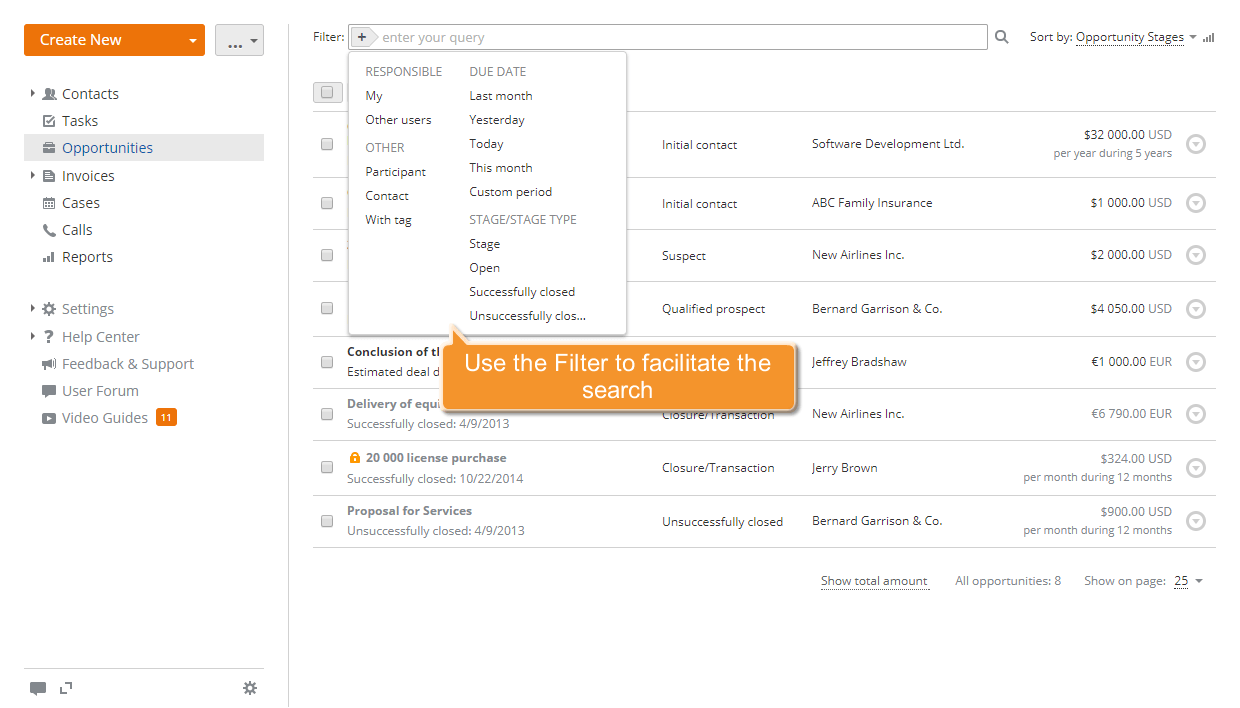
Select the opportunity from the list. To refine the search, use the filter at the top of the list.
Click the  button and select one of the options:
Responsible is used to display the opportunities assigned to you or to a specified user only;
Due date is used to display the opportunities with a specified due date;
Participant is used to display the opportunities with a specified participant only;
Contact is used to display the opportunities linked with a specified contact only;
With tag is used to display the opportunities with a specified tag only;
Stage/Stage type list is used to display the opportunities at a specific stage or of a specific stage type.
You can also use the wildcards to filter your opportunities:
- Use the question mark ? to perform a single-character wildcard search. For example, the Sm?th query will return results for both Smith and Smyth.
- Use the asterisk * to perform a multiple-character wildcard search. For example, to search for all the words beginning with O, use the O* query.
- Use double quotes "" to focus the results on words that appear as an exact phrase.
- Use the tilde ~ at the end of a word to search for words with a similar spelling.
To create a new opportunity, refer to these instructions.
Step 3. Create a project
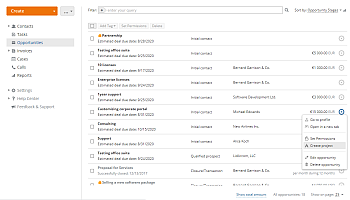
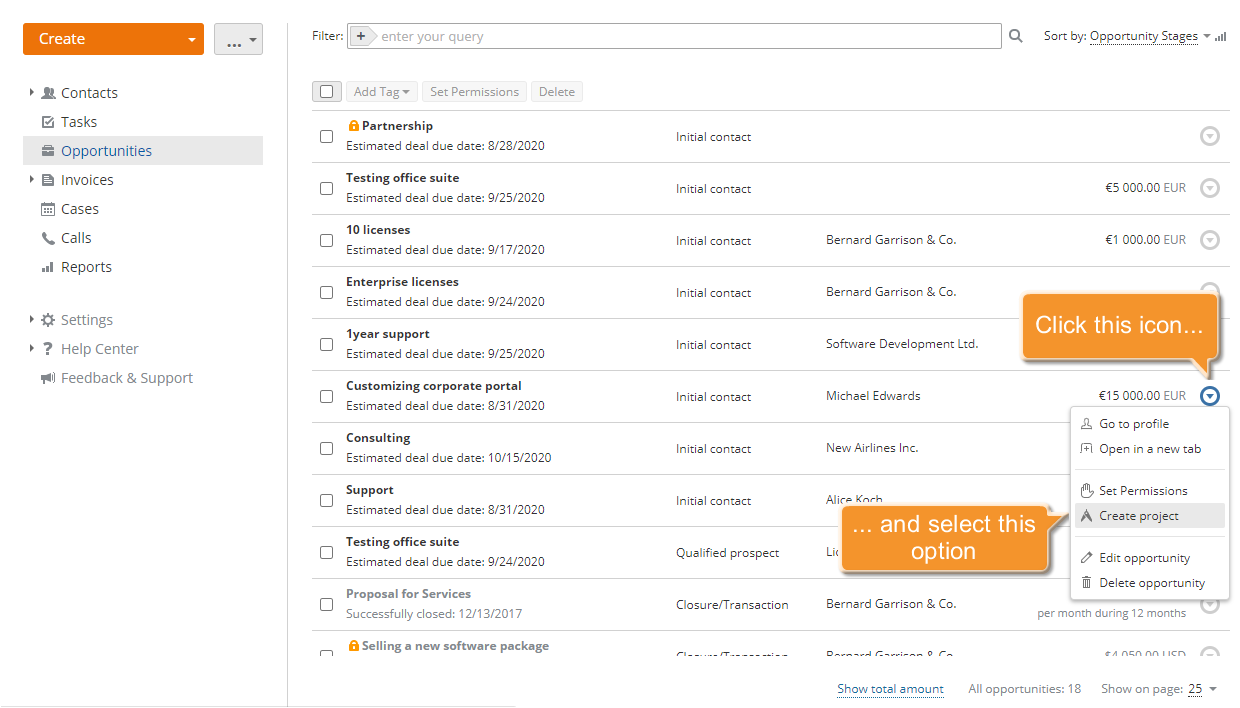
Once you have found the opportunity, click the  icon to the right and select the Create project option from the drop-down list.
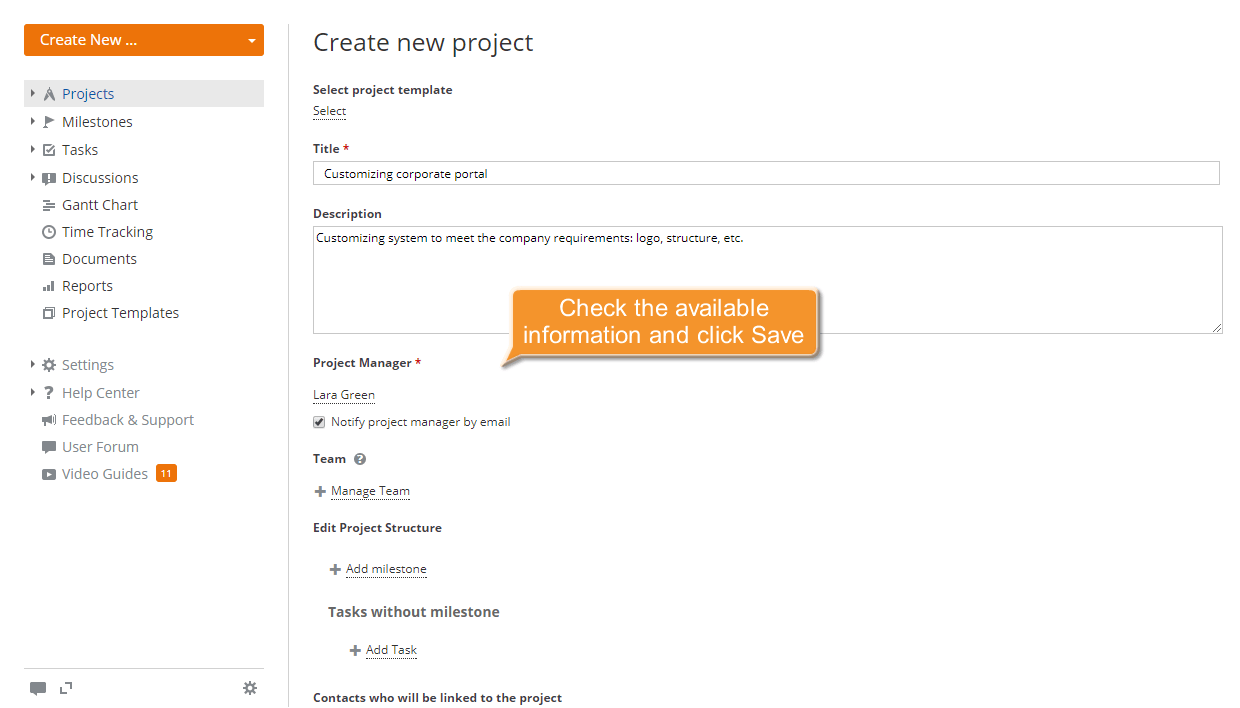
The standard Create new project form will open. Check the available information and modify it if necessary:
- Change your project Title and Description.
- Change the Project Manager.
To do that, open the corresponding drop-down list and select the person you need. Sort the users by group or use the filter field at the top to speed up the search. Select the checkbox next to this field if you want to notify the project manager by email.
- Manage your project Team.
Click the Manage Team link. In the left part of the form, select the users you want to add to your team and click the rightward arrow. To remove an added user, select them and click the leftward arrow.
When all the users are added, click Save. They will be notified by email.
- Edit the project structure.
You can edit the project structure by adding milestones. Click the Add milestone link, enter the title and due date, and select the responsible person. Click OK. To edit or delete a milestone or add a task, select the milestone, click the
icon to the right, and select the corresponding option from the drop-down list. If you want to add tasks without milestones, click the Add task link in the Tasks without milestones section, enter the task title, set its due date, and specify the responsible person. - Review the contact list.
If you add more participants to your opportunity, they will be automatically displayed on the Contacts tab of the created project.
- Enter tags, separating them with commas.
This helps categorize the project and makes it easier for other users to find it.
- Select the Save this project as private checkbox.
Use this option if you want to restrict access to the newly created project. In this case, the project will be available only to the project administrator, the project manager, and its members with corresponding rights.
- Select the Follow this project checkbox if you do not plan to participate in the project but need to keep track of it.
After reviewing all the information, click Save.
The created project will be added to the Projects list of the Projects module.