Keeping contacts up-to-date
Introduction
An effective, well-organized customer database enables you to communicate better with your customers and increase your sales. This guide describes how to maintain your customer database by arranging and updating the available contact information.
Step 1. Access the CRM
Sign in to your ONLYOFFICE portal and click the CRM link.

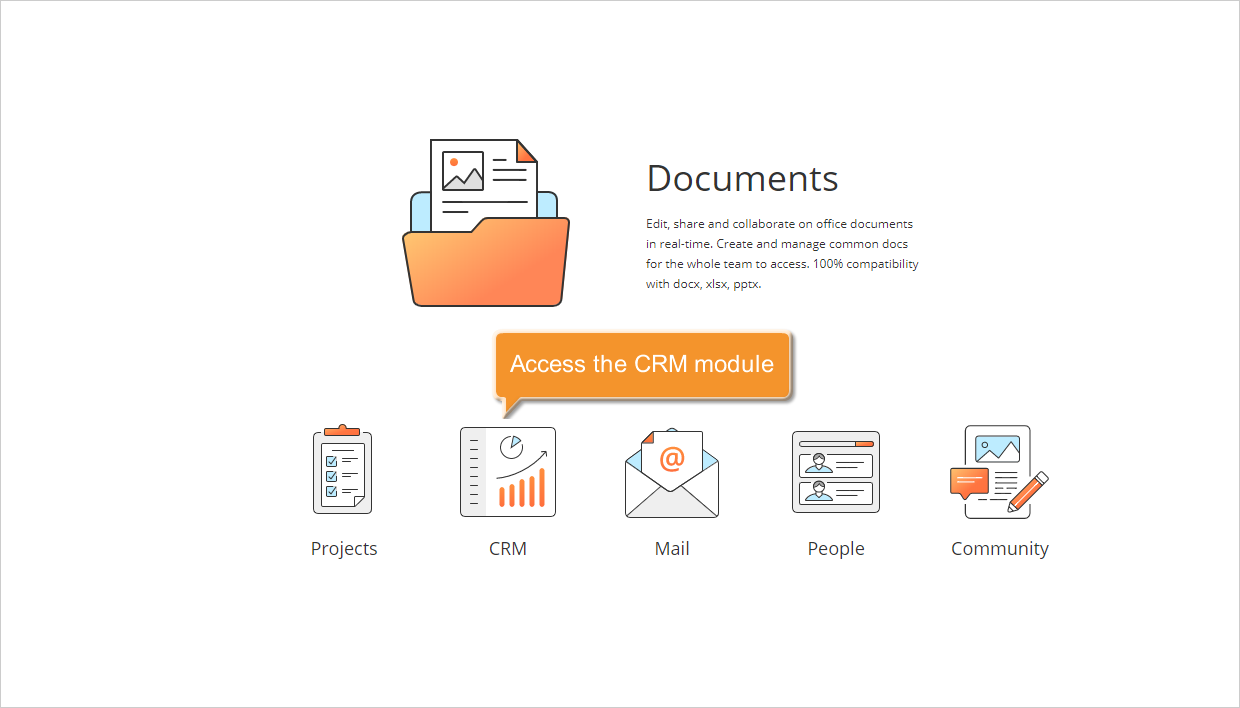
If you are already signed in and have been using the portal for some time, you can access the CRM module from any portal page: use the drop-down list in the upper-left corner of the page and select the corresponding option.
Step 2. Filter your database information
Your customer database can include as many contacts as you want, whether your customers are large companies or individuals.
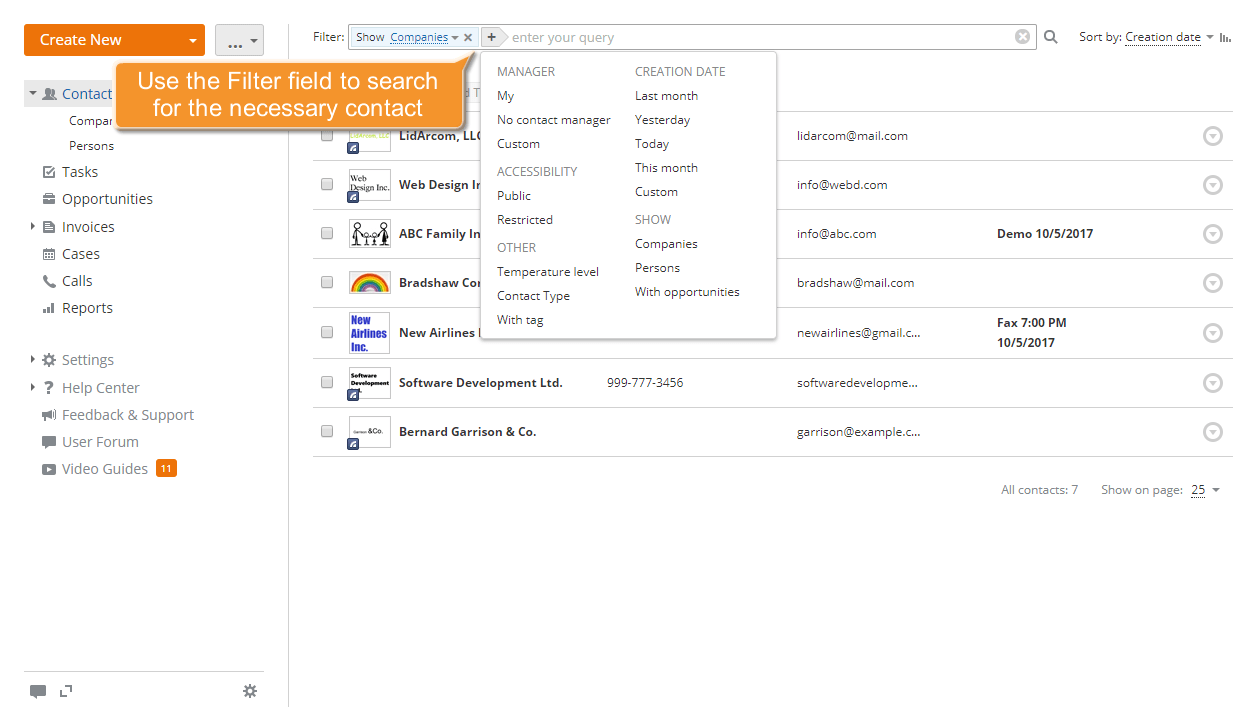
By default, all the available companies and persons are displayed in the Contacts list. To find the contact you need, use the filter at the top of the list.
Click the  button and select one of the options:
- MANAGER is used to display the contacts assigned to you or to any other CRM user;
- CREATION DATE is used to display the contacts created within a specified period of time: Last month, Yesterday, Today, This month, or any other custom period;
- ACCESSIBILITY is used to display all public or restricted contacts;
- SHOW is used to display all companies or all persons only, or to show the contacts with opportunities;
- TEMPERATURE LEVEL is used to display the contacts of a specific temperature level only. The default levels are cold, warm, and hot;
- CONTACT TYPES is used to display the contacts of a specific type only. The default types are Client, Competitor, Partner, and Supplier;
- WITH TAG is used to display the contacts with a specified tag only.
You can also enter a contact name, entirely or partially, in the Filter field and press the Enter key to find the contact. To refine the search, use wildcards:
- Use the question mark ? to perform a single-character wildcard search. For example, the Sm?th query will return results for both Smith and Smyth.
- Use the asterisk * to perform a multiple-character wildcard search. For example, to search for all the words beginning with O, use the O* query.
- Use double quotes "" to focus the results on words that appear as an exact phrase.
- Use the tilde ~ at the end of a word to search for words with a similar spelling.
Once you have found the contact, click its name to open the contact information page.
Step 3. Choose a picture for your contact
Adding an image, such as a photo or a company logo, makes your contacts easier to recognize. To add or change a picture, click the Change photo link below the image area. The Choose a profile photo window will open.
If you want to upload a picture from your computer, click Browse, locate the desired picture, and double-click it to upload it.
If you have previously filled in the social network field in the contact profile, images from the social networks will also be displayed in the Choose a profile photo window. Click the one you want to use for the contact.
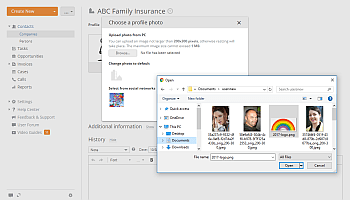
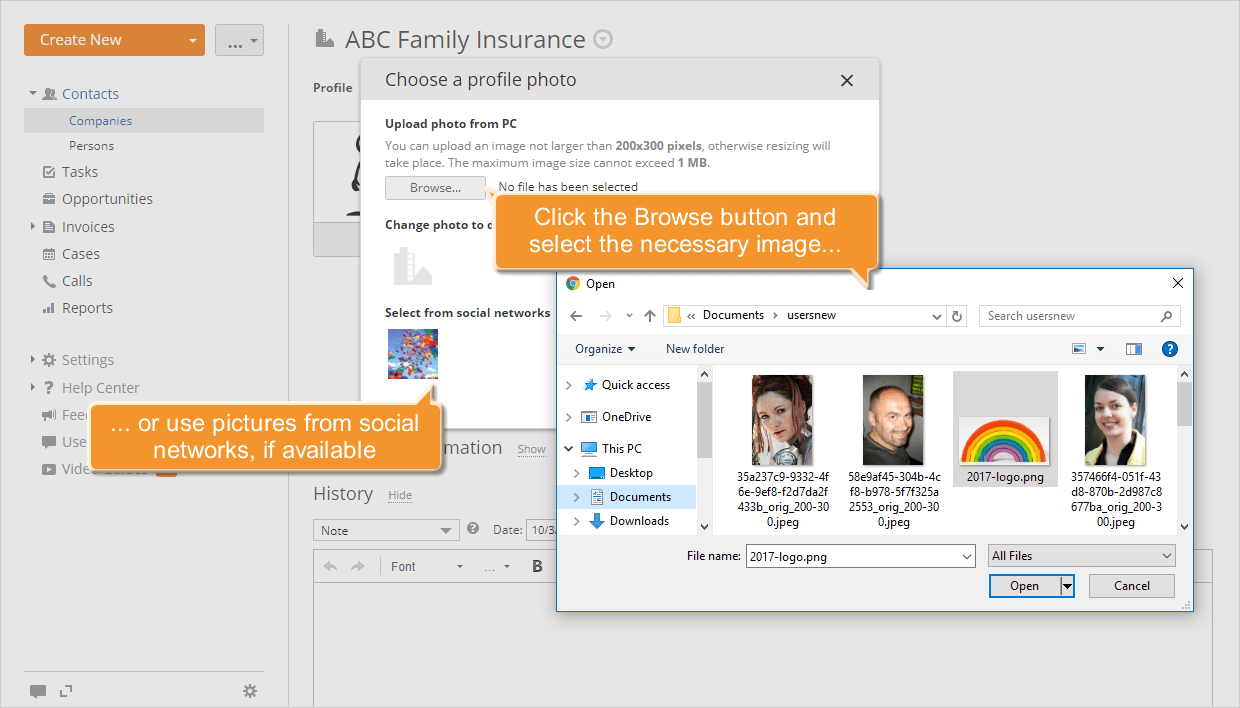
To remove a picture, click the Change photo link and select the default image in the Choose a profile photo window that opens.
Step 4. Update the existing contact information
A common problem that many companies face with customer databases is outdated and duplicated information. Incorrect data can cost you time and money.
To update the information of the selected contact, click the  icon to the right of the contact name and select the Edit contact option from the drop-down list.
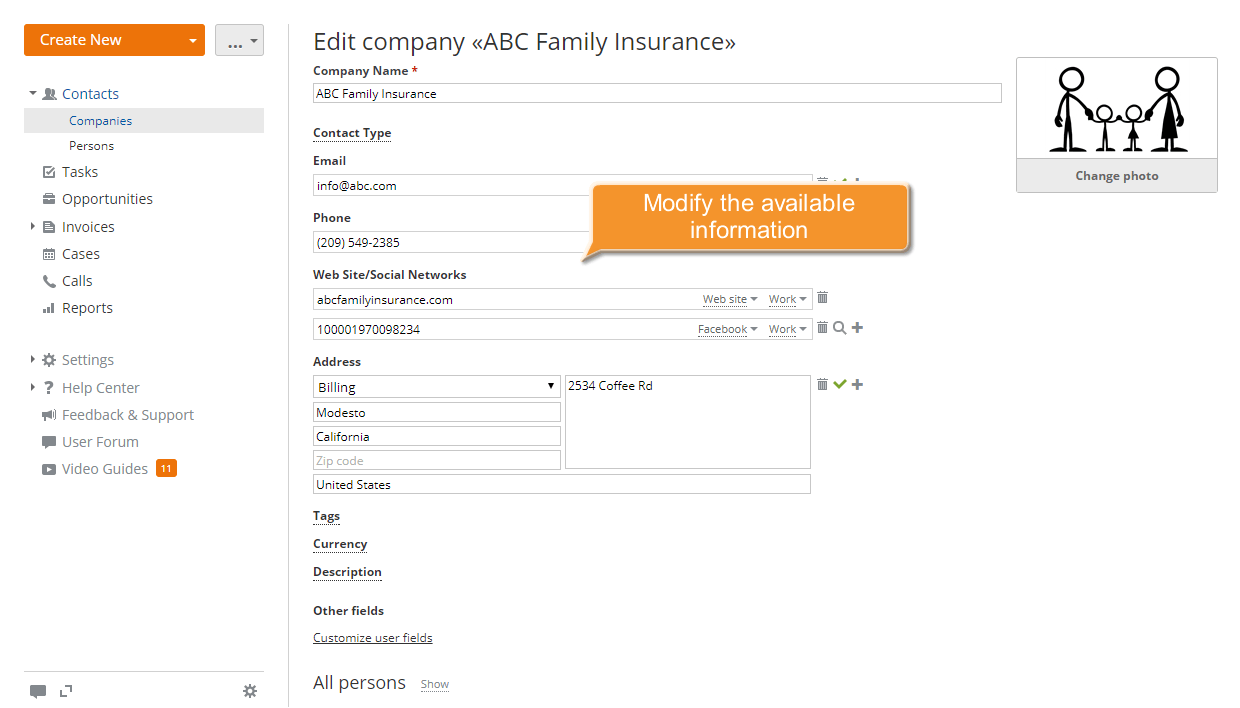
The Edit person/company page will open. Here you can:
modify the available information
The available data include first name, last name, company name, position, email, phone, website/social network, address, and description.delete the unnecessary data
Use the icon next to the unnecessary field to delete it.
set the information priority
Use the icon next to a field to mark it as primary. This information will be displayed in the general contact list.
enter additional information
Click the corresponding icon or add user fields to add more information about your contact.
To save the changes you have made, click Save Changes.
Step 5. Arrange your contacts
Arranging your contacts into groups helps you create marketing campaigns, track your contacts, and find them more easily. To arrange your contacts, you can divide them into types, set an appropriate temperature level, and add tags.
To tag your contact, click the Add Tag link in the General Information section of the contact profile page. Select one of the available tags, if any, or enter the tag you need, then click OK to confirm it.
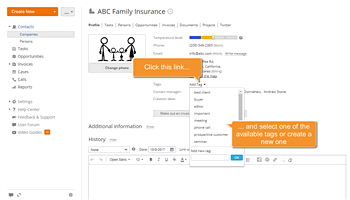
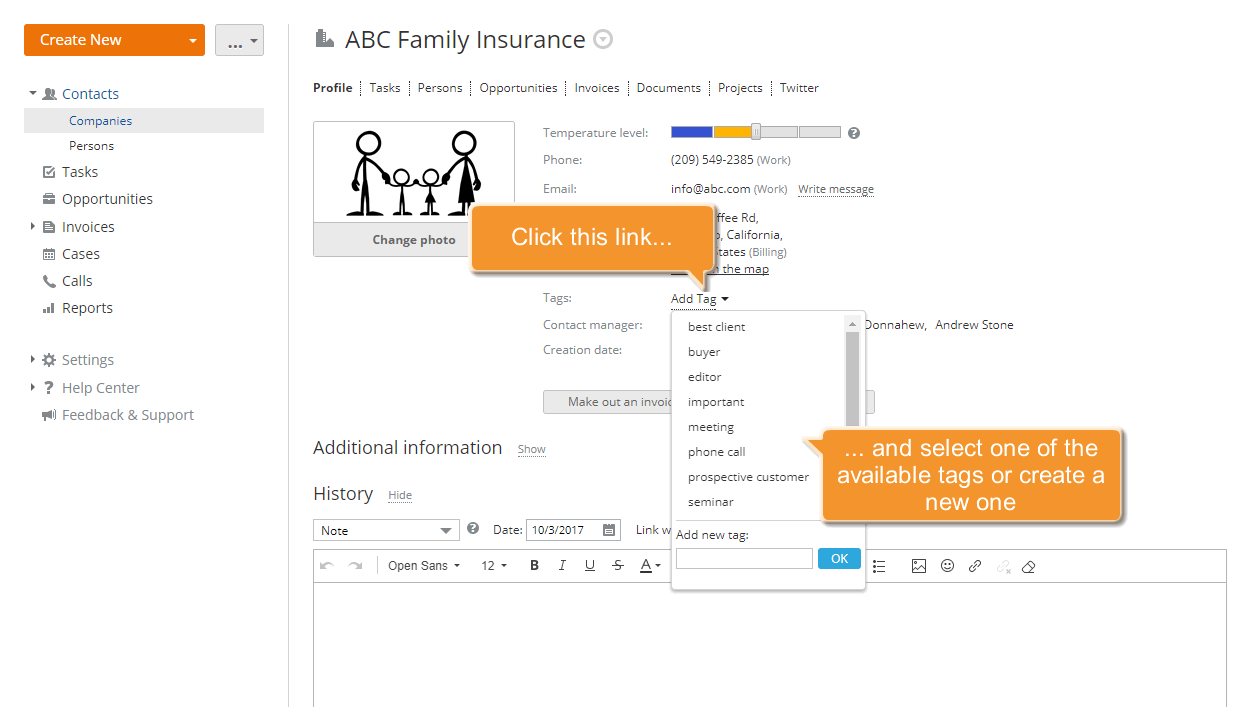
In the same way, you can add as many tags as you want.
To delete an unnecessary tag, point to it and click the  icon that appears to the right.
Step 6. Delete your contacts
If you need to remove an old customer from your system, click the icon to the right of the contact name and select the Delete contact option from the drop-down list.
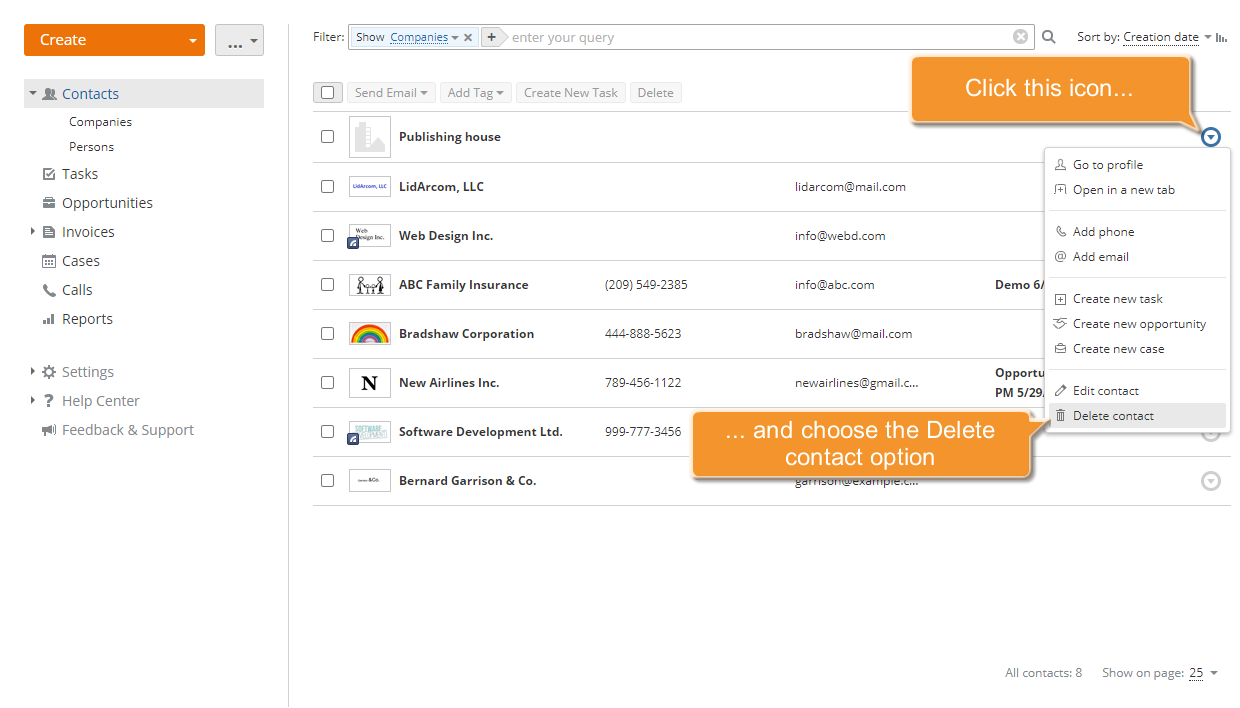
The selected contact, with all the associated information, will be removed from your system.