Creating invoices for your clients
Introduction
When the sales cycle is completed, you can create an invoice for the products and services you have provided and send it to the client. CRM allows you to do this efficiently. Complete the invoice form fields and send the invoice as an attachment via Mail.
Step 1. Access the CRM
Sign in to your portal and click CRM.

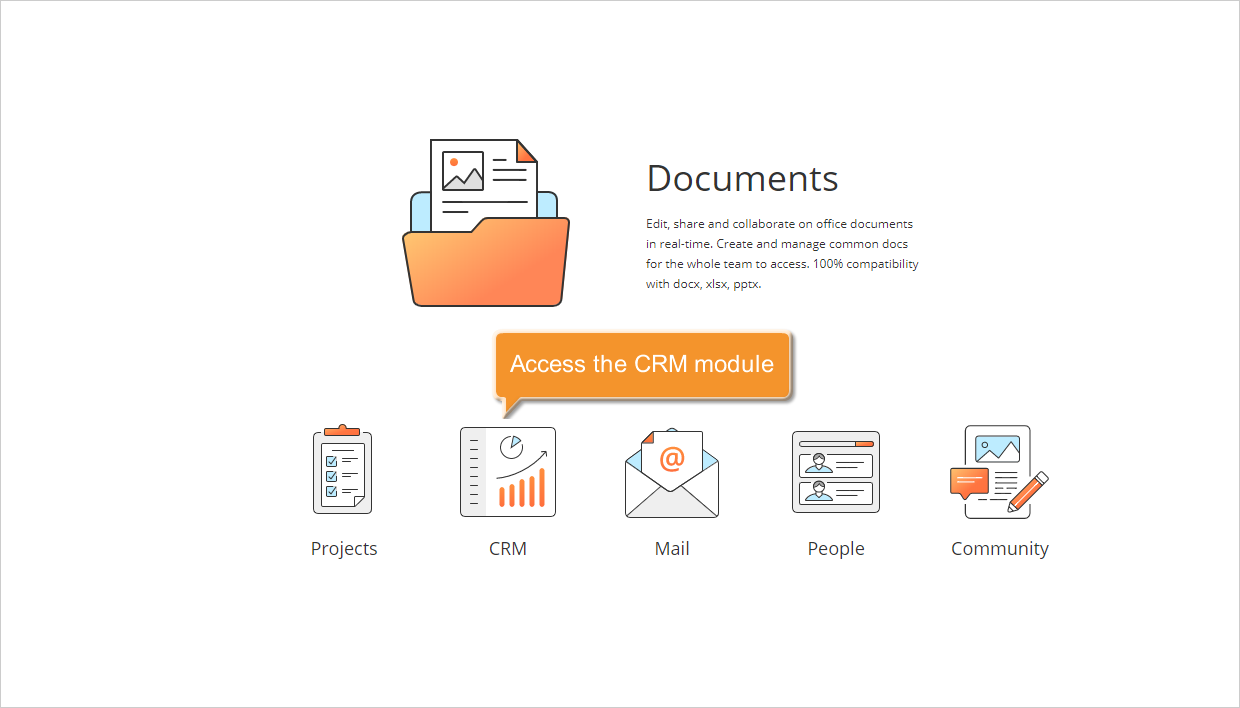
If you are already signed in, access the CRM module from the drop-down list in the top-left corner of the page and select the corresponding option.
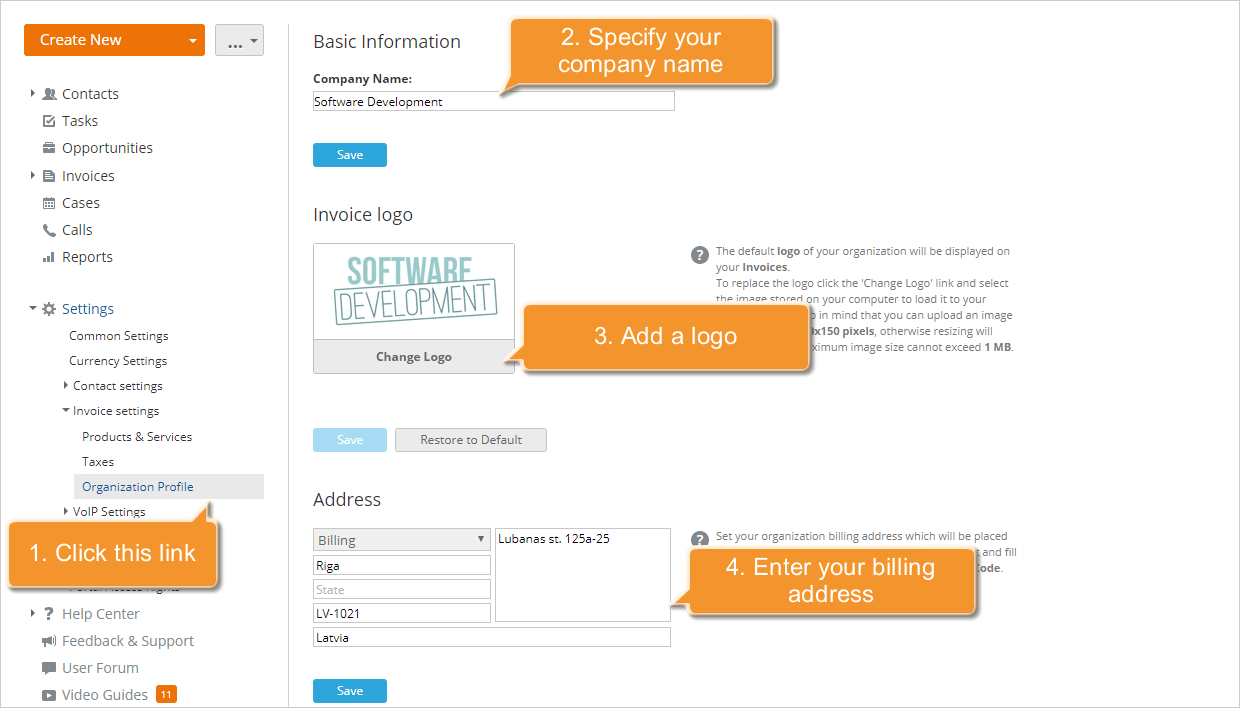
Step 2. Specify your company information
Before you start creating an invoice, you need to complete your organization profile.
To do so, expand Settings in the left-side panel, select Invoice settings, then click Organization Profile to open the corresponding page. On this page you can:
- Specify your company name.
Go to the Basic Information section, enter the name, and click Save below the field.
- Add your company logo.
Go to the Invoice logo section, click Change Logo below the default logo image, select the image file from your computer, and click, and click Save below the displayed invoice image. To restore the default image, click Restore to Default.
- Enter your company billing address.
Go to the Address section. Complete all the fields: Address, City, State, and Zip Code, select the Country from the drop-down list, and click Save below the address fields.
This information will be used for all future invoices and can be updated at any time on the Organization Profile page.
To specify payment terms and conditions, use the Terms field when creating an invoice (see step 5).
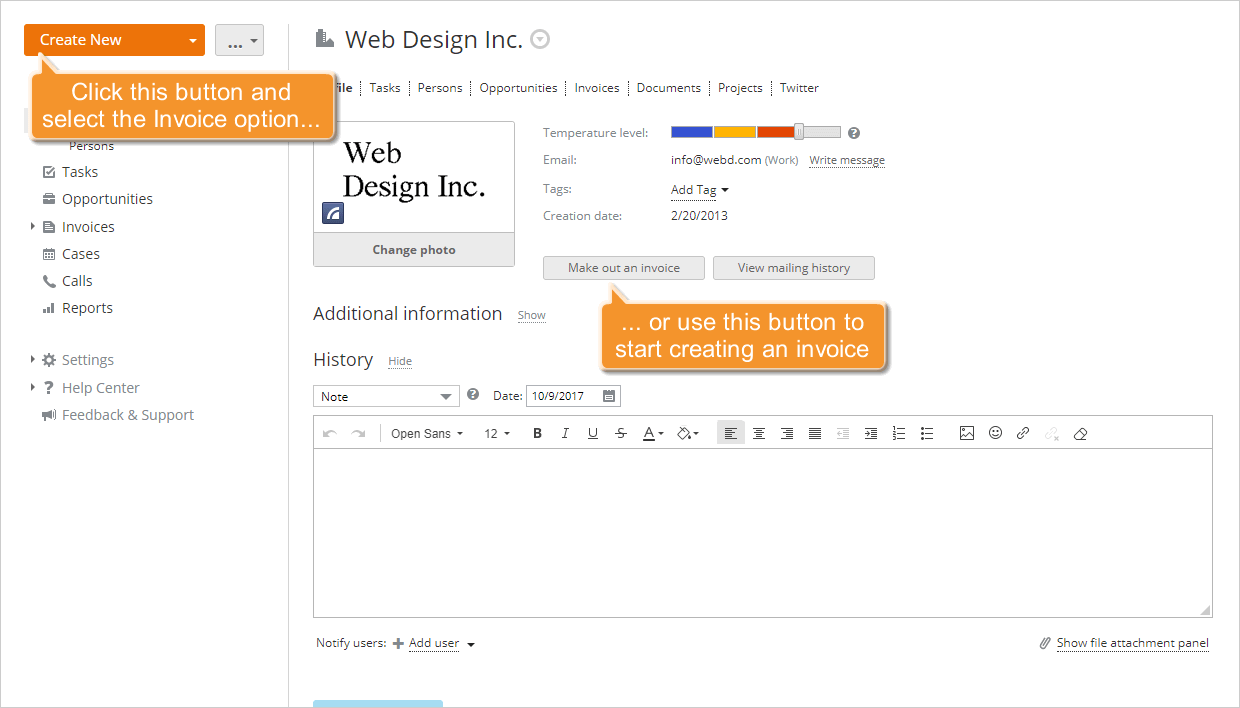
Step 3. Start creating an invoice
To start creating an invoice, you may proceed in one of the following ways:
- Click the Create New... button in the upper left corner and select the Invoice option.
OR
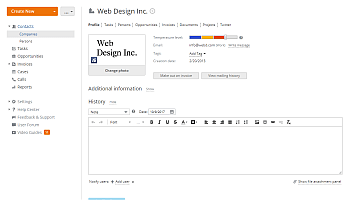
- Open the Contacts list, select the contact you need to make an invoice for, switch to its Profile page by clicking the title, and use the Make out an invoice button below the contact information.
The Create new invoice form will open.
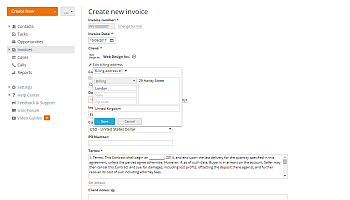
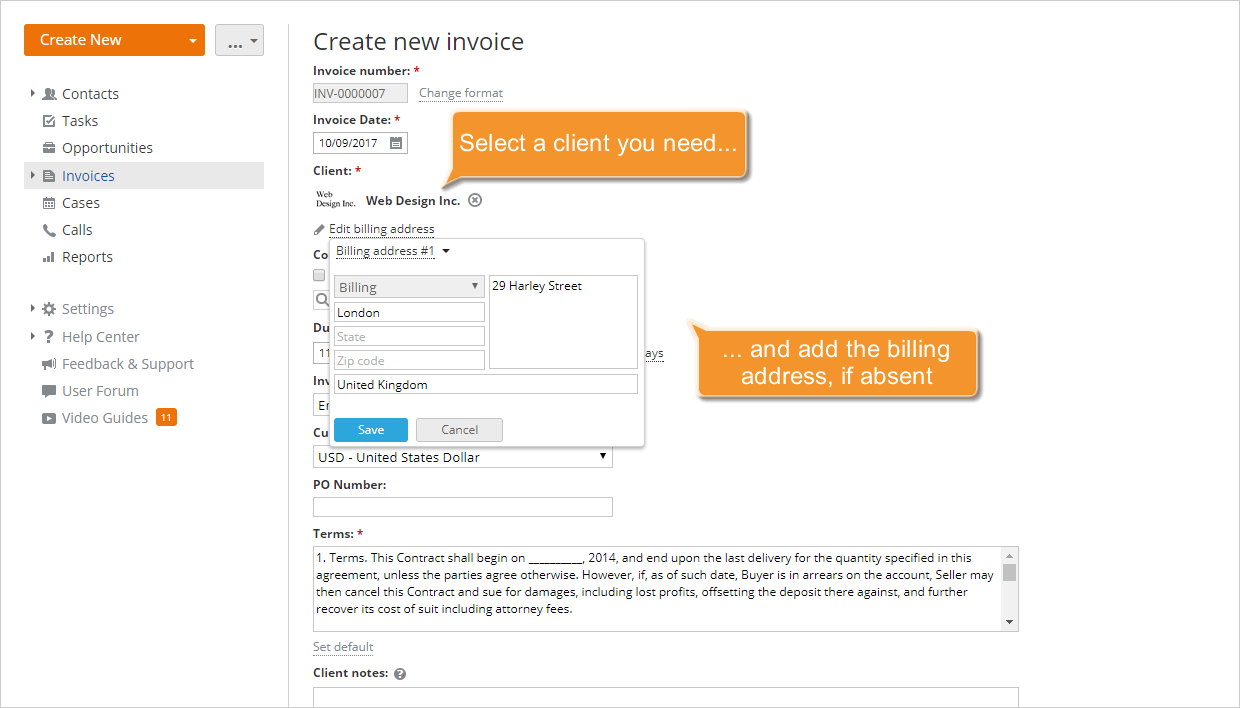
Step 4. Enter your client information
Click the Client filter field or start typing your client name to search your customer database. Once located, click the contact name.
Specify the billing address by clicking the Add billing address link that appears below the contact name. If the billing address was added when creating the contact, it will be automatically retrieved from the customer database. If not, enter the required information: City, Address, State, Zip code, select a Country from the drop-down list, and click the Save button.
To specify a Consignee, use the corresponding filter field. Then add the delivery address using the Add delivery address link that appears below the consignee name.
If the Consignee is the same as the Client, select the coincides with the client checkbox and verify the delivery address by clicking the Add delivery address link that appears next to the Add billing address link in the Client section.
To express gratitude or provide a special offer (for example, a 20% discount for payment within five days), use the Client notes field.
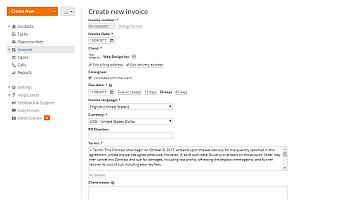
Step 5. Set the general invoice parameters
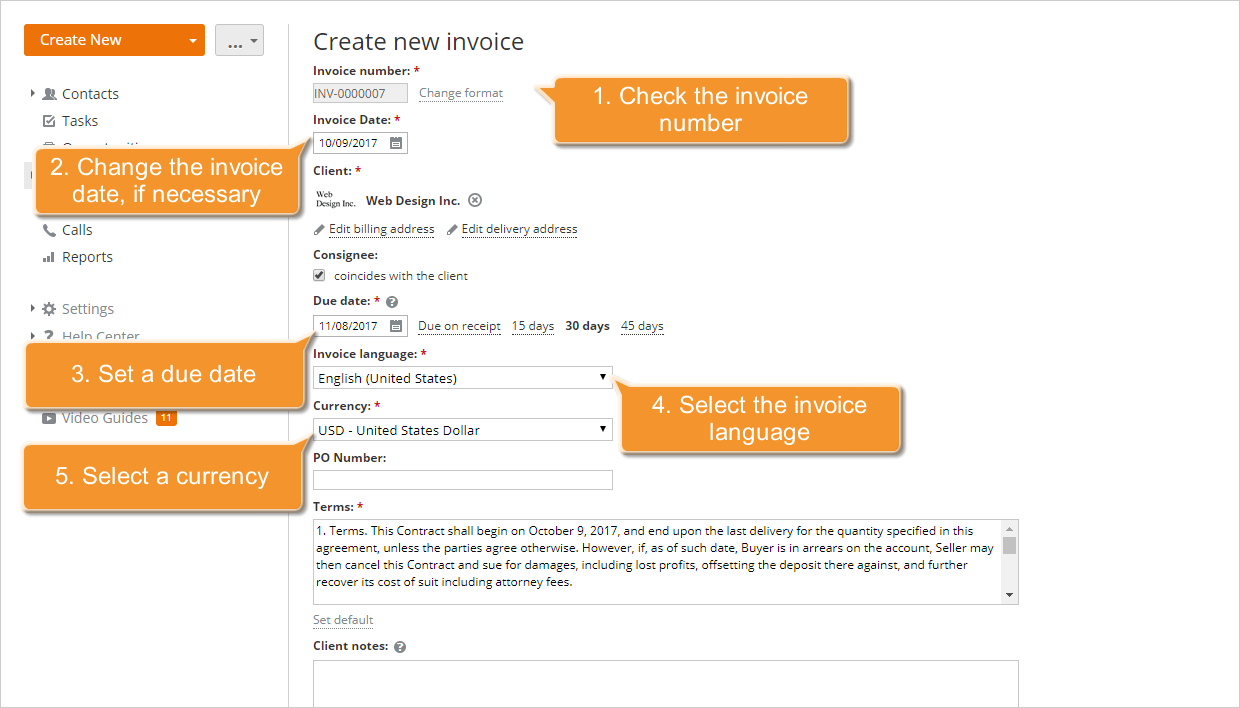
Review the automatically generated Invoice number. If you have CRM or full-access administrator rights, you can change the number format by clicking Change format next to the Invoice number field and entering the prefix and number format in the Change format window.
The Invoice Date, i.e., the date on which the invoice was issued, is set to the current one by default. If necessary, you can change it by selecting it from the calendar or entering it manually in the following format: dd/mm/yyyy.
To set the Due date, i.e., the date by which the invoice needs to be paid, use one of the available options on the right: Due on receipt, 15 days, 30 days, or 45 days, or select it from the calendar, or enter it manually in the following format: dd/mm/yyyy.
Select a Language for your invoice from the Invoice language drop-down list. If your language is not yet available or the translation is incomplete, you may contribute to the translation by sending your request to documentation@onlyoffice.com.
Select a Currency for the invoice. By default, the currency specified in the profile of the client is used. If the currency is not set in the client's profile, the default currency specified in the CRM settings is used. If necessary, you can select any other currency from the list of the available ones.
If you select a currency that differs from the default currency specified in the CRM settings, the Exchange rate field is also displayed. Set the appropriate conversion rate and click the Save button.
Enter a purchase order number (PO Number), if available, and specify your payment Terms. If you wish to specify the general terms for all your future invoices, click the Set default link below the Terms field, enter your terms, and click the Save button.
Step 6. Complete the Products&Services list
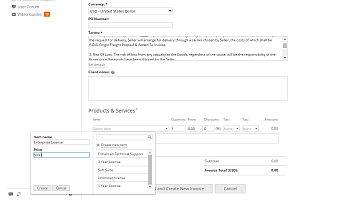
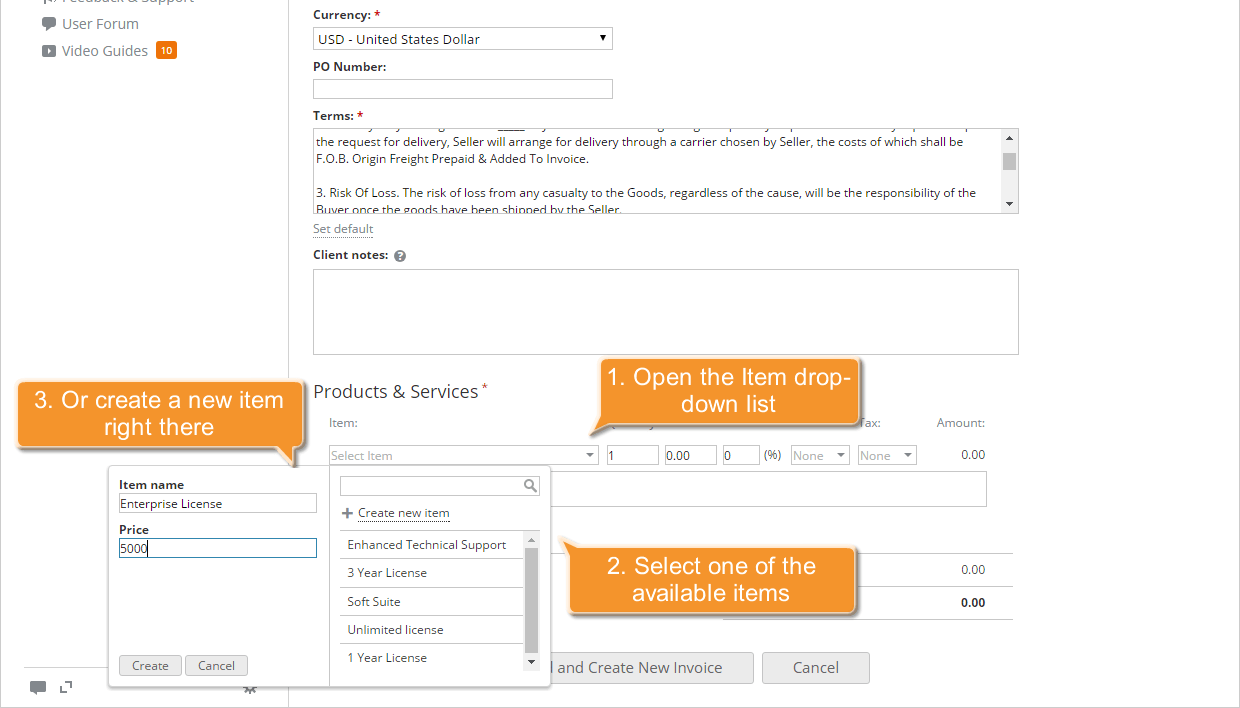
To specify the products and services you provided to the client, refer to Products&Services section of your invoice. To add an item to your invoice, open the Item drop-down list and select one of the available items (if you have already created the Invoice Item List) or create a new item right there:
- select the Create new item option from the Item drop-down list,
- fill in the Item name and Price fields,
- click the Create button to add this item to the Invoice Item List.
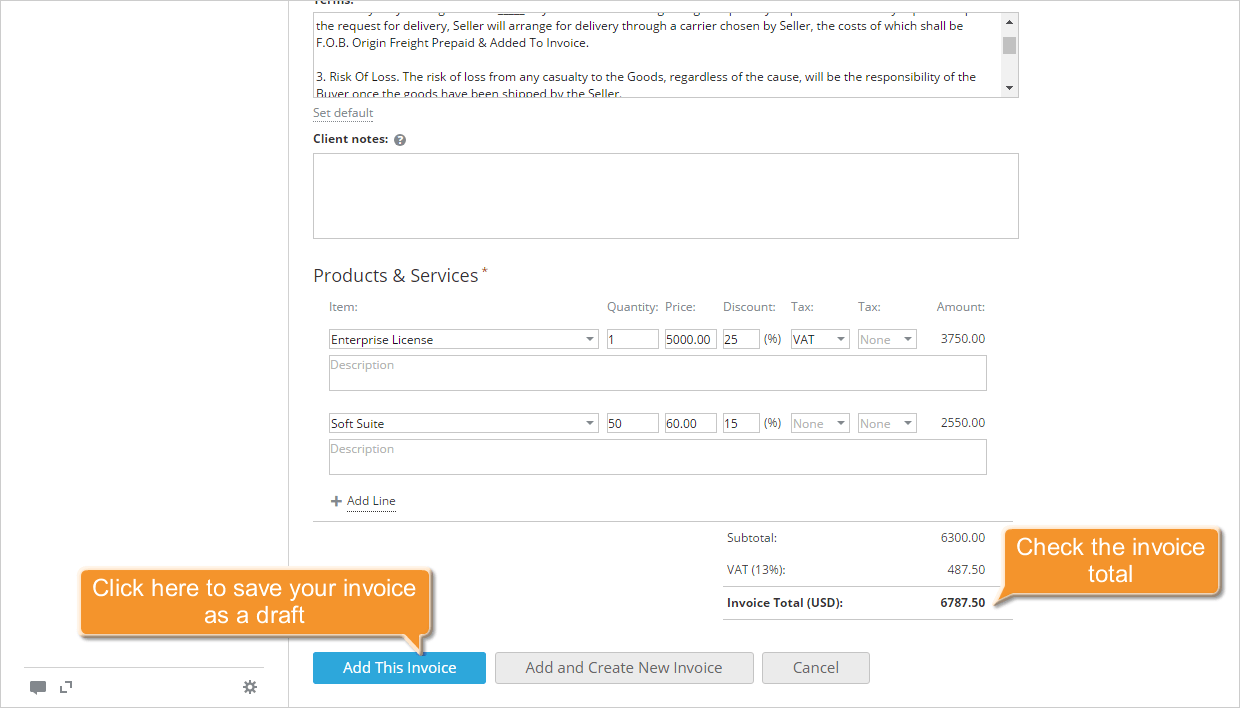
Then specify the current item details:
- Enter the Quantity of the products/services provided.
- Check and correct the Price.
- Specify the Discount rate, if applied.
- Select the Tax, if imposed, from the Tax drop-down list.
You can select one of the available taxes from the list if the Tax List is already created, or create a new one right there using the Create new tax if you have CRM or portal administrator rights.
If the double taxation is applied, use the second Tax field to select the second tax to be imposed. - Enter the item Description.
Use the Add Line link to add as many products/services to your invoice as you need.
Step 7. Save and manage your invoice
Once all fields have been completed, review the Invoice Total , which is calculated automatically based on the details entered in step 6, and click Add This Invoice.

The saved invoice will be added to the invoice Drafts and displayed in the Invoices tab of the selected contact/opportunity profile. At the Documents tab of the selected contact/opportunity profile, you will find the PDF copy of this invoice. As soon as the invoice is sent to your client, paid or rejected by the client, you can change its status in the Invoices list.
- select the invoice in the Invoices list,
- click the Change Status button above,
- select the appropriate status: Draft, Billed, Paid, or Rejected.
You can also change the invoice status by selecting the relevant option from the Actions ![]() drop-down list.
drop-down list.
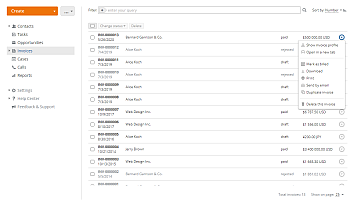
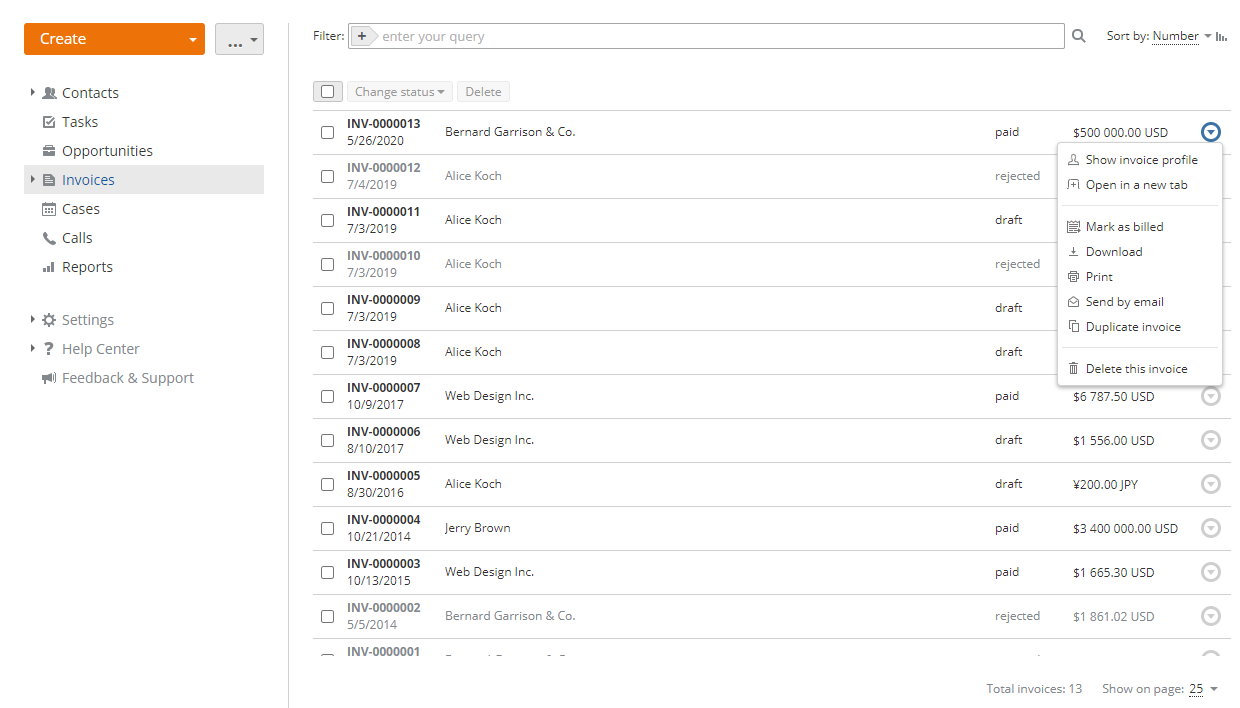
Using the same Actions menu, you can perform the following operations:
- Show invoice profile to see what your invoice looks like to your client.
- Download the invoice as a PDF file and save it to your computer.
- Send by email as an attachment using Mail.
- Duplicate invoice to create a new invoice on the basis of the existing one.
- Edit invoice with the Draft status.
- Delete this invoice.