Inviting guests
Introduction
The Guest user type is the best solution for those who:
- want to grant their clients access to the portal,
- need to involve freelancers or subcontractors in their work,
- do not want to pay extra for users who rarely take part in portal activities.
ONLYOFFICE Workspace allows you to add guests with view-only permissions at no extra cost.
You can add a person as a guest in four different ways:
- use the Create new guest option,
- use the Import People option,
- send the invitation link,
- allow self-registration.
This guide describes how to do it in a few easy steps.
Create a new guest
If you have the details of the person you want to add as a guest, use the Create new guest option. To do that, open the People module and follow the steps below:
- Click Create in the upper-left corner.
- Select the Guest option from the drop-down list.
- Complete the required fields of the Create New Profile form: First Name, Last Name, and Email.
- If necessary, create a temporary password by clicking the Set password link.
By default, the password must be at least 8 but no more than 120 characters long.
- Enter any additional information you have.
- Add a photo to the profile by clicking Edit Photo below the default image.
- Click Save.
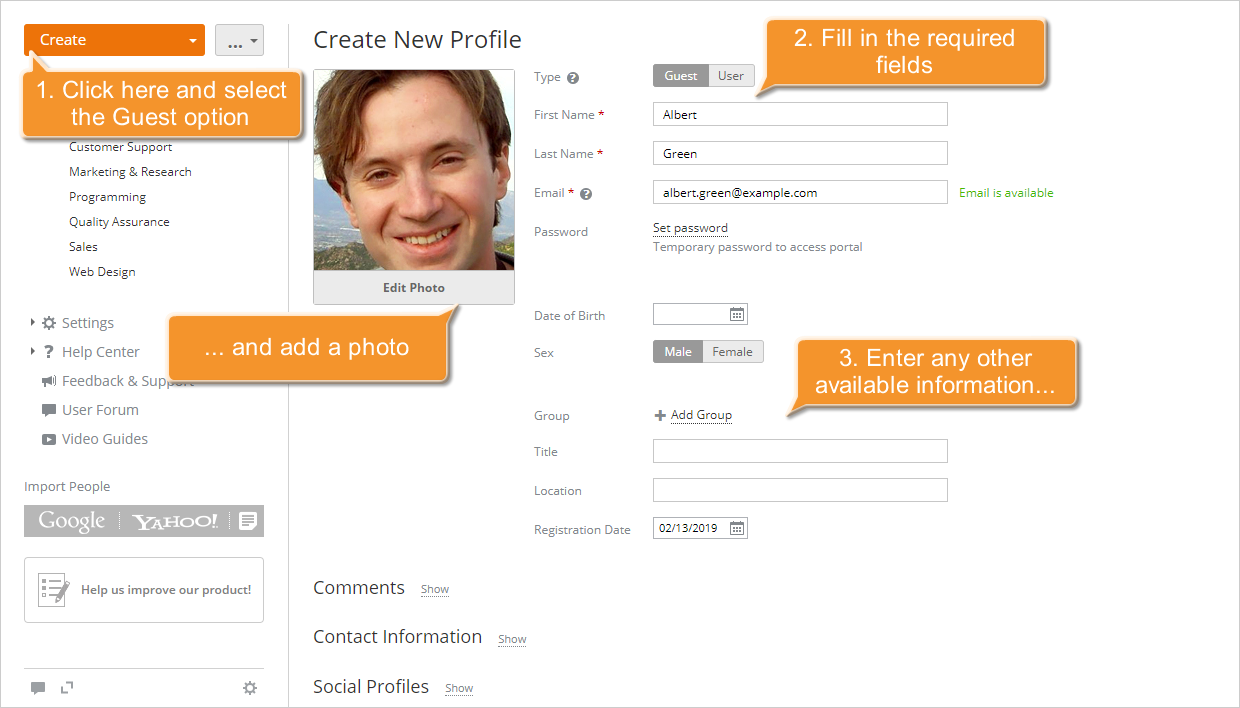
The person will be added to the portal right away and will receive an invitation via email.
Import guest accounts
If you want to add multiple guests at once using contact information from various sources, such as the web, a .csv file, or a mail client address book, use the Import People option. To do that, open the People module and follow the steps below:
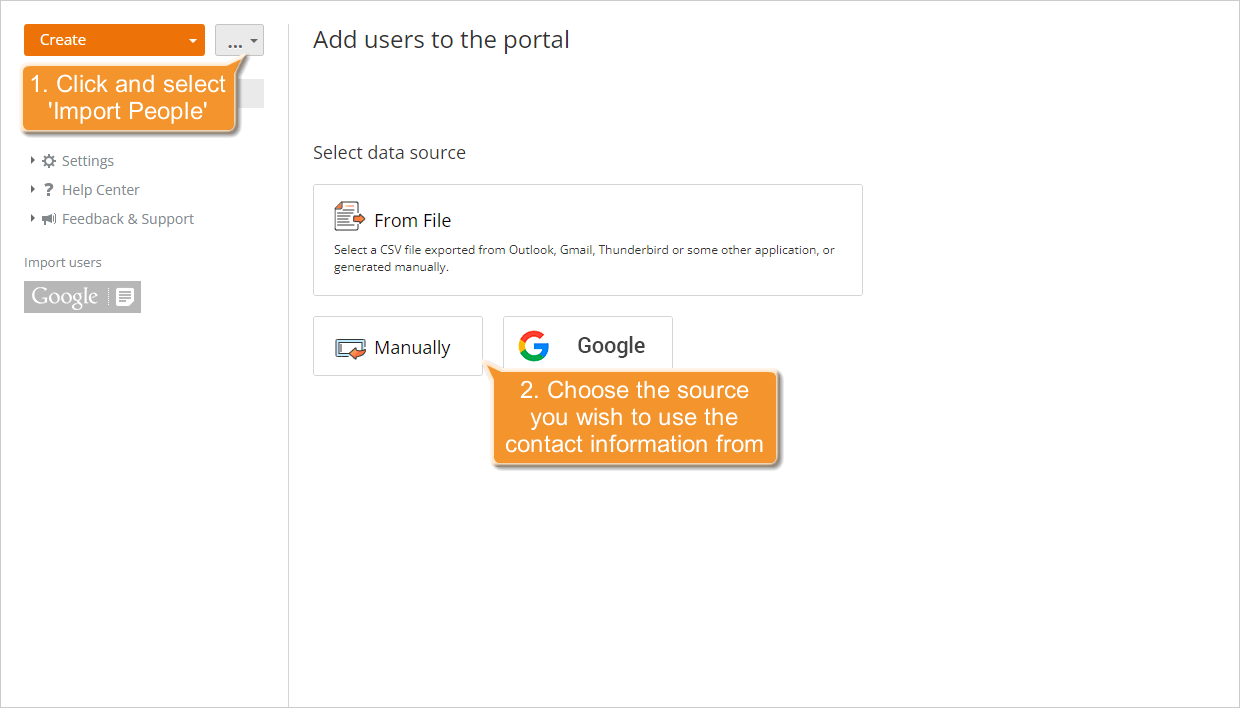
- Click the More Actions
 icon in the upper-left corner.
 - Select the Import People option from the drop-down list.
- In the Add users to the portal wizard that opens, select the source you want to import the contact information from:
- Click From File to import the contact information from a previously created .csv file or MS Outlook Express .csv file, then upload the file, verify the data, and click Go to contact list.
- Click Google and grant access to the selected account to import the contact information from the web.
- Click Manually to add the contact information of multiple guests to the list manually.
- Check the imported information displayed in the Add users to the portal wizard.
- Specify the person's first name and last name if they are missing.
- Select multiple users and click Guest at the top, or use the Guest menu item to the right of a particular user.
- Click Add to portal.
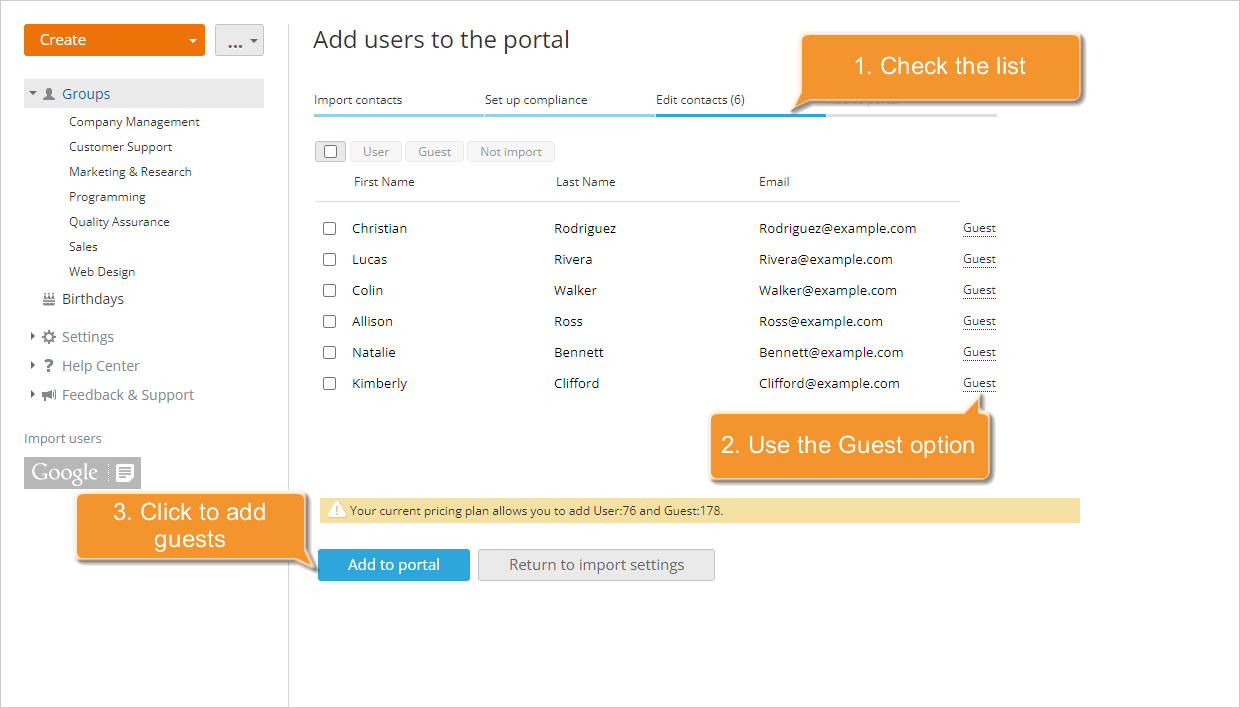
The selected people will be added to the portal right away and will receive an invitation via email.
Invite guests
If you want to invite each client personally instead of sending them the automatically generated invitation, or if you have no time to complete each profile, you can use the Invitation Link option. To do that, follow the steps below:
- Click the More Actions
 icon in the upper-left corner and select the Invitation Link option.
 - Select the Add users as guests checkbox below the link field.
- Click the Copy the link option, or use the Ctrl+A and Ctrl+C key combinations to copy the entire link.
- Paste the link into a message and send it to the client you want to invite.
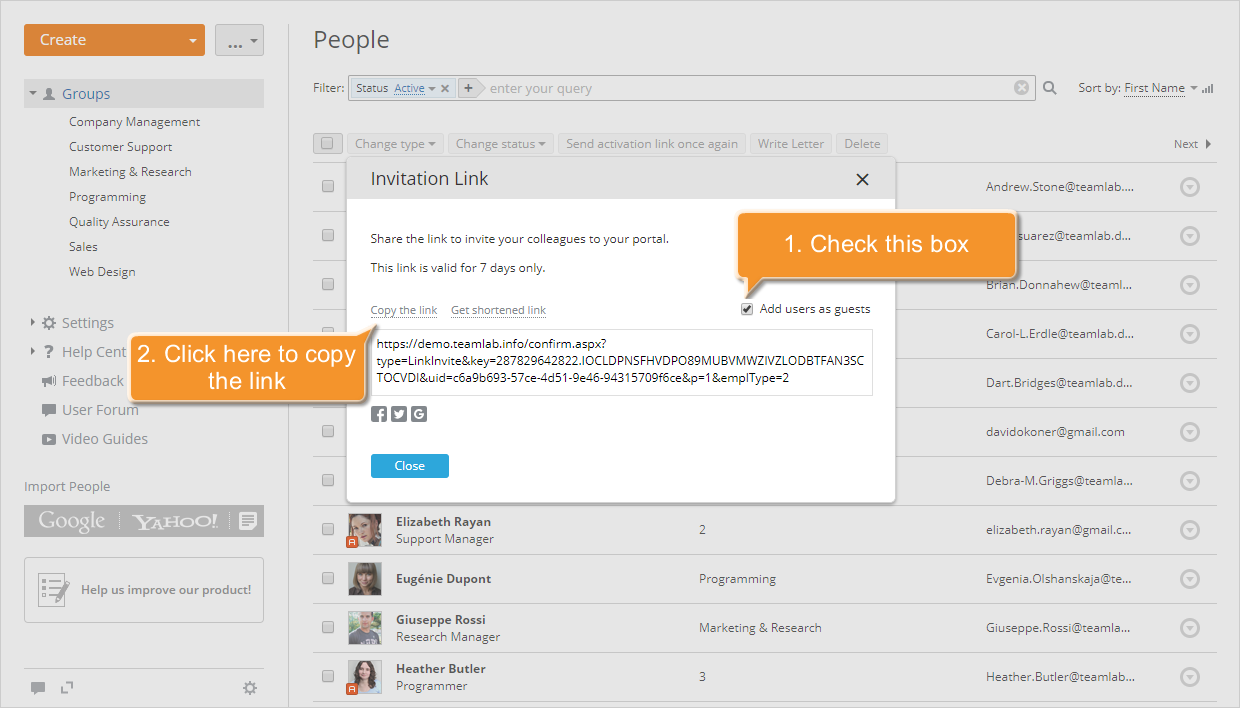
After the invited person follows the link and enters their email address, first name, last name, and password, they will be automatically added to your portal, and you will be notified that a new user has been added.
 Invite users to portal icon to generate the invitation link. This icon is available in the left-side panel of each portal module.
Allow guest self-registration
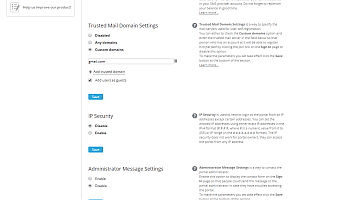
If you want to allow people to join your portal on their own, configure the Trusted Mail Domain settings so that anyone with an email address on a trusted mail server can access your portal by clicking the Click here to join link on the Sign in page. To do that, follow the steps below:
- Click the
 icon at the top of the page, or open the Choose drop-down list next to your portal logo and select the Settings option.
 - Select the Portal Access subsection of the Security section.
- Scroll down to the Trusted Mail Domain Settings section.
- Select the Custom domains radio button.
- Click the Add trusted domain link.
- Enter the trusted mail server in the field that appears below.
- Select the Add users as guests checkbox below the server fields.
- Click Save at the bottom of the section.
From this moment on, anyone who has an account on the specified mail server will be able to join your portal.
The users added as guests will have very limited permissions on your portal. You can always change their type from Guest to User to grant them extended access rights. Keep in mind that in this case, they will be included in the pricing plan, and if their number exceeds the maximum number allowed, you will need to upgrade your subscription.
Watch video
Providing guest access in ONLYOFFICE
This guide will show you how to grant access to the portal to the clients.