Saving/exporting/printing your spreadsheet
Save the spreadsheet
To save the changes you've made:
- Tap the
 icon in the left corner of the top toolbar to exit the Spreadsheet Editor.
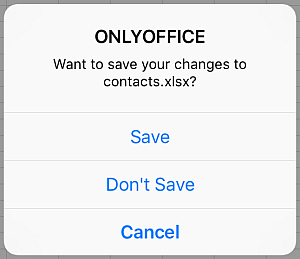
 - In the dialog that appears, tap Save to save your changes, Don't Save to discard them, or Cancel to return to editing.
Export the spreadsheet
To export your spreadsheet in a different format:
- Tap the
 Tools icon in the right corner of the top toolbar.
 - Tap the
 Export menu item.
 - Choose the format you want:
- XLSX — Microsoft Excel format
- PDF — Portable Document Format
- ODS — OpenDocument Spreadsheet
- XLTX — Excel template
- PDF/A — long-term archival PDF
- OTS — OpenDocument template
In the iOS share window that appears, select an app or a recent contact to share the file with.
Print out the spreadsheet
- Tap the Tools icon in the right corner of the top toolbar.
- Tap the
 Print menu item.
 - Adjust your Print Settings:
- Orientation — choose Portrait to print vertically or Landscape to print horizontally.
- Page Range — choose what to print: the Current Sheet, All Sheets, or a previously selected range of cells (Selection).
- Page Format — pick one of the available paper sizes.
- Print Gridlines — turn the switcher on to include gridlines in your printout.
- Print Headings — turn the switcher on to include row and column headings.
- Tap Next and set your Printer Options:
- If no printer is selected, tap Select Printer to choose an AirPrint Printer.
- Set the number of copies using the
 and
and  icons.
 - If needed, restrict the range of pages to print.
- Select the required printer and tap Print.
To save the spreadsheet as a PDF, tap the Share button in the top right corner of the Options window and choose the required action, e.g., Save to Files. The spreadsheet will be saved as a PDF.
Article with the tag:
Browse all tags