ONLYOFFICE Documents for iOS - Overview
The Documents app for iOS allows you to access the files stored in your ONLYOFFICE account on your mobile device, view and edit existing text documents, spreadsheets, and presentations, create new ones and organize them as well as connect third-party cloud storages. You can edit documents collaboratively with other portal users or work on your files offline.
Supported devices
The application runs under iOS 11 or higher.
First launch
The Documents app is available on the AppStore. After you've downloaded and installed the application on your mobile device, tap the
![]() icon to launch it.
icon to launch it.
Application sections
The Documents app contains four main sections which are available at the bottom panel.

 On Device section contains your local documents that can be viewed and edited without an internet connection.
 ONLYOFFICE section allows you to connect your existing ONLYOFFICE cloud or create a new one and work on the files stored on your portal in online mode.
 Clouds section allows to connect third-party clouds, such as ownCloud, Nextcloud, kDrive, Google Drive, and other storages which support WebDAV protocol.
 Settings section allows you to adjust the application settings.
You can easily switch between the application sections as well as move files between storages using both file/folder menu options and a simple drag-and-drop gesture. To drag the files between the application sections, touch and hold the file you want to move, open the different application section without releasing the file, and then drag the file to the destination folder.
On Device section
The On Device section opens by default when you launch the application. It allows you to create and edit new documents, spreadsheets, and presentations in offline mode without an internet connection. You can create folders to organize your local files, move the files between these folders, create a copy of a file, and rename or delete it.
It's also possible to edit the files previously downloaded from your portal. If necessary, you will be able to upload any of your local files to your portal later, when an internet connection is established.
ONLYOFFICE section
The ONLYOFFICE section allows you to connect your existing ONLYOFFICE cloud or create a new one and work on the files stored on your portal in online mode, share documents with other portal users and edit them collaboratively with your team.
Connecting to a portal
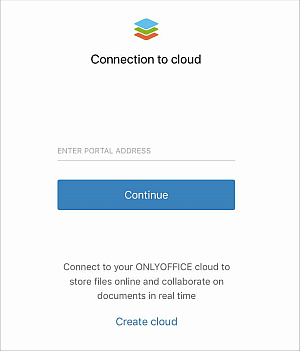
Switch to the ONLYOFFICE section at the bottom panel. The Connection to cloud screen will open where you will be prompted to connect to your existing portal or create a new one.
- Enter your existing portal address (portalname.onlyoffice.com) and tap the Continue button,
To access your Personal account (previously created at personal.onlyoffice.com), enter personal.onlyoffice.com.
- enter the email address and password you use to access your portal, then tap the Login button.
Alternatively, you can specify the portal address and sign in to your portal using your Facebook or Google account, if you have previously connected one of these accounts to your profile on the portal.
Creating a new portal
If you do not have an ONLYOFFICE account, you can easily create a new portal right from the mobile application when it is launched:
- tap the Create cloud link at the bottom of the screen,
- fill in the registration form: create Your Account Name, enter your First Name, Last Name, Email Address, and tap Continue,
- enter and confirm a password, then tap the Create portal button.
By default, the password must be at least 8 but no more than 120 characters long.
To recover a password from the portal,
- enter the portal on the start screen,
- enter the email to which your portal was registered,
- tap the Forgot? link on the sign-in screen,
- a recovery link will be sent to the specified email address. Follow the link from the email message to restore your password.
To sign out from your account, tap your profile photo in the upper corner on the left navigation panel and select the Logout option in the window that opens.
ONLYOFFICE portal sections
Tap icons at the left panel to switch between the Documents module sections.
Your Portal contains the following sections:
 My Documents is a section that contains your personal documents;
 Shared with Me is a section that contains documents that were shared with you by other portal users;
 Favorites is a section that contains documents and files previously marked as 'Favorites';
 Recent is a section that contains the files you have recently opened both on the portal and on the device;
 Common Documents is a section that contains files and folders available to all portal users;
 Project Documents is a section that contains folders corresponding to existing projects from the portal 'Projects' module;
 Trash is a section where all deleted files are stored and can be permanently deleted later.
Your Personal account contains the
My Documents and
Trash sections.
Clouds section
The Clouds section allows you to connect third-party clouds, such as ownCloud, Nextcloud, kDrive, Google Drive, and other storages which support WebDAV protocol, as well as connect your iCloud drive. This section can be used if you do not want to create an ONLYOFFICE portal, but want to edit your documents from third-party storage using ONLYOFFICE editors.
Connecting iCloud
To connect your portal to your iCloud storage,
- tap the
 iCloud Drive service in the MY CLOUDS section. The connection will be established automatically,
 - tap the Create button to start working.
Connecting third-party services
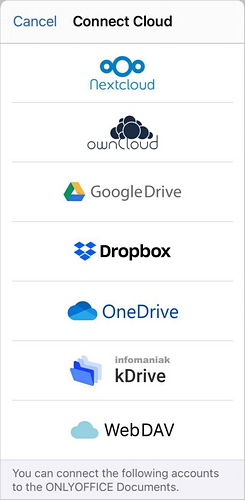
Tap the necessary service in the CONNECT CLOUDS section at the bottom panel: Nextcloud, ownCloud, Google Drive, Dropbox, OneDrive, kDrive, or other WebDAV service. If you select the Other Cloud option, the Connect Cloud window will open:
To connect the selected storage, specify the following data:
- specify your WebDAV Server address.
- enter the Login and Password that you use to access your third-party account.
- tap the Next button.
You can use an EMM service or MDM server to connect your WebDAV storage.
The connected clouds are displayed in the MY CLOUDS section at the left navigation panel. To open a different connected cloud, tap it in the list on the left.
You can view and edit existing documents, spreadsheets, and presentations, create new files and folders, move or copy files and folders from the connected cloud storage to other application sections, and rename or delete files and folders.
Settings section
The Settings section allows you to adjust some security settings for your app, manage storage space as well as view info about the app.
SETTINGS AND SECURITY
To enable push notifications:
- tap the Notifications menu item in the SETTINGS AND SECURITY settings section,
- tap the Turn ON in Settings option. You will be redirected to your device settings,
- enable the All notifications switcher if you want to receive notifications from the ONLYOFFICE portal.
To customize the app theme:
- tap the Theme menu item in the SETTINGS AND SECURITY settings section,
- tap the required theme: Same as system so that the theme corresponds with your device settings; Light to have the app in white and blue; Dark to have the app in black and blue.
To enable passcode protection for your application:
- tap the Passcode Lock menu item in the SETTINGS AND SECURITY settings section,
- tap the Turn Passcode On option,
- specify your 4-digit passcode and confirm it.
When the passcode is turned on, you will be able to change it or turn it off using the corresponding options in the Passcode Lock section.
STORAGE
To free up space on your device, you can clear the application cache. To do that:
- tap the Cache option in the STORAGE settings section,
- tap the Clear Cache button in the confirmation window.
To preview files, enable the Files Preview switcher in the STORAGE settings section.
To save space, you can also turn on the Compress Images switcher in the STORAGE settings section.
INFORMATION
The About section contains information about the application, e.g., its version, Terms of Service, or Privacy Policy.
The Support option allows you to contact the support team via e-mail or on the forum.
The What's New section reviews the latest features and updates.
Filtering items
To access the filtering settings, tap the  icon in the right top corner in either the On iPhone or ONLYOFFICE section to open the Filters window.
The available filtering options are:
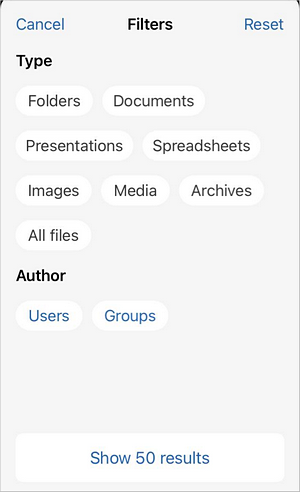
- Filtering by Type:
- Choose which types of files you want to display: Folders, Documents, Presentations, Spreadsheets, Images, Media, Archives, All files.
- Filtering by Author:
- Choose the author of the files you want to display: Users, Group.
- Depending on the previously selected option, the Select user or Select group window will open. Choose the required user/group or enter their name in the Search field above.
- When ready, tap the Show X results button below to apply the filtering options.
To reset previously applied filters, tap the icon in the right top corner in either the On iPhone or ONLYOFFICE section to open the Filters window and tap the Reset button at the top right corner.