Gérer et modifier des documents
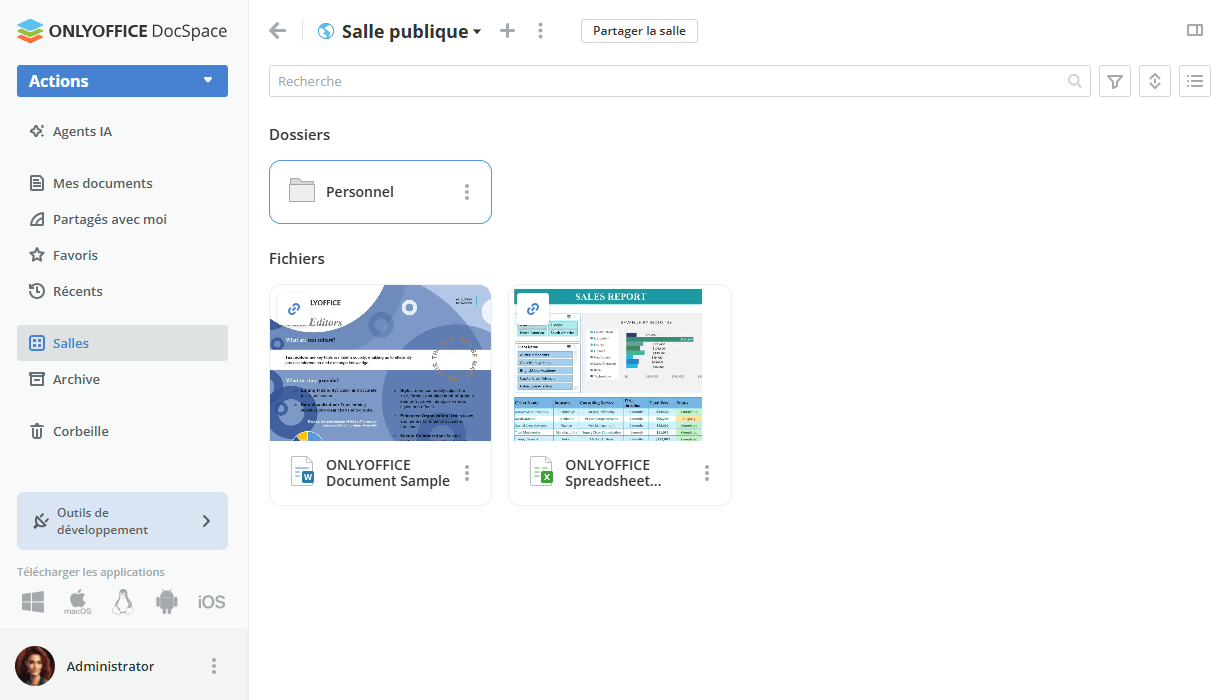
Une fois la salle créée dans ONLYOFFICE DocSpace, les administrateurs ou les utilisateurs avancés doivent ajouter des documents à cette salle pour démarrer la collaboration. Il est possible de télécharger les fichiers et les dossiers existants, d'en créer de nouveaux et de contrôler la collaboration en gérant les versions et en verrouillant des fichiers pour les coauteurs, etc. Les administrateurs peuvent également renommer les documents, les déplacer ou les copier vers une autre salle, ou supprimer les fichiers inutiles.
Les utilisateurs peuvent travailler sur des documents, des classeurs, des présentations, des formulaires, des formulaires PDF, des livres électroniques et des diagrammes, lire des fichiers multimédias et afficher des images à l'aide des éditeurs en ligne ONLYOFFICE.
Il est également possible de configurer les paramètres de gestion des fichiers.
Charger des fichiers et des dossiers
Pour charger un fichier,
- ouvrez la salle dans laquelle vous souhaitez télécharger les fichiers,
- cliquez sur le bouton Actions dans le coin supérieur gauche,
- sélectionnez l'option
 Télécharger les fichiers dans le menu,
 - choisissez les fichiers à charger vers la salle dans la fenêtre du gestionnaire de fichiers et cliquez sur le bouton Ouvrir.
Ou tout simplement faites glisser et déposez un fichier ou plusieurs fichiers de votre ordinateur dans la zone de travail pour les charger vers votre espace DocSpace de manière plus simple. Au milieu de l'écran, un bouton flottant apparaît avec des informations sur l'emplacement de l'élément sélectionné. Lorsque le téléchargement démarre, le bouton flottant se déplace vers le coin droit.
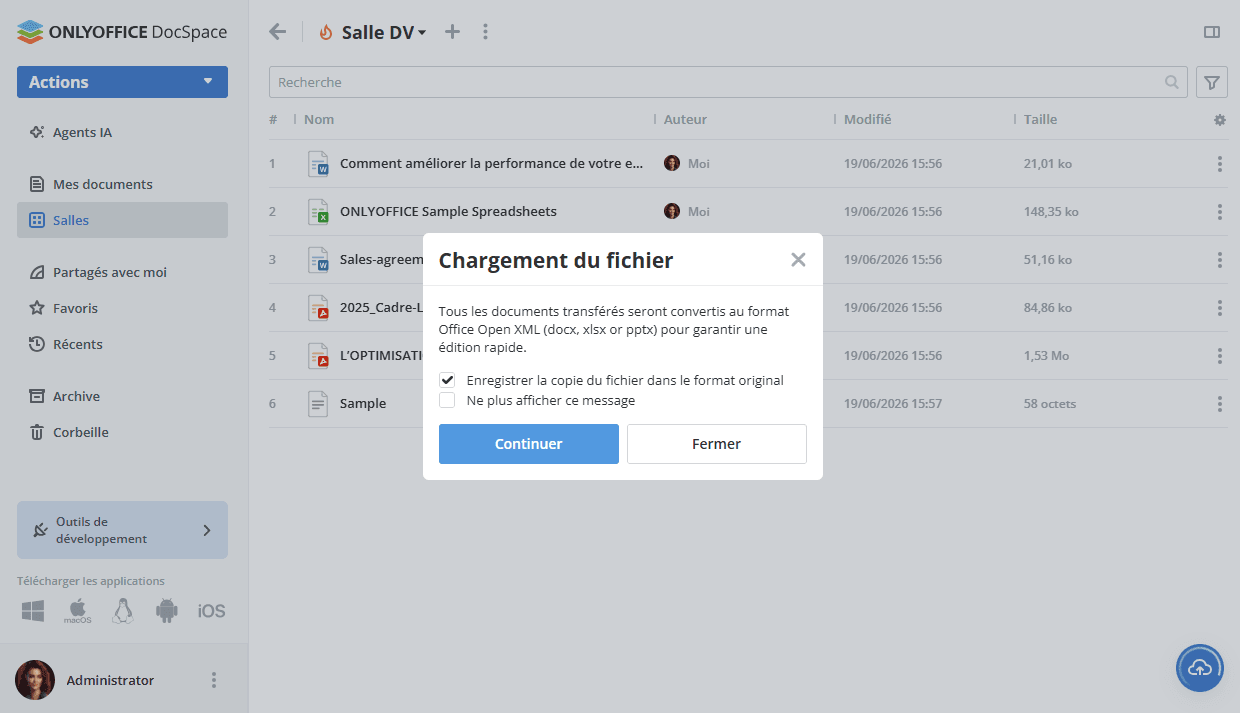
Si le fichier n'est pas dans le format Office Open XML, celui-ci sera converti dans le format .docx/.xlsx/.pptx pour une édition plus rapide. Une fenêtre de notification va apparaître où vous pouvez sélectionner si ce sont les deux fichiers que vous souhaitez sauvegarder (le fichier au format d'origine et le fichier au format Office Open XML). Si vous n'avez pas besoin de fichiers au format d'origine dans la salle, vous pouvez décocher la case Enregistrer aussi la copie du fichier au format d'origine. Cela sera pris en compte lors des prochaines opérations de chargement et le fichier converti sera sauvegardé en tant qu'une nouvelle version du fichier d'origine au lieu d'un nouveau fichier.
Si le fichier d'origine est protégé par un mot de passe, ce mot de passe est requis pour convertir le fichier. Lorsque vous cliquez sur l'icône  Convertir et ouvrir à droite du document téléchargé à partir de la liste de fichiers, une nouvelle fenêtre s'ouvrira où vous devez saisir le mot de passe.
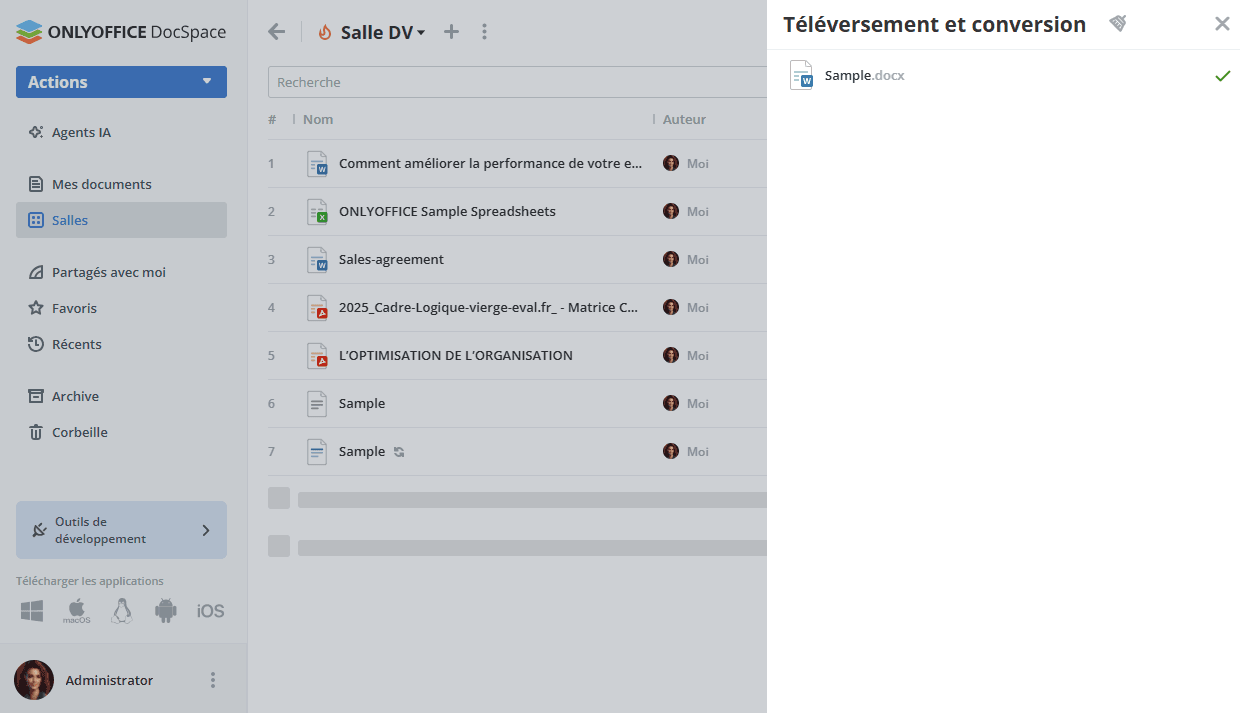
Consultez l'état de conversion et de téléchargement en cliquant sur l'icône  . Le menu Télécharger et convertir les fichiers s'affichera. Ce menu comporte des documents qu'on a déjà téléchargé et converti et ceux dans la file d'attente.
Si une erreur est survenue lors du téléchargement (par exemple, en raison d'une panne de réseau, d'un dépassement du délai d'attente ou d'une erreur interne du serveur), vous pouvez cliquer sur Réessayer à côté du fichier concerné pour le télécharger à nouveau.
Pour annuler le téléchargement du fichier, cliquez sur la croix  à côté du fichier. Pour arrêter le téléchargement de tous les fichiers à la fois, cliquez sur la croix grise
  dans le coin supérieur droit. Pour masquer le menu Téléchargements, cliquez sur l'icône
  . L'historique de téléchargements et conversions sera supprimé.
Pour télécharger un dossier comportant des sous-dossiers et des documents imbriqués :
- cliquez sur le bouton Actions dans le coin supérieur gauche,
- sélectionnez l'option Télécharger le dossier dans le menu,
- choisissez le dossier à charger vers la salle dans la fenêtre du gestionnaire de fichiers et cliquez sur le bouton Ouvrir.
Vous pouvez également glisser-déposer le dossier nécessaire depuis la fenêtre du gestionnaire de fichiers vers la zone de travail.
Pour télécharger un formulaire PDF vers la salle de remplissage de formulaires :
- cliquez sur le bouton Actions dans le coin supérieur gauche ou sur l'icône Plus
 .
. - sélectionnez l'option appropriée :
- sélectionnez l'option Télécharger le formulaire PDF -> De DocSpace, choisissez le formulaire dans la salle et cliquez sur le bouton Sélectionner.
- sélectionnez l'option Télécharger le formulaire PDF -> De l'appareil, choisissez le formulaire dans la fenêtre du gestionnaire de fichiers et cliquez sur le bouton Ouvrir.
- sélectionnez l'option Choisir parmi les modèles, choisissez le modèle et cliquez sur le bouton Créer.
Créer de nouveaux fichiers et dossiers
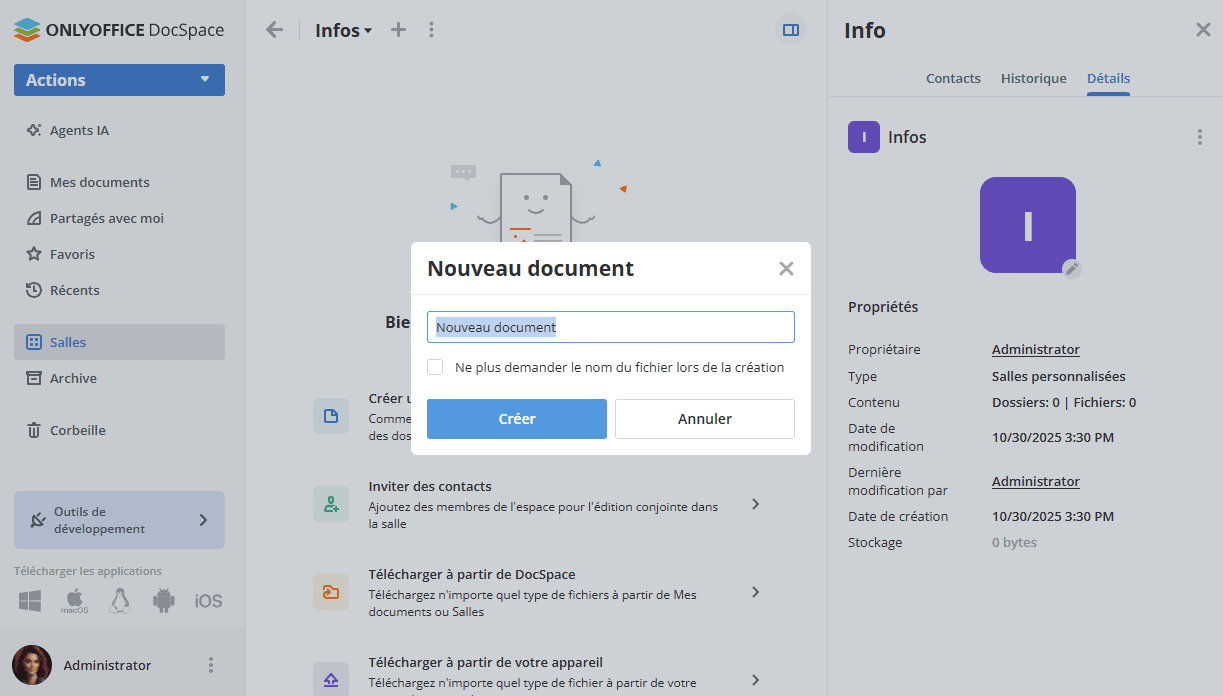
Pour créer de nouveaux fichiers ou dossiers,
- ouvrez la salle où vous souhaitez créer un fichier,
-
cliquez sur le bouton Actions dans le coin supérieur gauche ou sur l'icône Plus au-dessus de la liste des documents ou faites un clic droit dans la salle et sélectionnez l'une des options :
 Nouveau document pour créer un nouveau document texte,
 Nouvelle feuille de calcul pour créer un nouveau classeur,
 Nouvelle présentation pour créer une nouvelle présentation,
-
 Formulaire PDF pour créer un fichier
 PDFà partir de Blanc, Depuis un fichier texte (il faut télécharger le fichier texte vers la salle en avance) ou sélectionnez une disposition depuis la Galerie de formulaires. La Galerie de formulaires inclut plusieurs formulaires préconfigurés qui sont adaptés aux usages divers (formulaire du contrat de location, du Contrat de licence d'utilisation de logiciel, de l'offre d'emploi, etc.),La langue des formulaires dans la Galerie de formulaires sera réglée automatiquement en fonction de la langue de votre profil.  Nouveau dossier pour créer un nouveau dossier,
- Plus... ->
 Draw.io pour créer un nouveau diagramme à l'aide du module complémentaire Draw.io,
 - Plus... ->
 Markdown pour créer un nouveau fichier .md à l'aide du module complémentaire Markdown,
 - Plus... ->
 URL pour créer un nouveau fichier URL à l'aide du module complémentaire URL. Les fichiers URL contiennent un lien externe et peuvent être ouverts directement depuis la liste des fichiers.
-
entrez le nom de votre fichier ou votre dossier dans le champ approprié et cliquez sur le bouton Créer.
si vous ne souhaitez pas saisir un nom du fichier, activez l'option Ne plus demander le nom de fichier lors de sa création ou utilisez l'option appropriée parmi les paramètres du gestionnaire de salle.
Gérer des documents
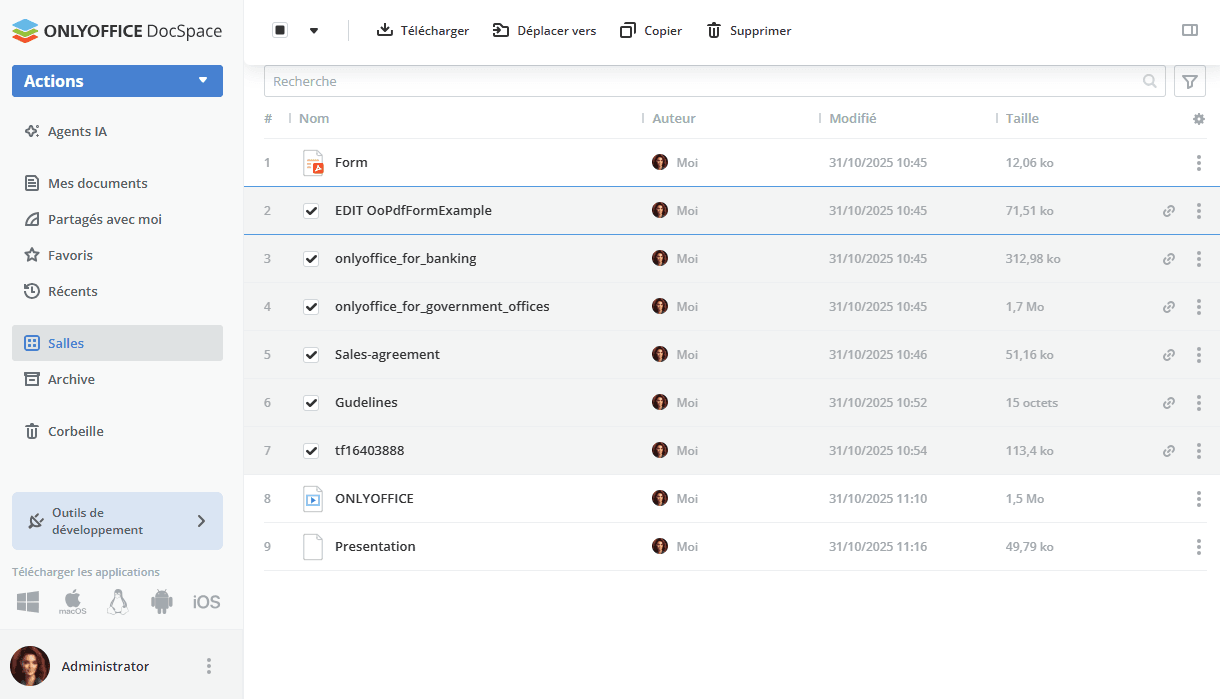
Pour trouver rapidement un document nécessaire, utilisez le filtre en haut de la liste de documents.
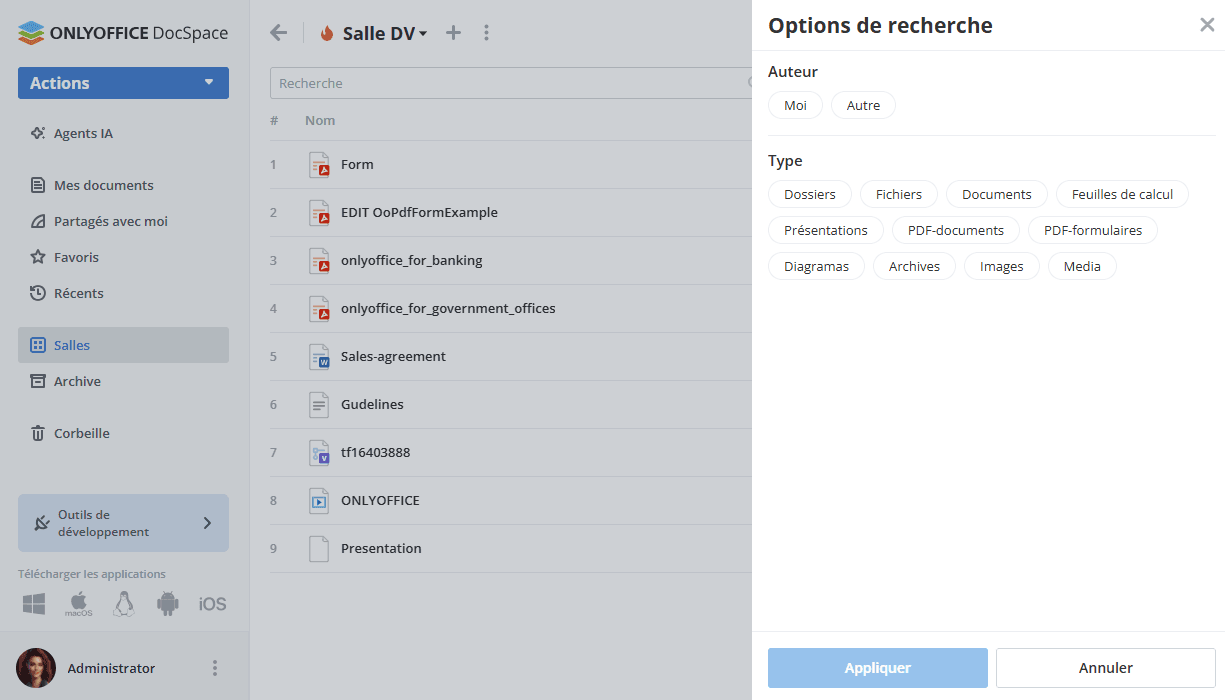
Cliquez sur le bouton  et définissez les paramètres du filtre et de la recherche :
- Pour filtrer des éléments par Auteur, cliquez sur Moi ou utilisez l'option Autre et sélectionnez l'utilisateur dans la liste.
- Pour filtrer des éléments par Type, choisissez l'une des options suivantes : Dossiers, Fichiers, Documents, Feuilles de calcul, Présentations, Documents PDF, Formulaires PDF, Diagrammes, Archives, Images, Média.
- Cliquez sur Appliquer pour appliquer les filtres. Pour effacer le filtre, utilisez l'icône
 dans le coin supérieur droit.
Saisissez le nom du fichier partiellement ou entièrement dans le champ de recherche et appuyez sur la touche Entrée pour afficher les résultats de recherche. Si vous souhaitez ouvrir l'emplacement du fichier, cliquez avec le bouton droit sur le fichier et choisissez l'option  Ouvrir l'emplacement. Pour accéder au dossier parent situé un niveau au-dessus du dossier actuel, utilisez la flèche
  .
.
Définissez les paramètres de tri (Nom, Modifié le, Taille) en utilisant le bouton  . Cliquez sur la flèche à côté du paramètre sélectionné pour modifier l'ordre de tri.
Utilisez les boutons  ou
ou  à droite pour choisir le mode d'affichage approprié : Affichage des miniatures ou Vue compacte. Les miniatures ne sont pas générées pour les services externes connectés.
Le mode Affichage des miniatures approprié :
Utilisez l'icône  pour afficher ou masquer les colonnes Auteur, Créé le, Modifié, Taille, Type dans la liste des documents (Vue compacte).
Les opérations que vous pouvez effectuer avec vos documents depuis le menu contextuel :
 Sélectionner sert à sélectionner le fichier dans la liste.
 Modifier sert à ouvrir le document pour modification sous un nouvel onglet.
- Modifier diagramme (disponible pour des fichiers au format
.drawio) sert à ouvrir un diagramme pour modification à l'aide du module complémentaire Draw.io.  Convertir en PDF (disponible pour des fichiers au format
 .docx,.xlsx,.pptx) sert à convertir des documents, des feuilles de calcul et des présentations en PDF à l'aide du module complémentaire Convertisseur PDF. Convertir en texte (disponible pour des fichiers audio et vidéo) sert à transcrire audio ou vidéo en texte à l'aide du module complémentaire Parole au texte.
 Actions -> Modifier/Afficher l'aperçu de markdown (disponible pour des fichiers
 .md) sert à ouvrir et modifier/afficher l'aperçu à l'aide du module complémentaire Markdown. Aperçu sert à ouvrir le document en mode Aperçu sous un nouvel onglet.
 Demander à l'IA sert à joindre le document à une instruction dans un chat IA. Après avoir cliqué sur cet élément du menu, le panneau de sélection des agents IA s'ouvrira. Une fois sélectionné, l'agent s'ouvrira dans l'onglet de chat et le fichier y sera joint. Cette option est disponible pour tous les formats de fichiers pouvant être joints au chat IA (
.txt,.docx,.xlsx,.csv,.pdf). Partager - cette rubrique du menu comporte les sous-rubriques suivantes :
 Copier le lien partagé sert à obtenir un lien vers le fichier pour d'autres utilisateurs DocSpace ou pour toute personne ayant le lien.
 Paramètres de partage sert à ouvrir les paramètres de partage pour donner la permission d'accès vers un fichier par un lien.
 Créer une salle (disponible dans la section Mes documents) sert à créer une nouvelle salle en vous basant sur les documents/dossiers sélectionnés dans la section Mes documents. Une fois la salle créée, les fichiers/dossiers sélectionnés seront copiés vers cette salle.
 Remplir sert à ouvrir et remplir le formulaire remplissable au format
 .pdf(disponible dans des salles de remplissage des formulaires).- Commencer le remplissage sert à ouvrir le formulaire remplissable au format
.pdfet commencer le remplissage selon le rôle attribué si on n'a pas encore commencé à remplir (disponible dans des Salles de données virtuelles). - Statut de remplissage sert à ouvrir le volet 'Statut de remplissage' pour le formulaire remplissable au format
.pdfen cours de remplissage selon le rôle attribué (disponible dans des Salles de données virtuelles).  Réinitialiser et commencer le remplissage sert à démarrer le remplissage du formulaire remplissable au format
 .pdfselon le rôle attribué lors de l'arrêt de remplissage (disponible dans des Salles de données virtuelles). Soumettre à la Galerie de formulaires (disponible pour des fichiers au format
 .pdf) sert à sauvegarder votre formulaire dans la Galerie pour le partager avec la communauté ONLYOFFICE. Propriétés - cette rubrique du menu comporte les sous-rubriques suivantes :
 Info sert à ouvrir le volet avec les paramètres de partage (disponible dans la section Mes documents) ou la liste des membres de la salle (disponible dans la section Salles), l'historique des modifications du fichier, et les informations sur le fichier et les propriétés telles que Aperçu du document, Propriétaire, Type, Extension du fichier, Taille, Date de modification, Dernière modification, Date de création, Versions et Commentaires. Pour ouvrir le même volet, vous pouvez cliquer sur l'icône
  dans le coin supérieur droit.
 Afficher l'historique des versions sert à ouvrir la liste des versions comportant une description détaillée de chaque version : Numéro de version, Date et heure, Auteur et Commentaires. Le menu
  de l'historique des versions permet également d'ouvrir la version en lecture seule, de Modifier le commentaire à chaque version à part, Restaurer ou Télécharger la version nécessaire.
 Activer le filtre personnalisé (disponible pour des fichiers au format
 .xlsx) sert à activer l'option Filtre personnalisé permettant aux utilisateurs d'afficher les fichiers .xlsx selon le filtre propre. Toutefois, les utilisateurs du portail ne peuvent pas ajouter de nouveaux filtres ou supprimer des filtres que l'auteur de la feuille de calcul a appliqué auparavant. De plus, les filtres appliqués par un utilisateur avec l'autorisation Filtre personnalisé seront affichés pour lui uniquement. Les résultats du filtre affichés restent inchangés pour d'autres utilisateurs. Lors de l'activation de l'option Filtre personnalisé, l'icône s'affiche à côté du fichier dans la salle.
- Désactiver le filtre personnalisé (disponible pour des fichiers au format
.xlsx) pour désactiver l'option Filtre personnalisé. - Synchroniser les réponses vers XLSX (disponible dans les salles de remplissage des formulaires pour la feuille de calcul des résultats générée automatiquement) sert à actualiser le fichier avec les dernières données de soumission de formulaire collectées depuis sa dernière génération.
 Verrouiller/Déverrouiller un fichier sert à verrouiller/déverrouiller toute modification par d'autres utilisateurs avec des permissions d'accès appropriées.
 Marquer en tant que favori pour ajouter le fichier aux Favoris.
 Retirer des favoris pour éliminer le fichier de la section Favoris.
 Ouvrir l'emplacement (disponible dans les sections Favoris et Récents) pour passer à la section où ce fichier est enregistré.
 Marquer comme lu sert à marquer comme lu un fichier ajouté à la salle ou modifié par un autre utilisateur.
 Télécharger - cette rubrique du menu comporte les sous-rubriques suivantes :
- Format d'origine sert à télécharger le fichier au format d'origine sur votre ordinateur.
-
 Télécharger comme sert à télécharger un fichier au format sélectionné sur votre ordinateur.
Plusieurs fichiers sont téléchargés sous forme d'une archive .zip et sont sauvegardés sur votre ordinateur.
Télécharger comme sert à télécharger un fichier au format sélectionné sur votre ordinateur.
Plusieurs fichiers sont téléchargés sous forme d'une archive .zip et sont sauvegardés sur votre ordinateur.
-
 Déplacer ou copier - cette rubrique du menu comporte les sous-rubriques suivantes :
 Déplacer vers une autre salle ou service tiers de stockage. Vous pouvez également créer un nouveau dossier dans la salle sélectionnée en cliquant sur le bouton Nouveau dossier.
- Copier le fichier et déplacer la copie vers la salle sélectionnée. Vous pouvez également créer un nouveau dossier dans la salle sélectionnée en cliquant sur le bouton Nouveau dossier.
 Dupliquer le fichier dans la salle actuelle. Les éléments en double sont marqués par un indice à la fin du nom.
 Modifier l'index sert à réorganiser les fichiers et à supprimer les espaces dans l'index de la Salle de données virtuelle. Vous pouvez utiliser les flèches pour modifier l'ordre manuellement un par un ou utilisez l'option Réorganiser en haut.
 Renommer le fichier.
 Supprimer le fichier en le déplaçant vers la Corbeille.
 Arrêter le remplissage sert à arrêter le remplissage du formulaire remplissable au format
 .pdfselon le rôle attribué (disponible dans des Salles de données virtuelles). Retirer de la liste (disponible dans la section Récents) pour supprimer le fichier de la section Récents.

Opérations sur un groupe de fichiers s'affichent en haut du menu contextuel. Pour télécharger, déplacer, copier ou supprimer plusieurs fichiers à la fois,
- accédez à la salle nécessaire en cliquant sur l'option appropriée sur le panneau de gauche,
- placez le curseur de votre souris sur l'icône du fichier et cochez les fichiers que vous souhaitez gérer,
- cliquez sur le bouton nécessaire en haut selon l'opération que vous allez effectuer.
Utiliser la section Partagés avec moi
Vous pouvez partager des fichiers et des dossiers individuels stockés dans les salles et dans la section Mes documents via un lien. Il est également possible de partager individuellement avec un utilisateur de DocSpace les fichiers et dossiers de la section Mes documents. Pour en savoir plus, veuillez consulter cet article.
Les fichiers et dossiers que les autres utilisateurs du DocSpace partagent avec vous depuis leur section "Mes documents" seront disponibles dans la section Partagé avec moi. Les fichiers et dossiers partagés par un lien depuis les salles n'apparaissent pas dans la section "Partagé avec moi".
La colonne "Niveau d'accès" dans la liste des fichiers indique votre niveau d'autorisation.
Vous pouvez masquer les fichiers et les dossiers partagés de la liste Partagé avec moi en sélectionnant l'option Retirer de la liste dans le menu contextuel. Dans ce cas, vos autorisations dans le panneau "Partager" seront définies comme Accès interdit.
- Les droits personnels sont les plus forts.
- Les droits de groupe sont plus forts que les droits de lien.
- Les droits de lien sont les plus faibles.
Par exemple, vous êtes invité en tant que Lecteur, mais vous disposez également d'un lien avec un accès complet. En suivant le lien, vous aurez un accès en lecture seule.
Si vous n'avez aucun droit personnel, lorsque vous cliquez sur un lien vers un fichier, celui-ci s'affichera dans la section « Partagé avec moi » avec les mêmes droits que ceux du lien. Les autorisations du dernier lien ouvert sont mémorisées.
Ajouter des documents aux Favoris
La section Favoris comprend tous les fichiers et les dossiers qui ont été marqués en tant que favoris provenant de la section Mes documents et de toutes les salles. Pour ajouter un fichier/dossier aux Favoris :
- Accédez à la section Mes documents ou à la salle appropriée,
- recherchez le fichier/dossier approprié et cliquez sur l'icône qui se trouve à côté,
- sélectionnez l'option Marquer en tant que favori.
OU
- ouvrez le document nécessaire,
- cliquez sur
 Marquer en tant que favori dans le coin supérieur droit.
Le fichier sera disponible dans la section Favoris et sera marqué avec l'icône ![]() dans la liste.
dans la liste.
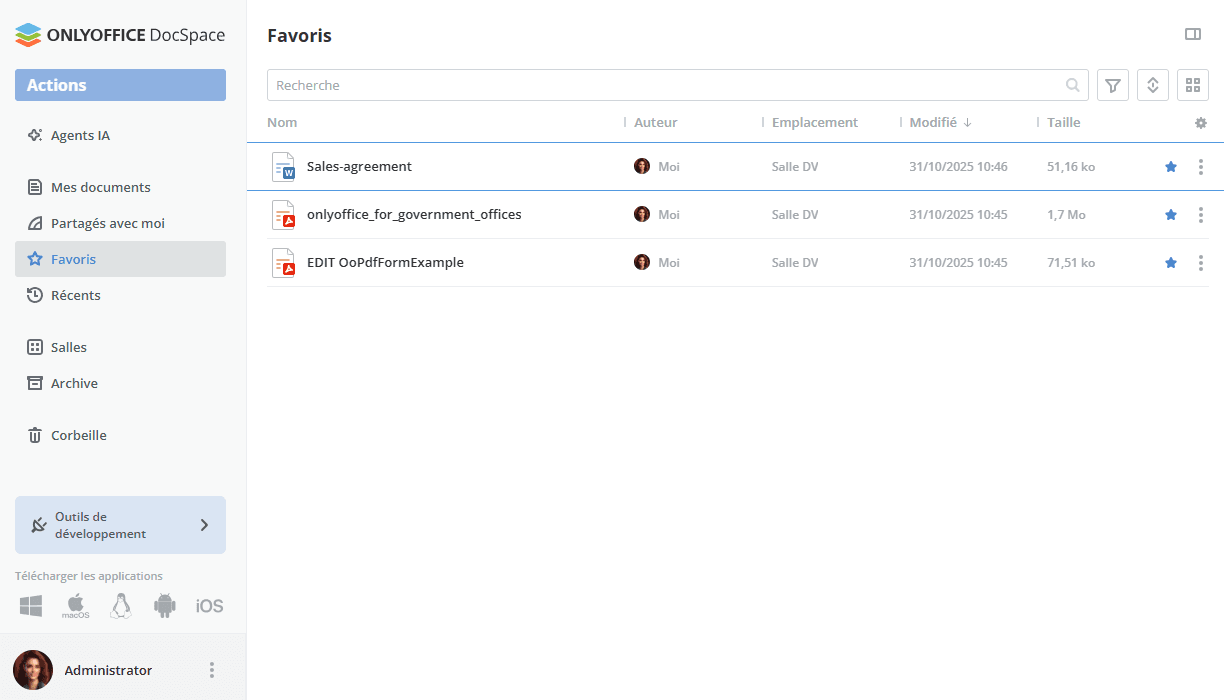
À partir de la section Favoris, vous pouvez utiliser l'option Ouvrir l'emplacement dans le menu contextuel pour passer à la section où ce fichier est enregistré.
Pour supprimer un favori, utilisez l'option ![]() Retirer des favoris dans le menu contextuel ou cliquez sur l'icône
Retirer des favoris dans le menu contextuel ou cliquez sur l'icône ![]() à côté du nom de fichier.
à côté du nom de fichier.
Utiliser la section Récents
L'onglet Récents représente l'espace de stockage des documents ouverts récemment dans l'éditeur. Cette section comprend 100 fichiers récents qui sont stockés pendant 90 jours. Les fichiers inclus dans cette section sont les fichiers depuis la section Mes documents et Salles et les fichiers auxquels on a accédé par un lien.
Le menu contextuel de la section Récents propose un nombre limité d'options. Vous pouvez exécuter les actions suivantes : sélectionner le fichier, afficher l'aperçu, consulter ses propriétés (telles que les informations et l'historique des versions), ouvrir son emplacement (sauf les fichiers accessibles par lien), télécharger, déplacer ou copier le fichier, renommer et retirer de la liste.
Afficher et modifier des documents
Vous pouvez afficher et modifier vos documents, feuilles de calcul, présentations, formulaires remplissables PDF et fichiers PDF directement dans des salles de l'espace DocSpace en utilisant les éditeurs en ligne multifonctionnels ONLYOFFICE.
Vous pouvez également afficher :
- les fichiers multimédias aux formats les plus populaires y compris
avi,mpg,mpeg,mp3,mp4,webm, etc. - les images
bmp,jpg,jpeg,png,gif,tif,tiff,webp - les livres électroniques
fb2,epub - les diagrammes
vsdx,vssx,vstx,vsdm,vssm,vstm
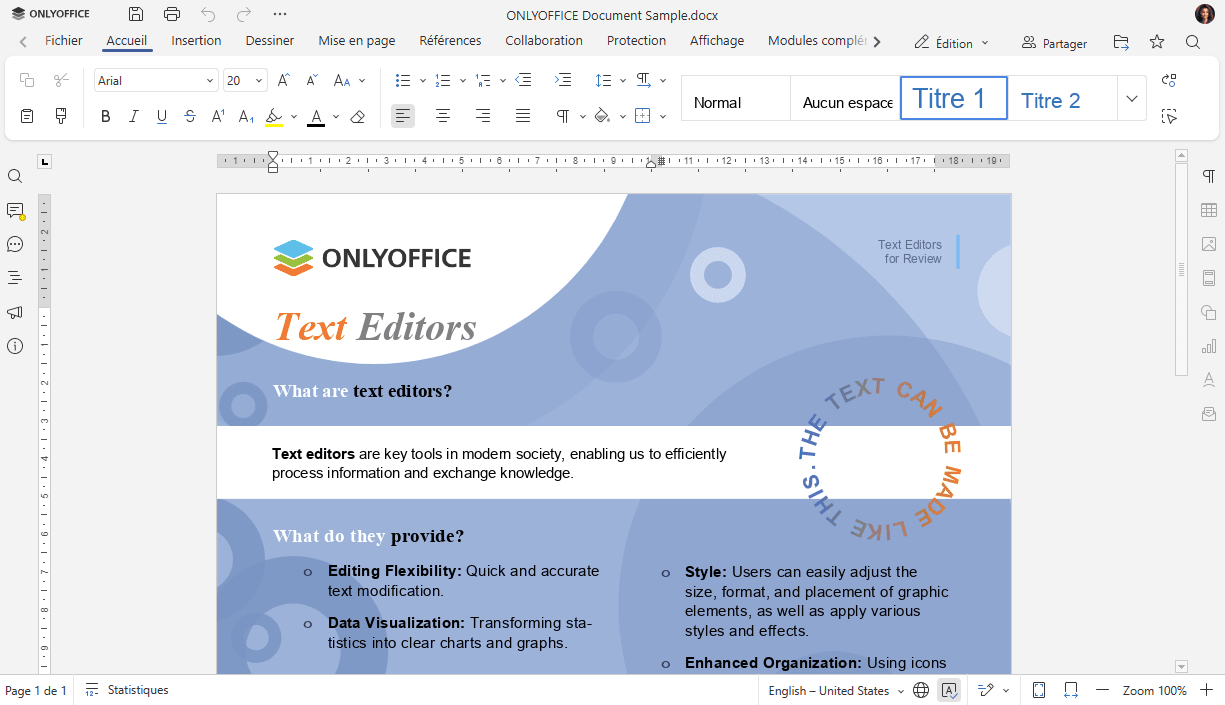
Pour modifier un document, cliquez sur son nom ou sur l'icône  à côté de celui-ci, sélectionnez l'option
  Modifier et il s'ouvrira dans un nouvel onglet du navigateur web. Lorsque ce document est en cours d'édition, une icône représentant un crayon de couleur s'affichera
  . Pour en savoir plus sur les fonctionnalités d'éditeurs, veuillez visiter cette page.
Une fois un document, un classeur ou une présentation modifié et les modifications enregistrées, les deux versions de votre fichier seront disponibles, de sorte que vous puissiez restaurer la révision précédente, le cas échéant. Pour en savoir plus sur les versions, veuillez consulter cet article.
Pour afficher un fichier, cliquez sur l'icône à côté de celui-ci et sélectionnez l'option Aperçu. Le fichier s'ouvrira dans la Visionneuse correspondante de ONLYOFFICE. Les images seront ouvertes dans la même fenêtre, les fichiers texte seront affichés dans un nouvel onglet de votre navigateur Internet. Les Visionneuses ONLYOFFICE offrent des outils standard pour zoomer/dézoomer vos fichiers, régler leur taille, naviguer entre les pages, les télécharger ou imprimer.
Lorsque vous affichez l'aperçu des fichiers multimédias, vous pouvez utiliser les boutons appropriés pour démarrer ou pauser la lecture, régler le niveau du volume, passer au mode d'affichage Plein écran, passer au fichier précédent ou suivant, télécharger ou supprimer le fichier.

Lorsque vous affichez l'aperçu des images, vous pouvez utiliser les boutons appropriés pour zoomer/dézoomer l'image, passer à l'image précédente ou suivante, afficher la taille actuelle de l'image (si celle-ci est zoomée ou dézoomée), faire pivoter l'image dans le sens horaire ou antihoraire, télécharger ou supprimer le fichier.
Lors de l'affichage des diagrammes à partir de la Visionneuse de diagrammes, vous pouvez naviguer entre les pages, utiliser les boutons de zoom, imprimer ou télécharger le diagramme. Pour en savoir plus sur les fonctionnalités de la Visionneuse de diagrammes, veuillez consulter cette page.