Keycloak IdP
Introduction
Single Sign-on (SSO) is a technology that allows users to sign in only once and then get access to multiple applications/services without re-authentication.
SSO is always ensured by the joint operation of two applications: an Identity Provider and a Service Provider (also called as "IdP" and "SP"). ONLYOFFICE SSO implements the SP only. A lot of different providers can act as an IdP, but this article considers the Keycloak implementation.
Creating an IdP in Keycloak
- Sign up to Keycloak as an administrator.
- Go to Manage realms and select the realm where the connection will be configured.
- Go to Clients and click the Create client button.
-
On the page that opens, set the following: In the Client type field, select SAML, in the Client ID field, enter
https://myportal-address.com/sso/metadata, replacing myportal-address.com with the domain name of your portal. In the Name and Description fields, enter any name and description for the client.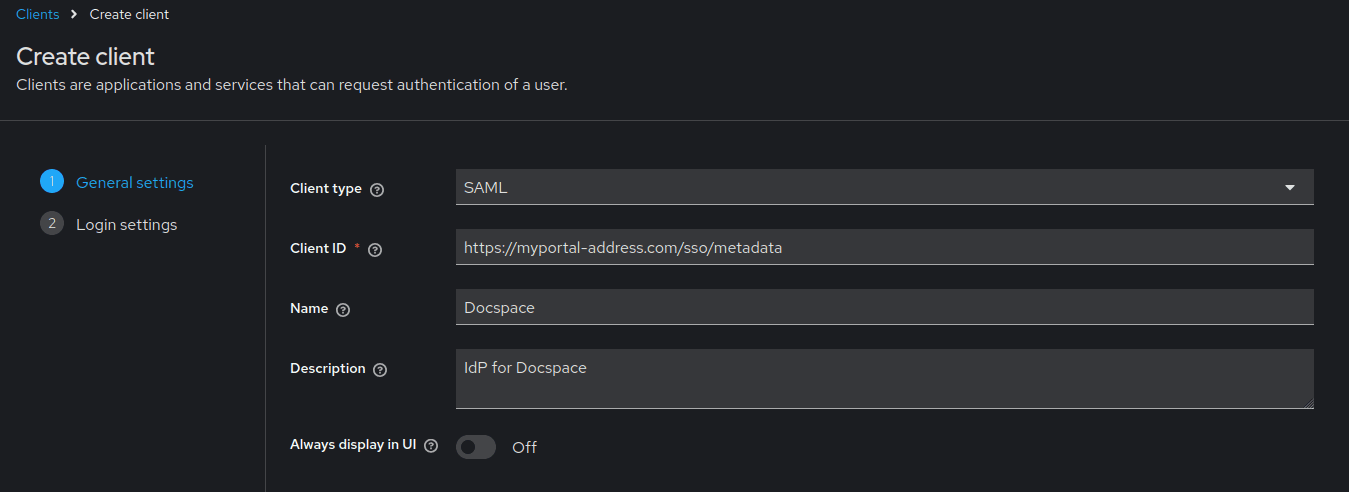
- Click the Next button.
-
Fill in the following fields:
Replace myportal-address.com with the domain name of your portal.
Application Details Root URL https://myportal-address.com/sso Home URL https://myportal-address.com/sso Valid redirect URIs https://myportal-address.com/sso/slo/callback
https://myportal-address.com/sso/acsValid post logout redirect URIs https://myportal-address.com/sso/slo/callback Master SAML Processing URL https://myportal-address.com/sso/acs 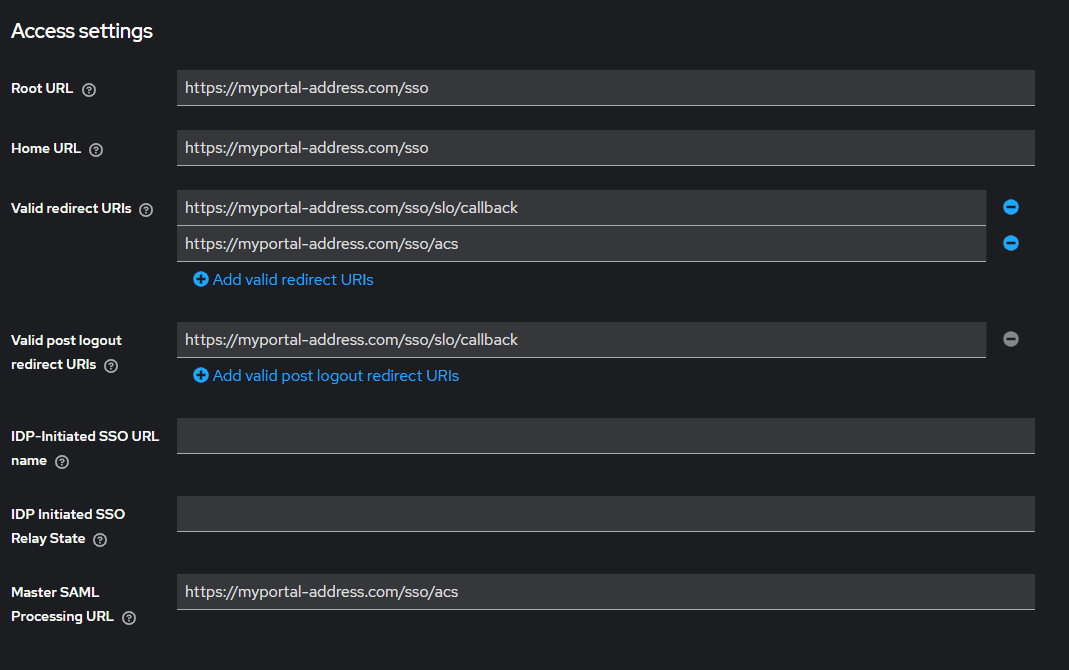
Fill in the following fields on the Advanced tab:
Assertion Consumer Service POST Binding URL https://myportal-address.com/sso/acs Assertion Consumer Service Redirect Binding URL https://myportal-address.com/sso/acs Logout Service POST Binding URL https://myportal-address.com/sso/slo/callback Logout Service Redirect Binding URL https://myportal-address.com/sso/slo/callback 
- Click the Save button.
- In the SAML capabilities section, select Name ID format as email.
-
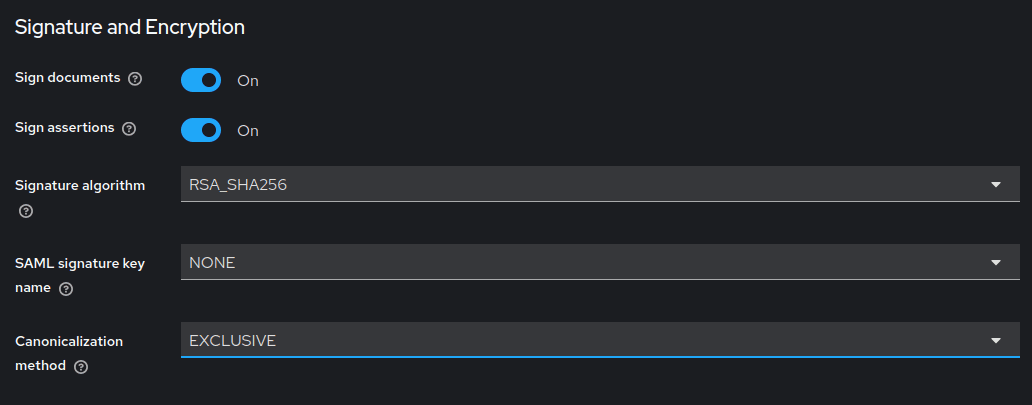
In the Signature and Encryption section, enable the Sign Assertions option and select a signature algorithm: RSA_SHA1, RSA_SHA256, or RSA_SHA512.
- Click the Save button.
-
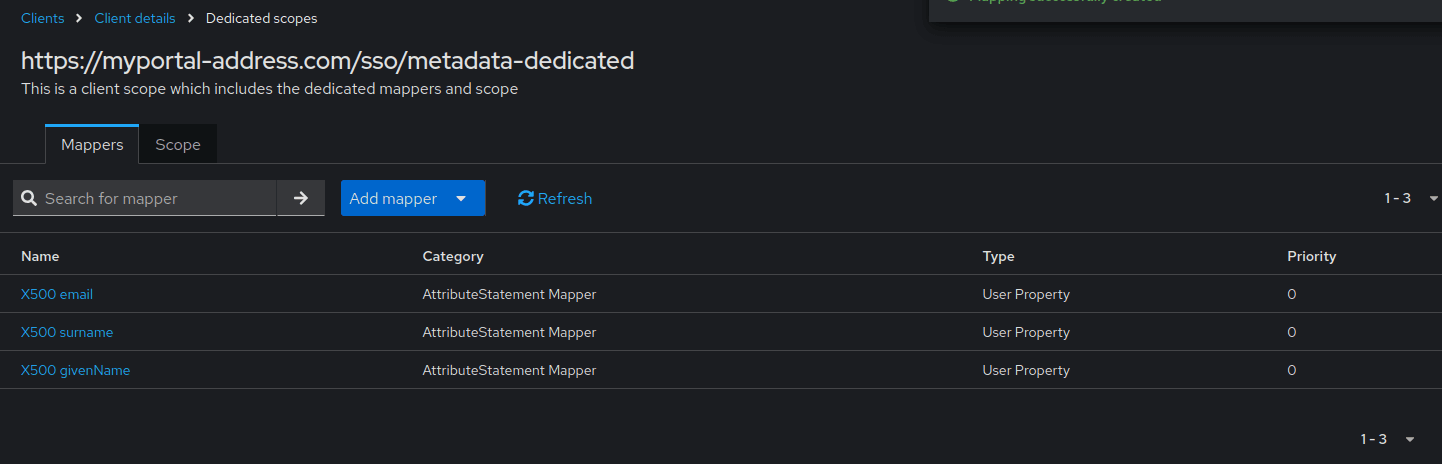
Go to the Client Scopes section and click the link with the name of your portal https://myportal-address.com/sso/metadata-dedicated.
Click the Add predefined mappers button, and in the pop-up window, select the following mappers:
- X500 email
- X500 givenName
- X500 surname
Then click the Add button.
Configuring ONLYOFFICE SP
- Make sure that you are signed in as an Administrator to your ONLYOFFICE DocSpace and go to the Settings menu, select the Integration section, and open the Single Sign-On tab.
-
Enable SSO using the Enable Single Sign-on Authentication switcher and paste https://<keycloakurl>/realms/<realm_name>/protocol/saml/descriptor into the URL to Idp Metadata XML field. Replace <keycloakurl> and <realm_name> with the address of your Keycloak server and the name of the realm where the connection was created. The final link must be accessible from a browser.

- Press the button with the upward arrow to load the IdP metadata. The ONLYOFFICE SP Settings form will be automatically filled in with your data from the Keycloak IdP.
-
Select the same Default Signature Verification Algorithm as the one specified in Keycloak.

-
Change NameId Format to emailAddress.

- Now you need to create a certificate in the SP Certificates section. To do that, click the Add certificate button in the corresponding section.
-
In the opened modal window, click the Generate New Self-Signed Certificate link, and choose the signing and encrypt option in the Use for list. Before you save the certificate, copy the Public Certificate text to the clipboard and save it in file (it will be necessary for Keycloak), then click the OK button.

-
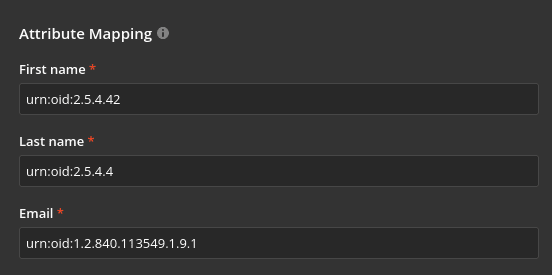
Go to the Attribute Mapping section and assign the following values to the attributes:
- First name: urn:oid:2.5.4.42
- Last name: urn:oid:2.5.4.4
- Email: urn:oid:1.2.840.113549.1.9.1
In the Advanced Settings section, you can check the Hide auth page option to hide the default authentication page and automatically redirect to the SSO service.
If you need to restore the default authentication page (to be able to access the portal if your IDP server fails), you can add the /login?skipssoredirect=true key after the domain name of your portal in the browser address bar.
- Click the Save button.
- Return to Keycloak to configure encryption, open your client, and go to the Keys section. Disable the Client signature required option and enable Encrypt assertions. In the pop-up window, select Import, set the Archive format to Certificate PEM, and click the Browse button. Specify the path to the certificate file from step 7 and click Confirm.
Checking the work of the ONLYOFFICE SP with the Keycloak IdP
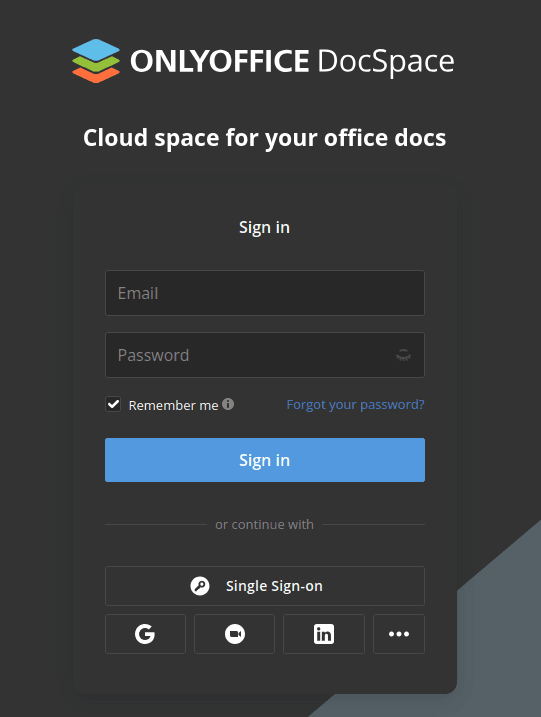
- Go to the ONLYOFFICE DocSpace Authentication page (e.g., https://myportal-address.com/login).
-
Click the Single Sign-on button. If the button is missing, this means that SSO is not enabled.
-
If all the SP and IdP parameters are set correctly, we will be redirected to the Keycloak IdP login form:
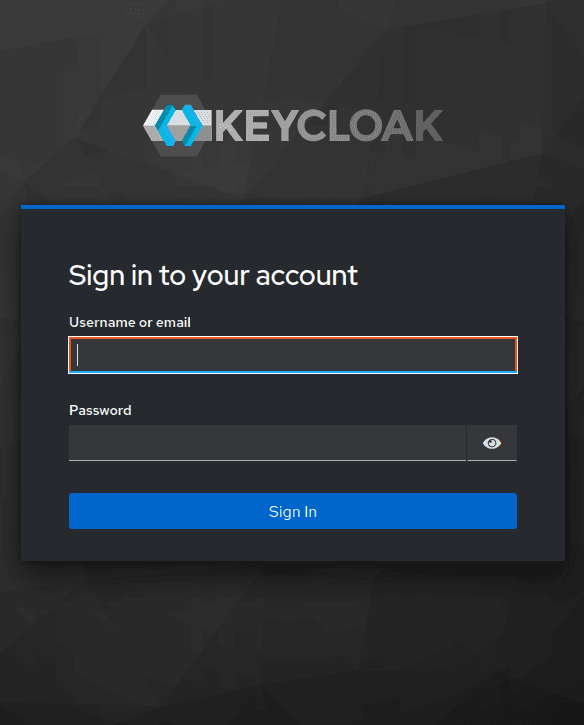
- Enter the login and password of the Keycloak user and click the Sign In button.
-
If the credentials are correct, we will be redirected to the main page of the portal (the user will be created automatically if missing, or the data will be updated if changed in the IDP).