Managing and editing AI agents
Administrators in ONLYOFFICE DocSpace can perform various operations with the existing AI agents: sort and filter the AI agent list to easily find the necessary AI agent, pin some important AI agent to the top of the list, edit the AI agent info, add new members, resend invitations, change the active user permission levels or remove users from the AI agent.
Operations in the AI agent list
Using tools on the top toolbar, you can perform the following operations:
- Search for a AI agent name using the search bar at the top of the AI agent list.
-
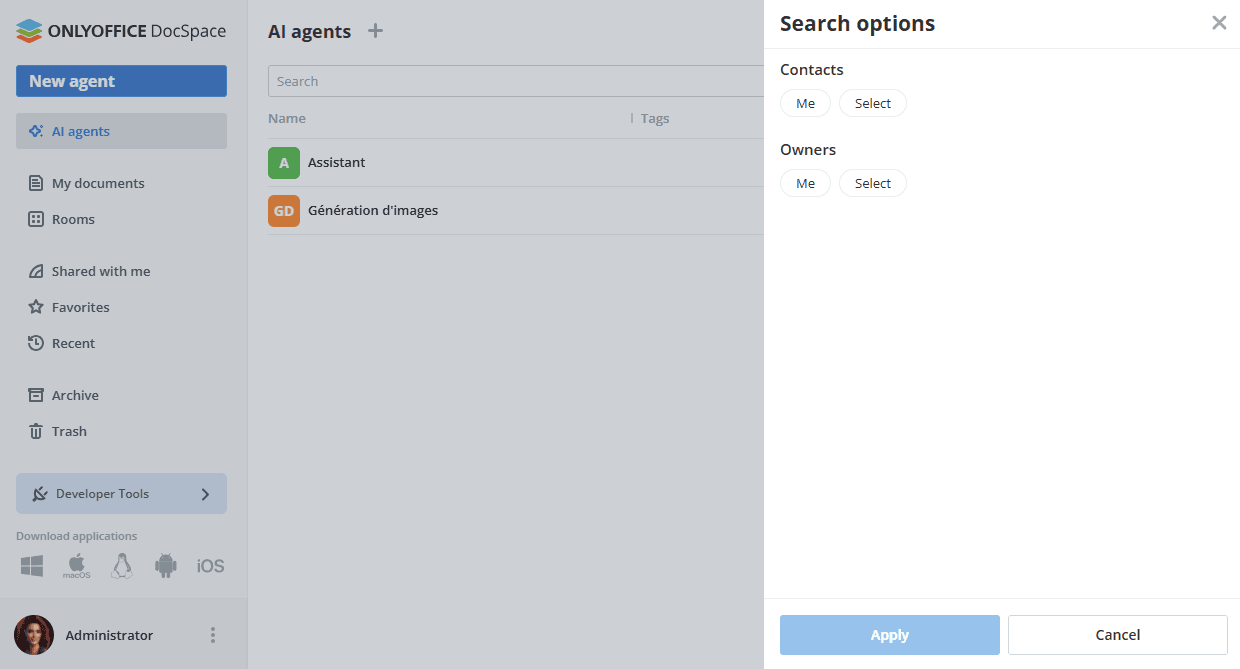
Filter AI agents by member or owner and the existing tags. Select the necessary filter parameters and click Apply. To clear the filter, use the
 icon in the upper right corner.
- Sort AI agents by parameters (Name, Tags, Owner, Last activity date, Storage) using the
 button. Click the arrow next to the selected parameter to change the sort order.
 - Switch between the available display modes (Thumbnails or Compact) using the
 or
or  button.
 - Use the
 icon to display or hide the Tags, Owner, Last activity, Storage / Quota columns in the AI agent list (Compact view).
Using the top panel that appears when one or several AI agents are selected in the list, you can perform the following operations:
- Pin/unpin the selected AI agent(s) to top.
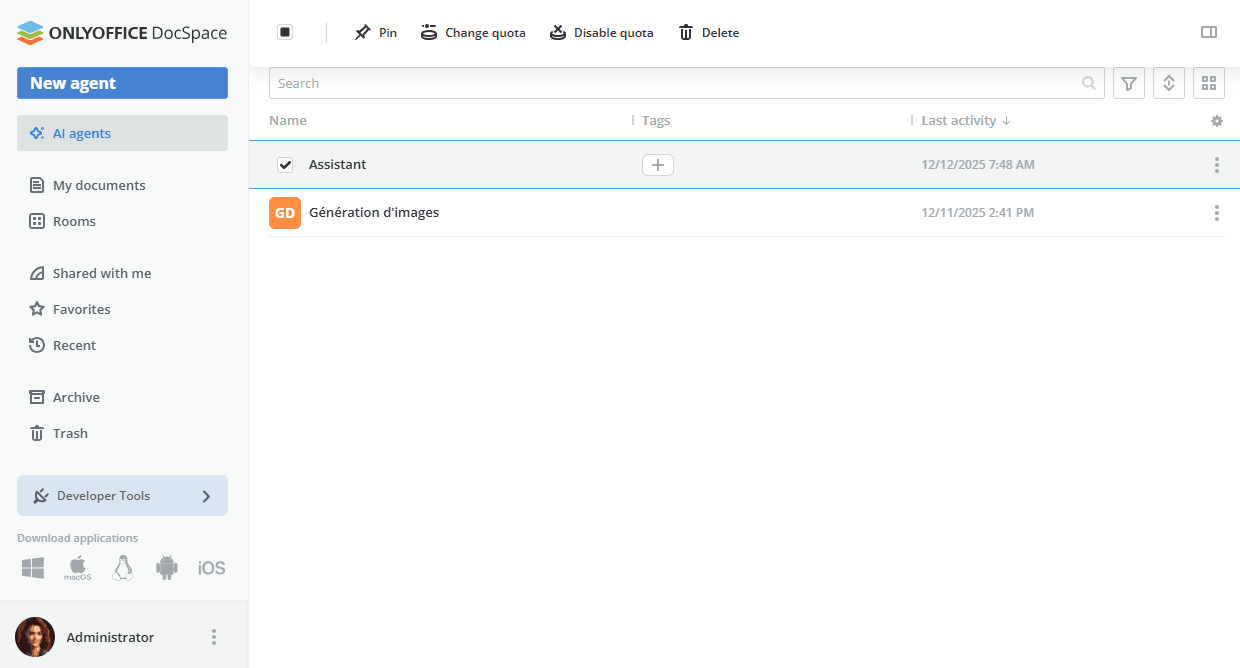
- Change a quota per AI agent.
- Set a custom quota to the default value.
- Disable the quota.
-
View info about the single selected AI agent using the
 icon.
icon.
- Delete the AI agent.
Using the right-click menu or the  icon next to the AI agent name, you can perform the following actions:
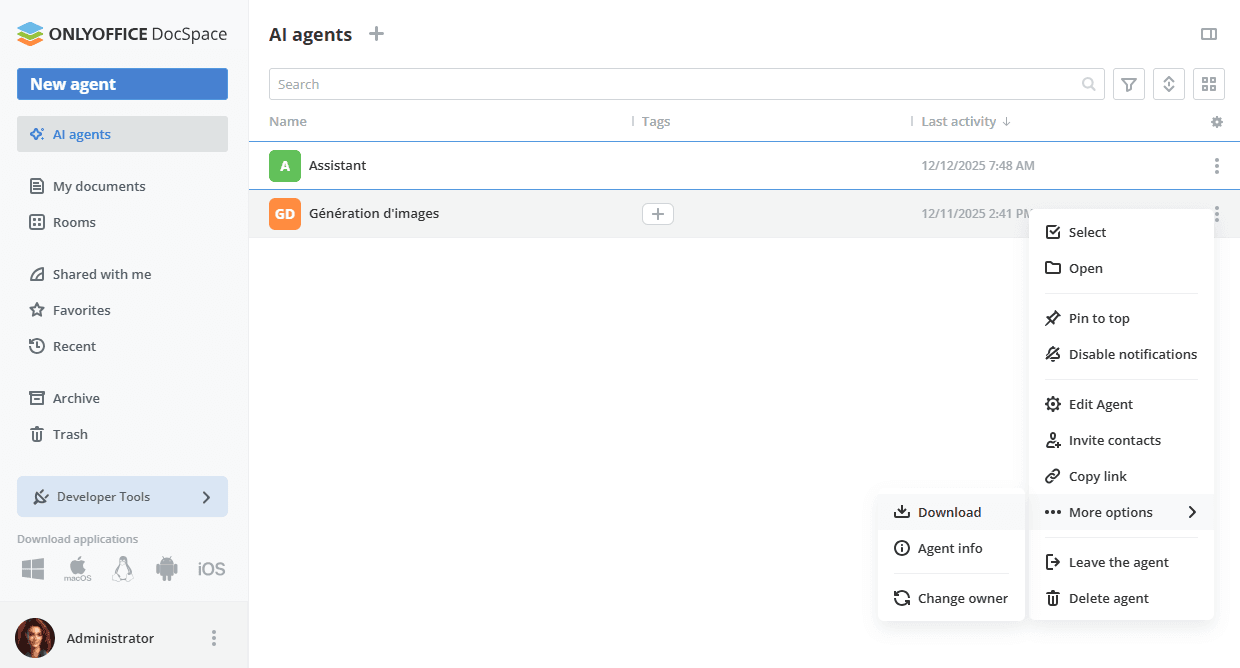
 Select – to select the AI agent in the list. When the AI agent is selected, you can Pin/Unpin or permanently delete it using the top toolbar options or view info using the icon.
 Open – to open the AI agent.
 Pin to top – to display the AI agent on the top of the list. You can unpin the pinned AI agent clicking the
  icon or using the Unpin option in the menu.
 Disable notifications – to disable notifications for this AI agent. You can re-enable notifications using the
  Enable notifications option in the menu.
 Edit Agent – to rename the AI agent, add tags or an image, change the AI agent owner, and update the provider, model, and instructions. A recommended model hint is always shown in the Provider and model section to help you choose the best option for your use case.
 Invite contacts – to send invitations to users or guests.
- Copy link – to copy the link to the created AI Agent.
- More options - this menu entry contains the following sub-entries:
 Download – to download the .zip archive containing the Knowledge and Result Storage folders.
-
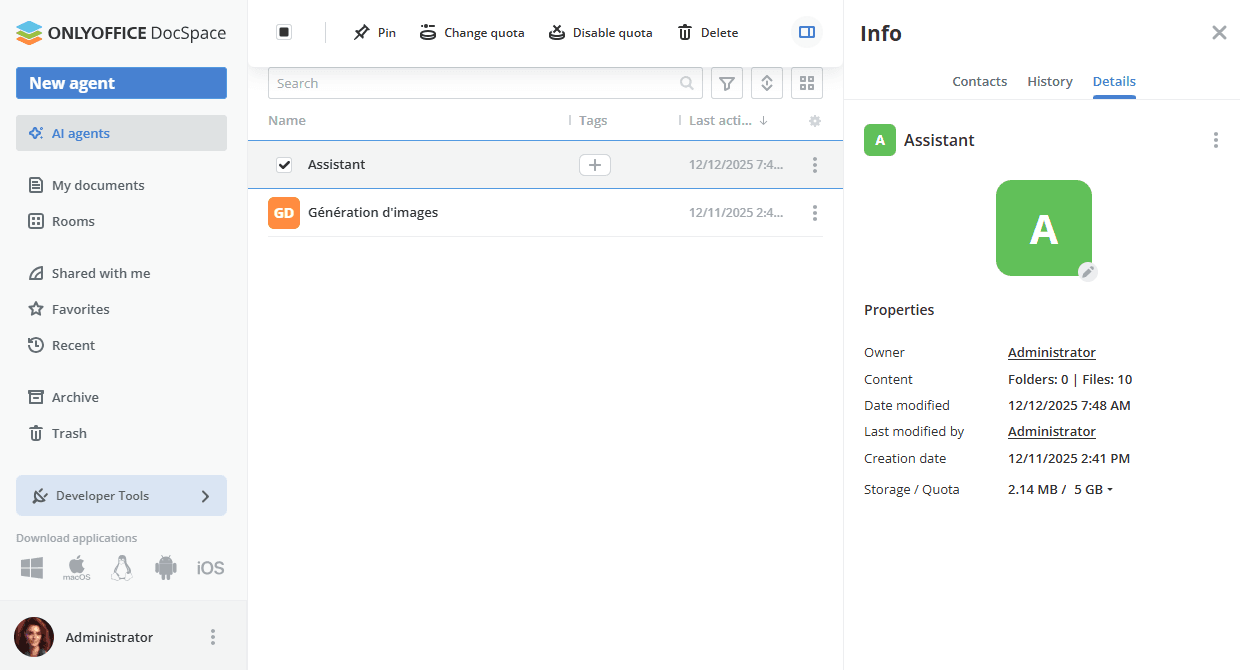
 Agent info – to view the following information: Contacts (Administration, Users, Expected users), History (Recent activities), Details (Owner, Content, Date modified, Last modified by, Creation date, Tags, Storage / Quota).
The Contacts screen also allows you to add new members, resend invitations, change the active user permission levels or remove a user from the AI agent.
Agent info – to view the following information: Contacts (Administration, Users, Expected users), History (Recent activities), Details (Owner, Content, Date modified, Last modified by, Creation date, Tags, Storage / Quota).
The Contacts screen also allows you to add new members, resend invitations, change the active user permission levels or remove a user from the AI agent.  Change owner – to change the AI agent owner.
 Leave the agent – to leave the AI agent. If you are the AI agent owner, you will need to assign another owner first.
 Delete agent – to permanently delete the AI agent. In the warning window that appears, check the I understand the consequences and want to delete the agent box and click the Delete permanently button.
Using the right-click menu in the Storage / Quota column next to the AI agent name, you can perform the following actions:
- Change quota (if the default quota is enabled) – to set a custom quota per AI agent.
- Disable quota (if the default quota is enabled) – to disable the quota.
Operations within the AI agent
When you open a AI agent by clicking its name in the list, you can use the top toolbar to perform the following actions:
- Return to the AI agents list using the
 arrow.
 - On the Knowledge tab, upload documents, spreadsheets, PDFs from DocSpace or from your device using the
 Plus icon.
 -
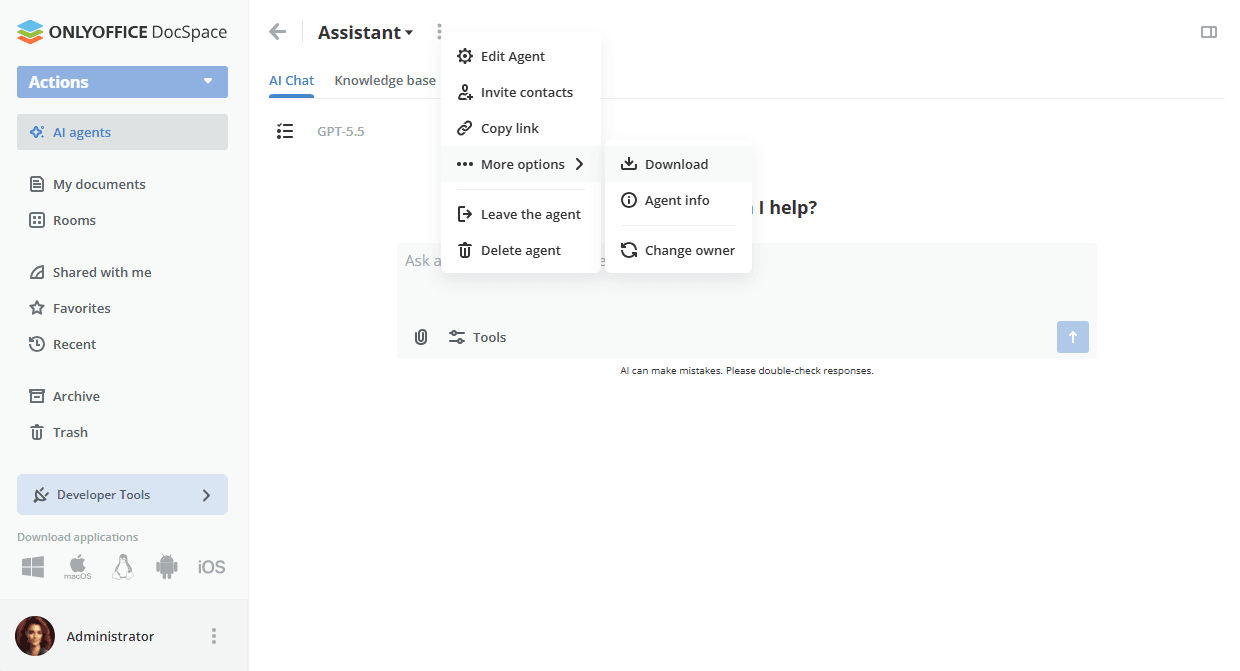
Manage the AI agent using the icon:
- Edit Agent – to rename the AI agent, add tags or an image, change the AI agent owner, and update the provider, model, and instructions. A recommended model hint is always shown in the Provider and model section to help you choose the best option for your use case.
- Invite contacts – to send invitations to users or guests.
- Copy link – to copy the link to the created provider.
- More options - this menu entry contains the following sub-entries:
- Download – to download the .zip archive containing the Knowledge and Result Storage folders.
-
Agent info – to view the following information: Contacts (Administration, Users, Expected users), History (Recent activities), Details (Owner, Content, Date modified, Last modified by, Creation date, Tags, Storage / Quota).
The Contacts screen also allows you to add new members, resend invitations, change the active user permission levels or remove a user from the AI agent.
- Change owner – to change the AI agent owner.
- Leave the agent – to leave the AI agent. If you are the AI agent owner, you will need to assign another owner first.
- Delete agent – to permanently delete the AI agent. In the warning window that appears, check the I understand the consequences and want to delete the agent box and click the Delete permanently button.
- View info about the AI agent using the icon.