Deploying ONLYOFFICE Docs Developer Edition on Alibaba Cloud
Introduction
Now you can easily launch the ONLYOFFICE Docs Developer Edition instance on Alibaba Cloud using the ONLYOFFICE Alibaba Cloud Image available on the Alibaba Cloud Marketplace.
The Alibaba Cloud Image is a pre-configured template that allows to easily launch an instance on a virtual cloud server.
The ONLYOFFICE Docs Developer Edition Alibaba Cloud Image includes all the necessary components - both the operating system and the software itself - to deploy your web office on a virtual server running under Linux.
Once your ONLYOFFICE Docs Developer Edition instance is launched, you can integrate ONLYOFFICE Docs with your own SaaS or on-premises solution. The license also allows you to provide Online Editors to end users as a part of your solution under your brand.
Step 1. Choose the necessary ONLYOFFICE Alibaba Cloud Image and subscribe for the solution
Log in to your existing Alibaba Cloud account or sign up for a new one and go to the Alibaba Cloud Marketplace.
Find the ONLYOFFICE Docs Developer Edition solution and choose the necessary instance type – for 250, 500 or 1000 connections. Connections mean the number of browser tabs with documents that can be opened for editing at the same time. Note that one document opened by two users means two simultaneous connections, as it is opened in two tabs. When the maximum value is reached, each next document will open in read-only mode.


At the Product Details page, you can read the description of the software functions, view the available image versions, the image ID corresponding to each region, estimate pricing details depending on the necessary region and subscription type ('Subscription' and 'Pay-As-You-Go'), read the End User License Agreement.


Click the Choose Your Plan button. The Custom Launch tab of the Alibaba Cloud ECS (Elastic Compute Service) console will open.
Step 2. Launch your ONLYOFFICE instance on Alibaba Cloud
On the Custom Launch tab, follow the configuration wizard steps.
In the 1 - Basic Configurations section, you can change the following parameters:
- Billing Method - select Subscription, Pay-As-You-Go, or Preemptible Instance.
- Region - select a region where the instance will be deployed. It’s recommended to select a region with the closest location.
- Instance Type - you can choose the necessary instance type.
- Image - the ONLYOFFICE Docs Developer Edition Marketplace image is selected.
- Storage - you can specify the necessary system disc capacity or add a data disk.
- Snapshot - you can use automatic snapshot policies to periodically back up disks.
Click the Next button in the lower right corner.


In the 2 - Networking section, you can change the following parameters:
- Network Type - you can leave default settings.
- Public IP Address - an automatically allocated IP address is already enabled.
- Network Billing Method - choose Pay-By-Bandwidth or Pay-By-Traffic.
- Security Group - you can create a new security group if necessary. The default security group is already selected.
- Elastic Network Interface - you can leave default settings.
- IPv6 - you can leave default settings.
Click the Next button in the lower right corner.


In the 3 - System Configurations (Optional) section, you can change the following parameters:
- Logon Credentials - you can set a password or create a new key pair to connect to your instance remotely using SSH. The Logon Username is root.
To create a new key pair,
- Click the Create Key Pair link. The Elastic Compute Service Console will open in a new browser tab.
- Enter the key pair name (e.g. ONLYOFFICE) in the corresponding field and select the Auto-create or choose Import and paste your Base64-encoded public key. Click the Ok button below.
Your public key will be stored in the Elastic Compute Service. The
.pemfile that contains your private key will be downloaded to your local machine and stored in the default Downloads folder. Please copy it and store in a safe place.


Return to the System Configurations page, refresh the key pair field using the icon to the right of it, and select the created key pair from the list.


- You can also customize the Instance Name, add a Description, or customize the Host name.
Click the Next button in the lower right corner.
In the 4 - Grouping (Optional) section, you can change the following parameters:
- Tags - you can add some tags to the instance.
- Resource Group - you can assign the instance to a resource group for easier management.
- You can also choose a Deployment set, Dedicated Host, or Private Pool.
Click the Next button in the lower right corner.


On the Preview page, view the configuration options, accept Terms of Service and click Create Instance.


It can take some time for the instance to become completely functional after you launched it.
Then you can connect to your instance via SSH to enable test examples and check the solution functionality via a web browser.
Step 3. Connect to your server via SSH
Once the instance is running, you can access it via SSH using the username root and your logon password or SSH private key.
To connect to your virtual server via SSH, you’ll also need to use the Public IP address of the instance. It can be found in the Alibaba Cloud ECS console. Open the Instances section of the left menu. Select the region where the instance is deployed on the top navigation bar. Find the IP address of your instance in the instance list.
On Windows, you can use the PuTTY utility.
- If a username and password are used for authentication,
- Launch PuTTY. Open the Session section in the left-side navigation panel.
- Enter the instance Public IP address into the Host Name or IP address field, make sure that port 22 is specified and the SSH connection type is selected, and click the Open button.
- Click Yes in the PuTTY Security Alert window.
- Type in the username
rootand press Enter. - Type in the logon password of the instance and press Enter.
- If a private key is used for authentication, first you need to convert the private key file from .pem to .ppk. For more details, read the detailed instruction.
On Linux, you can use an SSH client like OpenSSH.
- If a password is used for authentication, you’ll need to specify the
rootusername and your instanceIP address.Enter the following command in your terminal, specifying the actual value for the IP Address:
ssh root@your_instance_ipType in the logon password of the instance and press Enter.
- If a private key is used for authentication, you’ll need to specify a path to the
.pemfile with your private key stored on your local machine, therootusername and your instanceIP address.Enter the following command in your terminal, specifying the actual values for the
.pemfile path and the IP Address:ssh -i /path/onlyoffice.pem root@your_instance_ipType
yesto continue connecting to the server.
To explore the solution functionality, enable our test example, which will allow you to upload your local files for testing. To do that, execute the following command:
sudo docker exec $(sudo docker ps -q) sudo supervisorctl start ds:exampleAdd the example to autostart:
sudo docker exec $(sudo docker ps -q) sudo sed 's,autostart=false,autostart=true,' -i /etc/supervisor/conf.d/ds-example.confStep 4. Access your Docs Developer Edition via a web browser
Once the example is started, enter http://<public IP address>/example/ into a web browser address bar, replacing <public IP address> with the public IP address provided by Alibaba Cloud.
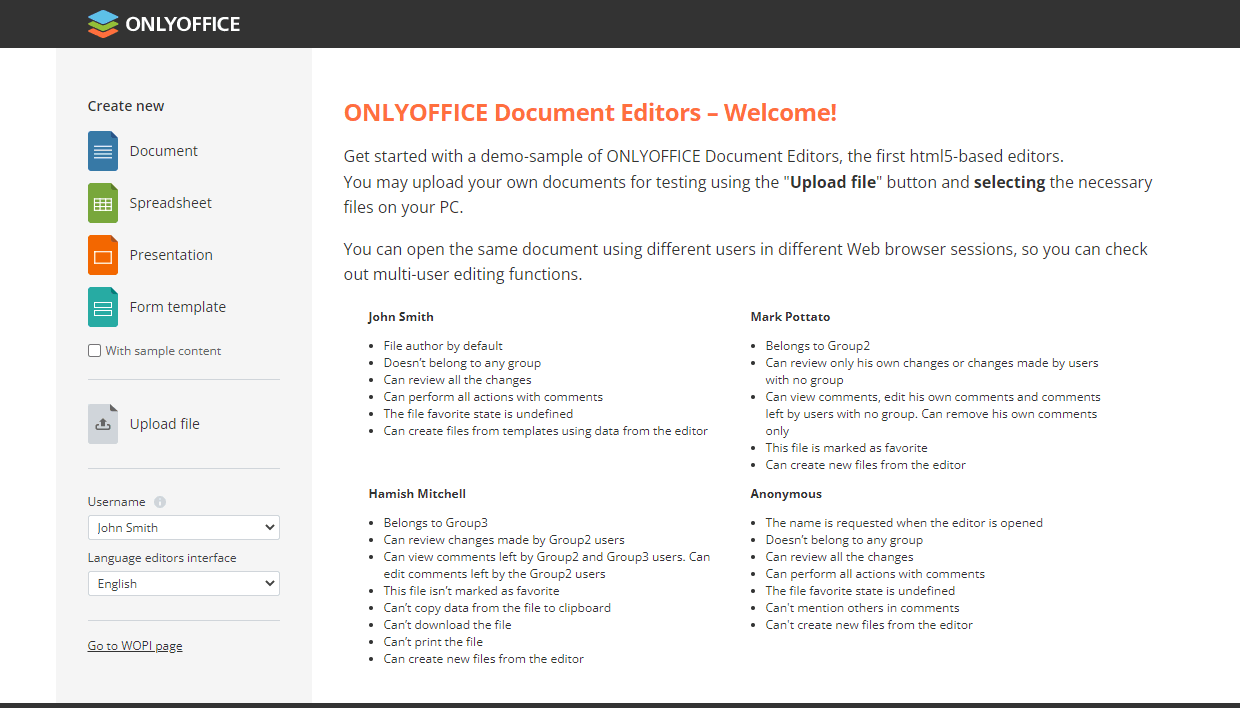
The ONLYOFFICE Docs Developer Edition example page opens. Here you can:
- Upload a file stored on your PC using the Upload file option.
- Create a new blank text document, spreadsheet, presentation, or form template using the Create new -> Document, Spreadsheet, Presentation, or Form template options. If you want to create a file with a sample content, first check the With sample content box.
The uploaded or created file will open in a new browser tab with the corresponding ONLYOFFICE Online Editor so that you can test editing capabilities.
The file will also appear in the Your documents list at the ONLYOFFICE Docs Developer Edition example page.
If you want to check co-editing capabilities, select another test user from the Username list and then click on the same document in the Your documents list to open it in a new browser tab.
To integrate ONLYOFFICE Docs with your own web application, you can refer to the API Documentation.