Getting started with ONLYOFFICE Docs Cloud
Overview
ONLYOFFICE Docs Cloud is a SaaS version of the online office suite which allows you to work with text documents, spreadsheets, presentations, and forms in your file sync and share platform, such as Alfresco, Chamilo, Confluence, HumHub, Jira, Liferay, Moodle, Nextcloud, Nuxeo, ownCloud, Plone, Redmine, SharePoint, Strapi, WordPress etc.
You don't need to install, configure, and update ONLYOFFICE Docs, just fill in the registration form to get your ONLYOFFICE Docs in a cloud and integrate the solution with your platform using the connectors developed by ONLYOFFICE or provided by our partners.
Buying a subscription
-
On the ONLYOFFICE Docs Cloud registration page, click the Registration button to create your free trial account:
- Enter your full name and your e-mail.
-
Choose the necessary pricing plan:
- Business - the solution is hosted on a public Amazon server. The prepaid billing model is used: you should pay in advance. The price depends on the number of users. Click the Get started button to proceed to the registration form.
- VIP - the solution is hosted on a dedicated server. The prepaid billing model is used: you should pay in advance. The price depends on the number of users. Click Contact us to send your request via email.
- Choose your preferred platform, e.g., Alfresco, Nextcloud, etc.
- If you want to receive tips, updates, and offers from the ONLYOFFICE team, check the corresponding box.
- Click the Start free button to proceed. Be advised that by clicking the button, you consent to the Terms of Use.
-
In order to gain access to the control panel, proceed with the following steps:
- Go to the ONLYOFFICE Docs Cloud registration page.
- Enter the e-mail address you used for registering your ONLYOFFICE Docs Cloud into the corresponding field and click the Send button.
- Check your mailbox and click the link provided in the mail to verify your account and proceed to the control panel.
-
Log into your Docs Cloud admin panel. In the top right corner, click the Subscribe now button to upgrade to the paid version.
You will be offered to include Dev Pack, i.e., Automation API and branding options, into your subscription. Please note that Dev Pack comes at a separate price.
-
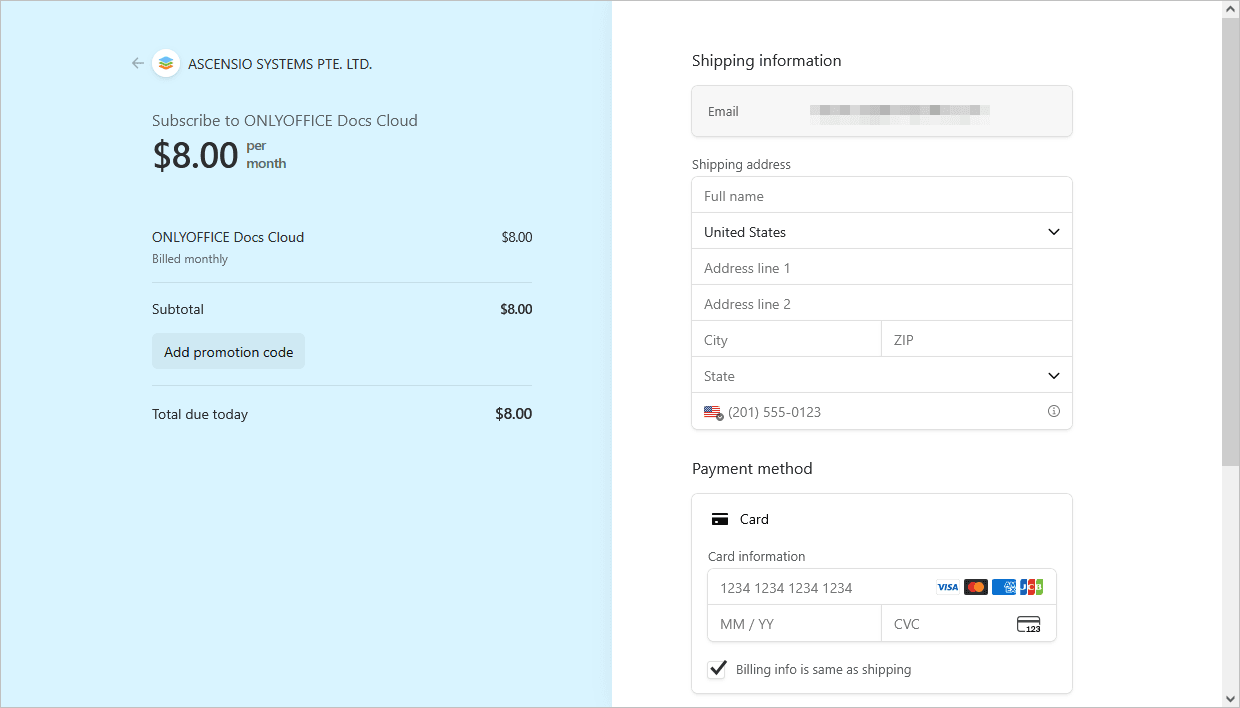
You will be redirected to the Stripe payment page. In the section on the left, you can see the details of your subscription. ONLYOFFICE Docs Cloud uses a pre-paid billing model, and the Total depends on the number of unique users.
For current pricing details, see the ONLYOFFICE Docs Cloud Enterprise page or the ONLYOFFICE Docs Cloud Developer page. The price depends on the number of unique users and the billing period.
- If you have a discount coupon, copy the coupon code, paste it in the Add promotion code field and click Apply.
-
In the section on the right, provide payment details of your card for future payments. You can use Google Pay by clicking the GPay button or fill in the required fields manually:
-
In the Shipping information section, specify the following information:
- In the Email field, enter your active Email address. Please pay special attention to this field, because the information for connecting ONLYOFFICE Docs to your platform will be sent to the specified email address.
-
In the Shipping address section, specify your real Name, select a Country and fill in the Address field. You can also click the Enter address manually option and fill in separate fields. The fields may differ depending on the selected country, for example:
- For the United States, the fields are the following: Address line 1, 2, City, ZIP, State.
- For the United Kingdom and other European countries, the fields are the following: Address, Address line 2, Town or city, Postal code.
- For China, the fields are the following: Postal code, Province, City, District, Address line 1, 2.
- Enter your phone number.
- For customers within the European Union, the VAT information may be required. If you represent a company, check the I'm purchasing as a business option and provide the VAT information: your Business name and VAT ID.
-
In the Payment method section, choose a payment method. The available methods may differ depending on your country, for example:
- For the United States, the Card is selected by default.
- For European countries, you can choose Card or SEPA Direct Debit.
If you select the Card, specify the information about the card you want to use to pay for the subscription:
- Enter your Card number.
- Enter your Card expiration date (month and year).
- Enter your card CVC code (the last three digits located on the back of the card. For the American Express cards, it is a four-digit code printed on the front side of the card, to the right and above the card number).
-
Click the Subscribe button.
During the trial period, you can cancel your subscription at any moment.
-
In the Shipping information section, specify the following information:
Cancelling your subscription
- Log into the Docs Cloud admin panel.
- Click the Manage subscription button in the top right corner.
- Click the Cancel subscription button. Please note that the subscription will remain active till the expiration date stated in the License column on the main page of the admin panel.
- If you want to renew your subscription period, you can do so till the expiration date stated in the License column. If you want to renew it at a later date, please register your account following the instructions.
Connecting Docs Cloud to your service
The email you received upon registration contains your Document Server address. Both Document Server JWT Header and Document Server secret are available in the Admin Panel.
Enter the Document Server address in your browser address bar to make sure that the service is successfully launched.


To start using ONLYOFFICE Docs Cloud, integrate it with your DMS platform:
- Install a ready-to-use connector for your platform, following the instructions.
- Within your platform, open the connector settings.
-
Specify the Document Server address and Document Server secret.
ImportantThe address of ONLYOFFICE Docs must be accessible from your platform, as well as the address of your platform must be accessible from ONLYOFFICE Docs.
Once you connect ONLYOFFICE Docs to your platform, you will be able to create, edit and collaborate on your documents. To learn more about available editing features, please refer to our User Guides.