Using the Admin Panel for ONLYOFFICE Docs
Overview
Starting from version 9.1, the ONLYOFFICE Admin Panel provides a secure web interface for managing server configuration and monitoring. This guide explains how to set up and use the authentication system.
Initial setup
By default, the Admin Panel is disabled. Follow the http://example.com/welcome page instructions to start it.
The example.com is the name of the server with the ONLYOFFICE Docs installed.
First-time installation
When you start the Admin Panel for the first time, it requires an initial setup:
-
Start the Admin Panel server.
- The server automatically detects that no admin password is configured.
- A bootstrap code will be generated and displayed in the server logs.
-
Locate your bootstrap code.
Check the server logs for a message like:
AdminPanel SETUP REQUIRED | Bootstrap code: ELAA8ZOCRUTX | Expires: 2025-10-01T20:50:00.000Z | Open: http://example.com/adminThe bootstrap code is a short 12-character code (letters and numbers).
This code is valid for 1 hour only.
Logs for the Admin Panel can be found here:
- For Linux -
/var/log/onlyoffice/documentserver/adminpanel/out.log - For Docker -
/var/log/onlyoffice/documentserver/adminpanel/out.log(first, enter the ONLYOFFICE Docs container using thedocker exec -it <containerid> bashcommand) - For Windows -
%ProgramFiles%\ONLYOFFICE\DocumentServer\Log\adminpanel\AdminPanel_<date>.out.log
You can also use some commands to find the bootstrap code without opening logs. For example, on Linux, execute the following command:
sudo grep -R "Bootstrap code" /var/log/onlyoffice/documentserver -nFor the Docker version, run this command within the ONLYOFFICE Docs container.
On Windows, you can use the following command:
Get-ChildItem -Path "C:\Program Files\ONLYOFFICE\DocumentServer\Log\adminpanel" -Recurse | Select-String -Pattern "Bootstrap code" - For Linux -
-
Open the Admin Panel web interface.
Navigate to
http://example.com/admin— the setup page will appear.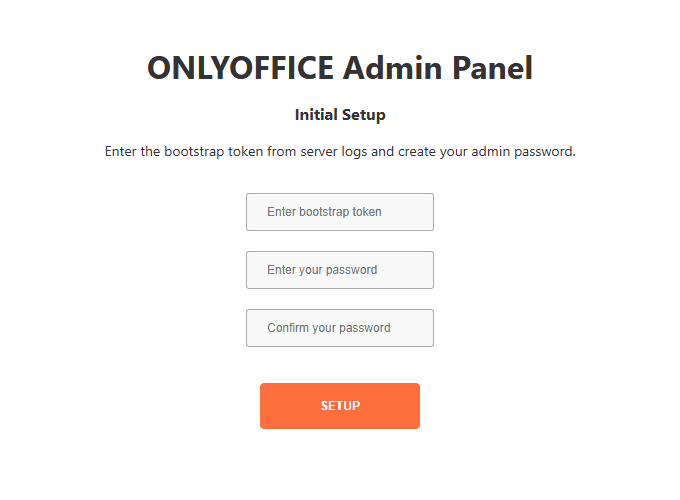
-
Complete setup.
- Enter the bootstrap code from the server logs.
- Create your admin password.
- Click Setup.
- You will be automatically logged in.
The
runtime.jsonfile will be created, which will contain the modified settings in the Admin Panel. It takes precedence over other configuration files such as local.json, default.json, production.json, etc.The
runtime.jsonfile can be found here:- For Linux -
/var/www/onlyoffice/Data/runtime.json - For Docker -
/var/www/onlyoffice/Data/runtime.json(first, enter the ONLYOFFICE Docs container using thedocker exec -it <containerid> bashcommand) - For Windows -
%ProgramData%/ONLYOFFICE/Data/runtime.jsonBy default,
ProgramDatais a hidden folder in Windows Server, you can enable hidden items in the File Explorer options to see it.
Security notes
- The bootstrap code is stored only in memory and displayed once in the logs.
- Codes are valid only until a password is set (checked via
passwordHashinruntime.json). - After setup, all bootstrap codes become invalid across all nodes.
- In clusters, codes work across all nodes sharing the same
ADMINPANEL_BOOTSTRAP_SECRET. - No password is transmitted or logged — only secure hashes are stored.
Regular login
After initial setup is complete:
- Navigate to
http://example.com/admin. - Enter your admin password.
-
Click Login.
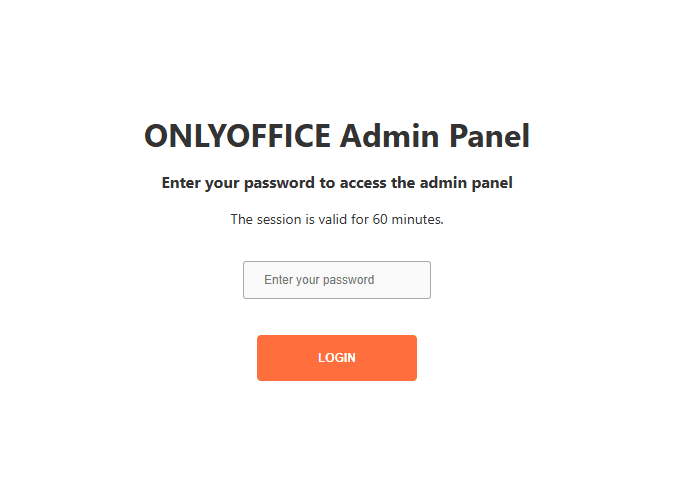
- Your session is valid for 1 hour.
Session details
- Sessions use secure HTTP-only cookies.
- They expire automatically after 1 hour of inactivity.
SameSite=Strictprotection is applied against CSRF attacks.
Changing your password
To change your admin password:
- Log in to the Admin Panel.
- Go to the Change Password page.
- Enter your current password.
- Enter your new password.
- Confirm the change.
- Your session remains active after changing the password.
Password hash details
- Algorithm: PBKDF2-SHA256 (600,000 iterations, OWASP 2023).
- Cross-platform: The hash can be generated via Python or Node.js.
Generate password hash externally
OpenSSL 3.0+ (recommended - MCF format):
PASSWORD="YourPassword"; I=600000; S=$(openssl rand -base64 16 | tr -d '\n'); H=$(openssl kdf -binary -keylen 32 -kdfopt digest:SHA256 -kdfopt pass:UTF8:"$PASSWORD" -kdfopt salt:base64:"$S" -kdfopt iter:$I PBKDF2 | base64 | tr -d '\n'); echo "\$pbkdf2-sha256\$$I\$$S\$$H"Node.js:
node -e "const crypto=require('crypto');const p=process.argv[1];const s=crypto.randomBytes(16);const sb=s.toString('base64').replace(/\+/g,'.').replace(/=/g,'');crypto.pbkdf2(p,s,600000,32,'sha256',(e,k)=>{const h=k.toString('base64').replace(/\+/g,'.').replace(/=/g,'');console.log('\$pbkdf2-sha256\$600000\$'+sb+'\$'+h)})" "YourPassword"Check OpenSSL version:
openssl version
# OpenSSL 3.0.0 or newer - ✅ Use openssl kdf command
# OpenSSL 1.x - ✅ Use openssl keyutl command
Add the resulting hash to the runtime.json file:
{
  "adminPanel": {
    "passwordHash": "$pbkdf2-sha256$600000$..."
  }
}
Password reset / recovery
If you forget your admin password, delete the passwordHash entry from runtime.json:
{
  "adminPanel": {
  }
}
A new bootstrap code will be generated. Follow the initial setup process again.
Troubleshooting
Can't find bootstrap code
Problem: The server started, but no bootstrap code is visible.
Solutions:
- Check server logs for "Bootstrap code" messages.
- If the code expired, refresh the Admin Panel page to generate a new one.
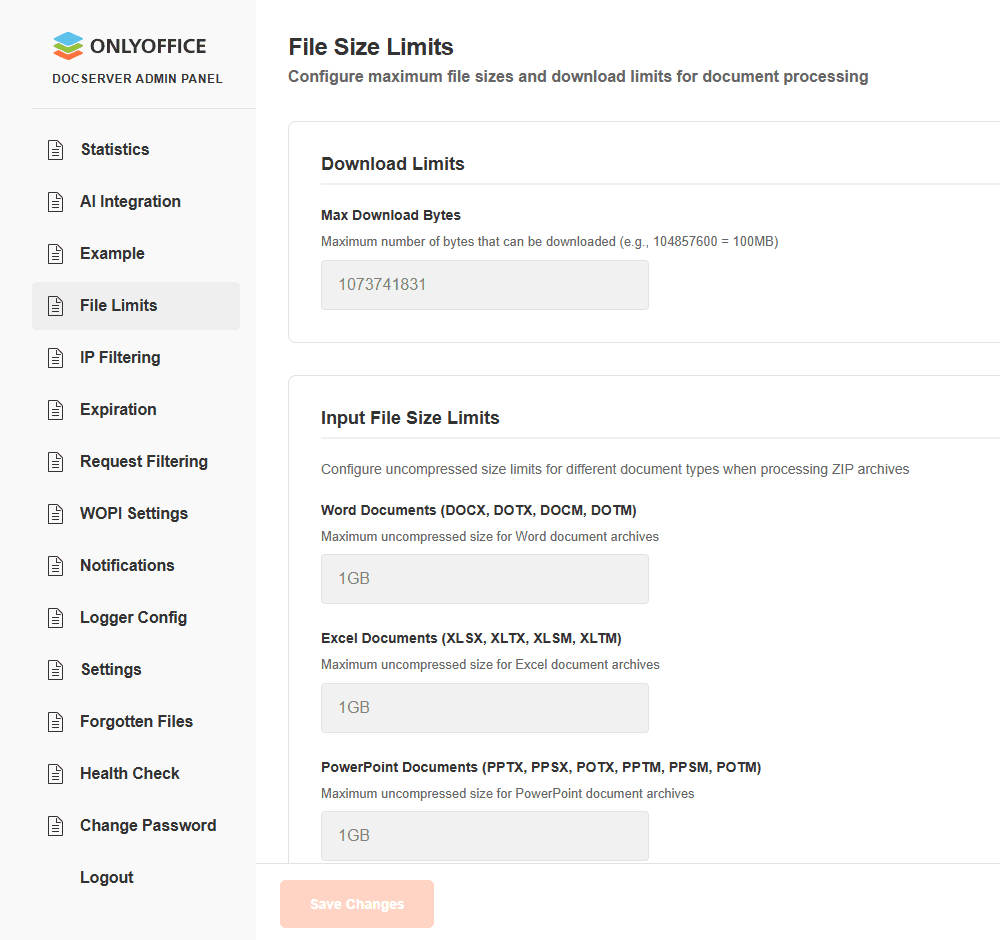
Settings
The Settings page of the ONLYOFFICE Admin Panel provides a set of tools for monitoring the server configuration, managing certificates, custom fonts, etc. Below is a brief description of the capabilities of this section.
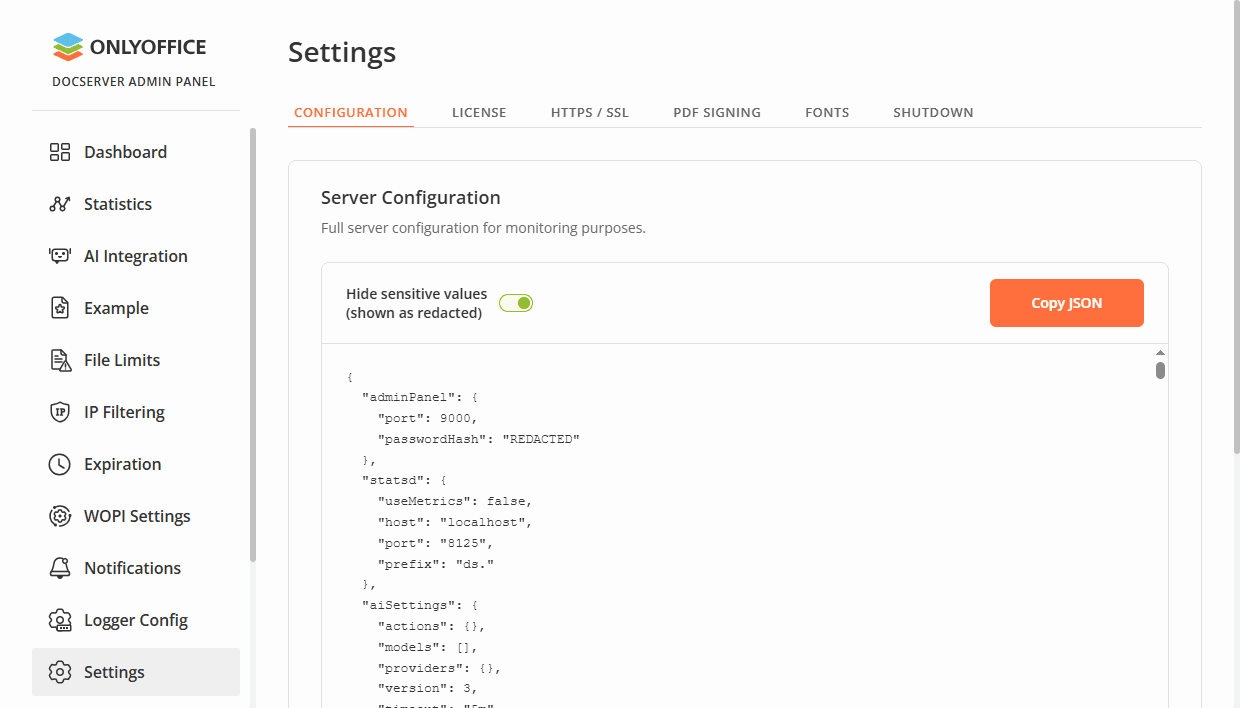
Configuration
Using this tab, you can:
- View server configuration. The final configuration is displayed here with all parameters redefined through all config files. Sensitive parameters (passwords, keys, secrets) are shown as REDACTED.
- Copy the content of the config file.
- Reset all configuration settings to their default values. This action cannot be undone.
License
Using this tab, you can upload your product license and view the license information:
- Build: type (Enterprise Edition, Developer Edition), mode (trial, production), release date.
- License: start date, the date until which the license is valid.
- Connections limit for editors and live viewer.
Click the Buy Now button to purchase a license. You will be redirected to the corresponding page of the official ONLYOFFICE website.
To upload the license:
- Click the Browse button to select the license file.
- Click the Apply License button.
PDF Signing
Using this tab, you can add a PKCS#12 (.p12/.pfx) certificate for signing submitted PDF forms. Filled PDF forms will be signed when submitting them by clicking the Complete & Submit button.
To create a .p12/.pfx certificate using existing files (a private key and a .crt / .pem certificate), you can use openssl from the command line:
openssl pkcs12 -export -out certificate.pfx -inkey privatekey.key -in certificate.crtTo create a certificate from scratch:
- Generate a private key:
openssl genrsa -out privatekey.key 2048 -
Create a certificate signing request (CSR):
openssl req -new -key privatekey.key -out request.csr -
Generate a self-signed certificate:
openssl x509 -req -days 365 -in request.csr -signkey privatekey.key -out certificate.crt -
Create the PKCS#12 file:
openssl pkcs12 -export -out certificate.pfx -inkey privatekey.key -in certificate.crt
Once you obtained your .p12/.pfx certificate, you can upload it to the 'Certificate File' field in the Admin Panel. If the certificate is password-protected, enter your password in the 'Certificate Passphrase' field. Then save the settings.
HTTPS / SSL
Using this tab, you can install a new CA-signed certificate from the letsencrypt.org service to enable the secure HTTPS protocol.
- Specify your domain name in the Domain field.
- Specify your email address in the Email field.
- Click the Install Certificate button.
Fonts
Using this tab, you can add new custom fonts:
- Click the Browse button to select font files or drag and drop them here.
- Click the Generate button.
Manage your added custom fonts:
- Filter all fonts by name to find the necessary one.
- Check the 'Show custom only' option to display only custom fonts in the list.
- Check the 'Mark all custom for deletion' option and click the Generate button to remove the selected custom fonts.
Shutdown
Using this tab, you can forcefully disconnect ONLYOFFICE Docs users to avoid data loss when you need to stop ONLYOFFICE Docs for reasons such as application updates or server reboots.
- Click the Shutdown button to block new editor connections and close existing sessions. When stopping the server in this way, users will be correctly disconnected from the editors, and their changes will be saved.
- Click the Resume button to return server to normal mode and allow new editor connections.
WOPI Settings
The WOPI Settings page allows you to configure WOPI support for document editing, including compatibility settings for SharePoint integrations, document lock behavior, and encryption key management.
Use the WOPI toggle at the top of the page to enable or disable WOPI support entirely.
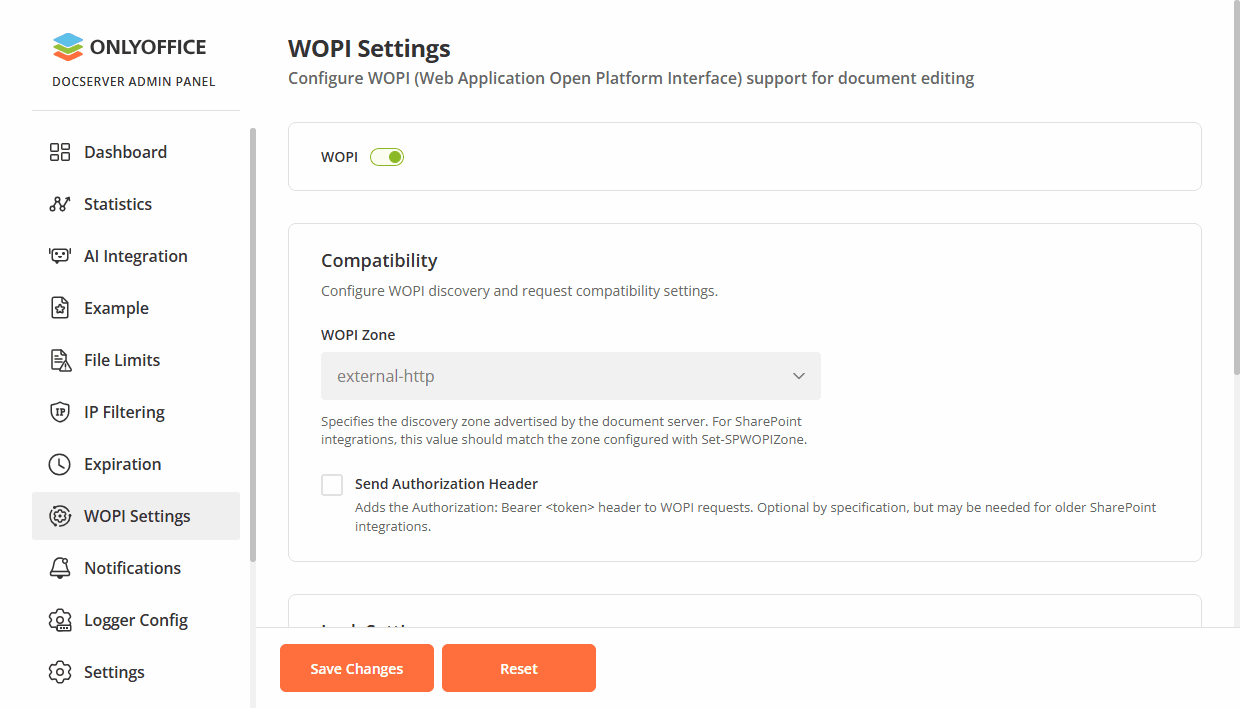
Compatibility
This section configures WOPI discovery and request compatibility settings for SharePoint and other WOPI-compatible storage integrations.
WOPI Zone
Specifies the discovery zone advertised by ONLYOFFICE Docs. This value must match the zone configured on the SharePoint side with the Set-SPWOPIZone PowerShell command. Available values:
external-httpsexternal-http(default)internal-httpsinternal-http
To check the currently configured zone on the SharePoint side, use the following PowerShell command:
Get-SPWOPIZoneTo change the zone on the SharePoint side, use the following PowerShell command:
Set-SPWOPIZone -Zone "external-http"Send Authorization Header
When enabled, adds the Authorization: Bearer <access_token> header to WOPI requests. This is optional by the WOPI specification, but required for some SharePoint configurations:
- SharePoint Subscription Edition: this option must be enabled. Without the Authorization header, an Invalid access token error occurs and document editing fails.
- SharePoint 2019: this option is optional. The connection works with the token passed in the URI, but enabling the header causes no issues.
This corresponds to the wopi.sendAuthorizationHeader configuration parameter (false by default).
Lock Settings
This section configures the document lock refresh interval for WOPI sessions.
Refresh Lock Interval
Specifies how often document locks are refreshed. Use the format <number><unit>, where the unit is s (seconds), m (minutes), or h (hours). Examples: 10m, 1h, 30s. The default value is 10m.
Key Management
This section allows you to rotate WOPI encryption keys. The Current Public Key field displays the active public key used for WOPI request authentication.
To rotate keys, select the Rotate Keys checkbox and click Save Changes. The current keys will be moved to "Old" and new keys will be generated.