个性化定制
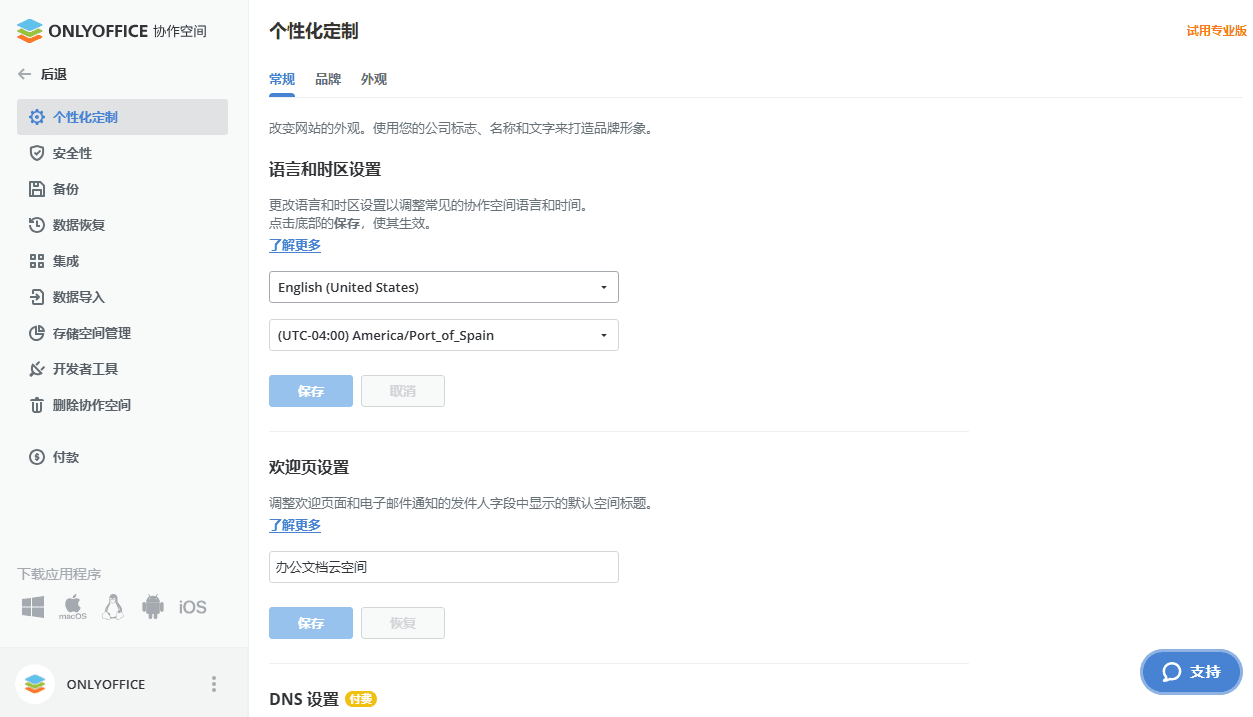
语言和时区设置
此部分可更改协作空间所有用户的界面语言,并配置时区确保事件显示正确时间。
配置语言和时区设置:
-
展开语言列表选择界面显示语言
此设置将作为新用户的默认协作空间语言。
- 在时区下拉列表选择与您位置匹配的时区
- 点击区域底部的保存按钮应用更改
欢迎页设置
此部分可更改协作空间登录页显示的默认标题:
- 在标题字段输入自定义名称(如公司名称或标语)
- 点击区域底部的保存按钮应用更改
协作空间邮件通知的发件人字段也将使用同样的名称。
DNS 设置
此部分可为协作空间设置替代 URL。在 SaaS 版本中,此为付费功能(仅可在专业版方案中使用)。默认协作空间地址为 名称.onlyoffice.com,修改为自定义域名步骤:
- 在域名注册商处配置 DNS 记录:添加 DNS CNAME 条目(例如:team.ourcompany.com指向intranet.onlyoffice.com)
- 配置完成后,在 DNS 设置区域点击发送请求按钮
- 请求处理完成后,自定义域名将显示在 DNS 设置区域
重要提示 服务器版本需配置域名确保通知服务(如whatsnew)提供正确链接。
协作空间重命名
此部分可修改协作空间 URL 中的名称部分(原为名称.onlyoffice.com)。在新空间名称字段输入名称后点击保存按钮。
点击“保存”按钮后,原名称将释放给新用户注册使用。
配置深度链接
在此部分,您可以设置用户在移动浏览器中处理文档时,是否能够选择在浏览器中打开文件,或在移动应用中打开文件。您可以选择:“提供选择(网页或应用)”、“仅在网页中打开”或“仅在应用中打开”,然后单击保存按钮。
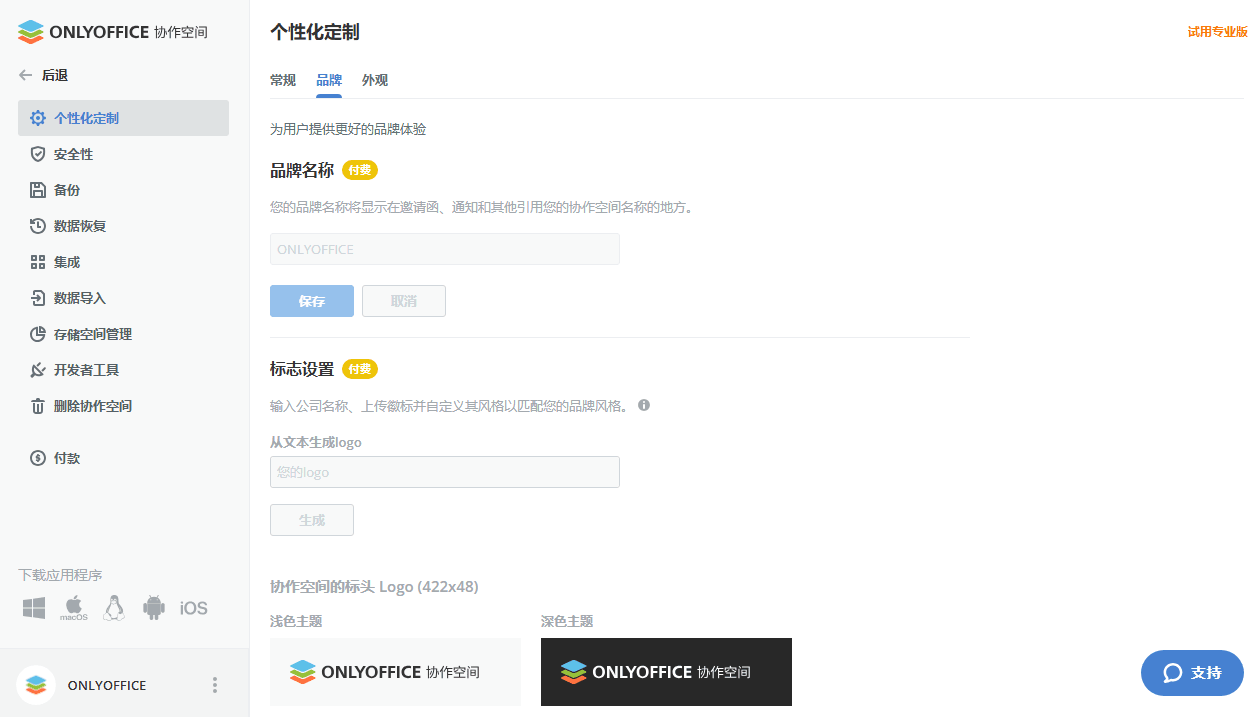
品牌
在个性化定制设置中的品牌部分,可将协作空间界面中的品牌元素替换为您自己的品牌元素。可在文本元素(如提示信息、消息框等)中使用您的公司名称,并将网站的默认图标和 logo 替换为您自己的。
在SaaS版本中,此为付费功能(仅可在专业版方案中使用)。
- 在输入文本字段填写您的品牌名称,以便替换协作空间界面中所有标题和消息的默认文本。
- 如要使用文字 logo 而非图像 logo,请在从文本生成 logo 字段输入文字,然后点击下方生成按钮,下面所有的 Logo 都会相应更改。
-
替换协作空间中所有 logo 图片(支持浅色/深色主题):
- 协作空间 logo (422x48) - 此 logo 出现在每个协作空间页面的左上角。
- 紧凑左侧菜单 logo (56x56) - 此 logo 出现在小屏幕紧凑模式下的左上角。
- 登录页面 logo (810x92) - 此 logo 出现在协作空间的登录页面上。
- 关于页面 logo (810x92) - 此 logo 出现在协作空间的关于此程序页面以及在线编辑器中的关于页面上。
- 网站图标(32x32) - 当协作空间在浏览器中打开时,此 logo 会出现在地址栏或标签页中;如果将协作空间地址添加到书签,则会出现在书签面板上。
- 编辑器标题 logo (172x40) - 此 logo 出现在已启动的在线编辑器的左上角。
- 编辑器标题 logo - 嵌入模式(172x40) - 此 logo 出现在嵌入网页的协作空间文档左上角。
点击更改 logo 链接上传新图片
建议您使用 PNG 格式背景透明的图片。为了提高 Logo 的可读性并使其轮廓清晰可辨,您还需要对其进行优化,以便在深色或浅色背景下使用。标注的图片尺寸适用于 Retina 显示屏。对于标准分辨率的显示屏,Logo 的宽度和高度将在上传时进行自动调整。 - 点击区域底部的保存按钮应用更改
点击恢复默认按钮可还原初始设置。
以下内容仅适用于服务器版本。
在公司信息设置中,可指定您的公司信息,它会显示在协作空间关于程序窗口和在线编辑器的关于页面。
- 在对应字段输入公司名称、邮箱、电话、网址和邮政地址
- 点击区域底部的保存按钮
附加资源用于控制是否显示资源链接:
-
取消选中要隐藏的元素,并选中要显示的元素:
- 显示反馈与支持链接 - 控制是否显示联系 ONLYOFFICE 支持团队的链接
- 显示视频指南链接 - 控制是否显示培训视频页面链接
- 显示帮助中心链接 - 控制是否显示帮助中心页面链接
- 点击区域底部的保存按钮
外观
个性化定制设置下的外观子部分可更改界面默认配色方案:
- 在“标准”区域切换可用配色,在下方的“预览”区域可查看浅色和深色界面主题下的外观。
- 在标准区域切换可用配色,在下方的预览区域可查看浅色和深色界面主题下的外观。
- 选择最适合的配色方案
- 点击底部保存按钮应用
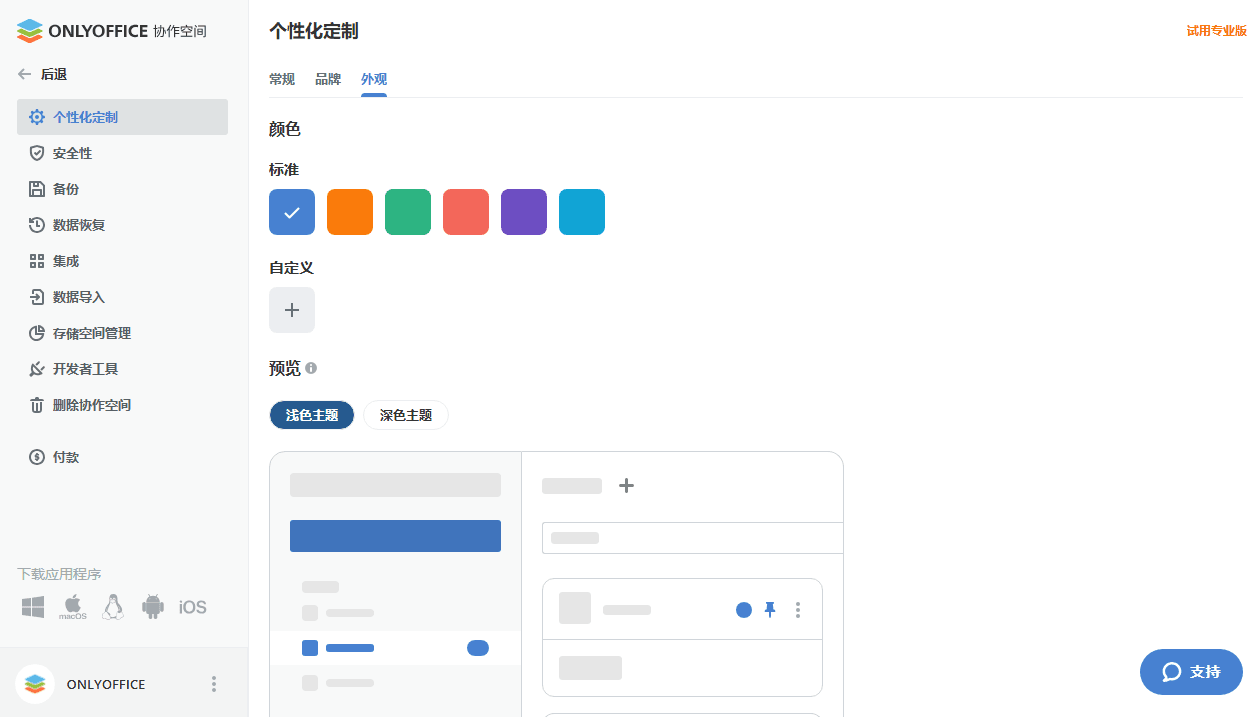
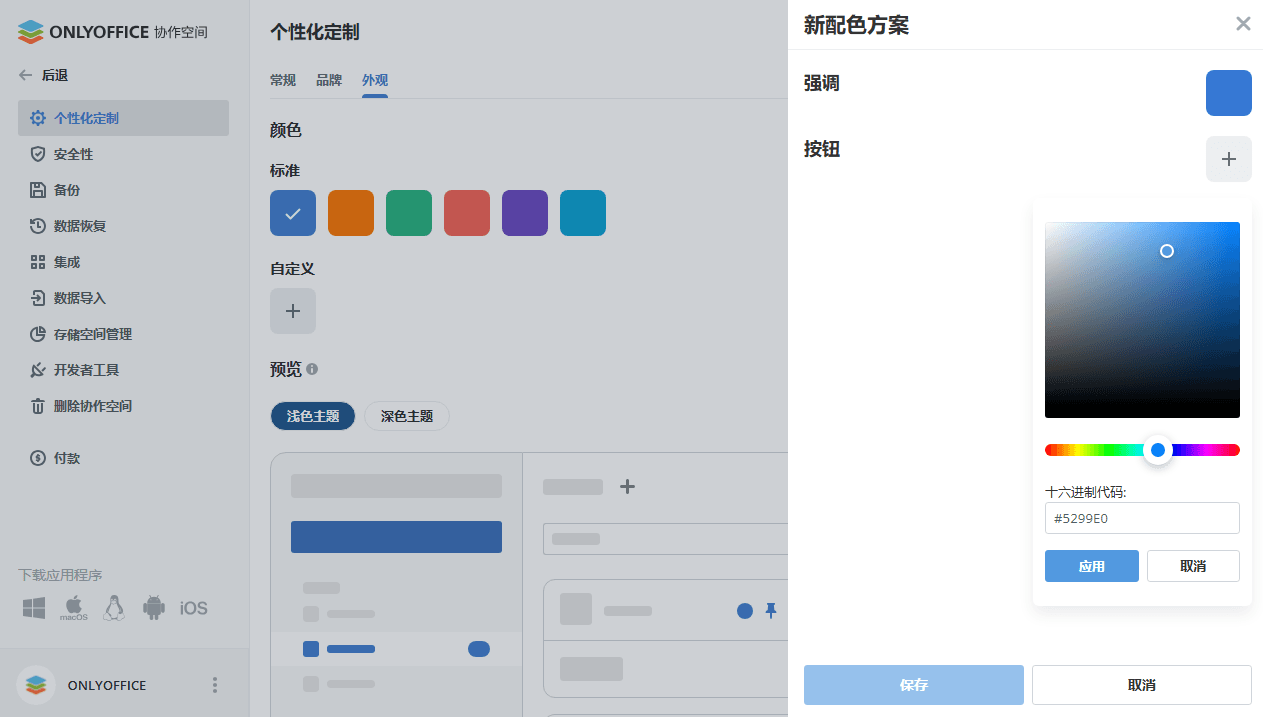
您也可以创建自定义配色:
- 点击自定义部分的加号图标以打开新配色方案面板。
- 点击强调部分旁边的加号图标以打开调色板,选择所需的颜色并点击应用。此颜色用于导航菜单项、设置选项卡和切换器。
- 点击按钮部分旁边的加号图标以打开调色板,选择所需的颜色并点击应用。此颜色用于对话框窗口中的按钮。
- 在新配色方案面板上点击保存按钮以保存自定义配色方案。
- 在主面板底部点击保存按钮以应用所创建的自定义配色方案。
您可以随时编辑或删除自定义方案。
文章: 标签:
浏览所有标签