Configuring ONLYOFFICE SP and AD FS IdP
Introduction
Single Sign-on (SSO) is a technology that allows users to sign in only once and then get access to multiple applications/services without re-authentication.
SSO is always operation of two applications""SSO is always facilitated by the joint operation of two applications: an Identity Provider and a Service Provider (hereinafter referred to as "IdP" and "SP"). ONLYOFFICE SSO implements the SP only. Many different providers can act as an IdP, but this article considers the Active Directory Federation Services (AD FS) implementation.
Preparing ONLYOFFICE Workspace for the SSO setup
- Install ONLYOFFICE Workspace for Docker or any later version with the SSO support (AD FS is supported starting from Community Server v9.5).
- Add a domain name, e.g., myportal-address.com.
- On your portal, go to Control Panel > HTTPS, create and apply the letsencrypt certificate for the traffic encryption (to enable HTTPS on your portal).
Preparing AD FS for the SSO setup
- Install the latest AD DS (Active Directory Domain Service) version with all official updates and patches.
- Install the latest AD FS version with all official updates and patches.
To deploy AD FS from scratch you can use the following instructions.
- Verify that the AD FS metadata link is publicly accessible:. To do that,
- In the Server Manager, open Tools -> AD FS Management,
- Go to AD FS \ Service \ Endpoints,
- Find the row with the Federation Metadata type in the table. The link to the IdP metadata is constructed under the following scheme:
https://{ad-fs-domain}/{path-to-FederationMetadata.xml}

Alternatively, you can use the following PowerShell command:
PS C:\Users\Administrator> (Get-ADFSEndpoint | Where {$_.Protocol -eq "FederationMetadata" -or $_.Protocol -eq "Federation Metadata"}).FullUrl.ToString()The result should be a link in the following format:
https://onlyofficevm.northeurope.cloudapp.azure.com/FederationMetadata/2007-06/FederationMetadata.xml - To verify that AD FS is running correctly, open the link in a web browser. The XML file should be displayed or downloaded. Copy the link to the metadata XML file: it will be needed at the next step.
Configuring ONLYOFFICE SP
- Ensure that you are signed in as an Administrator to your ONLYOFFICE Control Panel and click the SSO tab in the PORTAL SETTINGS section on the left sidebar.
You can only register one enterprise Identity Provider for your organization on the ONLYOFFICE portal.


- Enable SSO by clicking the Enable Single Sign-on Authentication toggle and paste the link copied from the AD FS into the URL to Idp Metadata XML field.


Click the upload button to load the IdP metadata. The AD FS IdP will automatically populate the ONLYOFFICE SP Settings form fields.
- In the Custom login button caption field, you can enter any text instead of the default one (Single Sign-on). This text will be displayed on the button used to sign in to the portal with the Single Sign-on service at the ONLYOFFICE authentication page.


- In the NameID Format selector, choose the following value: urn:oasis:names:tc:SAML:1.1:nameid-format:emailAddress.


- In the IdP Public Certificates \ Advanced settings section, deselect the Verify Logout Response Signature option, as AD FS does not require that by default.


- Add certificates to the SP Certificates section. You can generate self-signed certificates or add any other certificates.
In the New Certificate window, set the Use for selector to the signing and encrypt option, as AD FS IdP is automatically configured to verify digital signatures and encrypt data.


The result should be similar to the following:


- In the SP Certificates \ Advanced settings, deselect the Sign Logout Responses, as AD FS does not require that by default.

 The Attribute Mapping form does not need to be adjusted. In the Advanced Settings section, you can select the Hide auth page option to hide the default authentication page and automatically redirect to the SSO service.ImportantIf you need to restore the default authentication page (to be able to access the portal if your IdP server fails), you can add the
/Auth.aspx?skipssoredirect=truekey after the domain name of your portal in the browser address bar. - Click Save. The ONLYOFFICE SP Metadata section will open.


Verify that the settings are publicly accessible by clicking Download SP Metadata XML. The XML file contents should be displayed.
- Copy the link to the ONLYOFFICE SP metadata from the SP Entity ID (link to metadata XML) field and go to the machine where AD FS is installed.


Configuring AD FS IdP
- Enable strong authentication for .NET applications.
The .NET Framework 3.5/4.0/4.5.x applications can switch the default protocol to TLS 1.2 by enabling the
SchUseStrongCryptoregistry key. This registry key will force .NET applications to use TLS 1.2.For AD FS on Windows Server 2016 and Windows Server 2012 R2 you need to use the .NET Framework 4.0/4.5.x key: HKEY_LOCAL_MACHINE\SOFTWARE\Microsoft\.NETFramework\v4.0.30319For the .NET Framework 3.5 use the following registry key:
[HKEY_LOCAL_MACHINE\SOFTWARE\Wow6432Node\Microsoft\.NETFramework\v2.0.50727] "SchUseStrongCrypto"=dword:00000001For the .NET Framework 4.0/4.5.x use the following registry key:
HKEY_LOCAL_MACHINE\SOFTWARE\Microsoft\.NETFramework\v4.0.30319 "SchUseStrongCrypto"=dword:00000001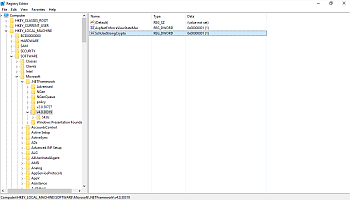
Alternatively, you can use the following PowerShell command:
New-ItemProperty -path 'HKLM:\SOFTWARE\Microsoft\.NetFramework\v4.0.30319' -name 'SchUseStrongCrypto' -value '1' -PropertyType 'DWord' -Force | Out-NullFor more details, please refer to this article.
- In the Server Manager, open Tools -> AD FS Management,


- In the AD FS Management panel, select the Trust Relationships > Relying Party Trusts. Click the Add Relying Party Trust... option on the right. The Add Relying Party Trust Wizard opens,


- In the wizard window, select the Import data about the relying party published online or on a local network radio button, paste the previously copied link to the ONLYOFFICE SP metadata into the Federation metadata address (host name or URL) field and click the Next button,


- In the Display name field, specify any name and click the Next button,


- Select the I do not want to configure multi-factor authentication settings for this relying party trust at this time option and click the Next button,


- Select the Permit all users to access this relying party option and click the Next button,


- Check the resulting settings and click the Next button,


- Leave the default option unchanged and click the Close button,


- A new window opens. At the Issuance Transform Rules tab, click the Add Rule... button,


- Select the Send LDAP Attributes as Claims option from the Claim rule template list and click the Next button,


- Enter any name in the Claim rule name field. Select the Active Directory option from the Attribute store list and fill in the Mapping of LDAP attributes to outgoing claim types form according to the table below. When complete, click Finish.
LDAP Attribute (Select or type to add more) Outgoing Claim Type (Select or type to add more) Given-Name givenName Surname sn E-Mail-Addresses mail Telephone-Number mobile Title title physicalDeliveryOfficeName l 

- In the Edit Claim Rules window, click the Add Rule... button once again, select the Transform an Incoming Claim option from the Claim rule template list and click the Next button,


- Type in any name in the Claim rule name field and select the following options from the lists:
- Incoming claim type: mail,
- Outgoing claim type: Name ID,
- Outgoing name ID format: Email


When ready, click the Finish button.
You should get nearly the same result:


If logout from AD FS does not work, it is recommended to add a Custom Claim Rule replacing
{portal-domain}with your SP domain and{ad-fs-domain}with your IdP domain:c:[Type == "mail"] => issue(Type = "http://schemas.xmlsoap.org/ws/2005/05/identity/claims/nameidentifier", Issuer = c.Issuer, OriginalIssuer = c.OriginalIssuer, Value = c.Value, ValueType = c.ValueType, Properties["http://schemas.xmlsoap.org/ws/2005/05/identity/claimproperties/format"] = "urn:oasis:names:tc:SAML:1.1:nameid-format:emailAddress", Properties["http://schemas.xmlsoap.org/ws/2005/05/identity/claimproperties/namequalifier"] = "http://{ad-fs-domain}/adfs/services/trust", Properties["http://schemas.xmlsoap.org/ws/2005/05/identity/claimproperties/spnamequalifier"] = "https://{portal-domain}/sso/metadata");

- Click OK.
- To allow SSO from the intranet, enable the Forms Authentication option in the Edit Global Authentication Policy (contextual menu AD FS / Authentication Policies),


- Open the properties of the created relying party trust and switch to the Advanced tab,


Select the SHA-1 option in the Secure hash algorithm list.


Verifying the ONLYOFFICE SP configuration with the AD FS IdP
Logging in to ONLYOFFICE on the SP side
- Go to the ONLYOFFICE Authentication page (e.g., https://myportal-address.com/auth.aspx).
- Click the Single sign-on button (the caption may differ if you have specified your own text when configuring ONLYOFFICE SP). If the button is missing, this means that SSO is not enabled.


- If all the SP and IdP parameters are configured correctly, you will be redirected to the AD FS IdP login form:


- Enter the login and password for the AD FS IdP account and click the Sign in button.
- If the credentials are correct, you will be redirected to the portal home page. The user account will be created automatically if it does not yet exist, or updated if any data has changed in the IdP.
Profiles for users added with SSO authentication
Editing user profiles created via SSO authentication is restricted. The user profile fields received from the IdP cannot be edited (i.e., First Name, Last Name, Email, Title and Location). You can edit these fields from your IdP account only.
The figure below shows the Actions menu for an SSO user:


The following figure shows an SSO user profile opened for editing:


The users created using the SSO authentication are marked with the SSO icon in the user list for the portal administrators:

