Managing memory quota
Introduction
The Portal memory quota feature provided by the Control Panel allows you to set the memory limitation on your portal.
Manage memory quota
- Sign in to your portal and click the Control Panel icon on the Start Page. Alternatively, you can go to the portal Settings and select the Control Panel link on the left-side panel.
- Go to the Storage section in the Control Panel.
- Scroll the page to find the Portal memory quota section.
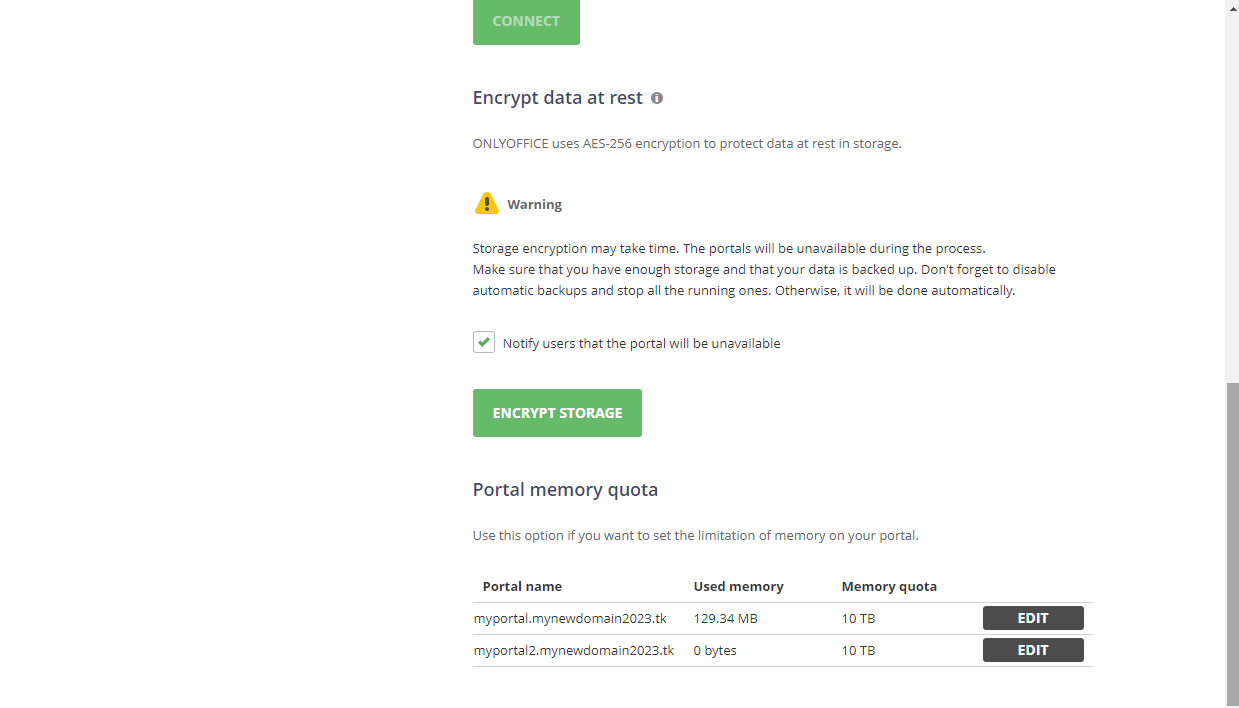
- Click EDIT next to the portal name. If you enabled the Multitenancy feature, the list contains multiple portals.
- Select the Edit quota option from the drop-down list.
- Set the value you need in the input field and select the unit of measure from the drop-down list: bytes, KB, MB, GB, or TB. By default, the quota is set to 10 TB.
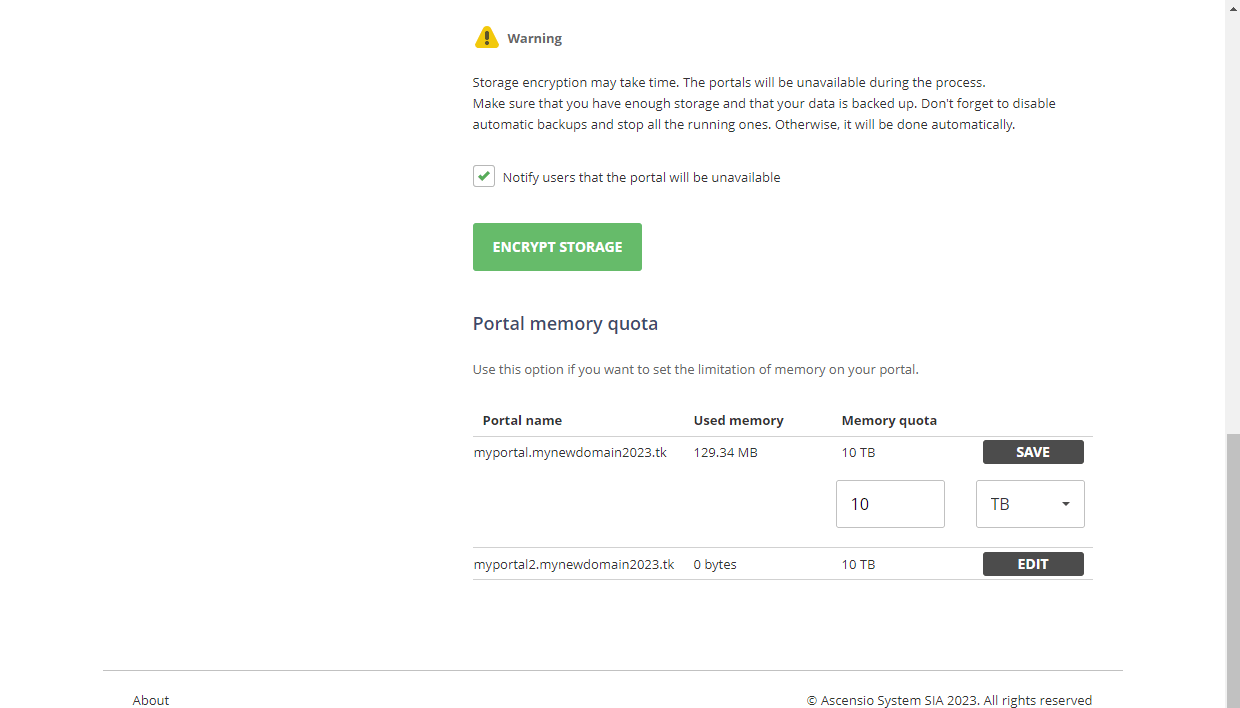
- Click SAVE.
If the memory quota you set is less than the memory used on the portal, you will get an error. The amount of space used on the portal is displayed in the Used memory section.
To disable the quota, click EDIT next to the portal name and use the No quota option.
Article with the tag:
Browse all tags