Integrating ONLYOFFICE with Yandex
Connect your Yandex account to sign in to your portal quickly and to access Yandex Disk documents from the Documents module.
Server version
Step 1. Obtaining Yandex access keys
To obtain the access keys required to connect Yandex to your portal:
- Go to https://oauth.yandex.com/.
- Sign in to your account.
- Click Create app.
- Specify the Service name.
- In the Platforms section, select Web services and click Save and continue.
- Click Save and continue on the next screen.
- In the Redirect URI field, enter
https://service.onlyoffice.com/oauth2.aspxand click Save and continue. - Enter your company or personal email address and click Save and continue.
- Verify the settings and click Everything is correct. Create the app.
- Copy or note down the
IDandPassword.
Step 2. Connecting Yandex on the portal
To connect Yandex on your portal:
- Click the
 icon in the upper-right corner to open Settings.
 - Select the Integration tab.
- Open the Third-Party Services page.
- Scroll down to Yandex and click the toggle to enable it.
- In the Yandex window that opens, enter the
IDandPasswordobtained in the previous step.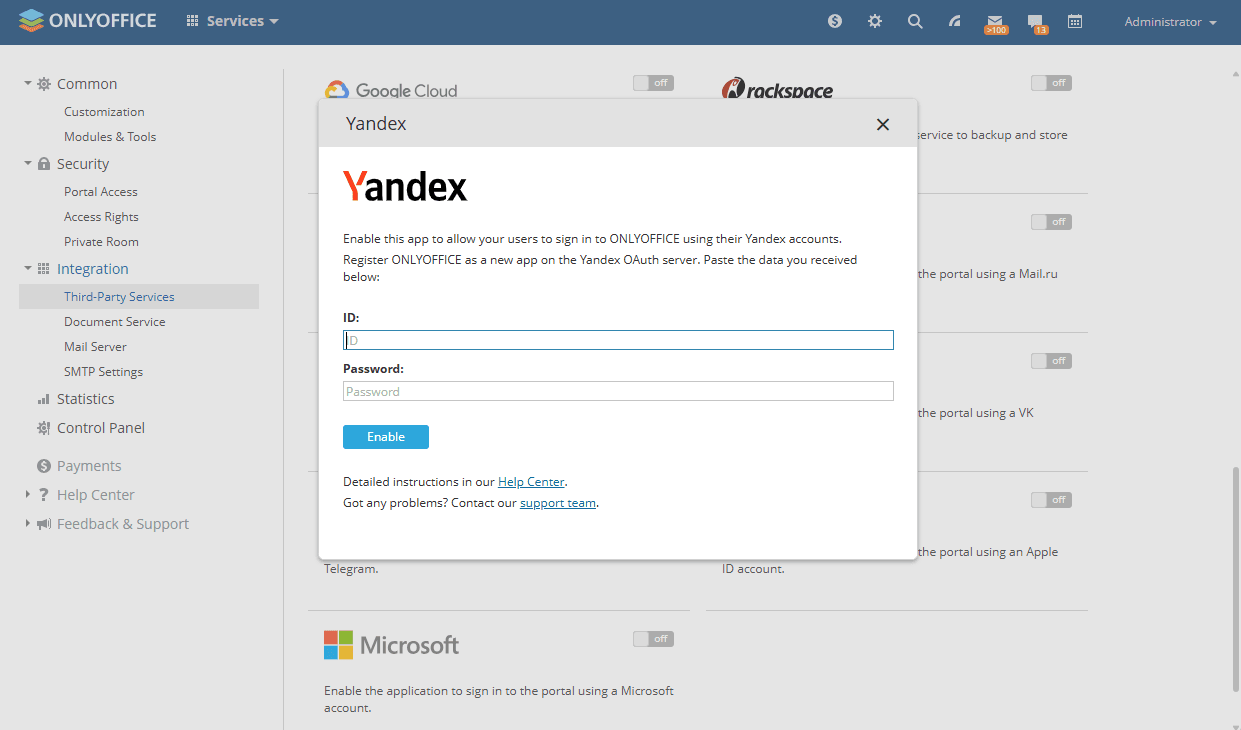
- Click Enable to connect the service.
Cloud version
In the cloud version, authorization key parameters are set up automatically.
A full-access administrator or the Documents module administrator must first enable the Allow users to connect third-party storages toggle in the Admin Settings section.
To connect your Yandex account, an application password is also required. For instructions on how to create one, refer to this article.
To connect your Yandex Disk account to the Documents module:
- In the left sidebar, click the three dots
 under the Connect section and select Yandex Disk in the Connecting account window, or go to Settings > Connected clouds and click Connect cloud.
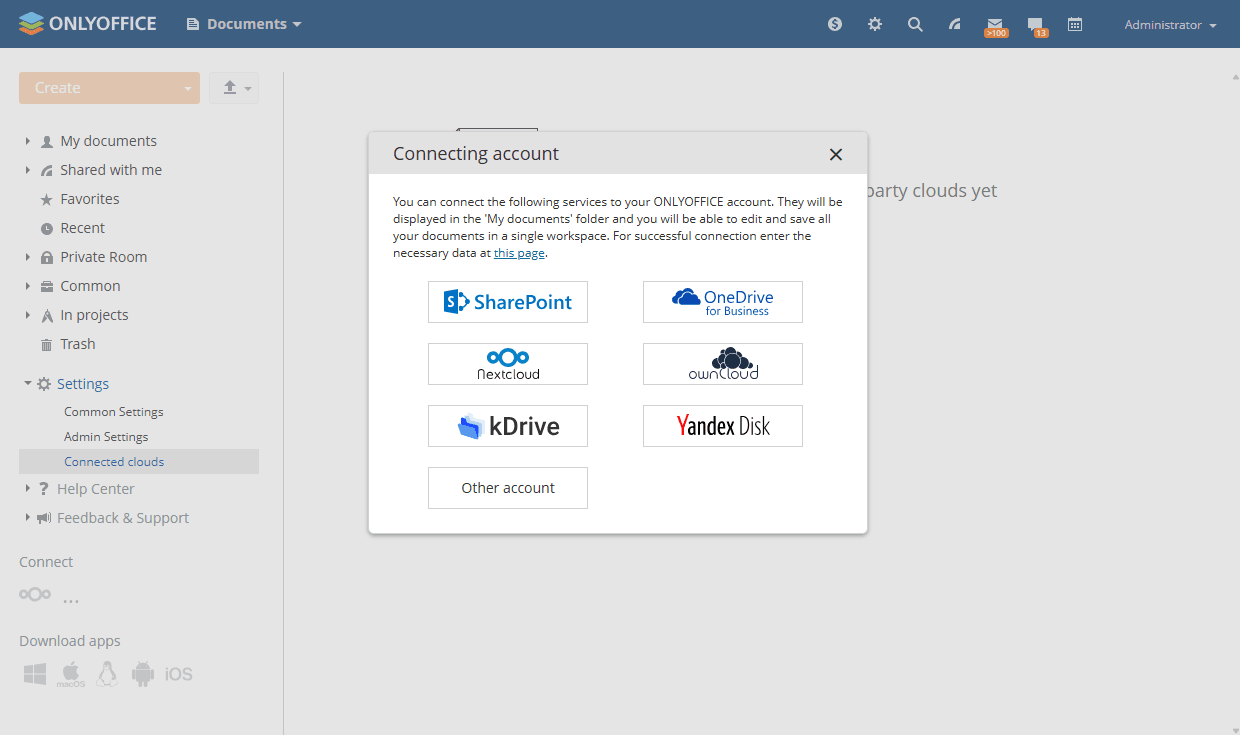
- Enter your Login and Password.
- Specify the name of the folder where Yandex Disk documents will be stored, or leave the default name.
- Click Save.
If you delete a document from the Yandex Disk folder, it will also be deleted from your Yandex account. The file will not be placed in the Trash section of the Documents module. The deletion is irreversible.
Article with the tag:
Browse all tags