- Home
- Docs
- User guides
- Document Editor
- Creating a hanging indent
Creating a hanging indent
Step 1. Select the necessary part of the document
Select the part of the document you want to be formatted as a hanging indented paragraph:
- Put the cursor within a single paragraph.
- Select several paragraphs with the mouse.
- Select all the text in the document by pressing the Ctrl+A key combination.


Step 2. Set the hanging indent using paragraph settings
To open the paragraph settings window, right-click the text and select the Paragraph Advanced Settings option from the menu, or use the Show advanced settings link at the right sidebar.
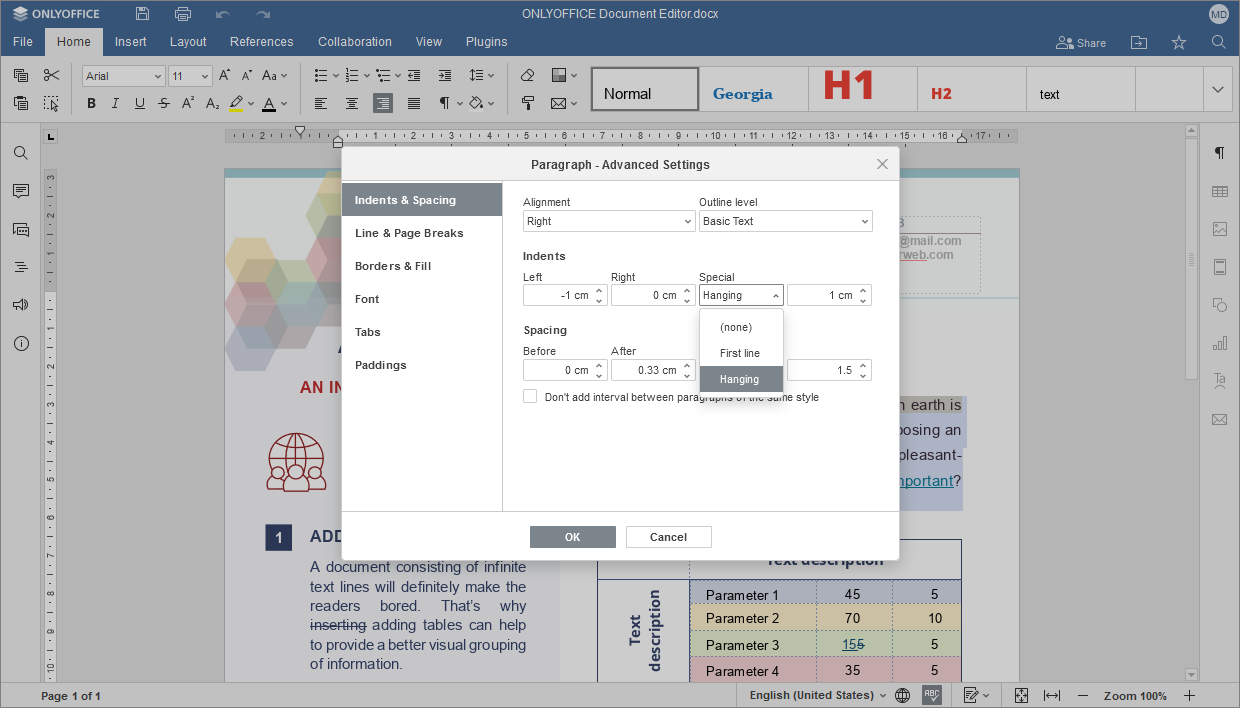
- In the opened Paragraph - Advanced Settings window, switch to the Indents & Spacing tab.
- In the Indents section, open the Special drop-down list and select the Hanging menu item.
- If necessary, change the default numeric value specified for Hanging using the entry field on the right. By default, the 1.27 cm value is used.
- Click the OK button to apply the changes.


Step 3. Set the hanging indent using rulers
First, make sure that rulers are visible. In the Document Editor, rulers are displayed by default. If they have been earlier hidden, display them again in the following way:
- Go to the View tab.
- Click the Rulers option to show or hide rulers.
On the left side of the horizontal ruler, you can see three markers that are used to adjust paragraph indents from the left margin of the page.


 The upper one is the First Line Indent Marker that allows to set the offset from the left margin for the first line of the paragraph.
 The lower triangular marker is the Hanging Indent Marker that we must use to make a hanging indentation.
 The lower rectangular marker is the Left Indent Marker that is used to move all the markers at once and allows setting the entire paragraph offset from the left margin of the page.
Click the triangular Hanging Indent Marker  and drag it to the right until the necessary offset is reached.
If you accidentally move the Left Indent Marker instead, just drag the First Line Indent Marker  back to the left margin.
That's all, you have made a hanging indent in your document in just a few clicks.