- Home
- Docs
- User guides
- Document Editor
- Protecting documents
Protecting documents
You can protect your documents with a password that is required to enter the editing mode by your co-authors. The password can be changed or removed later on.
The password cannot be restored if you lose or forget it. Please keep it in a safe place.
You can also protect your documents by restricting access rights.
Setting a password
-
go to the File tab at the top toolbar and choose the Protect option. Click the Add password button to open the Set password window,
or go to the Protection tab and choose the Encrypt option,
-
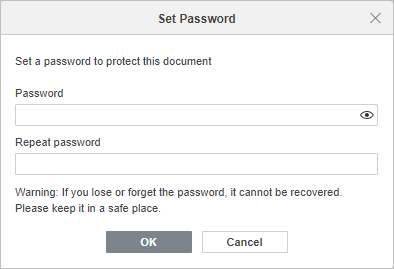
set a password in the Password field and repeat it in the Repeat password field below. Click
 to show or hide password characters when entered,

-
Click OK when ready.
To open the document with the full access rights, the user has to enter the set password.
Changing a password
-
go to the File tab at the top toolbar and choose the Protect option. Click the Change password button to open the Set password window,
or go to the Protection tab and choose the Encrypt option,
- set a new password in the Password field and repeat it in the Repeat password field below. Click
 to show or hide password characters when entered.
 - click OK.

Deleting a password
- go to the File tab at the top toolbar,
- choose the Protect option,
- click the Delete password button.
Protecting a document
- go to the Protection tab,
- click the Protect Document button,
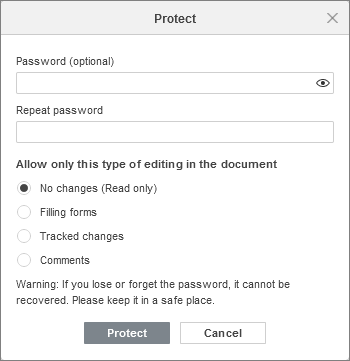
- set the password if necessary,
-
choose the required access rights for the document, provided the password has not been entered by the user:
- No changes (Read only) - the user can only view the document.
- Filling forms - the user can only fill a form.
- Tracked changes - the user can only view the document changes history and review the document itself.
- Comments - the user can only leave and answer comments.

- click Protect when ready.
To remove protection from the document, provided that the password has been set,
- go to the Protection tab,
- click the Protect Document button,
- enter the set password in the Unprotect Document window.
Adding a signature
This feature is available only in the Desktop Editors.
To add a signature,
- Go to the Protection tab.
-
Click the Signature icon and select the required type:
- Add digital signature - type in the purpose for signing this document and select the Certificate by clicking the corresponding button in the opened pop-up window. When ready, click OK.
- Add signature line - fill in the Suggested signer, Suggested signer's title, and Suggested signer's e-mail fields, as well as provide the instructions for the signer. Activate the Show sign date in signature line checkbox if necessary. When ready, click OK.
Host ONLYOFFICE Docs on your own server or use it in the cloud
Article with the tag:
Browse all tags