Configuring ONLYOFFICE SP and OneLogin IdP
Introduction
Single Sign-on (SSO) is a technology that allows users to sign in only once and then get access to multiple applications/services without re-authentication.
SSO is always ensured by the joint operation of two applications: an Identity Provider and a Service Provider (hereinafter referred to as "IdP" and "SP"). ONLYOFFICE SSO implements the SP only. A lot of different providers can act as an IdP, but this article considers the OneLogin implementation.
Preparing ONLYOFFICE Workspace for the SSO setup
- Install ONLYOFFICE Workspace v. 11.0.0 for Docker or any later version with the SSO support.
- Add a domain name, e.g., myportal-address.com.
- On your portal, go to the Control Panel -> HTTPS, create and apply the letsencrypt certificate for the traffic encryption (to enable HTTPS on your portal).
Creating an IdP in OneLogin
- Sign up for OneLogin, if you have not yet registered.
- Sign in to OneLogin as an administrator.
- Go to the Administration section.
- Click the Applications menu. Click the Add App button.


- In the Find Application search field, type in the following text: SAML Custom Connector (Advanced):


- Select the found option.
- In a new window that opens, enter any Display Name, for example, "IDP OneLogin Onlyoffice v11 Test", to distinguish this application from others, replace the icons with your own ones and click the Save button.


- Go to the Configuration submenu and fill in the fields according to the table below:
Please specify your own domain name or public IP where your ONLYOFFICE SP is hosted instead of myportal-address.com.


Application Details RelayState https://myportal-address.com Audience (EntityID) https://myportal-address.com/sso/ Recipient https://myportal-address.com/sso/acs ACS (Consumer) URL Validator* ^https:\/\/myportal-address\.com\/sso\/acs\/$ ACS (Consumer) URL* https://myportal-address.com/sso/acs Single Logout URL https://myportal-address.com/sso/slo/callback SAML initiator Service Provider SAML nameID format Email SAML issuer type Specific SAML signature element Assertion Encrypt assertion SAML encryption method AES-128-CBC Sign SLO Request Sign SLO Response 

- Click the Save button and go to the Parameters submenu.


- Use the + button to create 5 parameters (
givenName,sn,mail,title,mobile). Check the Include in SAML assertion option and specify a value from the Value list, suitable for issuing from the field catalog of the LDAP directory, for all of them:

- Once you fill in all the necessary fields for SAML assertion attributes in the IdP, you should receive nearly the same result as shown in the figure below. Click the Save button.


- Go to the SSO submenu. Choose a valid certificate from the certificate list by clicking the Change link, if you have several certificates. In the SAML Signature Algorithm field, leave the SHA-1 option and click the Save button:


- Copy the link from the Issuer URL field (e.g., https://app.onelogin.com/saml/metadata/4d87973f-629d-4a52-812e-bde45eff92b8) and go to the ONLYOFFICE portal, signing in as an administrator. Open the Control Panel -> SSO page.
Configuring ONLYOFFICE SP
- Make sure that you are signed in as an Administrator to your ONLYOFFICE Control Panel and click the SSO tab in the PORTAL SETTINGS section on the left sidebar.
You can only register one enterprise Identity Provider for your organization on the ONLYOFFICE portal.


- Enable SSO using the Enable Single Sign-on Authentication switcher and paste the link copied from the OneLogin issuer URL into the URL to Idp Metadata XML field.


Press the button with the upward arrow to load the IdP metadata. The ONLYOFFICE SP Settings form will be automatically filled in with your data from the OneLogin IdP.
- In the Custom login button caption field, you can enter any text instead of the default one (Single Sign-on). This text will be displayed on the button used to login to the portal with the Single Sign-on service at the ONLYOFFICE authentication page.


- Now you need to create a certificate in the SP Certificates section. To do that, click the Add certificate button in the corresponding section.


- In the opened modal window, click the Generate New Self-Signed Certificate link, and choose the signing and encrypt option in the Use for list. Before you save the certificate, copy the Public Certificate text to the clipboard (it will be necessary for OneLogin), then click the OK button.


- You should get nearly the same result:


- It is not necessary to adjust the Attribute Mapping form since we specified the same parameters when creating OneLogin IdP. The following values are used:
First Name givenName Last Name sn Email mail Location l Title title Phone mobile In the Advanced Settings section, you can check the Hide auth page option to hide the default authentication page and automatically redirect to the SSO service.
ImportantIf you need to restore the default authentication page (to be able to access the portal if your IDP server fails), you can add the/Auth.aspx?skipssoredirect=truekey after the domain name of your portal in the browser address bar. - Click the Save button. The ONLYOFFICE SP Metadata section should be opened. Verify that our settings are publicly available by clicking the Download SP Metadata XML button. The XML file contents should be displayed.
- Return to OneLogin to set up encryption, open your application, and go to the Configuration setting. Scroll down the page - the new SAML Encryption field for entering an encryption key should appear. Paste the copied Public Certificate text from step 4 of this instruction into this field and click the Save button:


Creating users in OneLogin and giving them access to ONLYOFFICE
To create users in OneLogin and provide them access to our ONLYOFFICE SP, perform the following steps:
- go to the OneLogin All Users page, signing in as an administrator,


- create a new user or edit an existing one,
- go to the Applications submenu and click the + button,
- select our newly created application from the list and click CONTINUE,


- in a new window that opens, add the missing data and click the SAVE button,


- now the user is able to work in ONLYOFFICE SP.
Checking the work of the ONLYOFFICE SP with the OneLogin IdP
Logging in to ONLYOFFICE on the SP side
- Go to the ONLYOFFICE Authentication page (e.g., https://myportal-address.com/Auth.aspx).
- Click the Single sign-on button (the caption may differ if you have specified your own text when configuring ONLYOFFICE SP). If the button is missing, this means that SSO is not enabled.


- If all the SP and IdP parameters are set correctly, we will be redirected to the OneLogin IdP login form:


- Enter the login and password of the user who has been granted access to the ONLYOFFICE SP and click the LOG IN button.
- If the credentials are correct, we will be redirected to the main page of the portal (the user will be created automatically if missing, or the data will be updated if changed in the IDP).


Logging out from ONLYOFFICE SP
- An SSO user can log out from the ONLYOFFICE portal using the Sign Out menu. The user should also be automatically logged out from the OneLogin IdP in case he/she is logged out from all other applications that he/she has been granted access to in OneLogin and that he/she previously signed in to.


- If you signed out successfully, you will be redirected to the portal authentication page.
- If you click the Single Sign-on button once again, you will be redirected to the OneLogin login page again (this means that you successfully logged out from the portal):
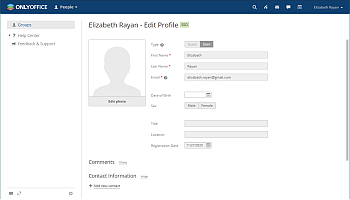
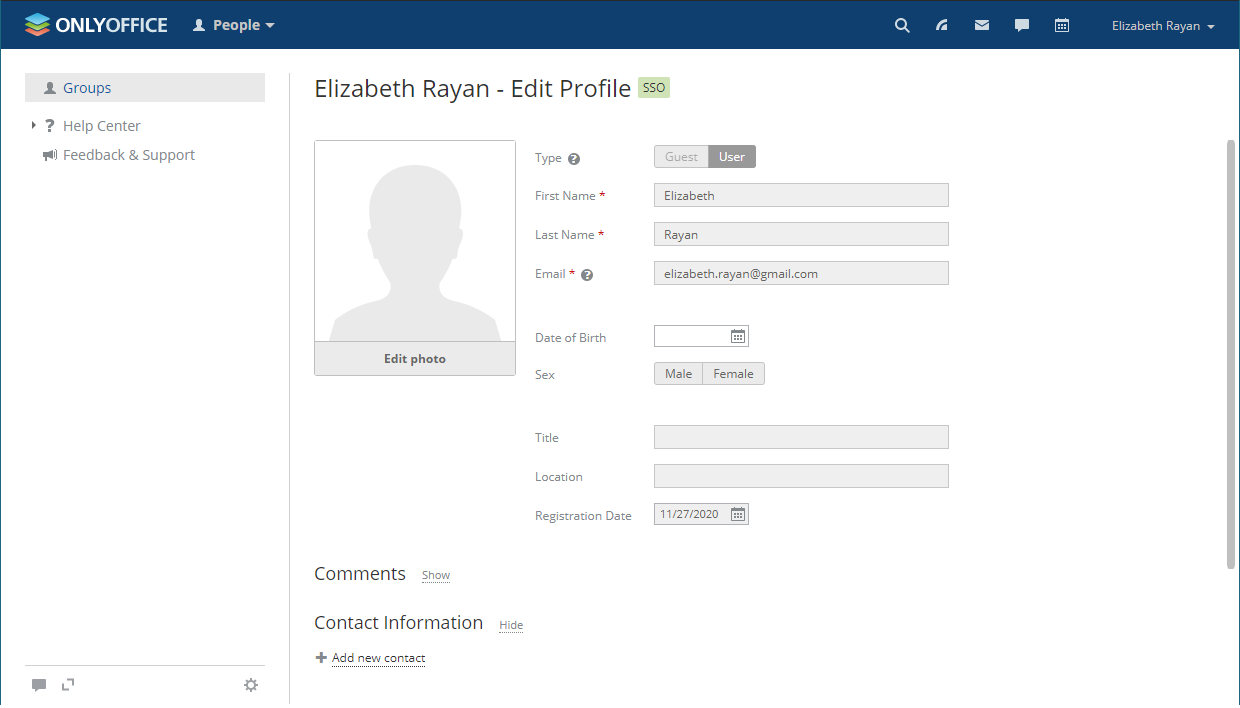
Profiles for users added with SSO authentication
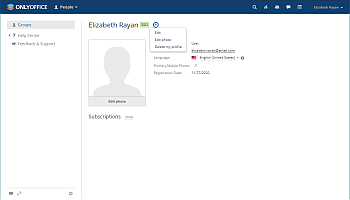
The possibility to edit user profiles created using the SSO authentication is restricted. The user profile fields received from the IdP are disabled for editing (i.e., First Name, Last Name, Email, Title, and Location). You can edit these fields from your IdP account only.
The figure below shows the Actions menu for an SSO user:
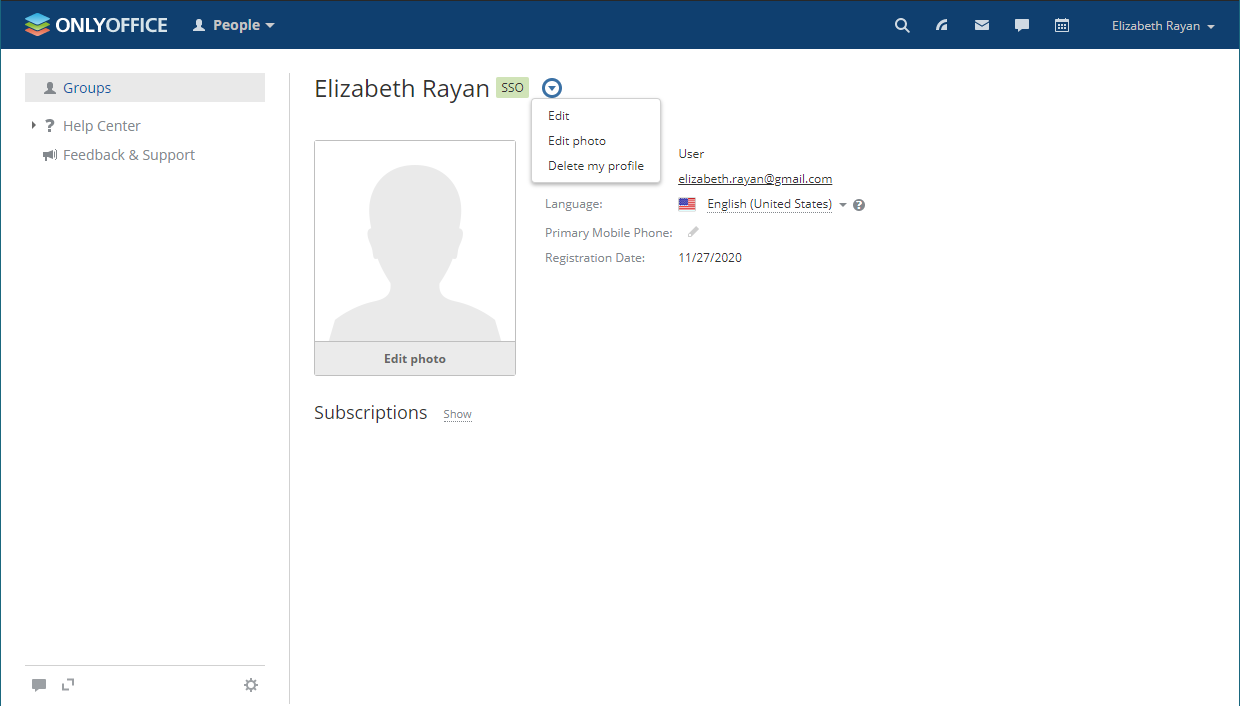
The following figure shows an SSO user profile opened for editing:
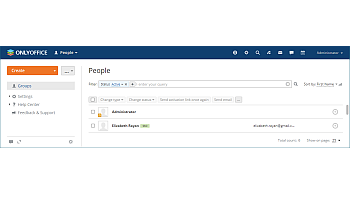
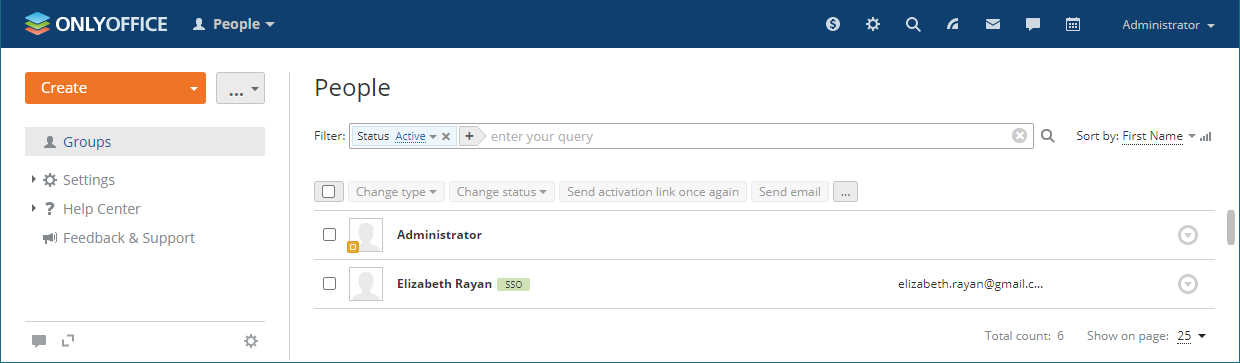
The users created using the SSO authentication are marked with the SSO icon in the user list for the portal administrators: