Using Mail Merge
Note: this option is available in the online version only.
The Mail Merge feature is used to create a set of documents combining a common content which is taken from a text document and some individual components (variables, such as names, greetings etc.) taken from a spreadsheet (for example, a customer list). It can be useful if you need to create a lot of personalized letters and send them to recipients.
- Prepare a data source and load it to the main document
- A data source used for the mail merge must be an .xlsx spreadsheet stored on your portal. Open an existing spreadsheet or create a new one and make sure that it meets the following requirements.
- The spreadsheet should have a header row with the column titles, as values in the first cell of each column will designate merge fields (i.e. variables that you can insert into the text). Each column should contain a set of actual values for a variable. Each row in the spreadsheet should correspond to a separate record (i.e., a set of values that belongs to a certain recipient). During the merge process, a copy of the main document will be created for each record and each merge field inserted into the main text will be replaced with an actual value from the corresponding column. If you are going to send results by email, the spreadsheet must also include a column with the recipients' email addresses.
-
Open an existing text document or create a new one. It must contain the main text, which will be the same for each version of the merged document. Click the Mail Merge
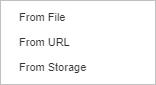
 icon on the Collaboration tab of the top toolbar and select the data source location: From File, From URL or From Storage.
-
Select the necessary file or paste a URL and click OK.
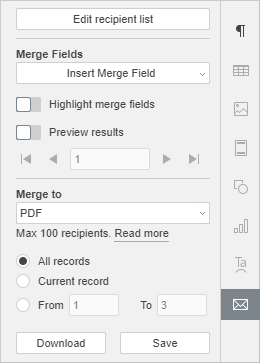
Once the data source is loaded, the Mail Merge setting tab will be available on the right sidebar.
- Verify or change the recipients list
-
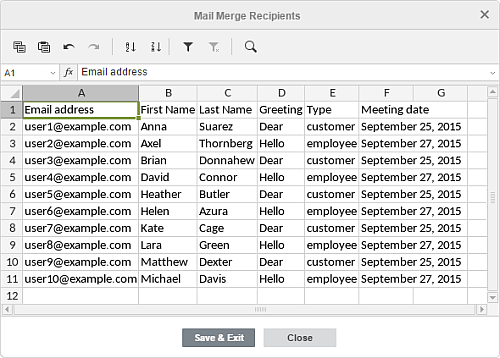
Click the Edit recipients list button on the top of the right sidebar to open the Mail Merge Recipients window, where the content of the selected data source is displayed.
-
In the opened window, you can add new information, edit or delete the existing data if necessary. To simplify working with data, you can use the icons at the top of the window:
 and
and  - to copy and paste the copied data
 and
and  - to undo and redo undone actions
 and
and  - to sort your data within a selected range of cells in ascending or descending order
 - to enable the filter for the previously selected range of cells or to remove the applied filter
 - to clear all the applied filter parameters
Note: to learn more on how to use the filter, please refer to the Sort and filter data section of the Spreadsheet Editor help.
 - to search for a certain value and replace it with another one, if necessary
Note: to learn more on how to use the Find and Replace tool, please refer to the Search and Replace Functions section of the Spreadsheet Editor help.
- After all the necessary changes are made, click the Save & Exit button. To discard the changes, click the Close button.
-
Click the Edit recipients list button on the top of the right sidebar to open the Mail Merge Recipients window, where the content of the selected data source is displayed.
- Insert merge fields and check the results
-
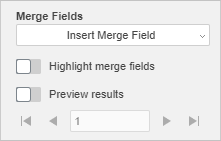
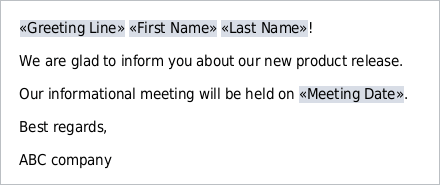
Place the mouse cursor where the merge field should be inserted, click the Insert Merge Field button on the right sidebar and select the necessary field from the list. The available fields correspond to the data in the first cell of each column of the selected data source. All the required fields can be added anywhere.
-
Turn on the Highlight merge fields switcher on the right sidebar to make the inserted fields more noticeable in the text.
-
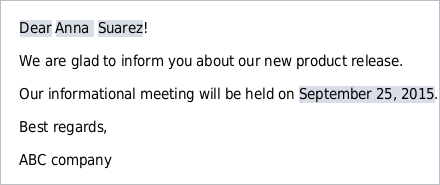
Turn on the Preview results switcher on the right sidebar to view the text with the merge fields replaced with actual values from the data source. Use the arrow buttons to preview the versions of the merged document for each record.
- To delete an inserted field, disable the Preview results mode, select the field with the mouse and press the Delete key on the keyboard.
- To replace an inserted field, disable the Preview results mode, select the field with the mouse, click the Insert Merge Field button on the right sidebar and choose a new field from the list.
-
Place the mouse cursor where the merge field should be inserted, click the Insert Merge Field button on the right sidebar and select the necessary field from the list. The available fields correspond to the data in the first cell of each column of the selected data source. All the required fields can be added anywhere.
- Specify the merge parameters
-
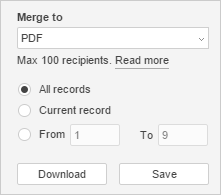
Select the merge type. You can start mass mailing or save the result as a PDF or DOCX file to print or edit it later. Select the necessary option from the Merge to list:
- PDF - to create a single PDF document that includes all the merged copies that can be printed later
- DOCX - to create a single DOCX document that includes all the merged copies that can be edited individually later
- Email - to send the results to recipients by email
Note: the recipients' email addresses must be specified in the loaded data source, and you need to have at least one email account connected in the Mail module on your portal.
-
Choose all the required records to be applied:
- All records (this option is selected by default) - to create merged documents for all records from the loaded data source
- Current record - to create a merged document for the record that is currently displayed
- From ... To - to create merged documents for a range of records (in this case you need to specify two values: the number of the first record and the last record in the desired range)
Note: the maximum allowed quantity of recipients is 100. If you have more than 100 recipients in your data source, please, perform the mail merge by stages: specify the values from 1 to 100, wait until the mail merge process is over, then repeat the operation specifying the values from 101 to N etc.
-
Complete the merge
-
If you've decided to save the merge results as a file,
- click the Download button to save the file on your PC. You'll find the downloaded file in your default Downloads folder.
- click the Save button to save the file on your portal. In the opened Folder for save window, you can change the file name and specify the folder where you want to save the file. You can also check the Open merged document in new tab box to check the result when the merge process is finished. Finally, click Save in the Folder for save window.
-
If you've selected the Email option, the Merge button will be available on the right sidebar. After you click it, the Send to Email window will open:
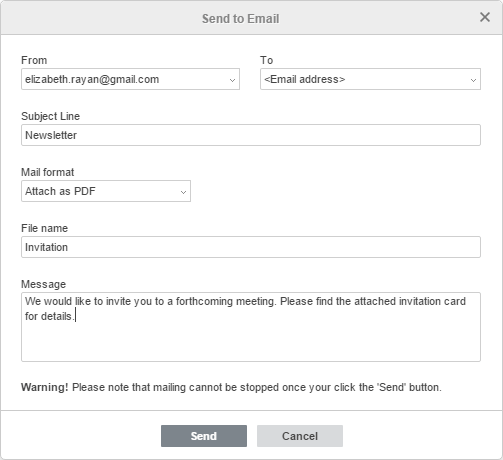
- In the From list, select the required mail account if you have several accounts connected to the Mail module.
- In the To list, select the merge field corresponding to the email addresses of the recipients, if this option was not selected automatically.
- Enter your message subject in the Subject Line field.
- Select the mail format from the list: HTML, Attach as DOCX or Attach as PDF. When one of the two latter options is selected, you also need to specify the File name for attachments and enter the Message (the text of your letter that will be sent to recipients).
- Click the Send button.
Once the mailing is over, you'll receive a notification to your email specified in the From field.
-
If you've decided to save the merge results as a file,
-
Select the merge type. You can start mass mailing or save the result as a PDF or DOCX file to print or edit it later. Select the necessary option from the Merge to list: