Wallet
Setting up the Wallet
In the cloud (SaaS) version, you can use the DocSpace Wallet to easily purchase additional storage space and backups.
Use the ![]() menu in the lower left corner and select the Payments option. Switch to the Wallet tab.
menu in the lower left corner and select the Payments option. Switch to the Wallet tab.
The main page displays the wallet balance and transaction history. The refresh button next to the balance allows you to update the data.
To top up the balance, click the Top up balance button. Restrictions: for a non-payer, this button is disabled.
If you are using the 'Startup' tariff, you need to link a card in Stripe before you start working with the wallet. If you are using the 'Business' tariff, the card is already linked, and you can use all the features of the wallet. Click the Plus button next to the Add payment method caption. You will be redirected to Stripe. Fill in your card data to link the card.
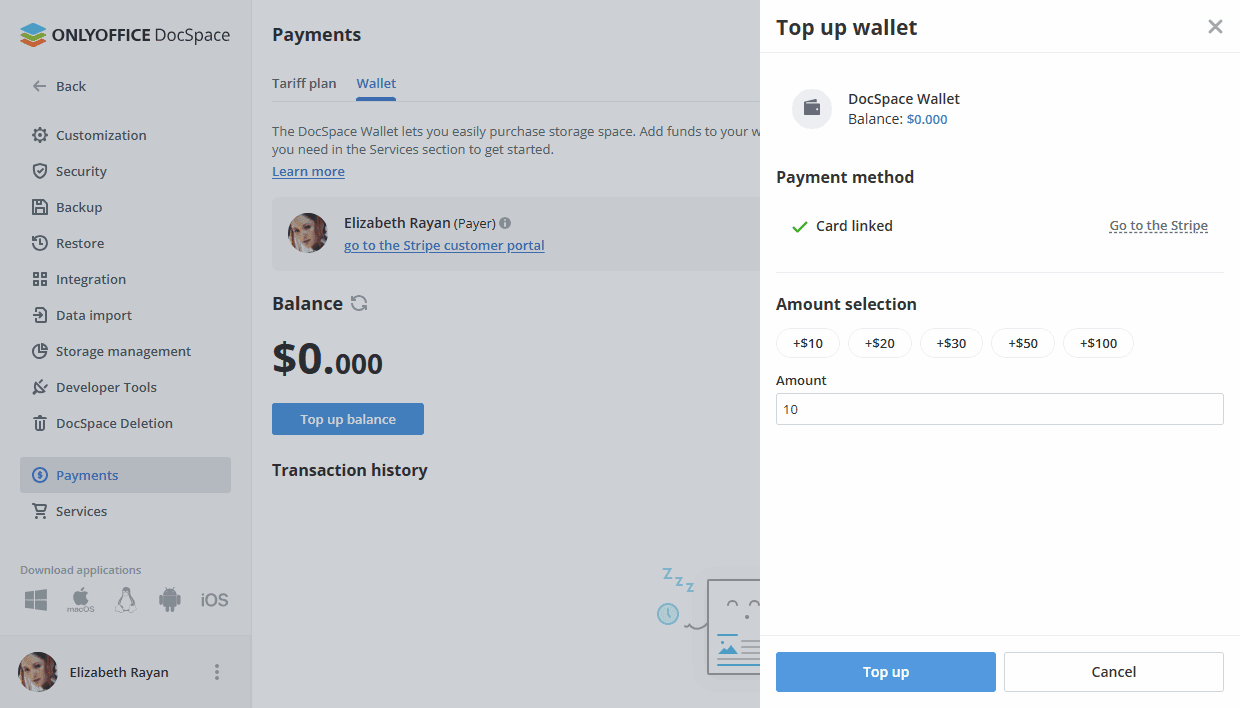

In the Amount selection section, you can choose one of the suggested presets for replenishment ($10, $20, $30, $50, or $100) or enter your own value. Restrictions: balance replenishment is only available for an integer. Specify the value and click the Top up button. The top-up might take some time to complete.
After the first successful replenishment, a dialog window appears offering to enable automatic payments. By enabling this setting, you will be able to top up the wallet automatically when your credit balance falls below a threshold. In the dialog window, turn on the Automatic payments switcher. Fill in the threshold value and an integer amount up to which the wallet must be replenished. When the balance drops to the first value, the wallet will be automatically topped up to the second value. Click the Save button. Similar settings will be available in the regular Top up wallet dialog. Restrictions: the 'Automatic payments' block is not available until the first balance replenishment.
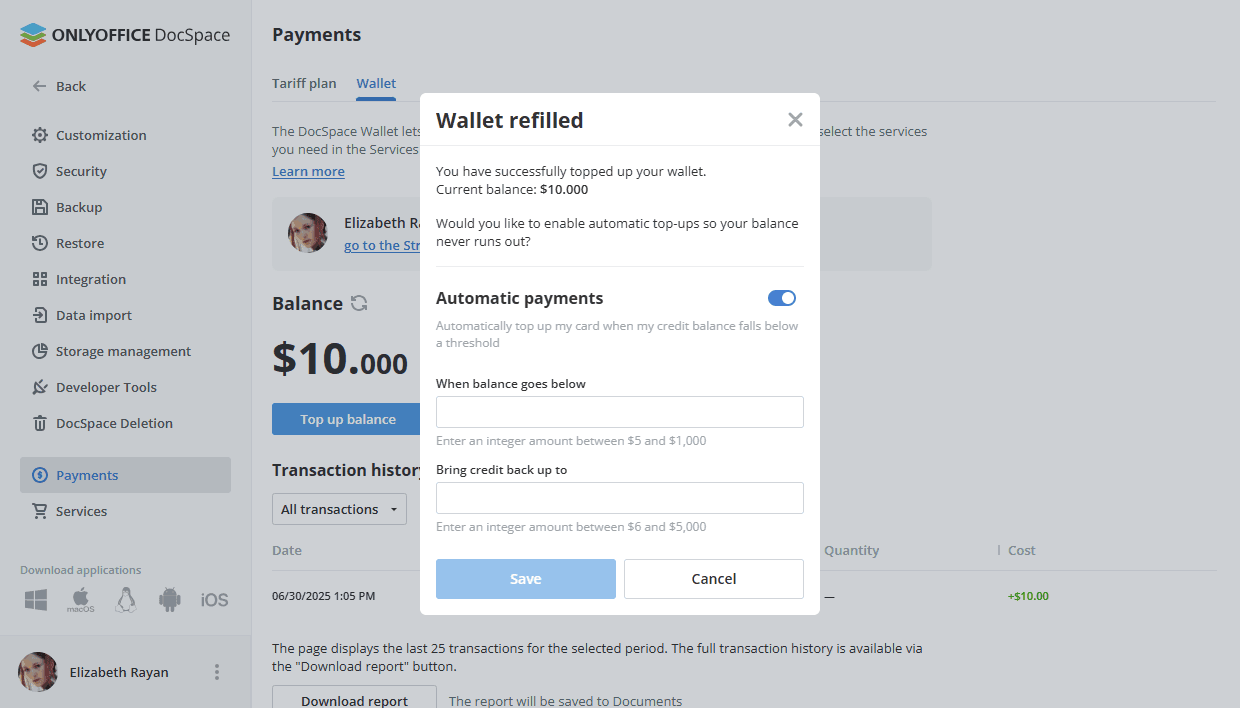

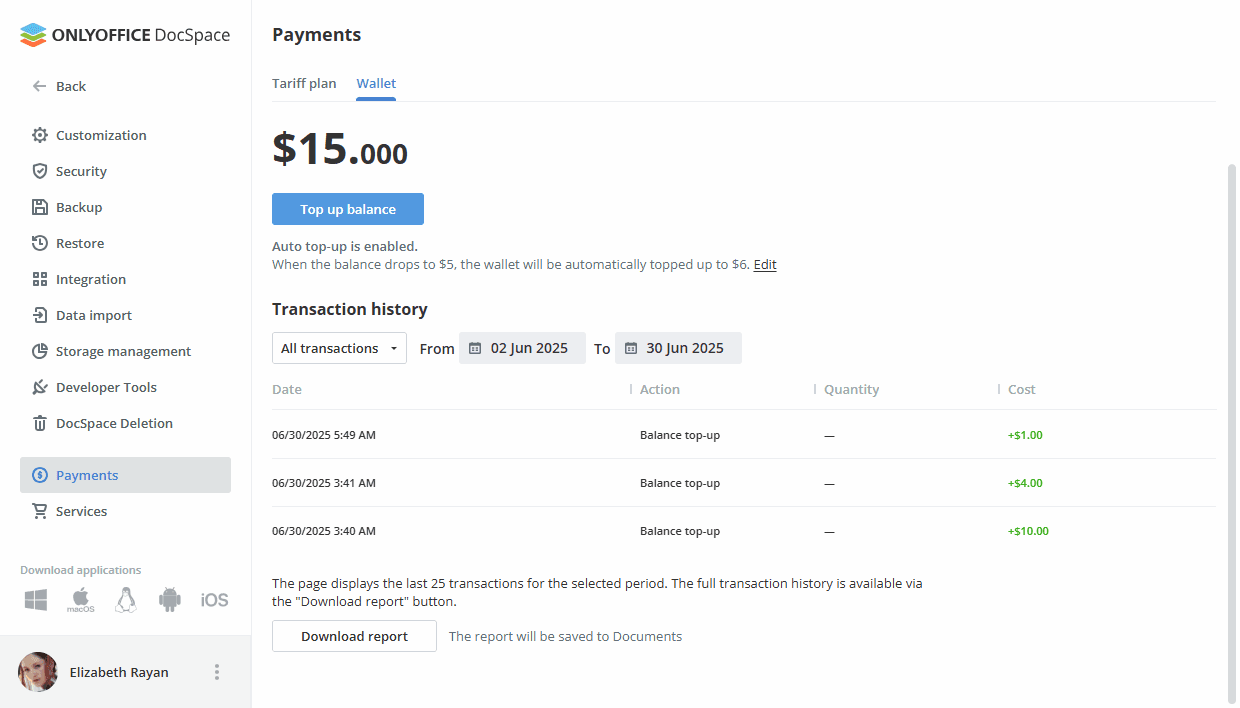
When the Auto top-up setting is enabled, the corresponding information with quick access to editing appears on the main page. Restrictions: for a non-payer, the Edit link is not available.
You can view the transaction history and filter transactions by specified parameters: transaction type (All transactions, Credit, Debit), time period, and contact (the person who made the purchase). You can also download the report generated by the selected parameters. The report will be saved in the 'Documents' section and opened in a new tab.

Purchasing additional disk space
Using the Wallet, you can purchase additional storage in the Services section.
Use the ![]() menu in the lower left corner and select the Payments or Settings option. Click the Services item on the left.
menu in the lower left corner and select the Payments or Settings option. Click the Services item on the left.
If the card is linked, the information about the payer is displayed on the main page. Restrictions: interaction with services is limited for non-payers, i.e., they cannot click and open a dialog to manage the service.
Click the switcher in the Additional disk storage section.
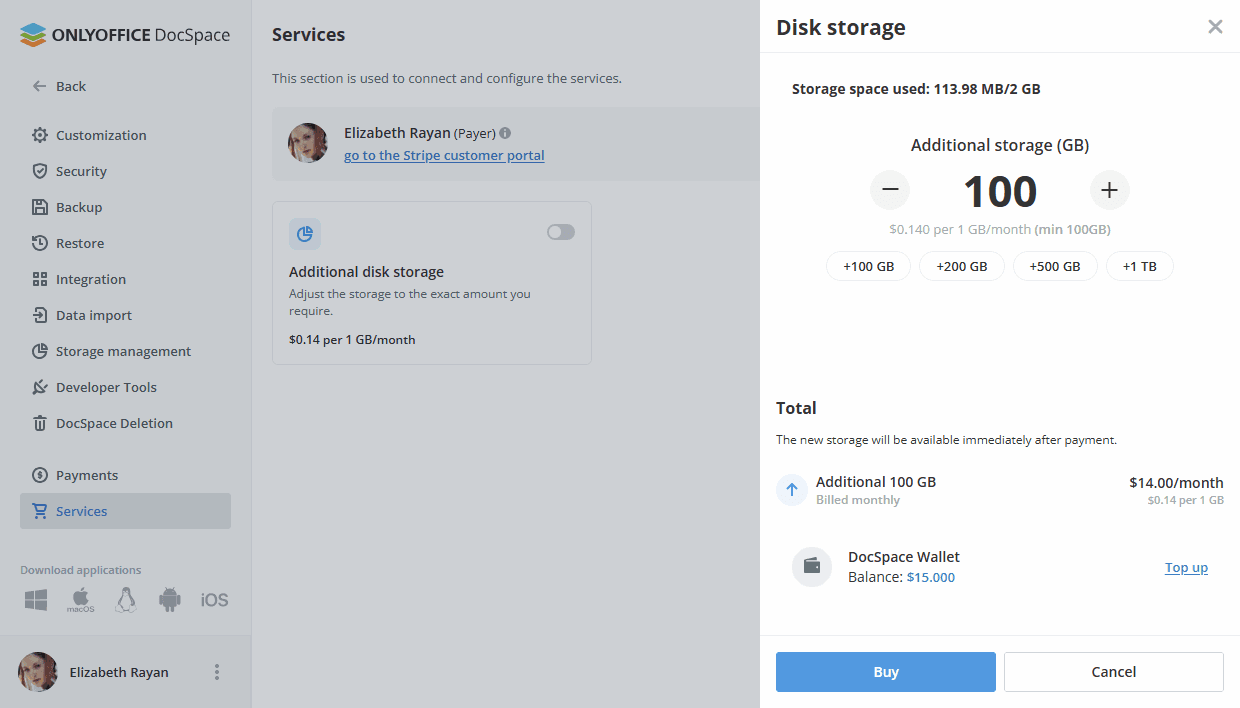

Select the necessary storage space value by using presets (100GB, 200GB, 500GB, 1TB) and +/- buttons.
The cost of additional storage is $0.14 per 1GB/month, min 100 GB.
If your wallet balance is insufficient, you can top it up by clicking the Top up link. The recommended top-up amount will be displayed. If the card is not linked, you can link it in the same dialog, there is no need to return to the wallet.
Click the Buy button.
Changing disk space subscription
If a tariff with additional storage exists, but you decide to buy more space, the cost that will be debited now will be calculated based on the the remaining days until your billing date. The full amount will be charged once per billing cycle on your regular billing date.
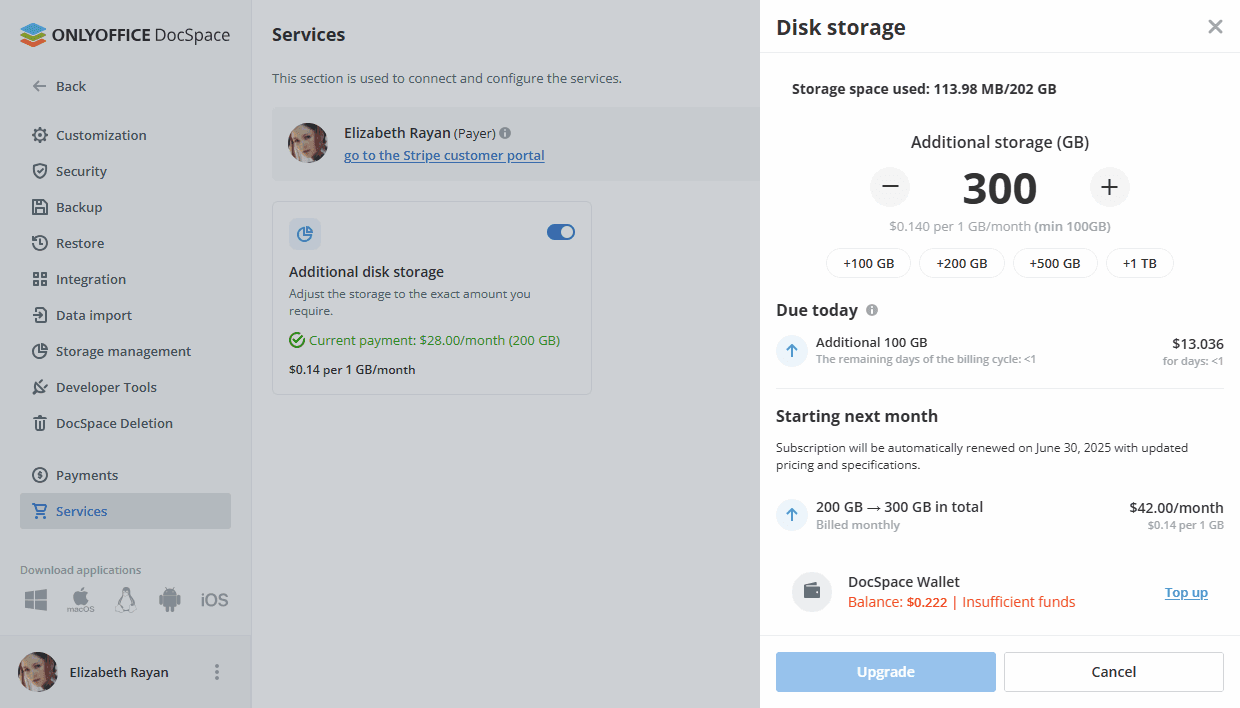

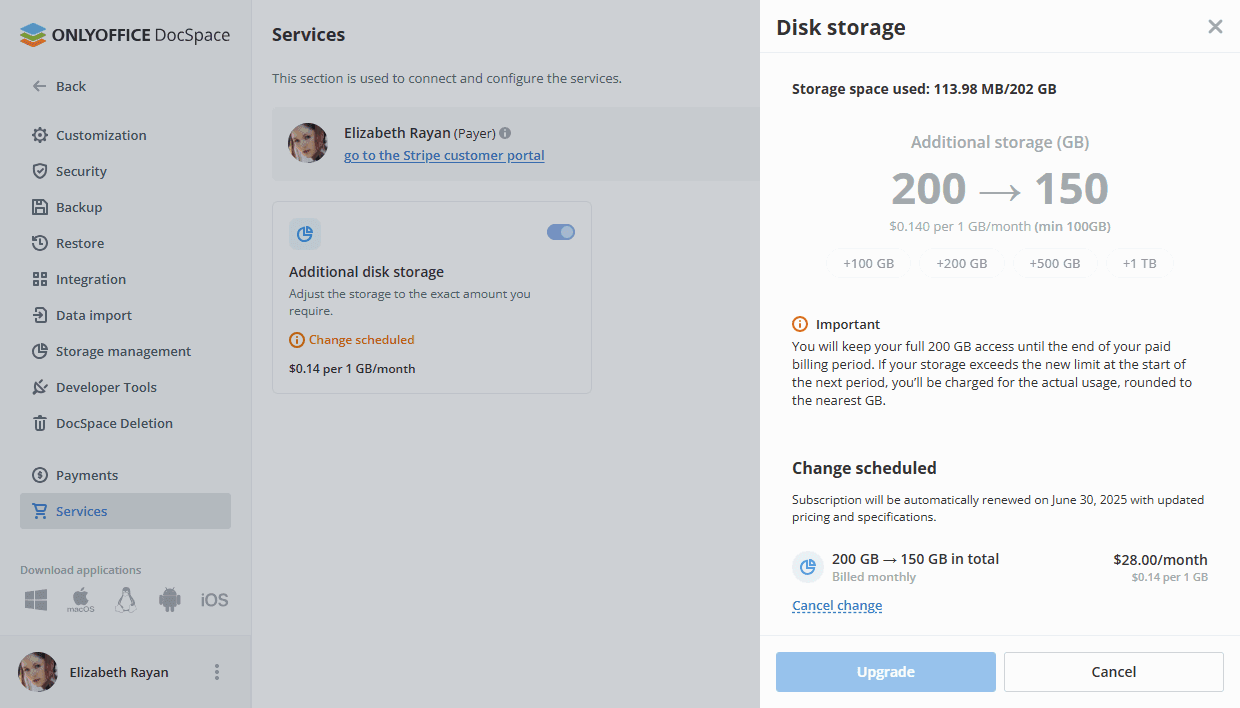
If you want to downgrade the tariff, the changes come into effect on the date of the next payment. Before this date, you must bring the amount of occupied space in line with the new tariff. If this does not happen, the payment for the actually used space will be debited.

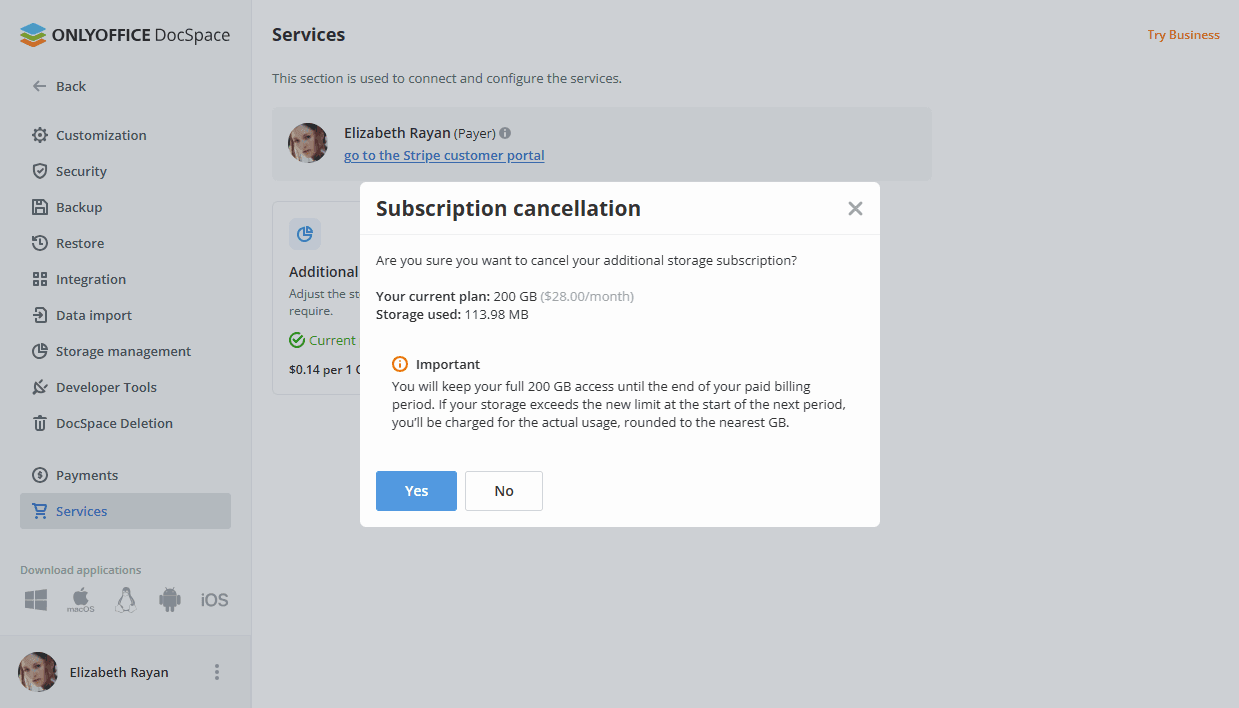
To cancel the existing tariff with additional storage, you can turn off the switcher or set 0 GB in the Additional storage section.

If a plan change (including cancellation of a subscription) is scheduled for the next billing date, the Change scheduled note will be displayed, and the switcher will become unavailable for change.
Purchasing Backups
Using the Wallet, you can purchase Backups in the Services section.
Use the ![]() menu in the lower left corner and select the Payments or Settings option. Click the Services item on the left.
menu in the lower left corner and select the Payments or Settings option. Click the Services item on the left.
If the card is linked, the information about the payer is displayed on the main page. Restrictions: interaction with services is limited for non-payers, i.e., they cannot click and open a dialog to manage the service.
Click the switcher in the Backup section.
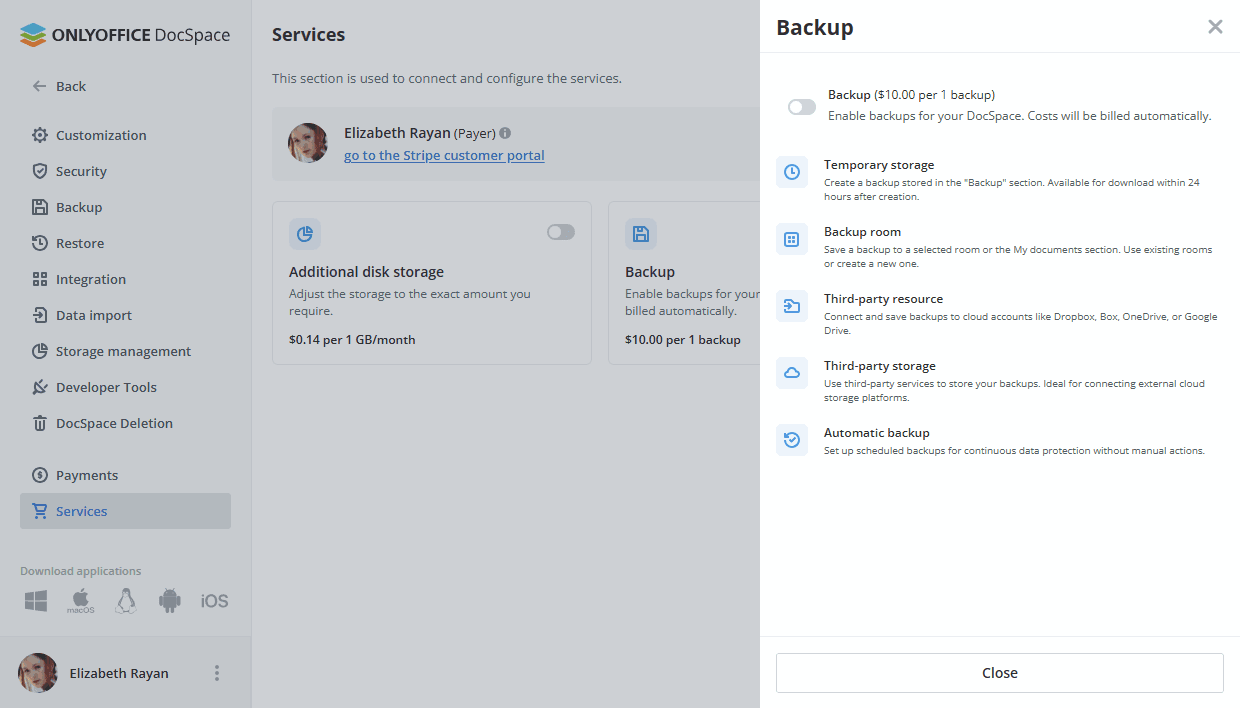

Enabling the Backup service will allow all DocSpace administrators to create backups anytime, as long as the wallet balance is sufficient.
The cost of backup is $10.00 per 1 backup.
Click the Continue button in the confirmation window.