Nextcloud
Introduction
In this article, we will show you how to transfer the Nextcloud server data to your ONLYOFFICE DocSpace.
Starting from v 2.5, ONLYOFFICE DocSpace supports exporting Nextcloud users, users’ files, sharing settings and groups.
Export data from Nextcloud
Enabling the maintenance mode
First, you need to enable the maintenance mode on your Nextcloud server. The maintenance mode stops the server and allows us to export data from the Nextcloud installation folder and MySQL database. To activate the maintenance mode:
-
Go to the folder with the Nextcloud installation.
cd /var/www/html/nextcloud -
Run the occ file to enable the maintenance mode.
sudo -u www-data php occ maintenance:mode --onDepending on the operating system, the location of the Nextcloud installation folder might differ.
Exporting the data folder
To successfully migrate your data to ONLYOFFICE DocSpace, we need to include users' folders in our backup archive. They are located in the data folder within the Nextcloud directory.
To export the data folder run the following command:
sudo rsync -Aax /var/www/html/nextcloud/data [preferred location]/data/Where [preferred location] is a destination of the exported folder.
Exporting the database
Also, we need to export the MySQL backup file. There are two possible ways of dumping the database.
In case the database is deployed on the same server, execute:
sudo mysqldump --lock-tables -u root -p nextcloud_db > [preferred location]/nextcloud-dirbkp_`date +"%Y%m%d"`/Where [preferred location] is a destination of the exported folder.
If the database is deployed on a different server, run the following command:
mysqldump --single-transaction -h [server] -u [username] -p[password] [db_name] > nextcloud-sqlbkp_`date +"%Y%m%d"`.bakDisabling the maintenance mode
After all the necessary folders and files have been exported, we can disable the maintenance mode and start the Nextcloud server.
To do that, go to the Nextcloud installation folder and execute:
sudo -u www-data php occ maintenance:mode --offPrepare the data for import
In order to import the data, you need to compress certain files and folders to a zip archive. The archive.zip file contains the data folder which stores the folders of the Nextcloud users and the database backup file. The structure of the archive.zip file looks as follows:
-archive:
    - data:
        - user1
        - user2
        - user3
    - MySQL backup file
Exporting with snap
If you are using Nextcloud installed with the snap package, run the following command:
sudo nextcloud.exportIt'll turn on maintenance mode and dump a backup of your entire instance into a timestamped folder, something like 20240723-103102, inside /var/snap/nextcloud/common/backups/.
After the export is complete, create the .tar archive with a command like this:
sudo tar -cvf 20240723-103102_nextcloud-backup.tar /var/snap/nextcloud/common/backups/20240723-103102Import the data to ONLYOFFICE DocSpace
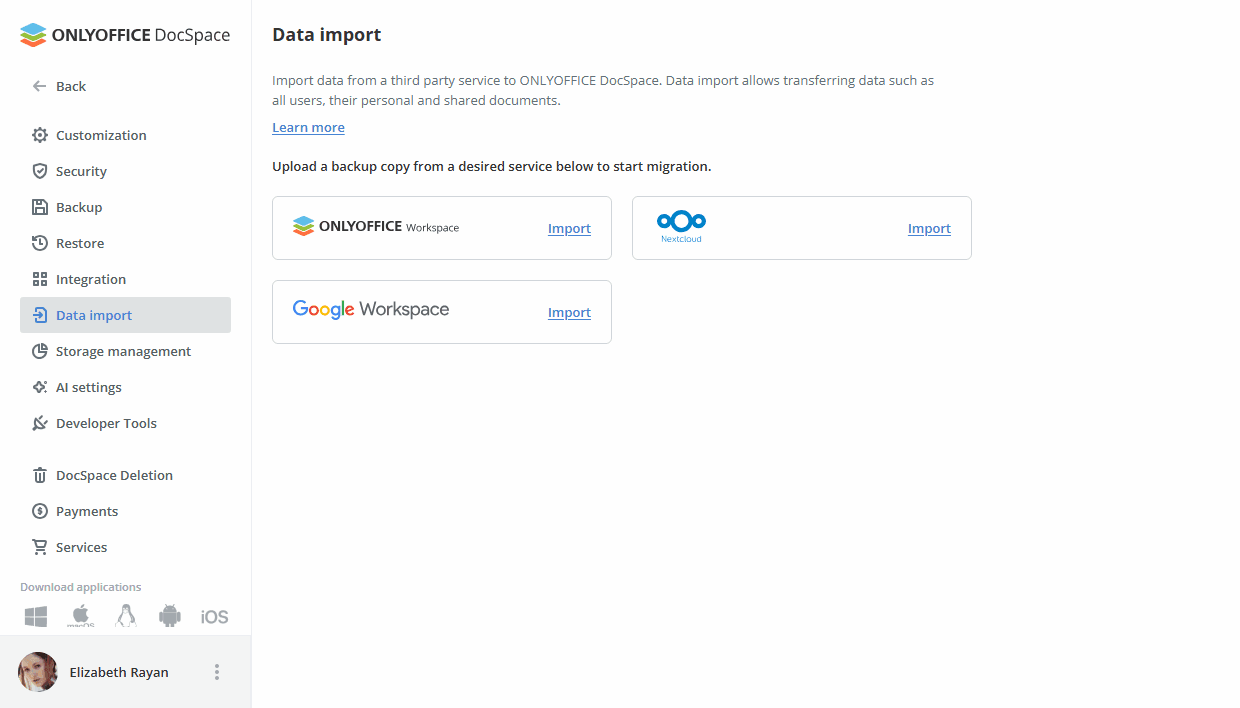
- Log in to your ONLYOFFICE DocSpace.
- Use the
 menu in the lower left corner and select the Settings option.
 - Choose the Data import section.
-
Click the Import link next to the Nextcloud service or the Nextcloud item itself.
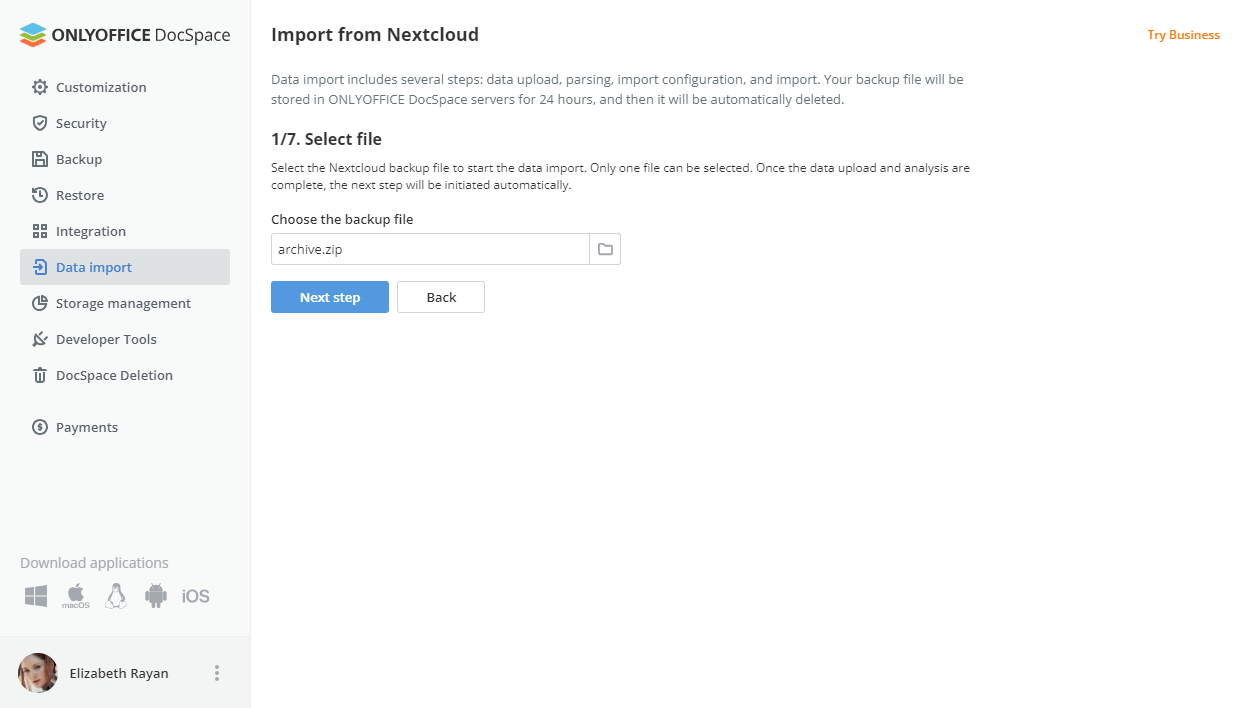
-
Click the folder icon next to the selection box or the 'Backup file' box itself and select the archives of the users.
Wait for the archive to load. When the loading is complete, click the Next step button.
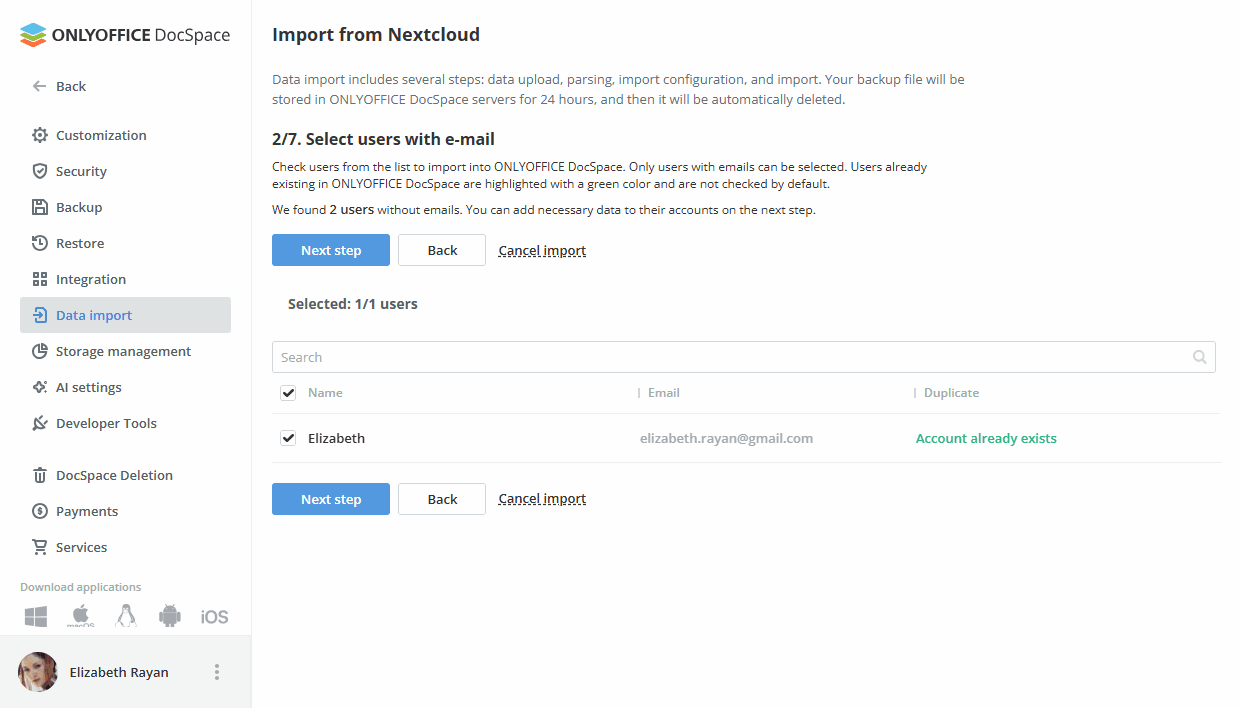
-
Select users from the list and click the Next step button. Only users with e-mails will be migrated first.
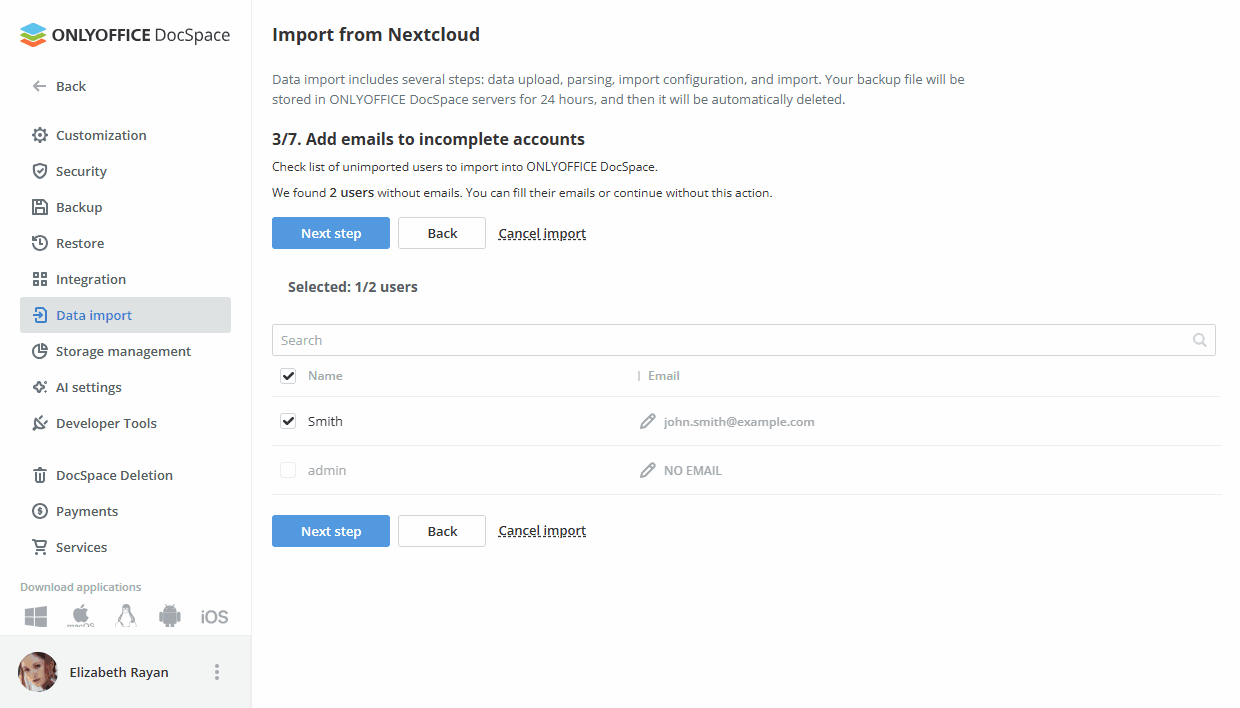
-
Now you can select not filled e-mail users and fill in their e-mail addresses. To do that, fill in the user's e-mail address. Click the Tick button next to the e-mail text box. Select several users from the list by ticking users' checkboxes. Proceed to the next step by clicking the Next step button.
-
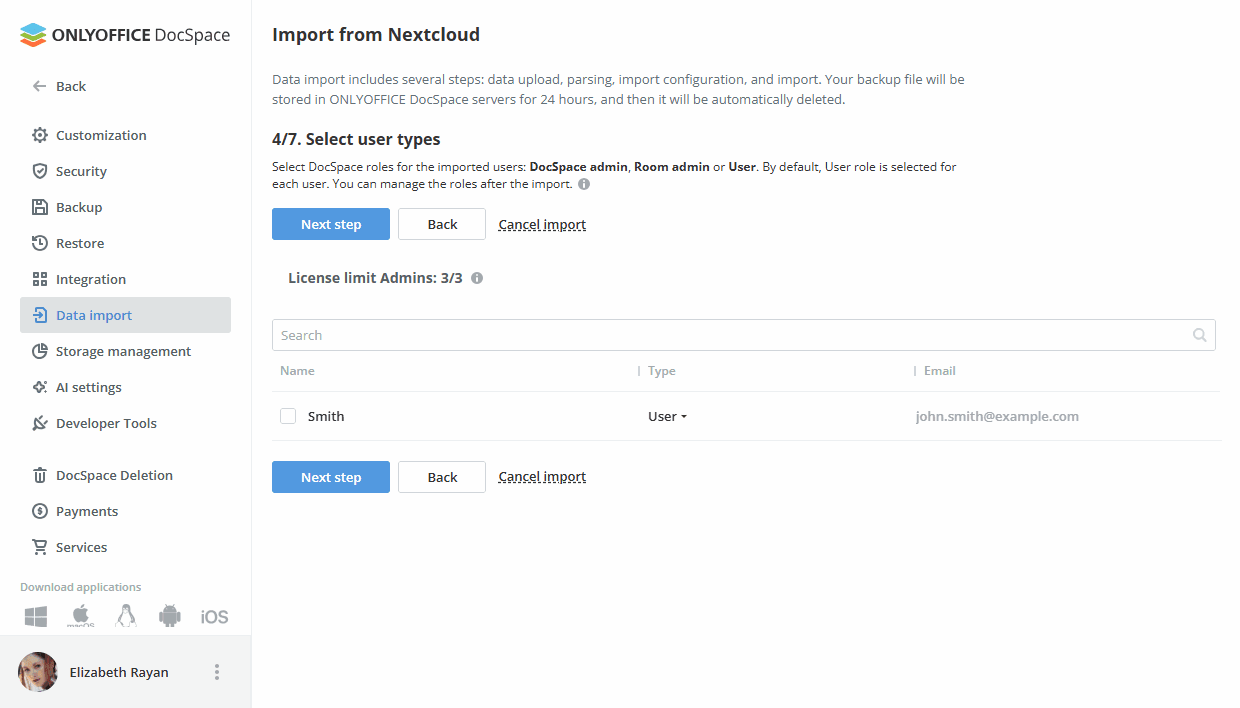
Select user types (DocSpace admin, room admin, user) and click the Next step button.
If the admin limit is exceeded, an error will appear and the button for moving to the next step will be blocked.
-
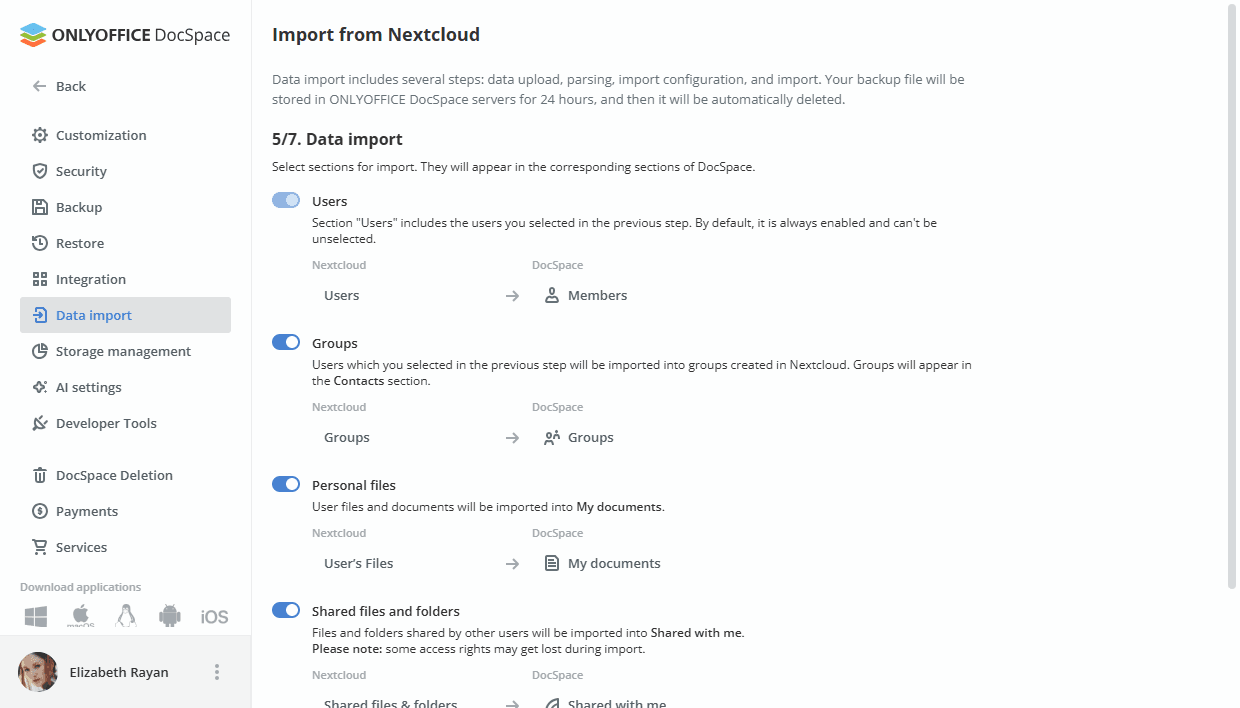
Select modules for import (Users, Groups, Personal files, Shared files and folders). Click the Start data import button to proceed with the final step.
If the 'Personal files' module is disabled, the 'Shared files and folders' module is blocked.
-
After the data is migrated, click the Finish button to complete the data import.
Use the Download log button if you want to download information about migration, as well as errors occurred.
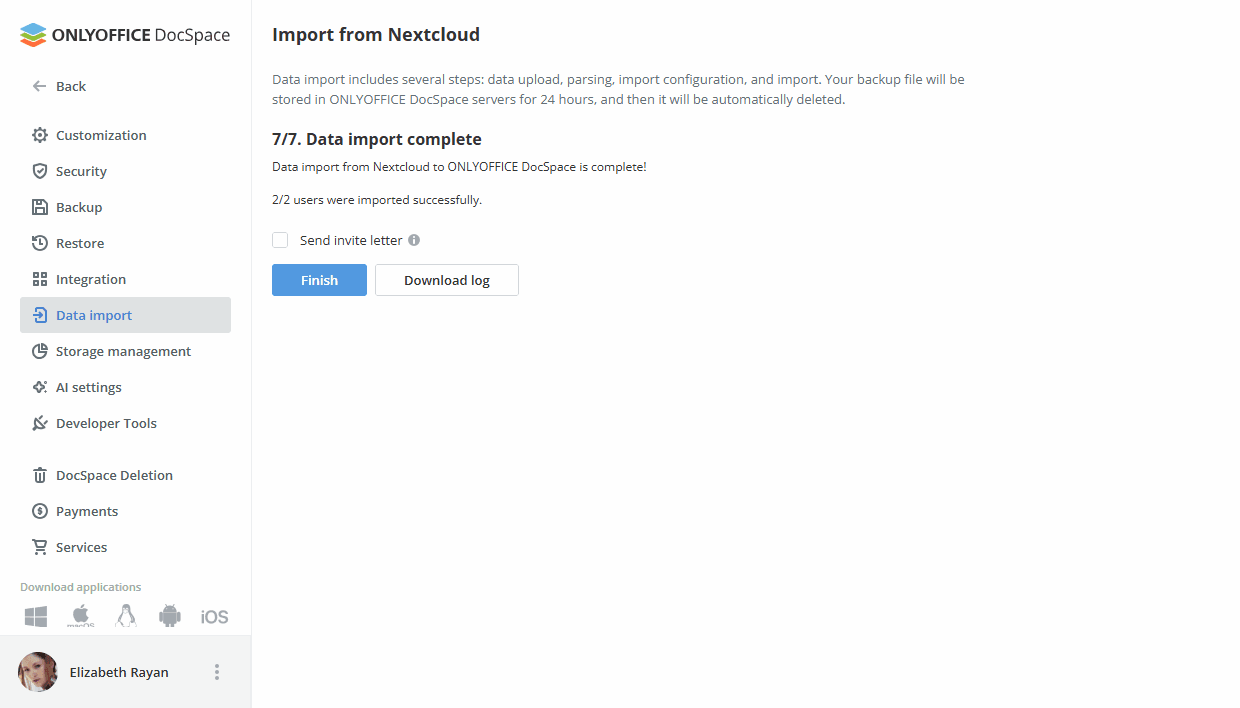
Also, you can send a welcome letter to the new users. This letter will inform your users about migration to ONLYOFFICE DocSpace. It contains a brief description of the main features and a login link. To send the letter, check the Send invite letter option before clicking the Finish button.
After the migration is complete, the new users and groups can be found in the Contacts section.
Personal files can be accessed through the My documents section. Files and folders shared by other users can be accessed through the Shared with me sections.