Encrypt data at rest
Introduction
The Encrypt data at rest feature provided by DocSpace allows you to ensure the security of sensitive data in your DocSpace.
Encryption is a reversible conversion of information in order to maintain the confidentiality of the data stored on disk. Thus, even if intruders managed to gain access to the data stored on the hard disk, they would not be able to read it since it is encrypted.
Encryption is based on the Encrypt-then-MAC type of encryption (AES-256-CBC + HMAC-SHA256) of the entire body of data within the ONLYOFFICE instance and is compliant with the AES-256 international data encryption standard. AES-256 encryption type with CipherMode.CBC symmetric algorithm is used for enciphering the data in DocSpace, while the SHA256 hashing function paired with HMAC message authentication code screening, verify integrity and authenticity of the encrypted data.
This feature is available only for server versions. It works only for DiscDataStore (only local disk. Not implemented for s3 and other cloud services).
Mounting a remote machine disk via SSHFS
Let's consider the option of mounting the disk on Linux when DocSpace is installed via DEB packages.
SSHFS (Secure SHell FileSystem) is a client program for Linux (and other operating systems for which there is a FUSE (Filesystem in Userspace) implementation) used to remotely manage files via the SSH protocol (more precisely, its SFTP extension) as if they were located on the local computer.
- HostA is the application server host with DocSpace
- HostB is the file storage host
- /var/www/onlyoffice/Data/ is the path to the data folder on HostA
- /app/onlyoffice/data is the path to the data folder on HostB
- docspace is the name of the non-privileged user on HostA
- datauser is the name of the non-privileged user on HostB
Step 1. Setting up HostB
Install updates on the system and reboot:
sudo su
apt update
apt upgrade
reboot
Create and configure the non-privileged user and the target folder:
sudo su
adduser datauser
mkdir /app/onlyoffice/data
chown datauser:datauser /app/onlyoffice/data
Step 2. Setting up HostA
Install updates and necessary packages on the system and reboot:
sudo su
apt update
apt upgrade
apt install sshfs
reboot
Stop DocSpace services:
sudo systemctl stop 'docspace-*' --allMove the DocSpace data to a temporary directory so that the source directory is empty before mounting:
mkdir /var/www/onlyoffice/tmp
mv /var/www/onlyoffice/Data/* /var/www/onlyoffice/tmp/
Create the non-privileged user, generate keys, and prepare the mount point:
sudo su
adduser docspace
ssh-keygen -t ed25519 -f /root/.ssh/id_ed25519 -C "key_for_hostb_connection"
Display the public key on the screen of HostA for copying to HostB:
sudo su
cat /root/.ssh/id_ed25519.pub
Output example:
root@sftp-test-01:~# cat /root/.ssh/id_ed25519.pub
ssh-ed25519 AAAAC3NzaC1lZDI1NTE5AAAAIBsDV25Pg8yB1QHeTZXJGphGTDhfqQQKVetcqvhk0dkf key_for_hostb_connection
The key output by the cat command must be copied and pasted into the /home/datauser/.ssh/authorized_keys file on HostB.
Test the connection using the key from HostA to HostB:
ssh -i /root/.ssh/id_ed25519 datauser@hostBIf you completed the previous step correctly, a connection to HostB should open. It can be closed with the exit command.
Test the mounting:
sshfs -o reconnect,ServerAliveInterval=15,ServerAliveCountMax=3 datauser@hostB:/app/onlyoffice/data/ /var/www/onlyoffice/Data/
touch /var/www/onlyoffice/Data/test.txt
umount /var/www/onlyoffice/Data
After executing these commands, the text.txt file should appear in the /app/onlyoffice/data folder on HostB. If the file appears, the mounting works correctly and you can proceed to the final configuration.
Find out the ID of the non-privileged user and make changes to the /etc/fstab file:
sudo id -u docspaceThis command will display the uid of the docspace user, which must be substituted into the uid and gid parameters in the mount line:
sshfs#datauser@hostB:/app/onlyoffice/data /var/www/onlyoffice/Data fuse _netdev,users,allow_other,IdentityFile=/root/.ssh/id_ed25519,ServerAliveInterval=15,ServerAliveCountMax=3,reconnect,uid=1000,gid=1000,umask=0022 0 0This line must be added to the /etc/fstab file. After adding the line, mount the folder via /etc/fstab and test it:
sudo su
systemctl daemon-reload
mount -a
su docspace
touch /var/www/onlyoffice/Data/test2.txt
If all procedures are performed correctly, the test2.txt file will be created in the /app/onlyoffice/data folder on HostB.
Delete test files and restore the DocSpace data:
rm /var/www/onlyoffice/Data/test*.txt
mv /var/www/onlyoffice/tmp/* /var/www/onlyoffice/Data/
rmdir /var/www/onlyoffice/tmp
Start DocSpace services:
sudo systemctl start 'docspace-*' --allAfter starting the application, check the work in the interface (downloading, opening files, changing the avatar, uploading the license).
Prepare for the encryption process
Before starting the encryption procedure, you must perform some preliminary steps.
- In your DocSpace, click the
 menu in the lower left corner and select the Spaces -> Space Management menu item on the left-side panel.
 - Switch to the Settings -> Backup section and disable the Automatic Data Backup feature.
- Make sure there is enough space on your hard drive.
If DocSpace is installed using the DEB packages, find the core.machinekey value in the /etc/onlyoffice/docspace/appsettings.production.json file.
After the preliminary preparations are ready, you can proceed to the next step.
Encrypt storage
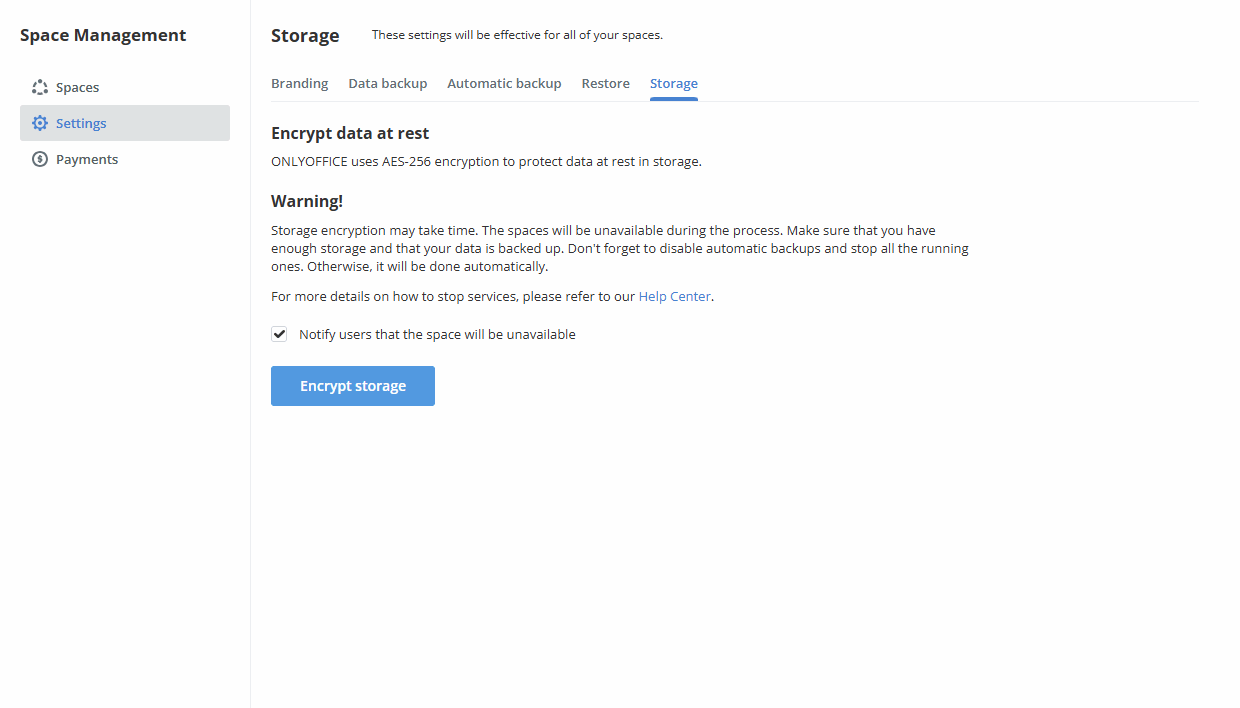
- Switch to the Space Management -> Settings -> Storage section.
-
Check the Notify users that the space will be unavailable checkbox to notify all active users via email when the encryption process starts.
Upon the successful completion of the encryption process, all active users will also receive email notifications. If an error occurs during the encryption process, then all administrators (regardless of the Notify users option) will receive email notifications of the unsuccessful encryption process.
- Click the Encrypt storage button and then OK to launch the encryption process.
The time required to complete the procedure depends on the data volume. All spaces will be unavailable during the encryption process. As soon as the encryption is over, the DocSpace data will be available for work.
UPDATE tenants_tenants SET status='0' WHERE status='6';Decrypt storage
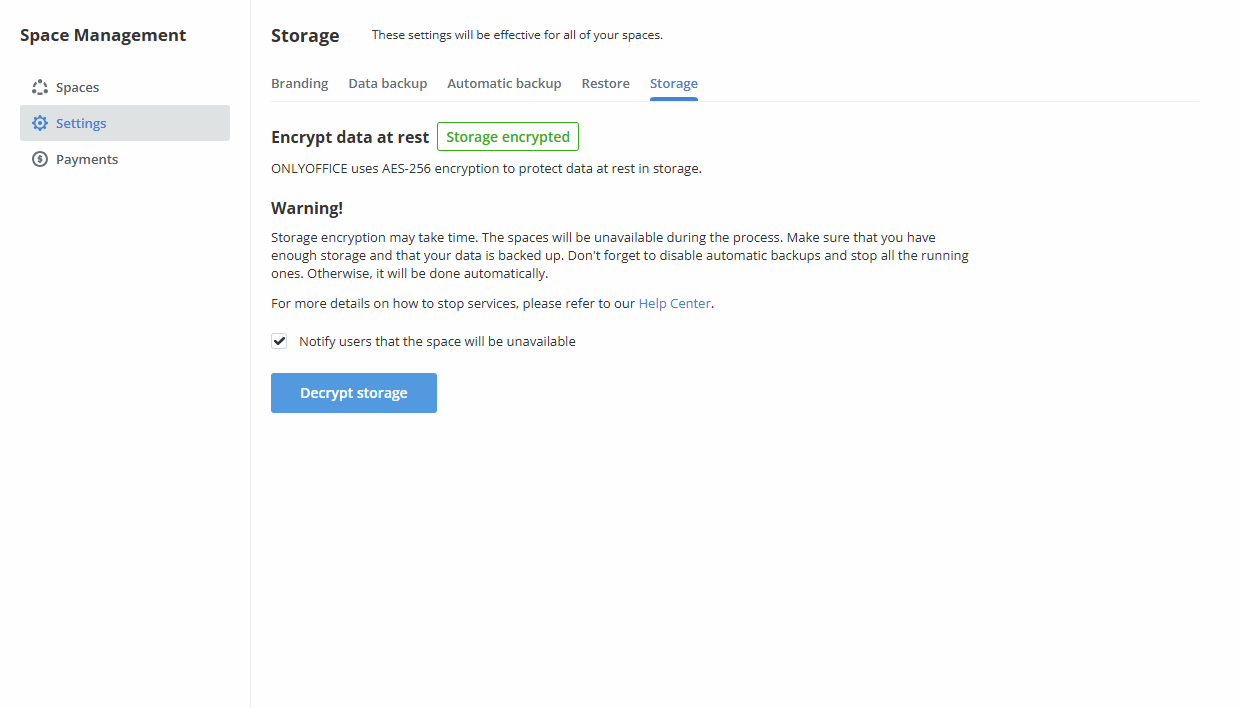
To decrypt data in DocSpace,
- Switch to the Space Management -> Settings -> Storage section.
-
Check the Notify users that the space will be unavailable checkbox to notify all active users via email when the decryption process starts.
Upon the successful completion of the decryption process, all active users will also receive email notifications. If an error occurs during the decryption process, then all administrators (regardless of the Notify Users option) will receive email notifications of the unsuccessful decryption process.
-
Click the Decrypt storage button and then OK to launch the decryption process.
The time required to complete the procedure depends on the data volume. All spaces will be unavailable during the encryption process. As soon as the encryption is over, the DocSpace data will be available for work.